
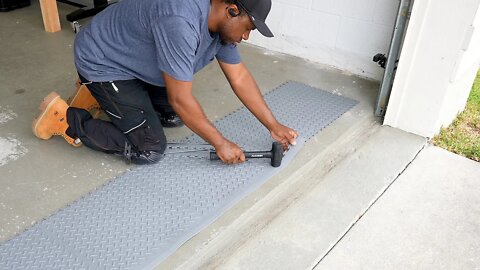
How I upgraded my garage floor (HUGE Difference)
I upgraded my garage floor with Husky PVC interlocking garage tiles. Now you can upgrade your garage flooring the easy way. Big thanks to @The Home Depot for sponsoring this video. Check out Husky interlocking floor tiles here https://homedepot.sjv.io/Ke0mdz
Written article on the floor tiles installation https://diycreators.com/husky-pvc-flooring
*How much did this install cost to install the tiles? *
• (31) boxes of tiles and (1) Trim kit = $1555 + Tax
• All my woodworking plans https://gumroad.com/diycreators
• Instagram: https://instagram.com/morediycreators
• YouTube: Subscribe & "RING the Bell": http://bit.ly/1PtWJEd
• Timberland pro gear - http://bit.ly/TimberlandPRO_DIYCreators
Materials used (Affiliate Links)
• Husky interlocking garage floor tiles https://homedepot.sjv.io/Ke0mdz
• (Black tiles) https://homedepot.sjv.io/jWe06a
• (1) Trim kit https://homedepot.sjv.io/LPKqbM
• Liquid nail https://homedepot.sjv.io/jWRQgb
• Bondo https://homedepot.sjv.io/YgRanq
• PVC Trim for the baseboard https://homedepot.sjv.io/159azB
Tools used (Affiliate Links)
• A utility knife https://homedepot.sjv.io/n1XxW7
• Tape measure https://homedepot.sjv.io/WDyr2M
• Straight edge https://homedepot.sjv.io/GjKJRk
• Rubber mallet https://homedepot.sjv.io/QOjL2A
• knee pad https://homedepot.sjv.io/DVWOrG
• Masonry Chisel https://homedepot.sjv.io/DVyNeq
• Air Sander https://homedepot.sjv.io/mg4jBy
Quick and simple Installation for the Husky floor tiles
Step 1. Clean and prep the floor surface
Step 2. Layout the first row of the tiles starts at the entry. Find the center.
Step 3. Connect the tiles in the first row using a mallet.
Step 4. Install the trim along the front, shift the row into position.
Step 5. Start the second row in the middle and work to the end.
Step 6. Install the rest of the tiles by working from left to right.
Step 7. Cut the tiles to fit at the perimeter.
Step 8. Install baseboard to cover the gap between the wall and the tile.
#Garageflooring #diy #diycreators
162
views
2
comments
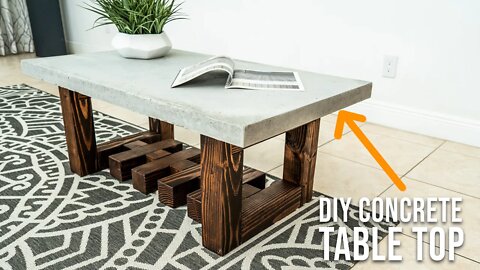
How to make a concrete table
Making an outdoor concrete coffee table
Visit https://bloomscape.me/DIYCREATORS and use my code DIYCREATORS to get 20% off your first plant order of $100 or more.
All my woodworking plans https://gumroad.com/diycreators
• Instagram: https://instagram.com/morediycreators
• YouTube: Subscribe & "RING the Bell": http://bit.ly/1PtWJEd
• Timberland pro gear - http://bit.ly/TimberlandPRO_DIYCreators
Materials List (Affiliate Links)
-------------------------------------------------------------------------------------------
• (3) 4 by 4 Douglas fir https://homedepot.sjv.io/EA16X
• Melamine https://homedepot.sjv.io/Ke02xa
• Concrete https://homedepot.sjv.io/7maLb3
• Wire Mesh https://homedepot.sjv.io/RyGW79
• 2in wood screws or 1-1/4in Pocket holes screws
• Black silicone https://homedepot.sjv.io/LPKona
• Exterior wood Glue https://homedepot.sjv.io/DVyAQy
• Stain https://homedepot.sjv.io/AoPkmD
• Black gloves https://amzn.to/3xObQCy
Water
Tools Used (Affiliate Links)
-------------------------------------------------------------------------------------------
• Table Saw https://amzn.to/3eiGXhQ
• Bandsaw
• Miter Saw https://homedepot.sjv.io/jWeD1n
• Hand saw https://amzn.to/3eXikGC
• Drill https://homedepot.sjv.io/yRqErD
• Clamps https://amzn.to/3uo8MLj
• Chisel https://amzn.to/2SljCU2
• Shovel https://homedepot.sjv.io/EaEGqX
• Mixing Tub https://homedepot.sjv.io/OReo1A
• Concrete Trowel https://homedepot.sjv.io/3PJX7v
• Sander https://homedepot.sjv.io/NK9oNO
• Ryobi bolt cutter https://homedepot.sjv.io/AoPabR
• Mallet https://amzn.to/3vQZQhT
• Marking gauge https://amzn.to/3esu9FE
********** Support my work **********
My Woodworking Plans: https://gumroad.com/diycreators
Help me make more Video: https://www.patreon.com/diycreators
YouTube: Subscribe & "RING the Bell": http://bit.ly/1PtWJEd
Instagram: https://instagram.com/morediycreators
Pinterest: https://www.pinterest.com/diycreators/
#concrete #patio #coffeetable
182
views
1
comment
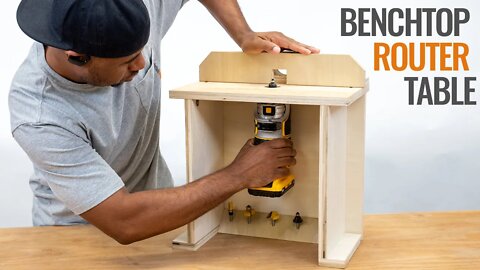
How to make and use a simple trim router table
Built this benchtop router table from leftover plywood. Simple, cheap, and functional.
Sponsored by @The Home Depot https://homedepot.sjv.io/6R1Zr
• Router table Plans: https://gum.co/routertable
• All my woodworking plans https://gumroad.com/diycreators
• Blog post: https://diycreators.com/benchtop-router-table
• Instagram: https://instagram.com/morediycreators
• YouTube: Subscribe & "RING the Bell": http://bit.ly/1PtWJEd
• Timberland pro gear - http://bit.ly/TimberlandPRO_DIYCreators
Materials Used
• (1/2) Sheet of plywood 3/4in X 48in X 48in
• (10) 1 1/2in wood screw (assembly)
• (4) 1in brackets
• (8) 3/4in wood screws (for the brackets)
• (2) 2in 1/4-20 screw (for router fence)
• (2) 1/4-20 wing nuts
• Optional: 4 (1 1/4in) machines screws for the router base
• Wood glue https://homedepot.sjv.io/ORBPxP
• Finishing wax
Tools used
• Table Saw (optional)
• Circular saw https://homedepot.sjv.io/Vyyejj
• Router https://homedepot.sjv.io/mgg317
• Drill https://homedepot.sjv.io/jWW34Z
• Speed square https://homedepot.sjv.io/jWX1aP
• Clamps https://homedepot.sjv.io/oee3gW
• 3/8’’ Forstner Drill bits https://homedepot.sjv.io/DVVgmb
• 1 -3/4’’ Hole saw https://homedepot.sjv.io/jWW34Z
********** Support my work **********
My Woodworking Plans: https://gumroad.com/diycreators
Help me make more Video: https://www.patreon.com/diycreators
YouTube: Subscribe & "RING the Bell": http://bit.ly/1PtWJEd
Instagram: https://instagram.com/morediycreators
Pinterest: https://www.pinterest.com/diycreators/
#Routertable #HomeDepotPartner #THDProSpective
151
views
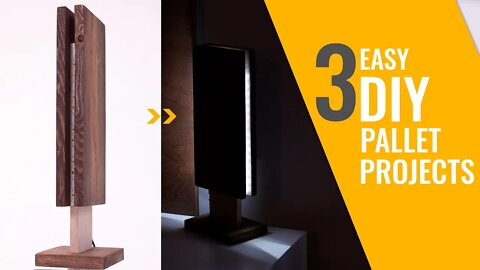
DIY LED Pallet lamp
Making 3 DIY projects from old wood pallets
Check out Mercari - start earning while decluttering. download here: https://www.mercari.com/tr/?s=2726
All my woodworking plans https://gumroad.com/diycreators
• YouTube: Subscribe & "RING the Bell": http://bit.ly/1PtWJEd
• Instagram: https://instagram.com/morediycreators
• Twitter https://twitter.com/Diycreators
• Timberland pro gear - http://bit.ly/TimberlandPRO_DIYCreators
********** Materials Used **********
LED https://amzn.to/3qoCwVE
Power Strip https://amzn.to/3kRcJ76
On/off switch https://amzn.to/3bmnU4A
Wood glue https://homedepot.sjv.io/Zdb0JX
Black spray paint https://homedepot.sjv.io/WDXBJA
Metal mesh (metal Lath) https://homedepot.sjv.io/mgRxrM
Danish oil https://homedepot.sjv.io/rZ7zQ
Spray shellac https://homedepot.sjv.io/x9EAX1
********** Tools used **********
Circular saw https://homedepot.sjv.io/Jrb5WQ
Drill https://homedepot.sjv.io/4b1J9
Dust canister https://www.rockler.com/dust-right-flexiport-dust-canister
Speed square https://homedepot.sjv.io/b3bR0B
Mini Square https://amzn.to/3ehKfSY
Chisel https://amzn.to/3ep2K7M
Sander https://homedepot.sjv.io/konzz
Staple gun https://amzn.to/3caIQux
#DIYCreators #Pallets #DIYPalletprojects
141
views
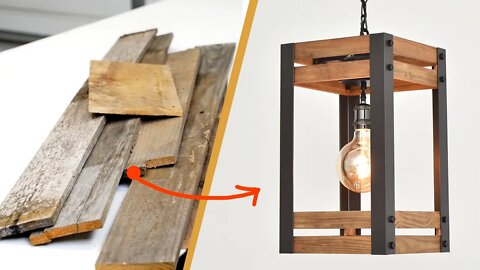
DIY Pendant Light from pallets
How to make pendant light from pallets
* The first 1000 people to use this link will get a free trial of Skillshare Premium
Membership: http://skl.sh/diycreators01211
All my woodworking plans https://gumroad.com/diycreators
• Instagram: https://instagram.com/morediycreators
• YouTube: Subscribe & "RING the Bell": http://bit.ly/1PtWJEd
• Timberland pro gear - http://bit.ly/TimberlandPRO_DIYCreators
********** Tools used **********
Speed Square https://homedepot.sjv.io/ORBPMr
Clamps https://homedepot.sjv.io/rVyo3
Hacksaw https://homedepot.sjv.io/2rk4mA
File https://homedepot.sjv.io/3PA4vk
Sander https://homedepot.sjv.io/konzz
Rasp https://amzn.to/3bXSZdV
Router https://homedepot.sjv.io/mgRQPa
Drill https://homedepot.sjv.io/4b1J9
Drill bit - https://homedepot.sjv.io/5dQED
Paint hooks
Dewalt right-angle attachment https://homedepot.sjv.io/a1REMo
Table Saw
********** Materials Used **********
Pallets
Angle iron https://homedepot.sjv.io/DV04j2
Wood glue https://homedepot.sjv.io/ORBPxP
Electric Ceiling box https://homedepot.sjv.io/yRgV1G
Vintage LED Light bulb https://homedepot.sjv.io/yRgV1G
Pendant light kit https://amzn.to/3sHJPJt
Spray paint https://homedepot.sjv.io/mgRQdO
Danish oil https://homedepot.sjv.io/P0j5GR
Plastic bolts https://amzn.to/3uOIh2k
Self Tapping screws https://homedepot.sjv.io/Vya1Xj
Anchor point Hanging hardware https://homedepot.sjv.io/JrbDPv
********** Support my work **********
My Woodworking Plans: https://gumroad.com/diycreators
Help me make more Video: https://www.patreon.com/diycreators
YouTube: Subscribe & "RING the Bell": http://bit.ly/1PtWJEd
Instagram: https://instagram.com/morediycreators
Pinterest: https://www.pinterest.com/diycreators/
#DIYPallet #DIYPalletprojects
111
views
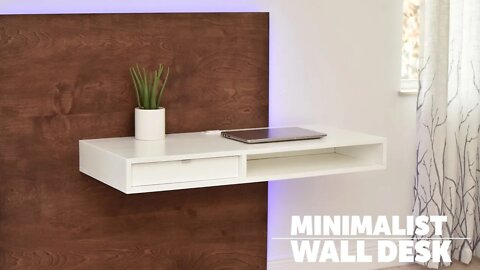
DIY LED floating desk (Space saving desk)
Building a minimalist wall desk with a secret compartment. Desk Plans https://gum.co/xMFiU
This video is sponsored by @The Home Depot https://homedepot.sjv.io/6R1Zr
In this video, I used basic power tools to build wall mounted desk. A desk that takes up minimal space, delivering not only beauty but functionality.
◼︎ All my woodworking plans https://gumroad.com/diycreators
◼︎ Desk Article https://diycreators.com/diy-minimalist-floating-wall-desk/
• Instagram: https://instagram.com/morediycreators
• YouTube: Subscribe & "RING the Bell": http://bit.ly/1PtWJEd
• Timberland pro gear - http://bit.ly/TimberlandPRO_DIYCreators
* Affiliate Links Below
Tools used
• Circular Saw https://homedepot.sjv.io/EabqY2
• Drill Driver Kit https://homedepot.sjv.io/zagjDr
• Sander https://homedepot.sjv.io/ZdbreX
• Oscillating tool https://homedepot.sjv.io/RyPbea
• Measuring tape https://homedepot.sjv.io/15ebK9
• Chisel https://homedepot.sjv.io/kjgRAL
• Speed square https://homedepot.sjv.io/jWX1aP
• Clamps https://homedepot.sjv.io/QOPKEo
• Level https://homedepot.sjv.io/7mebKg
• Stud Finder https://homedepot.sjv.io/MXnQEq
Materials Used
• (2) Sheet of Birch plywood 3/4'' X 48in X 96in
• Small (1/4'' or 1/5'' plywood 24in X24in)
• Edge band https://homedepot.sjv.io/jWX1BP
• 1 RF LED Strip kit https://amzn.to/3pnQhDo
• Wood glue https://homedepot.sjv.io/x9EnR1
• (-) 2in wood screws https://homedepot.sjv.io/XxyNV4
• (-) 1-1/4'' wood screws (attach bottom) https://homedepot.sjv.io/a1ReEb
• (8) 3in # 9 wood screws (mount to wall) https://homedepot.sjv.io/15e74a
• (8) 1/4 - 20 2in hex screw https://homedepot.sjv.io/3PAEGX
• (8) 1/4in Flat washer
• (8) 1/4in T-Nuts https://homedepot.sjv.io/MXnQkK
• Roller https://homedepot.sjv.io/j6Q2P
• 1 pair of 14in Drawer slide https://homedepot.sjv.io/yRgk7v
• (-) Finger pull https://amzn.to/3u1PP1i
• Recessed outlet https://amzn.to/3dgSvCg
• Bondo https://homedepot.sjv.io/3PA7YB
• High Gloss white paint
• Foam roller https://homedepot.sjv.io/qnDy7j
• Hickory Gel stain https://homedepot.sjv.io/4e5dMn
********** Other Links **********
My Woodworking Plans: https://gumroad.com/diycreators
Help me make more Video: https://www.patreon.com/diycreators
YouTube: Subscribe & "RING the Bell": http://bit.ly/1PtWJEd
Instagram: https://instagram.com/morediycreators
Pinterest: https://www.pinterest.com/diycreators/
#Walldesk #HomeDepotPartner #THDProSpective
114
views
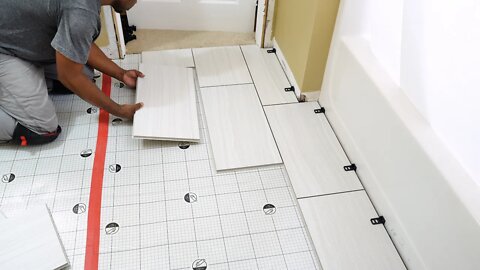
How To Install QuicTile "EASY DIY Porcelain Tiles" | DIY CREATORS
In this video, I am tearing up a bathroom floor and installing "Quictile." A floating tile system designed to speed up installation while delivering a professional look. No experience needed.
For the written article on this project visit https://diycreators.com/quictile
More from DIY Creators:
All my woodworking plans https://gumroad.com/diycreators
Instagram: https://instagram.com/morediycreators
Check out the https://diycreators.com/quictiles
https://www.patreon.com/diycreators
********** Tiles & Materials **********
Quictiles I used – https://homedepot.sjv.io/mYeBZ
All tiles options- https://homedepot.sjv.io/ox7XE
Red underlayment tape - https://homedepot.sjv.io/zA7yW
Underlayment - https://homedepot.sjv.io/2oAQa
Re-mixed urethane grout https://homedepot.sjv.io/7z47O
Grout Haze Remover - https://homedepot.sjv.io/vGb7L
********** Leveling the floor **********
Rapid set Concrete Leveler - https://homedepot.sjv.io/XgVqy
Floor squeegee - https://homedepot.sjv.io/0ge3Y
Eggbeater mixer - https://homedepot.sjv.io/OkjJK
1 Qt. Concrete leveler primer - https://homedepot.sjv.io/YXJxK
********** Tools used **********
Rotary hammer- https://homedepot.sjv.io/DY2qn
Grinder – https://homedepot.sjv.io/7EZLQ
Universal dust shroud pro https://homedepot.sjv.io/qQ7BY
Diamond cup disc https://homedepot.sjv.io/ZoZmk
Trowel - https://homedepot.sjv.io/GxvoL
Microfiber sponge https://homedepot.sjv.io/zA7X6
Grout float https://homedepot.sjv.io/7EZxQ
Steel chisel https://homedepot.sjv.io/1XmV9
Ridgid Vacuum - https://homedepot.sjv.io/3BGzM
Tile Speed Cutter https://homedepot.sjv.io/Gxv1m
#DIYTiles #HomeDepotPartner, #HomeDepotxQuicTile
136
views
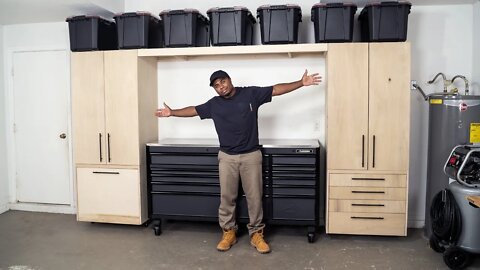
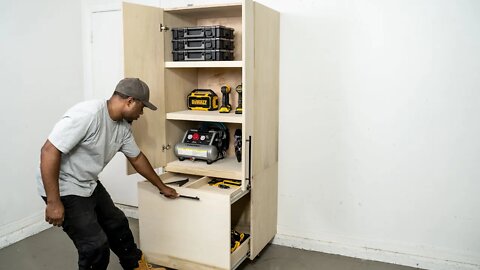
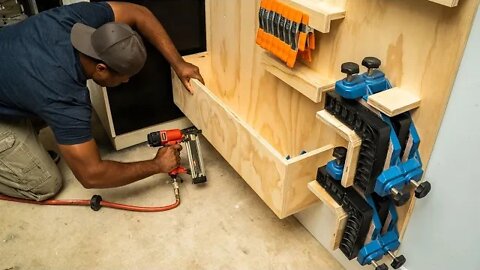
How to make Modern Cabinets and Organization
Building stylish cabinets to store stuff in.
* Get the plans here --https://gumroad.com/diycreators
* See the written version -- https://diycreators.com/diy-garage-cabinets/
Timberland pro (Pants and boots) - http://bit.ly/TimberlandPRO_DIYCreators
Help me make more Video: https://www.patreon.com/diycreators
Instagram: https://instagram.com/morediycreators
YouTube: Subscribe & "RING the Bell": http://bit.ly/1PtWJEd
******Materials Used*********
Wood
(8) 3/4in x 4ft x 8ft Plywood - https://homedepot.sjv.io/MZVON
(2) 1/5in x 4ft x 8ft underlayment plywood - https://homedepot.sjv.io/gmNbO
(4) 2in by 4in by 8ft lumber https://homedepot.sjv.io/2oX6Q
Cabinet Hardware
(9) Pull handle https://homedepot.sjv.io/rVyMB
(8) European hinge https://homedepot.sjv.io/xBvMO
(12) 6 pairs or 20 in Drawer slides https://homedepot.sjv.io/D5moq
(2) Adjustable feet https://amzn.to/3e7AC6Z
(2) Washer
(2) Thread inserts or T-nuts
Screws and Hardware
(80) 1-1/4in pocket holes screws https://homedepot.sjv.io/5E7DN
(48) 1-1/4in wood screws https://homedepot.sjv.io/jNDJM
(52) 2-1/4in wood screws https://homedepot.sjv.io/N5ox2
Others
Wood Glue - https://homedepot.sjv.io/LJ16O
120 and 150 grit Sandpaper – https://homedepot.sjv.io/N5oo1
Edgebanding - https://homedepot.sjv.io/Kr29e
************ Tools Used *********
Adjustable Height Workbench – https://homedepot.sjv.io/EkdXP
Speed Square - https://homedepot.sjv.io/RBk19
Orbital sander - https://homedepot.sjv.io/D5mzd
Woodworking clamp - https://homedepot.sjv.io/rVyo3
Kreg Pocket hole jig - https://homedepot.sjv.io/5RGPN
Kreg Hinge jig - https://homedepot.sjv.io/ayzQM
DeWalt Oscillating tool - https://homedepot.sjv.io/Z2z3k
Drill – https://homedepot.sjv.io/mLbqq
Shelf Pin Jig - https://amzn.to/35A7hQh
Other things in the Garage......
Husky 72in Tool chest workbench https://homedepot.sjv.io/OkWXn
Heavy-duty containers https://homedepot.sjv.io/RAWzb
Husky Spray kit https://homedepot.sjv.io/LjWjM
Nail Gun - https://homedepot.sjv.io/VnKDE
Air hose for the compressor - https://homedepot.sjv.io/zWvm6
Husky silent air compressor https://homedepot.sjv.io/xeRe1
Dewalt table saw https://homedepot.sjv.io/kyNyL
#Garagestorage #HomeDepotPartner #THDProSpective
153
views
DIY Garage Cabinet - Storage & Organization | DIY Creators
In this episode, I am on a mission to organize a garage. I built a 2 piece storage cabinet.
All my woodworking plans https://gumroad.com/diycreators
Timberland pro apparel - http://bit.ly/TimberlandPRO_DIYCreators
************ Tools used ************
- HUSKY Compressor - https://homedepot.sjv.io/ArQM7
- HUSKY Nail Gun - https://homedepot.sjv.io/VnKDE
- HUSKY Air hose for the compressor - https://homedepot.sjv.io/zWvm6
- HUSKY Adjustable Height Work Bench Table - homedepot.sjv.io/EkdXP
- HUSKY Speed Square - https://homedepot.sjv.io/RBk19
- Makita Sander - https://homedepot.sjv.io/D5mzd
- Duo Klamps - https://homedepot.sjv.io/rVyo3
- Kreg Pocket hole jig - https://homedepot.sjv.io/5RGPN
- Kreg Hinge jig - https://homedepot.sjv.io/ayzQM
- Milwaukee Drill – https://homedepot.sjv.io/oMbaW
- Level - https://homedepot.sjv.io/Gak3L
- DeWalt Oscillating tool - https://homedepot.sjv.io/Z2z3k
- Saw stop Table Saw -
************ Materials used ************
- (-) Plywood- https://homedepot.sjv.io/MZVON
- (1) 1/4in plywood - https://homedepot.sjv.io/KVGbz
- Wood Glue - https://homedepot.sjv.io/LJ16O
- 1-1/4pocket hole screws https://homedepot.sjv.io/5E7DN
- 1-1/2 in wood screws
- (12) 2-1/4 wood screws
- (4) European hinge https://homedepot.sjv.io/xBvMO
- (4) 20 in Drawer slides https://homedepot.sjv.io/D5moq
- (2) Adjustable feet https://amzn.to/3e7AC6Z
- (2) Thread head
- (2) Washer
- (3) Pull handle https://homedepot.sjv.io/rVyMB
********** Support my work **********
My Woodworking Plans: https://gumroad.com/diycreators
Help me make more Video: https://www.patreon.com/diycreators
YouTube: Subscribe & "RING the Bell": http://bit.ly/1PtWJEd
Instagram: https://instagram.com/morediycreators
Pinterest: https://www.pinterest.com/diycreators/
#Garagestorage #HomeDepotPartner #THDProSpective
108
views

DIY Concrete Bluetooth speaker
Build this Concrete Bluetooth speaker, a perfect project for desk setup. This is also a fun project to do with the kids, get creative, and build something.
This video is sponsored by https://www.rockler.com/
Get the plans here: https://gumroad.com/diycreators
Materials List
• (1) - Small sheet of melamine
• (1) - Rockler stereo Speakers kit https://bit.ly/2SDnrRx
• (1) - Small piece of 1/4in plywood
• (2) - 2’ PVC Pipe cap https://homedepot.sjv.io/ZkAAX
• (1) - (2in long) PVC pipe Schedule 40
• (1) - Small piece of walnut lumber
• (1) - Rapid set cement all(fast setting cement) Note this is optional can use other cement https://homedepot.sjv.io/Qv7VY
• (1) - Flow control https://homedepot.sjv.io/knqqL
• (-) - Styrofoam (3/4in took from shipping package)
• (-) - Aluminum or duct tape
• (-) - Silicone (black) https://homedepot.sjv.io/gzEdA
• (1) - Krazy glue for wood (fast DRY) https://amzn.to/30NVgns
• (1) - Wire mesh
• (1) - Hot glue
• (1) JB Weld (bonder for the wood and cement) https://homedepot.sjv.io/6aN43
********** Support my work **********
My Woodworking Plans: https://gumroad.com/diycreators
Help me make more Video: https://www.patreon.com/diycreators
YouTube: Subscribe & "RING the Bell": http://bit.ly/1PtWJEd
Instagram: https://instagram.com/morediycreators
Pinterest: https://www.pinterest.com/diycreators/
87
views
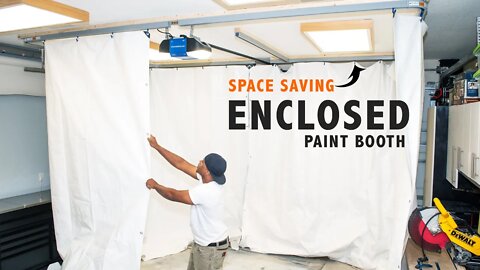
How to Make a PAINT BOOTH (Easy Set up)
In this video, I am setup up a large DIY paint booth in my shop. With this setup, I can have the paint both up in a matter of minutes. Saving me time and making it enjoyable to spray in my current workshop.
This video is sponsored by https://www.rockler.com/
**Check out All my woodworking plans https://gumroad.com/diycreators**
- Drill- https://homedepot.sjv.io/4b1J9
- Miter saw https://homedepot.sjv.io/xrz1R
- Drill Guide https://www.rockler.com/rockler-portable-drill-guide
Track Parts
- Tracks https://bit.ly/2GarrWO
- 90 Curve https://bit.ly/3jb6oSr
- Ceiling track Accessories https://bit.ly/36bcxKT
- (2) Large White Tarp https://homedepot.sjv.io/35d0B
- 2 by 3 by 8ft lumber
- 1- 1/2 Lag Screws
Other Rockler products
- HVLP Sprayer https://bit.ly/2G565tB
- Sure-hooks 360 https://bit.ly/2GiozH9
- Universal sure hooks https://bit.ly/33Y6uGG
- 1 Gallon Paint Mixing mate https://bit.ly/2GgKnmt
- 1 Quart Paint Mixing mate https://bit.ly/36heDcd
********** Support my work **********
My Woodworking Plans: https://gumroad.com/diycreators
Help me make more Video: https://www.patreon.com/diycreators
YouTube: Subscribe & "RING the Bell": http://bit.ly/1PtWJEd
Instagram: https://instagram.com/morediycreators
Pinterest: https://www.pinterest.com/diycreators/
90
views
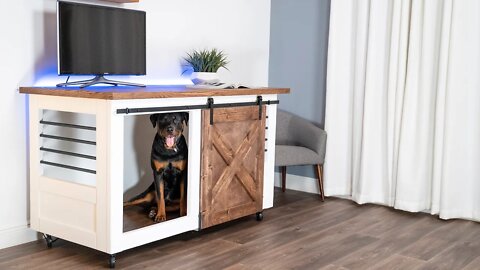
2 in 1 Barn Door Entertainment Center DOG Crate | DIY CREATORS
In this is video, I am building a multipurpose dog crate that can be used as a TV stand.
**This video is sponsored by https://www.rockler.com/
All my woodworking plans https://gumroad.com/diycreators
***Tools Used ***
- Drill guide https://www.rockler.com/rockler-portable-drill-guide
- Square https://www.rockler.com/clamp-it-assembly-square
- Clamps https://www.rockler.com/hand-tools/clamps
- Dowel Jig https://www.rockler.com/rockler-3-8-dowel-drilling-jig-kit
- HVLP Paint Sprayer https://bit.ly/2G565tB
- Router table https://bit.ly/33NOUFq
- Drill https://homedepot.sjv.io/4b1J9
- Pocket hole jig https://homedepot.sjv.io/oKJzg
- Speed Square https://homedepot.sjv.io/RBk19
- Circular saw https://homedepot.sjv.io/oMbaW
- Miter saw https://homedepot.sjv.io/xrz1R
***Materials Used ***
Hardware used
- (1) 5ft Sliding barndoor hardware https://bit.ly/3hYH0hb
- (2) 4in Surface bolt https://homedepot.sjv.io/x4VOk
- (1) 3in Set of wheels https://amzn.to/3665QtB
- (3) 10ft 1/2in conduit https://homedepot.sjv.io/r66O3
- (8) brackets (hold the top can use any screws are needed) https://amzn.to/2HjGga3
- (18) Insert nuts https://amzn.to/3cengoP
- (18) 1/4 20 https://amzn.to/35TN8F6
- (-) Pocket holes screws (1-1/4in and 2in)
- DIY Keeper plate
Lumber & Other items used
- (3) 4ft x 8ft x 3/4in Plywood (top, back, bottom)
- (-) 2in x 4in x 8ft Lumber
- (2) 1in x 4in x 8ft Lumber (Door frame)
- (1) 1/4 plywood (Door)
- Laminate flooring (optional) https://homedepot.sjv.io/bV1Av
- LED Strip https://bit.ly/360erhc
- 3/8 Dowels https://homedepot.sjv.io/0LE5O
Finish
- Hickory Gel Stain https://homedepot.sjv.io/mWWZ1
- White paint and primer (satin)
- Black Spray paint https://homedepot.sjv.io/qbbZL
***note: Material list may not be complete,
********** Support my work **********
My Woodworking Plans: https://gumroad.com/diycreators
Help me make more Video: https://www.patreon.com/diycreators
YouTube: Subscribe & "RING the Bell": http://bit.ly/1PtWJEd
Instagram: https://instagram.com/morediycreators
Pinterest: https://www.pinterest.com/diycreators/
#DIYpetcrate #dogkennel #Slidingbarndoor
127
views
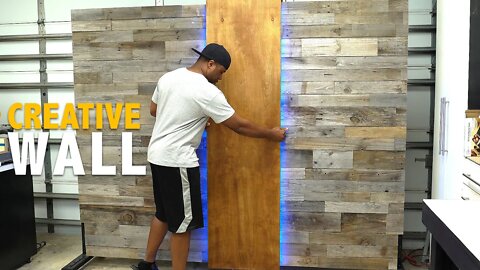
How to build a portable WALL (COOL IDEA) | DIY Creators
I needed a creative background, so I made a double side movable wall.
Check out the latest labor day-saving at The Home Depot https://homedepot.sjv.io/6R1Zr
All my woodworking plans https://gumroad.com/diycreators
Written article
https://diycreators.com/how-to-build-a-portable-pallet-wall/
Tools Used
- Makita circular saw https://homedepot.sjv.io/K1Dxn
- Husky Speed Square https://homedepot.sjv.io/RBk19
- Drill https://homedepot.sjv.io/4b1J9
- Pocket hole jig https://homedepot.sjv.io/oKJzg
- Nail gun https://homedepot.sjv.io/Y6J1J
- Orbital sander https://homedepot.sjv.io/vB74e
Materials used
- Lots of pallets (see below for how to get them)
- (7) 2 by 3 by 8ft Lumber
- (4) Sheet of 1/4 by 4ft by 8ft Plywood
- (1) 2 by 4 by 8ft lumber
- (4) 2in Casters https://homedepot.sjv.io/Qo5NA
- (32) 1/4in by 1in lag bolts https://homedepot.sjv.io/qJ7Ey
- (4) 10in corner brace https://homedepot.sjv.io/e96rr
- Wood glue https://homedepot.sjv.io/jkvne
- Danish oil https://homedepot.sjv.io/rZ7zQ
- Masking tape
- Paint
- (1) LED Strip per panel (RGB Color) https://homedepot.sjv.io/DP2Qj
- (-) LED Strip per panel (white) https://homedepot.sjv.io/mA7ze
*** Where do you get pallets? and pallets alternative ***
- You can find pallets at local stores (Ask the store, some will be happy to give them to you)
- You can find them on the side of the road
- I just found out Home Depot sells them https://homedepot.sjv.io/e96Nj
- Alternative https://homedepot.sjv.io/xW7Zv
********** Support my work **********
My Woodworking Plans: https://gumroad.com/diycreators
Help me make more Video: https://www.patreon.com/diycreators
YouTube: Subscribe & "RING the Bell": http://bit.ly/1PtWJEd
Instagram: https://instagram.com/morediycreators
Pinterest: https://www.pinterest.com/diycreators/
#homedepotpartner #thdlaborday
122
views
2
comments
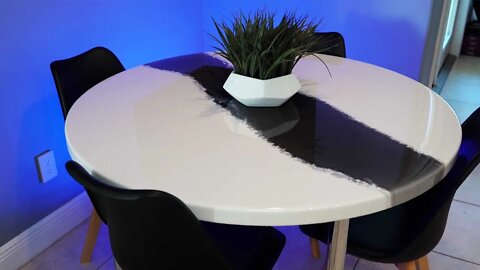
Epoxy round Table build - Resin art | DIY CREATORS
Making a small epoxy resin table from MDF
Private Internet Access VPN provides no log online protection. Now, you can sign up with my link http://www.privateinternetaccess.com/diy to get a 77% discount, 3 extra months free with just $2.59 a month.
All my woodworking plans https://gumroad.com/diycreators
The written version is coming soon @ https://diycreators.com/
---------------Materials List (Affiliate Links) ------------------
Epoxy used
- Countertop Epoxy http://bit.ly/2nrrvVk
- White base color - https://bit.ly/32XoxxG
- Powder http://bit.ly/2MlpHLM
Legs
- Legs from Rockler https://bit.ly/2CIHiKS
- Threaded insert nut https://amzn.to/30OoiT9
- Machine screws https://amzn.to/2OUzmsf
Other
- Black Chair https://amzn.to/3jAIiBc
- Mixing containers
- Mixing stick
- Adhesive spreader https://amzn.to/2EcEDt2
- Spreader squeegee https://amzn.to/32XgkcX
- Silicone brush https://amzn.to/2DaivPp
---------------Tools used: ------------------
Circle Jig https://amzn.to/2EfQx5q
Table or Circular saw
Clamps and weights
measuring tape
Router
Sandpaper
Torch https://homedepot.sjv.io/kP4JV
Sander
Drill
Router bit https://amzn.to/2D3FHyT
--------------------------------------------------------------------------
********** Support my work **********
My Woodworking Plans: https://gumroad.com/diycreators
Help me make more Video: https://www.patreon.com/diycreators
YouTube: Subscribe & "RING the Bell": http://bit.ly/1PtWJEd
Instagram: https://instagram.com/morediycreators
Pinterest: https://www.pinterest.com/diycreators/
76
views
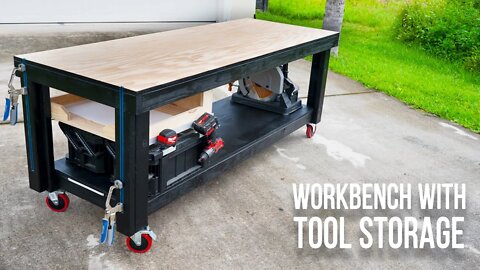
How to make A Workbench | DIY WOODWORKING
In this video, I will be making a multipurpose workbench from 2 by 4 and plywood.
All my woodworking plans https://gumroad.com/diycreators
Building this workbench has really changed the work I work in my shop. I keep two toolboxes underneath for my most used tools. Being able to hang drills and measuring tapes on the side is very handy. My favorite part is being able to store tools I want in the shop, but do not want to build a workbench for. The T-Track on the side works great for holding materials. This workbench is made from 3/4in plywood and 2by4. Get the plans here https://gum.co/gfKwe
Materials List (Affiliate Links)
• (11) - Lumber 2in. x 4in. x 8ft (Frame)
• (2) - Plywood 3/4 in. 4ft x 8ft (Top, bottom shelf and storage)
• (1) - 48in. T-Track (Cut in half) https://amzn.to/3esyvtQ
• (12) - #6 x 3/4in Screw (for the T-Track) https://amzn.to/3eDRfad
• (38) - #8 x 3/4in. Wood screw (For brackets) https://amzn.to/2YsRwHj
• (19) - 2in. x 2in. Corner Bracket (need two packs) https://amzn.to/3erLY5m
• (46) - # 8 x 1-1/2in. Wood screw (Bottom shelf, storage mount, and foot pad)
• (50) - 2-1/2in. Pocket Hole Screws Wood screw (Frame) https://amzn.to/2NjI9mT
• (4) - 5in Workbench Casters https://amzn.to/2zWe2Pb
• (16) - #12 X 1in wood screw (Caster mount)
• (16) - Washer for the caster screw
• (1) - 32in x 1-1/4in. x 1/16in. Aluminum angle
• (8) - #6 X 3/4in wood screw (Mount the Aluminum angle)
Tools List
• Circular saw https://amzn.to/37Xj5f0
• K5 Pocket hole jig https://amzn.to/2Yn95IG
• Drill https://amzn.to/316lbaL
• Clamps
• Router and 3/4in router bit
• Hand saw https://amzn.to/2Z3aCm6
• Chisel https://amzn.to/2YYBCmZ
• Sander
• Kreg bench clamps https://amzn.to/2YpqH6x
• RIDGID R8660B 18v cordless drywall screwdriver https://homedepot.sjv.io/xPBL5
********** More From DIY Creators**********
My Woodworking Plans: https://gumroad.com/diycreators
Help me make more Video: https://www.patreon.com/diycreators
YouTube: Subscribe & "RING the Bell": http://bit.ly/1PtWJEd
Instagram: https://instagram.com/morediycreators
Pinterest: https://www.pinterest.com/diycreators/
115
views
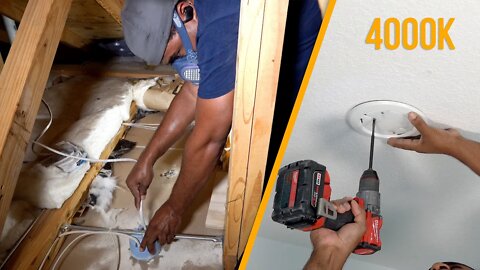
How to install recessed lights 4000k LED // Parmida LED
In this video, I will be removing my old fluorescent light and installing Dimmable LED Disk Light Flush Mount Recessed Retrofit Ceiling Lights
This video is sponsored by Parmida LED:https://www.parmida.com/
https://amzn.to/36vwJ84
All my woodworking plans https://gumroad.com/diycreators
*******Items I used in this video: (affiliate links) *******
▪︎ 4000k LED lights used https://amzn.to/2XpUxq5
▪︎ Blue electrical work box https://amzn.to/36xF37p
▪︎ 14/2 Romex electric wire https://amzn.to/2TBMghM
▪︎ Romex wire staple https://amzn.to/36EOYIF
▪︎ Push-in connector https://amzn.to/3c0NObl
Paint color on the wall: ppu13-1 caribe
Tools:
▪︎ Drill
▪︎ Wirecutter
▪︎ Drywall saw https://amzn.to/2XriUDR
Pain color on the wall: ppu13-1 caribe
LED Disk Light Flush Mount Recessed - (Packs)
4 pack: https://amzn.to/2XsoQw7
12 pack: https://amzn.to/3c4jE6W
********** Support my work **********
My Woodworking Plans: https://gumroad.com/diycreators
Help me make more Video: https://www.patreon.com/diycreators
YouTube: Subscribe & "RING the Bell": http://bit.ly/1PtWJEd
Instagram: https://instagram.com/morediycreators
Pinterest: https://www.pinterest.com/diycreators/
#LEDDISKLIGHT
82
views
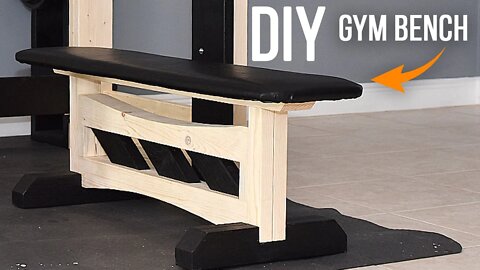
How to build a GYM Bench - Homemade GYM // EP02
As part of my homemade gym, I made a workout bench.
Check out part 1: POWER RACK Home GYM https://youtu.be/jSPgAV-gbfg-
Gym bench plans: https://gum.co/TPjYa
All my woodworking plans https://gumroad.com/diycreators
*Note: I forgot to mention, the 1in foam I used is not that great! 2in thick foam minimum would be better. Other than that, the bench is good. Solid and lightweight.
- Olympic weights - https://amzn.to/37lhjEk
- Dumbells - https://amzn.to/37hNFzR
Materials List (Affiliate Links)
● 2in x 4in by 8ft Prime Whitewood Stud | (HD SKU #161640)
● Black Soft Faux Leather | https://amzn.to/2X1GzKG
● 2in Foam | https://amzn.to/2T1EcXk
● 1/4in. 20 x 2in. Zinc Hex bolt
● 1/4in. 20 x 15mm https://amzn.to/2WRaw07
● 1/4in. 20 x 0.789in. https://amzn.to/2yR7dxK
● 1/4in. 20 x 2-1/2in.
● Furniture Feet
Tools Used (Affiliate Links)
● Measuring tape | https://amzn.to/3dK8i9k
● Clamps | https://amzn.to/2WMOJXi
● Square | https://amzn.to/35XQCoo
● Pull saw (hand saw) | https://amzn.to/2WtODEV
● Band saw | https://amzn.to/2T1LsT3
● Chisel | https://amzn.to/2WtpURe
● Sander | https://amzn.to/3cppkJP
● Miter saw| https://amzn.to/2AkfZEU
● Staple gun | https://amzn.to/3dOj2Uv
● Glue Applicator | https://amzn.to/2Z6In80
● 3/8 Forstner Drill bit | https://amzn.to/3bI0TGe
********** Support my work **********
My Woodworking Plans: https://gumroad.com/diycreators
Help me make more Video: https://www.patreon.com/diycreators
YouTube: Subscribe & "RING the Bell": http://bit.ly/1PtWJEd
Instagram: https://instagram.com/morediycreators
Pinterest: https://www.pinterest.com/diycreators/
88
views
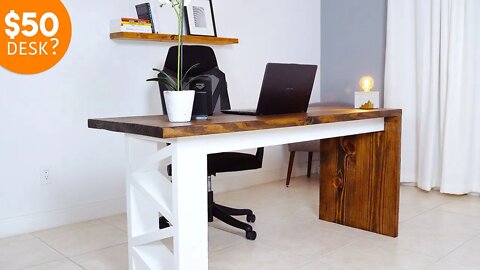
DIY Desk under $50 | DIY Creators
In this video, I will show a way to use cheap lumber to build furniture. You can create an awesome desk like this for your space.
GET PAID TO SHOP AT YOUR FAVORITE STORES: Get a $10 sign-up bonus when you spend your first $25 using TopCashback with this link: https://bit.ly/2Yo9bQu This offer will expire on May 30th, 2020.
All my woodworking plans https://gumroad.com/diycreators
Plans are now available: https://gum.co/NMJnr
Materials List (Affiliate Links)
Materials used:
(2) 2in x 12in by 8ft Southern yellow Pine
(2) 2in x 6in x 8ft pine board
(1) 2in x 4in x 8ft pine board
(1) 1/2in dowels
(1) 2-1/2in pocket holes screws - https://amzn.to/2YtAxVz
- Wood glue
- LED used - https://amzn.to/2YsbPF6
- LED connector clip kit - https://amzn.to/2zUC78N
Finish applied
- Minwax Espresso 273 Gel Stain
- Primer
- Oil-based white gloss paint
Accessories on the desk:
- Fast charging Wireless Charger https://amzn.to/2VXMDo7
- Aluminum Mouse pad https://amzn.to/2YAKfpn
- Office Chair https://amzn.to/2zNkA26
Tools Used (Affiliate Links)
- Circular saw https://homedepot.sjv.io/kqd6N
- Sander - https://amzn.to/3fdy1Zv
- 1/2 dowel jig - https://amzn.to/2KXI0V4
- Pocket hole jig - https://amzn.to/2WqLZi0
- Drill - https://amzn.to/2xz1Uma
- Measuring Tape - https://amzn.to/2KURMaf
- Speed Square - https://amzn.to/2KWNFuk
- 24 in Clamps https://amzn.to/2Sw7cWM
- Belt sander
- Jawhorse - https://amzn.to/2ypqupN
---------------------------------------------------------------------------
FAQ: Camera Gear
1. Camera - https://amzn.to/361QFxS
2. Mic - https://amzn.to/2FOI0nA and https://amzn.to/3888i09
3. Lights https://amzn.to/3aeLVIg
4. Tripod https://amzn.to/2RoIx5f
5. Software Adobe Premiere Pro
FAQ: Top Materials I use
1. 3/4 Plywood, Select pine Southern yellow pine
2. LED- Multi-Color LED - (White LED https://amzn.to/30mSSCJ )
3. Wood Glue - (Glue bottle https://amzn.to/2QU1VrI ) & (Glue https://amzn.to/36WbBHR )
********** Support my work **********
My Woodworking Plans: https://gumroad.com/diycreators
Help me make more Video: https://www.patreon.com/diycreators
YouTube: Subscribe & "RING the Bell": http://bit.ly/1PtWJEd
Instagram: https://instagram.com/morediycreators
Pinterest: https://www.pinterest.com/diycreators/
108
views
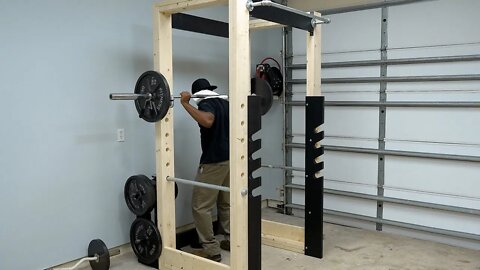
How to make a POWER RACK - Homemade GYM // EP01
In this episode, I will be building a power rack for my home gym. Plans are now available for the POWER Rack! See details here: https://gum.co/YHcU
All my woodworking plans https://gumroad.com/diycreators
Weight options:
- Olympic weights - https://amzn.to/37lhjEk
- Dumbells - https://amzn.to/37hNFzR
Tools Used (Affiliate Links)
- Circular saw https://homedepot.sjv.io/oMbaW
- Table Saw (Optional - can use circular saw)
- Miter saw (Optional - can use circular saw)
- Drill https://homedepot.sjv.io/oMbaW
- Router https://homedepot.sjv.io/Kb9ve
- Jigsaw https://homedepot.sjv.io/JnQvv
- 1 3/8 drill bit (large holes) https://homedepot.sjv.io/rMbyy
- 3/8 drill bit (for the threaded inserts)
https://homedepot.sjv.io/JnQA7
- 1/4 steel bit (for drilling metal) https://homedepot.sjv.io/5dQED
- Wood Clamps https://homedepot.sjv.io/Kb9dy
- Pocket hole jig https://amzn.to/3bpkE64
- 15 Lumber 2in. X 6in. X 8ft
- 1 Plywood 3/4 in. 4ft X 8ft
- (-) 1/4 - 20 - threaded insert nuts https://homedepot.sjv.io/qMNkq
- (-) #9 2.5in Wood screws
- 1 1/4 PVC
- (-) 1/4in - 20 by 1in zinc bolt
- (-) 1/4in - 20 by 2 1/2in zinc bolt
- (-) 1/4in zinc washer
- (-) 1/4in – T-nut
- (1) 10ft 1in Threade Steel Pipe
- (6) 1in end cap
- 2.5 in pocket hole screws https://amzn.to/2Vk5yZX
incomplete list .........
********** Support my work **********
My Woodworking Plans: https://gumroad.com/diycreators
Help me make more Video: https://www.patreon.com/diycreators
YouTube: Subscribe & "RING the Bell": http://bit.ly/1PtWJEd
Instagram: https://instagram.com/morediycreators
Pinterest: https://www.pinterest.com/diycreators/
80
views
1
comment
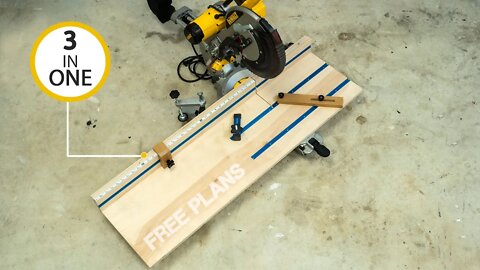
3 in 1 miter saw station (must have WOODWORKING jig) DIY Creators
Making a 3 in 1 miter saw station. Now make repeatable cuts, safely cut small parts and make miter cuts. If you lack space in your shop or want a quick and easy miter saw setup, then this is a great addition.
Download the plans: https://gumroad.com/diycreators
Written article: https://diycreators.com/3-in-one-diy-miter-saw-station/
Materials & tools used (Affiliate Links)
- 3/4'' Plywood and 1 by 2 stock
- (1) 48’’ Universal T-Track https://amzn.to/2w2Y9nN
- (1) 48’’ Universal T-Track with hold down clamp kit https://amzn.to/2TcYD2F
- #6 (3/8’’) Screws used to secure the T-Track
- M4 - Thread insert https://amzn.to/3brXkoL
- M4 - Screws for insert https://amzn.to/3bty3e0
- Miter saw https://homedepot.sjv.io/xrz1R
- Mini Square https://amzn.to/3aaSMlk
- Digital protractor angle finder https://amzn.to/2TdPDf1
- Black Gloves https://homedepot.sjv.io/JN6yQ
-------------------------------------------------------------------------------------------
FAQ: Must have tools for beginners (Affiliate Links)
1. Circular saw https://amzn.to/37311Pm
2. Drill https://amzn.to/2FRikGX
3. Sander https://amzn.to/37313qs
4. Pocket hole jig https://amzn.to/36WN4ST
5. Miter saw https://amzn.to/30llr3s
6. Table Saw https://amzn.to/2QVBeTv
7. Clamps https://amzn.to/30lyS3p
8. Router https://amzn.to/2sqsTO4
9. Jig Saw https://amzn.to/2QWnzeQ
10. Nail Gun https://amzn.to/387Hayh
FAQ: Camera Gear
1. Camera - https://amzn.to/361QFxS
2. Mic - https://amzn.to/2FOI0nA and https://amzn.to/3888i09
3. Lights https://amzn.to/3aeLVIg
4. Tripod https://amzn.to/2RoIx5f
5. Software Adobe Premiere Pro
FAQ: Top Materials I use
1. 3/4 Plywood, Select pine Southern yellow pine
2. LED- Multi-Color LED - (White LED https://amzn.to/30mSSCJ )
3. Wood Glue - (Glue bottle https://amzn.to/2QU1VrI ) & (Glue https://amzn.to/36WbBHR )
********** Support my work **********
My Woodworking Plans: https://gumroad.com/diycreators
Help me make more Video: https://www.patreon.com/diycreators
YouTube: Subscribe & "RING the Bell": http://bit.ly/1PtWJEd
Instagram: https://instagram.com/morediycreators
Pinterest: https://www.pinterest.com/diycreators/
128
views

Easy DIY Floating shelves | DIY Creators
Easy DIY Floating shelves you can make in minutes (start to finish). See below for more information on this.
All my woodworking plans https://gumroad.com/diycreators
---------------------
Making The Shelves
Step 1: Locate your studs.
Step 2: Cut your lumber to the desired length.
Step 3. Drill pocket holes in each shelf at every stud location.
Step 4. Sand each shelf and clean them up.
Step 5. Apply a finish.
Step 6. Mount the shelves to the wall with 2.5in screws.
Step 7. Decorate it.
Step 8. Enjoy.
These shelves are perfect for many things you want to store on it.
Displaying valuables, Storing things, or just to decorate, to name a few.
Materials List (Affiliate Links)
• 2in by 8in by 20in southern yellow pine https://homedepot.sjv.io/BaW5y
• 2in by 8in by 30in southern yellow pine
• 2in by 8in by 40in southern yellow pine
• 2.5in pocket hole screws https://amzn.to/2NvwhOW
• Pocket hole white caps https://amzn.to/3abS8EX
• 3/8in dowels https://amzn.to/2TryE9y
• Danish Oil https://amzn.to/389XfUh
Tools Used
• Black Gloves https://homedepot.sjv.io/5DoOn
• Pull saw (Roamwild Multi Pull Saw) - https://amzn.to/3aeXdMz
• Pocket hole jig kit - https://amzn.to/2NrDPlK
• Milwaukee M18 Fuel Drill - https://homedepot.sjv.io/mq6O1
• Measuring tape https://amzn.to/385MuT1
• Stud finder https://amzn.to/30nBv4F
• 24in spirit Level https://amzn.to/2Ri8AL7
• Jawhorse https://amzn.to/2QWE8Hw
-------------------------------------------------------------------------------------------
FAQ: Must have tools for beginners (Affiliate Links)
1. Circular saw https://amzn.to/37311Pm
2. Drill https://amzn.to/2FRikGX
3. Sander https://amzn.to/37313qs
4. Pocket hole jig https://amzn.to/36WN4ST
5. Miter saw https://amzn.to/30llr3s
6. Table Saw https://amzn.to/2QVBeTv
7. Clamps https://amzn.to/30lyS3p
8. Router https://amzn.to/2sqsTO4
9. Jig Saw https://amzn.to/2QWnzeQ
10. Nail Gun https://amzn.to/387Hayh
FAQ: Camera Gear
1. Camera - https://amzn.to/361QFxS
2. Mic - https://amzn.to/2FOI0nA and https://amzn.to/3888i09
3. Lights https://amzn.to/3aeLVIg
4. Tripod https://amzn.to/2RoIx5f
5. Software Adobe Premiere Pro
FAQ: Top Materials I use
1. 3/4 Plywood, Select pine Southern yellow pine
2. LED- Multi-Color LED - (White LED https://amzn.to/30mSSCJ )
3. Wood Glue - (Glue bottle https://amzn.to/2QU1VrI ) & (Glue https://amzn.to/36WbBHR )
********** Support my work **********
My Woodworking Plans: https://gumroad.com/diycreators
Help me make more Video: https://www.patreon.com/diycreators
YouTube: Subscribe & "RING the Bell": http://bit.ly/1PtWJEd
Instagram: https://instagram.com/morediycreators
Pinterest: https://www.pinterest.com/diycreators/
115
views
Wall mounted storage rack for clamps ( DIY Woodworking )
Organizing my clamps with a wall-mounted clamp rack.
As part of my ongoing shop update, I created a clamp rack to keep an organized shop and improve my efficiency.
All my woodworking PLANS https://gumroad.com/diycreators
Tools used "Affiliate Links"
• Drill https://homedepot.sjv.io/0oD6Y
• Pocket hole jig https://amzn.to/2rUO0ry
• Circular Saw https://amzn.to/2QIQe5O
• Table Saw https://amzn.to/2QRWQyI
• Trim Router https://amzn.to/2sOrQYw
• Router Bits
CLAMP LIST
1. Clamp it jig https://amzn.to/39FH9mN
2. Hand screw clamps https://amzn.to/37HkAwt
3. Parallel clamps https://amzn.to/2ulqoNK
4. Bessy clamps https://amzn.to/2QPSesW
5.Jorgensen clamps https://amzn.to/2FoX0sd
6. Rockler https://amzn.to/2FoX0sd
Materials used "Affiliate Links"
- 3/4in plywood
- Pack of wood screws https://amzn.to/2ZSxPHJ
- Pocket hole screws https://amzn.to/2QM8NGi
- (if masonry wall) Use tapcons https://amzn.to/2QrBLwg
How can you support this channel?
Woodworking Plans: https://gumroad.com/diycreators
Help me make more Video: https://www.patreon.com/diycreators
********** Subscribe & follow my work **********
YouTube: Subscribe & "RING the Bell": http://bit.ly/1PtWJEd
Instagram: https://instagram.com/morediycreators
Pinterest: https://www.pinterest.com/diycreators/
54
views

DIY STORAGE for lumber (DIY Woodworking Shop project)
In this video, I made a plywood and lumber storage on wheels. A great solution to keep shop lumber organized.
All my PLANS https://gumroad.com/diycreators
Materials for the Project:
***Affiliate Links***
• 5 sheets of 3/4 plywood (anyone can work)
• Pocket holes screws https://homedepot.sjv.io/5E7DN
• Wood glue https://homedepot.sjv.io/GJZ4L
• Wheels Used in the Video https://homedepot.sjv.io/j0nZe
• Will Change to these wheels 250lb each: https://amzn.to/2Z4QeRi
Tools used:
***Affiliate Links***
• Drill Set https://homedepot.sjv.io/xa2QA
• Pocket hole jig Kreg K5 https://amzn.to/35InGj1
• Right angle drill attachment https://homedepot.sjv.io/LBZyZ
• 12'' Drill Extension attachment https://homedepot.sjv.io/7qJ9y
• Router https://homedepot.sjv.io/kEo1N
• Measuring Tape
• Table saw
• Battery Powered Vaccum https://homedepot.sjv.io/9DJj3
●Woodworking Plans (Big Bundle) https://gum.co/CpSyF
Help me make more Video: https://www.patreon.com/diycreators
********** Subscribe & follow my work **********
YouTube: Subscribe & "RING the Bell": http://bit.ly/1PtWJEd
Instagram: https://instagram.com/morediycreators
Pinterest: https://www.pinterest.com/diycreators/
52
views

DIY Wall Mounted Entertainment Center ( Part 2 )
In this video, I will be revisiting an old build and make a few modifications to it.
Install Raid for Free ✅ IOS: http://bit.ly/2qqbdRu ✅ ANDROID: http://bit.ly/2WLEEJR Start with💰50K silver and get a Free Epic Champion 💥 on day 7 of “New Player Rewards” program
My Woodworking Plans: https://gumroad.com/diycreators
Plans for the Entertainment Center: https://gum.co/Adkt
********MY SETUP *******
- LG OLED TV - https://lgoled.co/DIYCreator
- Playstation 4 Pro https://amzn.to/2qZEUJH
- Cooling Fan https://amzn.to/2P0Kaod
- LED around the TV https://amzn.to/37WznEg
- Cable Box
- DVD Player
- Power strip https://amzn.to/2rEN5Ly
#1 Video for the TV Back Panel: https://youtu.be/a5AN4eAlW2c
#2 Video for the Entertainment Center Build https://youtu.be/eS5nuNivbSw
*********** Tools Used (Affiliate links) ***********
- Router - https://amzn.to/2R6YAG0
- Drill
- Level
- Laser Level
- Fish Tape https://amzn.to/37X9mVF
- Drywall knife https://amzn.to/3829xyW
*********** Hardware (Affiliate links) ***********
- 3/16 Toggle wing bolts https://amzn.to/2Y1cYRC
- 1/4 Snap toggle https://amzn.to/2Oz5eTO
- Power strip https://amzn.to/2rEN5Ly
- Wireport https://amzn.to/2R9H04j
- Single Gang mouting ring https://amzn.to/2R5DMPl
********Woodworking Plans (Big Bundle) https://gum.co/CpSyF********
********** Subscribe & follow my work **********
YouTube: Subscribe & "RING the Bell": http://bit.ly/1PtWJEd
Instagram: https://instagram.com/morediycreators
Pinterest: https://www.pinterest.com/diycreators/
#Entertainmentcenter #LGOLEDTV #DIY
50
views

Building A Ground Level Deck with LED Lights l Composite Deck (part 2)
In this video, I will install Trex composite deck boards.
Big thanks to Trex Decking for Sponsoring this video
for more info on composite decks visit: http://bit.ly/2MCfyZ2
If you missed PART ONE: of the deck build you can find it here https://youtu.be/Z6fBHCBYyJY
I completed the deck with composite deck boards, lights at the step, and LED strips going around the perimeter. I will be working on plans soon, but I have the SketchUp model for the deck here https://www.patreon.com/diycreators
********** WOODWORKING PLANS **********
Woodworking Plans: https://gumroad.com/diycreators
Coming soon...
- Full material list with the cost break down
- Written article
- Plans
- Tools used list
Part 1: Building the Deck Frame video:
https://youtu.be/Z6fBHCBYyJY
****** Affiliate links ******
LED LIGHT STRIP (Going around the deck perimeter)
- Light Strip https://amzn.to/2WkctS1
- Light Clips- https://amzn.to/31TESj5
DECK LIGHTING ( On the step)
- LED Stair Light https://amzn.to/2J4NDA6
- LightHUB 6-Way Splitter https://amzn.to/2J3y5N9
- LightHUB 10ft Extension Wire https://amzn.to/2P2im4t
******Woodworking Plans (Big Bundle) https://gum.co/CpSyF******
********** Subscribe & follow my work **********
YouTube: Subscribe & "RING the Bell": http://bit.ly/1PtWJEd
Instagram: https://instagram.com/morediycreators
Pinterest: https://www.pinterest.com/diycreators/
Music from https://artlist.io/Glen-297242
#deck #trexdeck #DIY
91
views