
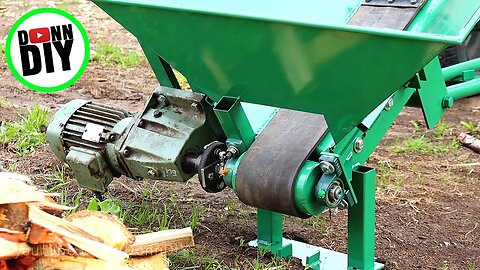
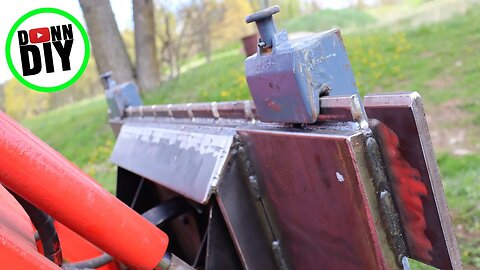
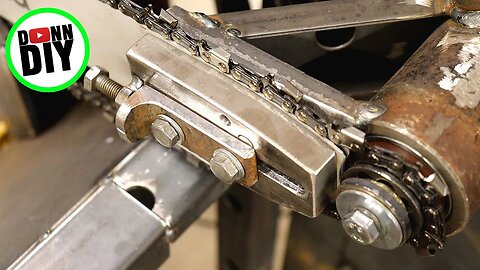
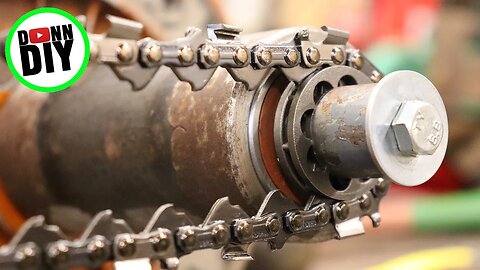
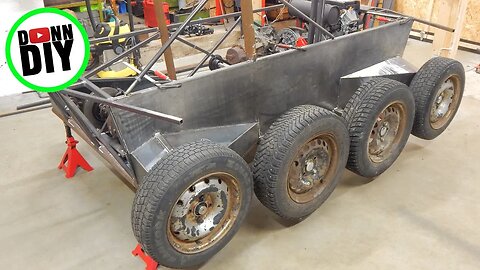
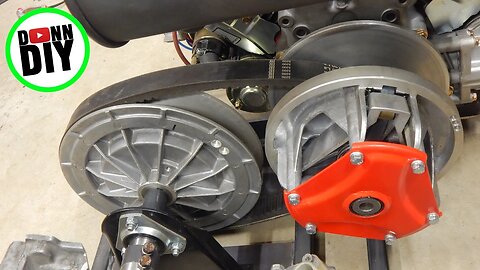
Belt Conveyor Build - Part 2
Fabricating a belt conveyor for my homemade firewood processor so I can transport firewood straight into the firewood crates. This means I don't have to stack firewood ever again. I'm using scrap steel and bits and pieces I have laying around on the homestead to keep the project cost down. This video is the second and also the final part of the two part series. But new videos will come! Stay tuned!
Check out my other videos on my channel page: https://www.youtube.com/c/DonnDIY
#donndiy #homemade #firewood
Soundtrack:
Pomade - Silent Partner (YouTube Audio Library)
Welding equipment borrowed from Spetselektroodi AS, Estonia:
Fronius TransSteel 2700 welder
Optrel Crystal 2.0 Welding Helmet
Hypertherm Powermax 45 XP plasma cutter
5
views

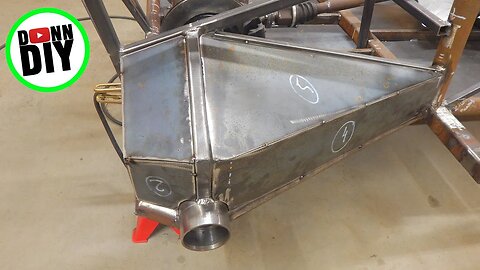
Belt Conveyor Build - Part 1
Fabricating a belt conveyor for my homemade firewood processor so I can transport firewood straight into the firewood crates. This means I don't have to stack firewood ever again. I'm using scrap steel and bits and pieces I have laying around on the homestead to keep the project cost down. Stay tuned for the second part on this build.
Check out my other videos on my channel page: https://www.youtube.com/c/DonnDIY
#donndiy #homemade #firewood
Soundtrack:
Pomade - Silent Partner (YouTube Audio Library)
Welding equipment borrowed from Spetselektroodi AS, Estonia:
Fronius TransSteel 2700 welder
Optrel Crystal 2.0 Welding Helmet
Hypertherm Powermax 45 XP plasma cutter
7
views
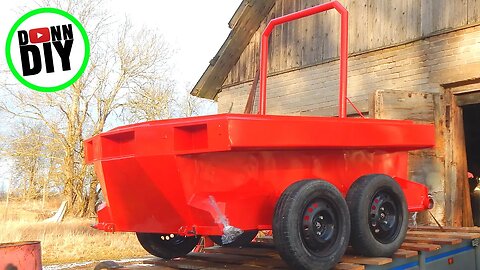
Skid Steer Loader Forklift Attachment Fabrication
Fabricating a custom forklift attachment for my mini skid steer loader. This is for loading anything I need, primarily however for relocating the firewood crates I'm about to build that I'm gonna use in conjunction with my homemade firewood processor. Why this little GEHL 1620 loader? It is small enough so it can fit in my workshop / machine shop and in the barn so I can work on it or unload cargo that I mainly need in the workshop. Also when I start demolishing the barn floor I can use the same loader with hydraulic hammer attachment to break the concrete and later use the bucket to clean up the concrete. I sorely remember doing this work by hand in my machine shop. The forks I use in this video for the forklift attachment are bought. They are old but unused. To create the forklift attachment I'm welding together one big and two smaller pieces of heavy duty steel sheet, adding some attachment points and that's about it. Now this loader is more versatile and with no heavy expenses. This project cost me around 200 EUR altogether.
Check out my other videos on my channel page: https://www.youtube.com/c/DonnDIY
#donndiy #homemade #firewood
Soundtrack:
Pomade - Silent Partner (YouTube Audio Library)
Welding equipment borrowed from Spetselektroodi AS, Estonia:
Fronius TransSteel 2700 welder
Optrel Crystal 2.0 Welding Helmet
Hypertherm Powermax 45 XP plasma cutter
12
views
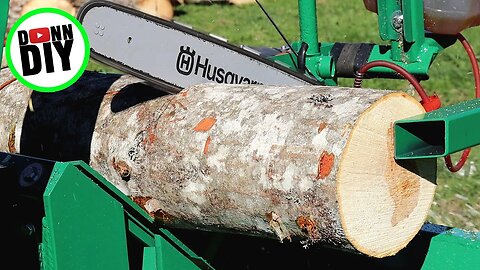
Homemade Firewood Processor - Log Splitter To Firewood Processor Ep. 5
Log splitter to firewood processor conversion. Taking an electric-hydraulic 7 tonne splitting force log splitter and converting it to a homemade firewood processor. The drawbacks of the current log splitter are the low height, single edge wedge and no firewood pan around the wedge so you have to constantly pick up pieces of wood you still want to split making the handling of the wood time consuming and annoying. Still better than splitting the wood with an axe though! Also you have to pre-cut the material you want to split. My plan is to put this log splitter on wheels, weld some steel to the trailer and around the wedge, add a log feed conveyor and a chain saw blade with separate electric motor and call it a firewood processor. It will make the firewood making process much simpler. Why haven't we done it sooner... It will take a log up to 3 m in length on the feed conveyor and a 35 cm cut log in the splitter since the stroke of the splitter is only 40 cm. I had to leave extra 5 cm wiggle room. But it's okay - our fireplaces are quite small. My sauna stove takes even as small as 25 cm firewood, and also my workshop stove. In addition to this creation I want to build firewood crates so we don't have to stack firewood ever again. And moving firewood will be as simple as that - just pick up the crate (with a machine) and deliver it wherever you want/need. No more re-re-re-stacking and unnecessary time consuming wood handling. Sounds like a TV commercial but it will be that good. Come along for the journey!
This video is part of a series of videos: https://www.youtube.com/playlist?list=PLkmF7FAZBzkVRPU6b-IeJVu91-frjF8v3
Check out my other videos on my channel page: https://www.youtube.com/c/DonnDIY
#donndiy #homemade #firewood
Soundtrack:
Pomade - Silent Partner (YouTube Audio Library)
Welding equipment borrowed from Spetselektroodi AS, Estonia:
Fronius TransSteel 2700 welder
Optrel Crystal 2.0 Welding Helmet
Hypertherm Powermax 45 XP plasma cutter
137
views
Chainsaw Bar Mount - Log Splitter To Firewood Processor Ep. 4
Log splitter to firewood processor conversion. Taking an electric-hydraulic 7 tonne splitting force log splitter and converting it to a homemade firewood processor. The drawbacks of the current log splitter are the low height, single edge wedge and no firewood pan around the wedge so you have to constantly pick up pieces of wood you still want to split making the handling of the wood time consuming and annoying. Still better than splitting the wood with an axe though! Also you have to pre-cut the material you want to split. My plan is to put this log splitter on wheels, weld some steel to the trailer and around the wedge, add a log feed conveyor and a chain saw blade with separate electric motor and call it a firewood processor. It will make the firewood making process much simpler. Why haven't we done it sooner... It will take a log up to 3 m in length on the feed conveyor and a 35 cm cut log in the splitter since the stroke of the splitter is only 40 cm. I had to leave extra 5 cm wiggle room. But it's okay - our fireplaces are quite small. My sauna stove takes even as small as 25 cm firewood, and also my workshop stove. In addition to this creation I want to build firewood crates so we don't have to stack firewood ever again. And moving firewood will be as simple as that - just pick up the crate (with a machine) and deliver it wherever you want/need. No more re-re-re-stacking and unnecessary time consuming wood handling. Sounds like a TV commercial but it will be that good. Come along for the journey!
This video is part of a series of videos: https://www.youtube.com/playlist?list=PLkmF7FAZBzkVRPU6b-IeJVu91-frjF8v3
Check out my other videos on my channel page: https://www.youtube.com/c/DonnDIY
#donndiy #homemade #firewood
Soundtrack:
Pomade - Silent Partner (YouTube Audio Library)
Welding equipment borrowed from Spetselektroodi AS, Estonia:
Fronius TransSteel 2700 welder
Optrel Crystal 2.0 Welding Helmet
Hypertherm Powermax 45 XP plasma cutter
93
views
Chainsaw Motor & Log Lifting System - Log Splitter To Firewood Processor Ep. 3
Log splitter to firewood processor conversion. Taking an electric-hydraulic 7 tonne splitting force log splitter and converting it to a homemade firewood processor. The drawbacks of the current log splitter are the low height, single edge wedge and no firewood pan around the wedge so you have to constantly pick up pieces of wood you still want to split making the handling of the wood time consuming and annoying. Still better than splitting the wood with an axe though! Also you have to pre-cut the material you want to split. My plan is to put this log splitter on wheels, weld some steel to the trailer and around the wedge, add a log feed conveyor and a chain saw blade with separate electric motor and call it a firewood processor. It will make the firewood making process much simpler. Why haven't we done it sooner... It will take a log up to 3 m in length on the feed conveyor and a 35 cm cut log in the splitter since the stroke of the splitter is only 40 cm. I had to leave extra 5 cm wiggle room. But it's okay - our fireplaces are quite small. My sauna stove takes even as small as 25 cm firewood, and also my workshop stove. In addition to this creation I want to build firewood crates so we don't have to stack firewood ever again. And moving firewood will be as simple as that - just pick up the crate (with a machine) and deliver it wherever you want/need. No more re-re-re-stacking and unnecessary time consuming wood handling. Sounds like a TV commercial but it will be that good. Come along for the journey!
This video is part of a series of videos: https://www.youtube.com/playlist?list=PLkmF7FAZBzkVRPU6b-IeJVu91-frjF8v3
Check out my other videos on my channel page: https://www.youtube.com/c/DonnDIY
#donndiy #homemade #firewood
Soundtrack:
Pomade - Silent Partner (YouTube Audio Library)
Welding equipment borrowed from Spetselektroodi AS, Estonia:
Fronius TransSteel 2700 welder
Optrel Crystal 2.0 Welding Helmet
Hypertherm Powermax 45 XP plasma cutter
109
views
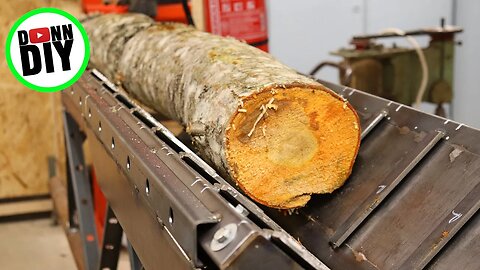
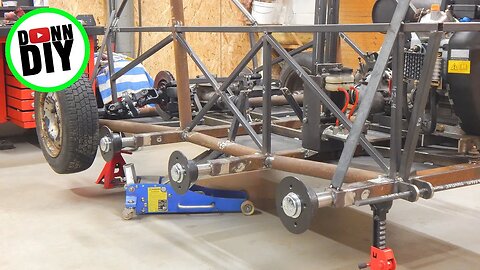
Log Conveyor - Log Splitter To Firewood Processor Ep. 2
Log splitter to firewood processor conversion. Taking an electric-hydraulic 7 tonne splitting force log splitter and converting it to a homemade firewood processor. The drawbacks of the current log splitter are the low height, single edge wedge and no firewood pan around the wedge so you have to constantly pick up pieces of wood you still want to split making the handling of the wood time consuming and annoying. Still better than splitting the wood with an axe though! Also you have to pre-cut the material you want to split. My plan is to put this log splitter on wheels, weld some steel to the trailer and around the wedge, add a log feed conveyor and a chain saw blade with separate electric motor and call it a firewood processor. It will make the firewood making process much simpler. Why haven't we done it sooner... It will take a log up to 3 m in length on the feed conveyor and a 35 cm cut log in the splitter since the stroke of the splitter is only 40 cm. I had to leave extra 5 cm wiggle room. But it's okay - our fireplaces are quite small. My sauna stove takes even as small as 25 cm firewood, and also my workshop stove. In addition to this creation I want to build firewood crates so we don't have to stack firewood ever again. And moving firewood will be as simple as that - just pick up the crate (with a machine) and deliver it wherever you want/need. No more re-re-re-stacking and unnecessary time consuming wood handling. Sounds like a TV commercial but it will be that good. Come along for the journey!
This video is part of a series of videos: https://www.youtube.com/playlist?list=PLkmF7FAZBzkVRPU6b-IeJVu91-frjF8v3
Check out my other videos on my channel page: https://www.youtube.com/c/DonnDIY
#donndiy #homemade #firewood
Soundtrack:
Pomade - Silent Partner (YouTube Audio Library)
Welding equipment borrowed from Spetselektroodi AS, Estonia:
Fronius TransSteel 2700 welder
Optrel Crystal 2.0 Welding Helmet
Hypertherm Powermax 45 XP plasma cutter
79
views
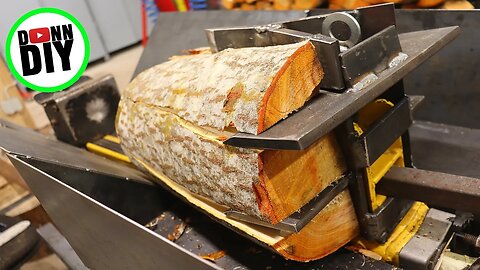
Wedge & Split Wood Platform - Log Splitter To Firewood Processor Ep. 1
Log splitter to firewood processor conversion. Taking an electric-hydraulic 7 tonne splitting force log splitter and converting it to a homemade firewood processor. The drawbacks of the current log splitter are the low height, single edge wedge and no firewood pan around the wedge so you have to constantly pick up pieces of wood you still want to split making the handling of the wood time consuming and annoying. Still better than splitting the wood with an axe though! Also you have to pre-cut the material you want to split. My plan is to put this log splitter on wheels, weld some steel to the trailer and around the wedge, add a log feed conveyor and a chain saw blade with separate electric motor and call it a firewood processor. It will make the firewood making process much simpler. Why haven't we done it sooner... It will take a log up to 3 m in length on the feed conveyor and a 35 cm cut log in the splitter since the stroke of the splitter is only 40 cm. I had to leave extra 5 cm wiggle room. But it's okay - our fireplaces are quite small. My sauna stove takes even as small as 25 cm firewood, and also my workshop stove. In addition to this creation I want to build firewood crates so we don't have to stack firewood ever again. And moving firewood will be as simple as that - just pick up the crate (with a machine) and deliver it wherever you want/need. No more re-re-re-stacking and unnecessary time consuming wood handling. Sounds like a TV commercial but it will be that good. Come along for the journey!
This video is part of a series of videos: https://www.youtube.com/playlist?list=PLkmF7FAZBzkVRPU6b-IeJVu91-frjF8v3
Check out my other videos on my channel page: https://www.youtube.com/c/DonnDIY
#donndiy #homemade #firewood
Soundtrack:
Pomade - Silent Partner (YouTube Audio Library)
Welding equipment borrowed from Spetselektroodi AS, Estonia:
Fronius TransSteel 2700 welder
Optrel Crystal 2.0 Welding Helmet
Hypertherm Powermax 45 XP plasma cutter
138
views
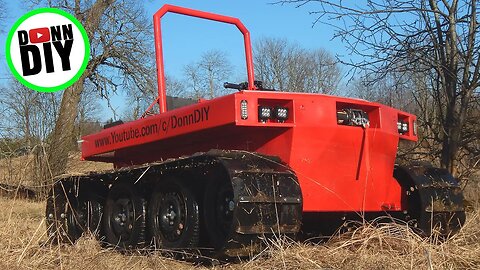
IT'S FINISHED! - Tracked Amphibious Vehicle Build Ep. 25
After all these months - my tracked amphibious vehicle is finished. Check out the final steps of the build in this video and finally see yourself will it float or not. Thank you all for watching this series. It has been epic!
#donndiy #homemade #trackedvehicle
This video is part of a series of videos, check out the series here: https://www.youtube.com/watch?v=vNDiAHNykoY&list=PLkmF7FAZBzkWdzAxcrnz-WJbzSRyqrSBt
Check out my other videos on my channel page: https://www.youtube.com/c/DonnDIY
Soundtrack:
Demon - JVNA (YouTube Audio Library)
Pomade - Silent Partner (YouTube Audio Library)
Welding equipment borrowed from Spetselektroodi AS, Estonia:
Fronius TransSteel 2700 welder
Optrel Crystal 2.0 Welding Helmet
Hypertherm Powermax 45 XP plasma cutter
10
views
Final Assembly - Tracked Amphibious Vehicle Build Ep. 24
In this episode I'm starting the final assembly on my homemade tracked amphibious vehicle. I'm fabricating a new hood scoop for the otherwise vulnerable to elements engine bay cooling fan, making the engine and gearbox frame lighter and slightly modifying it to make the CVT belt tensioning easier. I'm also adding a car alternator with a custom belt tensioning system to make the charging system cope with two 12 V winches and all the lights on board. Cleaning and painting the differential brake steering unit without the side brakes on, installing the engine and the gearbox and starting to button up the rest of the vehicle. In the next episode we will ride this thing! Stay tuned!
#donndiy #homemade #trackedvehicle
This video is part of a series of videos, check out the series here: https://www.youtube.com/watch?v=vNDiAHNykoY&list=PLkmF7FAZBzkWdzAxcrnz-WJbzSRyqrSBt
Check out my other videos on my channel page: https://www.youtube.com/c/DonnDIY
Soundtrack:
Pomade - Silent Partner (YouTube Audio Library)
Welding equipment borrowed from Spetselektroodi AS, Estonia:
Fronius TransSteel 2700 welder
Optrel Crystal 2.0 Welding Helmet
Hypertherm Powermax 45 XP plasma cutter
21
views
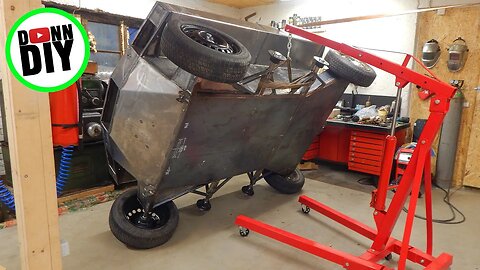
Powder Coating Hull - Tracked Amphibious Vehicle Build Ep. 23
Before going to the powder coating I still had to fully weld the tracked amphibious vehicle hull and grind welds down nice and smooth. Then I wire brushed rusty parts and cleaned the whole thing with compressed air and vacuum cleaner. Since the tracked vehicle is wider than the car trailer box I also had to fabricate a platform on top of the trailer. I made it out of wood I milled a couple of years ago with the homemade chain sawmill. These larch boards sure came in handy. I installed a hand winch so I could winch the tracked amphibious vehicle on the platform. And like a curse just the night before the powder coating it snowed and made everything a bit more difficult. Difficult in the sense that when it snows the road will be salted. Bare steel and salt don't mix, especially just before going to powder coating. Thus I had to wrap the tracked amphibious vehicle in tarp and plastic. The powder coating was done locally. I don't have a personal powder coating facility as someone suspected. There is no need for that for my business yet. Now when the hull and other parts are painted I can start putting this thing together. There's still a bunch of things to do on the engine/CVT/gearbox unit to make it work 100% like I personally want. But all of that already next week. Or the week after that. Thanks for watching! ;)
#donndiy #homemade #trackedvehicle
This video is part of a series of videos, check out the series here: https://www.youtube.com/watch?v=vNDiAHNykoY&list=PLkmF7FAZBzkWdzAxcrnz-WJbzSRyqrSBt
Check out my other videos on my channel page: https://www.youtube.com/c/DonnDIY
Soundtrack:
Pomade - Silent Partner (YouTube Audio Library)
Welding equipment borrowed from Spetselektroodi AS, Estonia:
Fronius TransSteel 2700 welder
Optrel Crystal 2.0 Welding Helmet
Hypertherm Powermax 45 XP plasma cutter
32
views
LED Lights, Plywood Seat, Bilge Pump & Paint Prep - Tracked Amphibious Vehicle Build Ep. 22
Installing LED lights and drilling mounting holes, fabricating space saving passenger seat out of plywood, redoing the hood scoop and adding electric fan to make the engine cooling more forced, fabricating hitch ball mount, installing bilge pump and prepping the tub for paint next week by welding all the seams on the upper body. More is yet to come. Stay tuned. We'll be riding this thing soon! Can't wait!
#donndiy #homemade #trackedvehicle
This video is part of a series of videos, check out the series here: https://www.youtube.com/watch?v=vNDiAHNykoY&list=PLkmF7FAZBzkWdzAxcrnz-WJbzSRyqrSBt
Check out my other videos on my channel page: https://www.youtube.com/c/DonnDIY
Soundtrack:
Pomade - Silent Partner (YouTube Audio Library)
Welding equipment borrowed from Spetselektroodi AS, Estonia:
Fronius TransSteel 2700 welder
Optrel Crystal 2.0 Welding Helmet
Hypertherm Powermax 45 XP plasma cutter
13
views
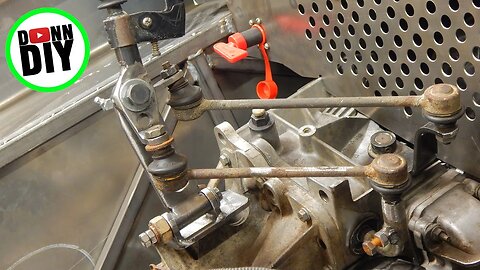
Fabricating Transmission Shifter - Tracked Amphibious Vehicle Build Ep. 21
Using FWD transmission turned 90 degrees but still want to shift gears as normal? This Peugeot Partner gearbox is now installed sideways in the tracked amphibious all terrain vehicle. Thus the original gear linkage doesn't work anymore. To avoid confusion for any pilot of the vehicle I wanted to shift gears as usual and use the original gear shift knob as well. So I took a couple of old car front end stabilizer rods from the shelf, some steel from the scrap heap and a welder and two full days of work. The most demanding was to get the geometry right so the two rods work together without any problems. The brake lever on the shift knob will be used for braking the secondary clutch of the CVT so I can shift gears without grinding the teeth in the gearbox. I also installed the gas tank / petrol tank and directed the exhaust out of the hull.
#donndiy #homemade #trackedvehicle
This video is part of a series of videos, check out the series here: https://www.youtube.com/watch?v=vNDiAHNykoY&list=PLkmF7FAZBzkWdzAxcrnz-WJbzSRyqrSBt
Check out my other videos on my channel page: https://www.youtube.com/c/DonnDIY
Soundtrack:
Pomade - Silent Partner (YouTube Audio Library)
Welding equipment borrowed from Spetselektroodi AS, Estonia:
Fronius TransSteel 2700 welder
Optrel Crystal 2.0 Welding Helmet
Hypertherm Powermax 45 XP plasma cutter
15
views
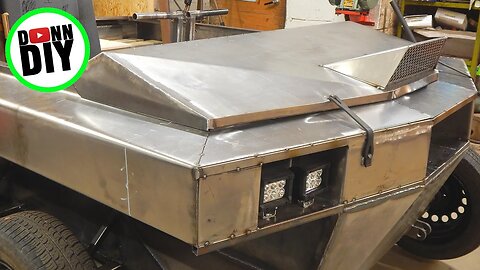
Fabricating Bonnet & Dashboard - Tracked Amphibious Vehicle Build Ep. 20
This time I'm handcrafting a bonnet/hood and instrument panel out of sheet metal. In the process of making the dashboard I also had to think about the placement of the switches and accessories on the instrument panel. I need the basics on the dashboard like ignition key switch, light switches, bilge pump switch, hour meter and so on. I would also like to add oil temperature gauge (only way to tell the temperature of my air cooled V-twin). On the very left end of the dashboard I mounted an emergency battery cutoff switch so I can disconnect the battery every time I leave the machine and nothing gets juice from the battery while the vehicle is left unused. I ordered a switch cluster online which has 5 separate switches with built in fuses. This cluster also features a voltmeter, a 12 V and USB power outlet so this should cover everything I need. On the backside of the dashboard in the engine bay I mounted a pair of winch relays just because I'm using two winches on the tracked amphibious vehicle, both front and back. The front winch switch will be mounted on the left steering lever so I can use it ergonomically while driving, for lifting plow and such. The rear winch switch is yet to be mounted somewhere on the dashboard. I will also install the remote control units so I'll retain the possibility of remotely operating the DragonWinch 12 V electric winches. They might come in handy in the swamp for sure. The bonnet's main job is to keep the rain out when stored outside. Don't know if I fabricate the cab just yet. Probably keep it under a tarp for starters and think about the cab design later. Although, a simple frame and a plastic roof wouldn't take too much time to fabricate. We'll see.
#donndiy #homemade #trackedvehicle
This video is part of a series of videos, check out the series here: https://www.youtube.com/watch?v=vNDiAHNykoY&list=PLkmF7FAZBzkWdzAxcrnz-WJbzSRyqrSBt
Check out my other videos on my channel page: https://www.youtube.com/c/DonnDIY
Soundtrack:
Pomade - Silent Partner (YouTube Audio Library)
Welding equipment borrowed from Spetselektroodi AS, Estonia:
Fronius TransSteel 2700 welder
Optrel Crystal 2.0 Welding Helmet
Hypertherm Powermax 45 XP plasma cutter
21
views
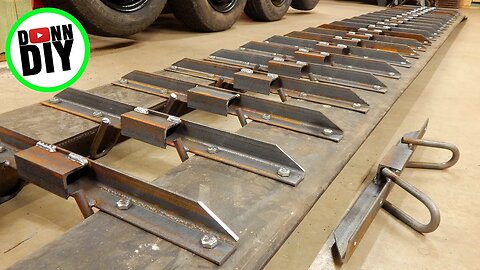
Fabricating Tracks - Tracked Amphibious Vehicle Build Ep. 19
Fabricating tracks completely from scratch for a homemade tracked amphibious vehicle. The track design is very simple. It consists of custom made steel cleats made out of angle iron and round bar and all cleats bolted on two strips of rubbery conveyor belt. I really don't need to worry about the pitch of the cleats since I don't use any drive cogs which teeth they have to match. The tracks will be driven by rubber tires by friction. There is a small lip on the cleat also to better the bite into the tire tread and avoid slippage. Custom bender had to be made for bending the track guides. Also a couple of jigs for welding were constructed.
#donndiy #homemade #trackedvehicle
This video is part of a series of videos, check out the series here: https://www.youtube.com/watch?v=vNDiAHNykoY&list=PLkmF7FAZBzkWdzAxcrnz-WJbzSRyqrSBt
Check out my other videos on my channel page: https://www.youtube.com/c/DonnDIY
Soundtrack:
Pomade - Silent Partner (YouTube Audio Library)
Welding equipment borrowed from Spetselektroodi AS, Estonia:
Fronius TransSteel 2700 welder
Optrel Crystal 2.0 Welding Helmet
Hypertherm Powermax 45 XP plasma cutter
19
views

Sheet Metal Hull DONE - Tracked Amphibious Vehicle Build Ep. 18
This DIY tracked amphibious all terrain vehicle project has come along nicely - the watertight hull design is now done. There will be no more shape alterations, although the engine exhaust pipe has to be routed through one of the side panels I just made in this video. I fiddled around with rear seat ideas and came to conclusion that the simplest solution must be the best. So no car seats for the rear. I made a tunnel / cover for the propshaft but running out of sheet metal made it look not perfect. And again - using my homemade sheet metal brake / bender for all the bending in the video. The design of the brake leaves a lot to be desired but it does the job. An update on it is a must. I hope you enjoy! Thanks for watching!
#donndiy #homemade #trackedvehicle
This video is part of a series of videos, check out the series here: https://www.youtube.com/watch?v=vNDiAHNykoY&list=PLkmF7FAZBzkWdzAxcrnz-WJbzSRyqrSBt
Check out my other videos on my channel page: https://www.youtube.com/c/DonnDIY
Soundtrack:
Pomade - Silent Partner (YouTube Audio Library)
Welding equipment borrowed from Spetselektroodi AS, Estonia:
Fronius TransSteel 2700 welder
Optrel Crystal 2.0 Welding Helmet
Hypertherm Powermax 45 XP plasma cutter
14
views

LED Lights & Upper Hull - Tracked Amphibious Vehicle Build Ep. 17
Fabricating upper part of the hull and installing LED lights, both front and rear on the tracked amphibious vehicle. Taking my homemade sheet metal bender to the max when bending 1.5 mm sheet and beefing it up in the process to make it work better. Check it all out in the video. Thank you for watching and stay tuned for future episodes!
#donndiy #homemade #trackedvehicle
This video is part of a series of videos, check out the series here: https://www.youtube.com/watch?v=vNDiAHNykoY&list=PLkmF7FAZBzkWdzAxcrnz-WJbzSRyqrSBt
Check out my other videos on my channel page: https://www.youtube.com/c/DonnDIY
Soundtrack:
Pomade - Silent Partner (YouTube Audio Library)
Welding equipment borrowed from Spetselektroodi AS, Estonia:
Fronius TransSteel 2700 welder
Optrel Crystal 2.0 Welding Helmet
Hypertherm Powermax 45 XP plasma cutter
15
views
Welding A Sheet Metal Hull - Tracked Amphibious Vehicle Build Ep. 16
MIG/MAG welding the bottom half of the tracked amphibious vehicle's hull sheet metal and hopefully making it watertight in the process. The drainage bolts are not welded in yet and the seals are also not in the rear wheel hubs yet. But other than that - this hull should already float like a boat. I will cut an additional hole in the rear for a specific purpose, and plug it up too, but all of that in the future episodes. This hull will have a 20 cm upper edge on it that will reach the end of the rectangular pipes that are hanging over the edge of the existing tub (just like on the picture in the beginning of the video). These will create mudguards for the wheels / tracks, and more buoyancy too. I will add actual mud flaps in the rear since the wheels are the most out reaching points of the vehicle. And that is on purpose - when I got the chance to drive the Canadian ARGO 8x8 extreme terrain vehicle I noticed I got stuck on the protruding nose all the time when trying to leave a small stream over a steep bank. The first to reach the ground was always the nose. So while designing my own tracked amphibious vehicle I decided to make the wheels/tracks the most protruding features on this handmade DIY offroad all terrain / extreme terrain amphibious vehicle so I would never get stuck again. But all of that will be put on test when my own tracked amphibious vehicle is finally ready to be tested. My vehicle, as the ARGO didn't, has no suspension. Why? It will run very slowly, it's a crawler. I can't say the ride will be very pleasant, but deflating the tires a bit in the middle (the idler wheels) will help to soften the ride a little. Also having less moving parts outside in the mud and water will lower the maintenance cost on this vehicle. Why this enormous ugly looking crash bar / roll bar? So I don't get trapped / squashed by the capsized vehicle. Oh, why is it so TALL? I'm a tall guy, a taller crash bar makes it easier to navigate the inside of the vehicle under the crash bar when on water, under the roof. And the removable roof will be supported by the crash bar too. Why the roof? For protection against the elements during Fall and Winter to make using the vehicle more pleasant. When snowplowing with ATV I've always missed weather protection. So this problem should be solved after this build is finished. Thank you for watching and stay tuned for future episodes!
#donndiy #homemade #trackedvehicle
This video is part of a series of videos, check out the series here: https://www.youtube.com/watch?v=vNDiAHNykoY&list=PLkmF7FAZBzkWdzAxcrnz-WJbzSRyqrSBt
Check out my other videos on my channel page: https://www.youtube.com/c/DonnDIY
Soundtrack:
Pomade - Silent Partner (YouTube Audio Library)
Welding equipment borrowed from Spetselektroodi AS, Estonia:
Fronius TransSteel 2700 welder
Optrel Crystal 2.0 Welding Helmet
Hypertherm Powermax 45 XP plasma cutter
63
views
Plasma Cutting Body Panels - Tracked Amphibious Vehicle Build Ep. 15
In this tracked amphibious vehicle build episode I'm working on the sheet metal that gets welded to the tube frame I built a couple of episodes back. Plasma cutter gets worked harder and steel gets cut into smaller pieces. I haven't neglected the almighty and powerful angle grinder. It will remain my main tool for sure. But using more advanced technology is always a time saver. Join me on my metal fabrication adventures and please consider subscribing for more. Cheers!
#donndiy #homemade #trackedvehicle
This video is part of a series of videos, check out the series here: https://www.youtube.com/watch?v=vNDiAHNykoY&list=PLkmF7FAZBzkWdzAxcrnz-WJbzSRyqrSBt
Check out my other videos on my channel page: https://www.youtube.com/c/DonnDIY
Soundtrack:
Pomade - Silent Partner (YouTube Audio Library)
Welding equipment borrowed from Spetselektroodi AS, Estonia:
Fronius TransSteel 2700 welder
Optrel Crystal 2.0 Welding Helmet
Hypertherm Powermax 45 XP plasma cutter
10
views
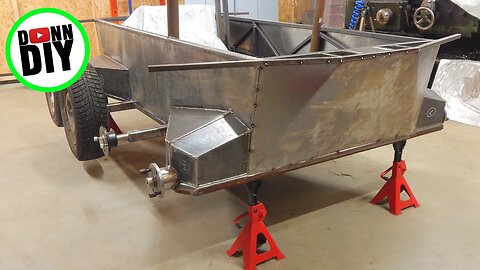
Winch Mounts & Sheet Metal - Tracked Amphibious Vehicle Build Ep. 14
This time I'm fabricating mounts for the 12 V winches and finally start the sheet metal work on the tracked amphibious vehicle. To achieve the rigidness and structural soundness of the winch mounts I'll have to support the mount plates from various angles with rectangular steel tubing. Yes, I'm welding on more steel and it is waaayyy tooo heeaavyy for some people but I'll bet it'll float like a boat when it's finished. :) That's some backyard engineering right there - hardly no math ever used and eyeballing things most of the time. That has to make a real engineer's skin crawl. And that shows we're in a right place - a place that is playful and interesting. This steel frame, or chassis, is now almost finished to the point where I can slap on the rest of the sheet metal which is thinner, thus lighter than the 2 mm sheet I used for the bottom and the leftovers turned into the rear corners of the tub in this video. I'm welding on two winch mounts which means I'm gonna install two winches too. You know these times when you think you're going to pin your ATV straight through a mud hole and it doesn't happen... Instead you're stuck, you can get out one way and instead you're pointing the other way. Thus a rear mounted winch would be helpful. At the same time I really hope I don't have to ever use it. The front one on the other hand will serve most of the time as a snow plow lift in the winter time. Can't wait till the vehicle is finished and for the first test rides (and break downs). I bet you can't too. I'm gonna continue the build next week and new video on next Friday! Stay tuned!
#donndiy #homemade #trackedvehicle
This video is part of a series of videos, check out the series here: https://www.youtube.com/watch?v=vNDiAHNykoY&list=PLkmF7FAZBzkWdzAxcrnz-WJbzSRyqrSBt
Check out my other videos on my channel page: https://www.youtube.com/c/DonnDIY
Soundtrack:
Pomade - Silent Partner (YouTube Audio Library)
Welding equipment borrowed from Spetselektroodi AS, Estonia:
Fronius TransSteel 2700 welder
Optrel Crystal 2.0 Welding Helmet
Hypertherm Powermax 45 XP plasma cutter
31
views
Steel Frame & Electrolysis - Tracked Amphibious Vehicle Build Ep. 13
Fabricating a supporting steel frame for the tracked amphibious vehicle hull which will make the whole ATV rigid. Welding on square tubing and free cutting steel with angle grinder which, in my opinion, is much faster way than going to the cut off saw and setting clamp angles and such. Also cleaning up rusty rims I took tires off of in the previous episodes. Instead of using just angle grinder and a wire wheel I use electrolysis that works brilliantly. Had to finish up the rims with a wire wheel though to knock off loosened rust. Worked like a charm. Next week I'll be attaching the DC 12 V winches and hopefully completing the hull's bottom half to make it as water tight as an amphibian's supposed to be. :) Thanks for watching! More videos will come. Subscribe for more! Cheers!
#donndiy #homemade #trackedvehicle
This video is part of a series of videos, check out the series here: https://www.youtube.com/watch?v=vNDiAHNykoY&list=PLkmF7FAZBzkWdzAxcrnz-WJbzSRyqrSBt
Check out my other videos on my channel page: https://www.youtube.com/c/DonnDIY
Soundtrack:
Pomade - Silent Partner (YouTube Audio Library)
Welding equipment:
Fronius TransSteel 2700
Optrel Crystal 2.0 Welding Helmet
22
views
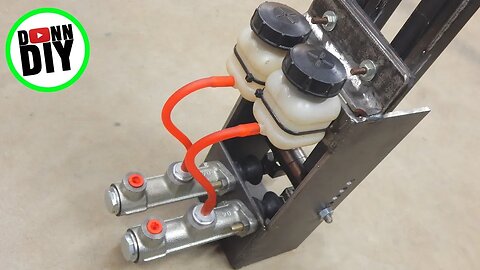
Hydraulic Brake Steering - Tracked Amphibious Vehicle Build Ep. 12
Fabricating a hydraulic brake steering assembly out of two LADA hydraulic clutch master cylinders and brake fluid reservoirs, while using some steel, a welder and angle grinders. This handmade assembly in conjunction with the differential in the rear axle and separately routed brake calipers will provide the steering for this tracked amphibious vehicle when pulling levers separately: left lever for the left caliper and vice versa. When pulling both levers the vehicle will stop. The throttle will be operated via old snowmobile thumb throttle on the right lever which will regulate engine RPM and the engagement of the CVT - Continuously Variable Transmission, that is currently installed on the engine. This gives me clutch. Since the machine is geared down via CVT, the differential in the gearbox and the differential in the rear axle there will be no gear changing whilst driving. Max speed will be around 35 km/h and most probably it'll take off from stand still in fifth gear without any problems. Thanks for watching! More videos will come. Subscribe for more! Cheers!
#donndiy #homemade #trackedvehicle
This video is part of a series of videos, check out the series here: https://www.youtube.com/watch?v=vNDiAHNykoY&list=PLkmF7FAZBzkWdzAxcrnz-WJbzSRyqrSBt
Check out my other videos on my channel page: https://www.youtube.com/c/DonnDIY
Soundtrack:
Pomade - Silent Partner (YouTube Audio Library)
Welding equipment:
Fronius TransSteel 2700
Optrel Crystal 2.0 Welding Helmet
13
views
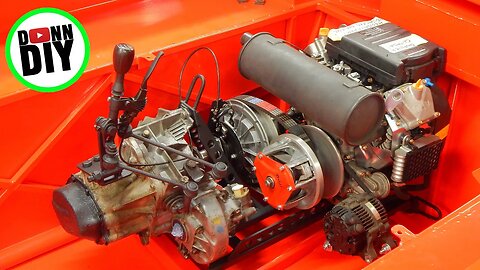
Buran Safari CVT - Tracked Amphibious Vehicle Build Ep. 11
Making a whole separate frame for the Rotek V-twin engine, new Buran Safari continuously variable transmission and Peugeot Partner five speed gearbox to get rid of the flex between the gearbox and the engine. Now this whole frame is mounted on rubber bushings on the frame of the tracked amphibious vehicle and should reduce vibrations from the engine. Fabricating a roll bar / crash bar and mounts for the pilot seat.
#donndiy #homemade #trackedvehicle
This video is part of a series of videos, check out the series here: https://www.youtube.com/watch?v=vNDiAHNykoY&list=PLkmF7FAZBzkWdzAxcrnz-WJbzSRyqrSBt
Check out my other videos on my channel page: https://www.youtube.com/c/DonnDIY
Soundtrack:
Pomade - Silent Partner (YouTube Audio Library)
Welding equipment:
Fronius TransSteel 2700
Optrel Crystal 2.0 Welding Helmet
19
views
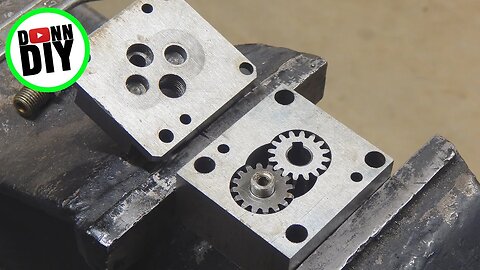
Used Milling Machine For The Workshop - Unloading & Inspection
I've always dreamed about having a milling machine to advance my skills in the field of metalworking. So I went on the Internet and one caught my attention for a reasonable price. Hoping that it would be a great addition to the workshop I went to take a look at it. It wasn't hooked up to the grid and was neglected under storage shelving gathering dust. All the mechanical parts from the outside seemed to be working, the cross-table didn't have any slack in it etc. I bargained off third of the selling price and went to pick it up with my father in the beginning of the week one evening after finishing the days work on the tracked amphibious vehicle. We got it on the trailer with a fork lift and the next day when back at home I had to figure out how to get that thing off the trailer without wrecking it. At first I tried the micro excavator which sort of lifted the mill, more like dragged the mill across the trailer bed. Then me and my grandfather fired up our farm's old McCormick tractor with a front loader on it. This however was sitting in the elements for at least two years beforehand and the fuel system got air in it. However, it fired up after some old school diesel knowledge from my grandfather and the mission continued. To my surprise this front loader also barely picked up the mill. Later my father told me that this tractor was used to lift up half ton nitrogen fertilizer bags back in the day when we still had cows. And that a half a ton is the limit for this front loader anyway. Got lucky since the mill weighs 480 kg's. We got it on the small trolley with my grandfather and then I pushed the thing uphill to the machine shop with the micro excavator. I filled the mill with oil, connected a three phase plug to it, stuck it into a socket and pushed a button. It shorted out. I tried it the other way (two buttons for turning the tool either way), the bit started to turn the right way but the oil wasn't squirting into the sight glass up in the gearbox like it was supposed to. I presumed the oil pump was bad and took the gearbox apart to take a closer look. And indeed, the oil pump was worn badly, beyond repair. So now I have to find an original part from Russia or fix some external 12 V pump through a AC/DC transformer to it and make some new lines for the oiling. My father was kind enough to rewire the whole thing to meet the standards of our grid. IN CONCLUSION - the mill works. Three problems remain: 1) Oil pump, 2) Lifting the mill on the drill press/milling machine table, 3) The tool is stuck in the mill. My father already brought an AC/DC transformer that I'll try with a diesel fuel pump as an external oiling system. Lifting the mill on the table will be a "blast" I guess. Using the cherry picker? Don't think it'll handle the weight of the mill. We'll see. Tool is stuck - using a hammer big enough? :) Let me know in the comments! Thanks for watching!
#donndiy #millingmachine #workshop
Soundtrack:
Pomade - Silent Partner (YouTube Audio Library)
56
views
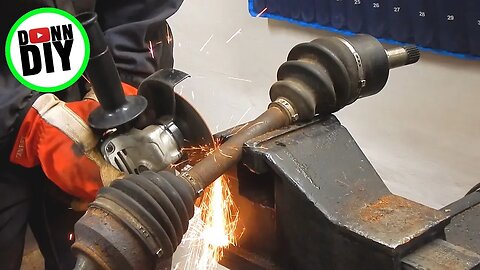
DRIVELINE TEST! - Tracked Amphibious Vehicle Build Ep. 10
This episode brings you installing of the Rotek V-twin 20 HP engine, fabricating a driveshaft, trying out different seats for the pilot of this tracked vehicle, supporting the clutch shaft with a pillow block bearing. After filling the gearbox and the differential with oil again and connecting the battery I start this beast up and try out all the gears and see how the CVT and the rest of the driveline actually works. See it for yourself and watch the video! Cheers!
#donndiy #homemade #trackedvehicle
This video is part of a series of videos, check out the series here: https://www.youtube.com/watch?v=vNDiAHNykoY&list=PLkmF7FAZBzkWdzAxcrnz-WJbzSRyqrSBt
Check out other videos on my channel page: https://www.youtube.com/c/DonnDIY
Soundtrack:
Pomade - Silent Partner (YouTube Audio Library)
Welding equipment:
Fronius TransSteel 2700
Optrel Crystal 2.0 Welding Helmet
12
views