

How to Make the Best Thumbprint Jelly Cookies (Jelly Sugar Cookie)!
This video will teach you how to make thumbprint jelly cookies. These cookies are easy to make but the product tastes like you spent all day making them. Your kids will eat these up like there is no tomorrow and you will likely have a hard time resisting them as well.
Tell me what is better than a nice tall glass of milk and a plate of cookies? Milk and cookies any one? These cookies are perfect for milk and cookies, coffee and cookies or coca cola and cookies. These are also the perfect Christmas cookies to leave out for Santa!
What is a thumbprint cookies? Well it is a type of sugar cookies with an indent in the center where you can deposit your favorite jam or jelly, homemade of course.
Recipe for Thumbprint Cookie (Jelly Sugar Cookie)
Ingredients
1/2 cup slightly chilled butter
1 cup light brown sugar
1/2 cup of dark brown sugar
(if you do not have light and dark brown sugar you can substitute will "brown sugar")
1 teaspoon baking soda
2 and 3/4 cups of all purpose flour
1 and 1/2 teaspoon vanilla
1 teaspoon salt
1/4 cup white sugar (enough to roll dough balls in)
Procedure
To a mixing bowl combine the flour, baking soda and salt. Stir to combine. In a separate large mixing bowl combine the butter, light brown sugar, dark brown sugar and vanilla with hand mixer.
In small portions and with a hand mixer combine the flour mixture to the sugar mixture. This will make a dry dough that crumbles easily. In small portions blend the water and flour/sugar mixture until the dough comes together.
With your hand remove enough dough to form a table tennis sized ball by rolling the dough in your hands. Roll the ball on a small plate containing white sugar until the dough ball is covered with sugar.
Place the sugar coated ball on a baking sheet lined with parchment paper. Repeat this process until the baking sheet is filled with sugar coated balls.
With your thumb press down on the center of each ball until about 1/4 inches of dough remains below your thumb. Fill the thumb indent of each ball with your favorite jelly or jam. (we recommend homemade of course).
Bake the cookies at 350 °F for 20 minutes. For a crunchier cookie bake for an additional 4 minutes.
After baking, transfer the cookies to a cooling rack. Allow the cookies to cool for at least 5 minutes and enjoy.
Subscribe to our YouTube channel:
https://www.youtube.com/channel/UCOHncCRBkOxB3mqi6ylIt4w
Follow Rina and I on social media!
Facebook: Cafe Amora
instagram: Cafe Amora
YouTube: Cafe Amora Kitchen
#milkandcookies
#cookies
#sugarcookies
#christmascookies
#dessert
#thumbprintcookies
#goodeats
#bestcookingchannelonyoutubeforbeginners
#yummy
#howto
#homemade
#homebaker
#amaturebaker
#foodie
#food
50
views

How I Make a Gin and Tonic #shorts
In this video I will show you how I make a gin and tonic. It is by far my favorite cocktail and I hope you will love it to!
Start off with a low ball glass and lots of ice. Add 1.5 to 2 ounces of london dry gin (or the gin of your choice), the juice of half a lime and a quality tonic water. I use Fever Tree but you pick the one you enjoy... remember this is your cocktail not mine so make it your own!
Subscribe to our YouTube channel:
https://www.youtube.com/channel/UCOHncCRBkOxB3mqi6ylIt4w
Follow Rina and I on social media!
Facebook: Cafe Amora
instagram: Cafe Amora
YouTube: Cafe Amora Kitchen
#shorts
#shortvideo
#ginandtonic
#gin&tonic
#adultbeverages
#goodeats
#gin
#tonic
#fevertree
#bar
#mixeddrink
#mixdrinks
#londondrygin
#party
#libations
#sociable
#homebar
#homebartender
#daydrinking
6
views
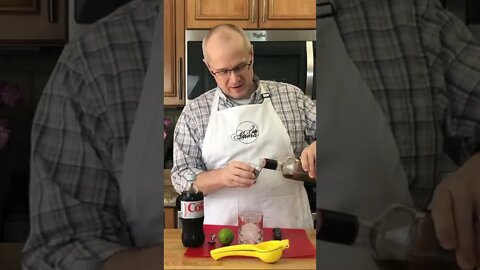
How I Make a Cuba Libre How to Make a Rum and Coke with Lime #short
In this video I will show you how I make a Cuba Libre. A Cuba Libre has four ingredients: rum, coca cola and Ice. We use diet coke but that is your preference. I use Venezuelan Rum because my wife is from Venezuela, but you can use a Cuban rum for a more authentic experience. Although I am not sure if Cuban rum is available in the United States. I know it is available in Canada and it certainly lives up to the hype... very smooth rum for sure. This cocktail is delicious and refreshing. Perfect for a holiday party or a get together with friends!
Subscribe to our YouTube channel:
https://www.youtube.com/channel/UCOHncCRBkOxB3mqi6ylIt4w
Follow Rina and I on social media!
Facebook: Cafe Amora
instagram: Cafe Amora
YouTube: Cafe Amora Kitchen
#shorts
#shortvideo
#rumandcoke
#cubalibre
#adultbeverages
#goodeats
#rum
#coke
#cocacola
#mixeddrink
#mixdrinks
#cuba
#party
#libations
#sociable
#homebar
#homebartender
#daydrinking
11
views
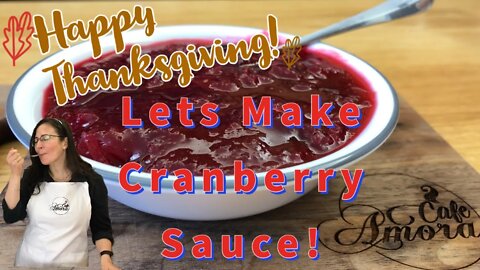
How to Make Cranberry Sauce for Thanksgiving Dinner and Christmas Dinner
In this video I will show you my cranberry sauce recipe and how to make cranberry sauce starting with fresh cranberries, sugar, water and a large orange. Imagine it’s Thanksgiving day the table is set with all shades of brown and there is your cranberry sauce like a bright red beacon of flavor calling people to eat it! This cranberry sauce recipe is simple to make and a pleasure to eat. Your Thanksgiving dinner (Thanksgiving 2022) or Christmas dinner will be elevated to the next level. People will also be impressed to find out that cranberry sauce does not have to come from a can! In fact never buy the canned cranberry sauce again… make cranberry sauce fresh! Your family will thank you for it. Trust me this is not Ocean Spray Canned cranberry sauce... this is the real thing.
The best cranberry sauce recipe
Ingredients:
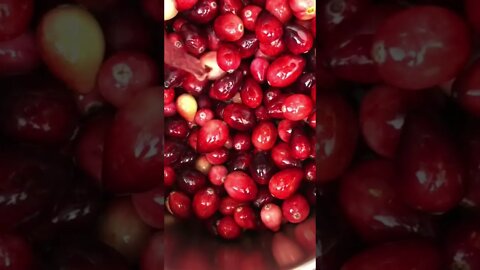
12 oz bag of cranberries (fresh)
2/4 cup of white sugar (more if you like it sweeter!)
1 large orange
Water
Instructions:
Using a microplane slowly and carefully remove the zest from the surface of the orange being very careful to not include any of the bitter white material located just under the zest. Set the zest aside for now.
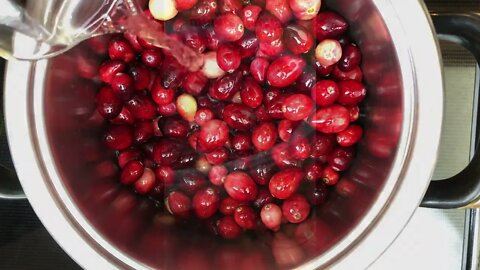
In to a medium saucepan add the cranberries and just enough filtered water so that you can see it between the cranberries. Turn on the heat and allow the water temperature to rise to a near boil. At this time blend in the sugar, zest and orange juice. Allow the water to return to a near boil. At this time with a firm silicone spatula press the cranberries against the side of the pot until all of them are burst open to liberate all that amazing cranberry color and flavor. Keep doing this until all the cranberries are crushed. At this point the cranberry sauce should look like a thin red soup, do not worry it will thicken into a jam-like consistency once it cools. Allow to cool for at least a few hours. For the best results transfer the cranberry sauce to a glass bowl and place it in the fridge overnight! Serve with your thanksgiving meal or your Christmas Dinner or just do what we do and enjoy it all the time with ice cream!
Subscribe to our YouTube channel:
https://www.youtube.com/channel/UCOHncCRBkOxB3mqi6ylIt4w
Follow Rina and I on social media!
Facebook: Cafe Amora
instagram: Cafe Amora
YouTube: Cafe Amora Kitchen
#cranberrysauce
#cranberries
#cranberrysaucerecipe
#DeliciousCranberrySauce
#EasyCranberrySauceRecipe
#QuickCranberrySauce
#thanksgivingdessert
#thanksgiving_recipe
#HolidayCranberrySauceRecipe
#CranberrySauceRecipeForTheHoliday
#CranberrySauceRecipes
#thanksgiving2022
#thanksgivingrecipe
#thanksgivingdinner
#christmas
#christmasdinner
#freshcranberrysauce
#CranberrySauceRecipe
#HowToMakeCranberrySauce
#HowToCookCranberrySauce
#BestCookingChannelOnYoutubeForBeginners
#CookingChannel
#HowTo
#HowToCook
#QuickMealIdeas
#RecipesForTwo
#BestCookingChannelOnYoutubeForBeginners
#EasyRecipes
#MealsOnABudget
#FoodRecipes
#DinnerRecipes
64
views
How to Make Cranberry Sauce from Fresh Cranberries. Perfect for a Thanksgiving Potluck! #shorts
In this video I will show you my cranberry sauce recipe and how to make cranberry sauce starting with fresh cranberries, sugar, water and a large orange. Imagine it’s Thanksgiving day the table is set with all shades of brown and there is your cranberry sauce like a bright red beacon of flavor calling people to eat it! This cranberry sauce recipe is simple to make and a pleasure to eat. Your Thanksgiving dinner (Thanksgiving 2022) or Christmas dinner will be elevated to the next level. People will also be impressed to find out that cranberry sauce does not have to come from a can! In fact never buy the canned cranberry sauce again… make cranberry sauce fresh! Your family will thank you for it. Trust me this is not Ocean Spray Canned cranberry sauce... this is the real thing.
The best cranberry sauce recipe
Ingredients:
12 oz bag of cranberries (fresh)
2/4 cup of white sugar (more if you like it sweeter!)
1 large orange
Water
Instructions:
Using a microplane slowly and carefully remove the zest from the surface of the orange being very careful to not include any of the bitter white material located just under the zest. Set the zest aside for now.
In to a medium saucepan add the cranberries and just enough filtered water so that you can see it between the cranberries. Turn on the heat and allow the water temperature to rise to a near boil. At this time blend in the sugar, zest and orange juice. Allow the water to return to a near boil. At this time with a firm silicone spatula press the cranberries against the side of the pot until all of them are burst open to liberate all that amazing cranberry color and flavor. Keep doing this until all the cranberries are crushed. At this point the cranberry sauce should look like a thin red soup, do not worry it will thicken into a jam-like consistency once it cools. Allow to cool for at least a few hours. For the best results transfer the cranberry sauce to a glass bowl and place it in the fridge overnight! Serve with your thanksgiving meal or your Christmas Dinner or just do what we do and enjoy it all the time with ice cream!
Subscribe to our YouTube channel:
https://www.youtube.com/channel/UCOHncCRBkOxB3mqi6ylIt4w
Follow Rina and I on social media!
Facebook: Cafe Amora
instagram: Cafe Amora
YouTube: Cafe Amora Kitchen
#cranberrysauce
#cranberries
#cranberrysaucerecipe
#DeliciousCranberrySauce
#EasyCranberrySauceRecipe
#QuickCranberrySauce
#thanksgivingdessert
#thanksgiving_recipe
#HolidayCranberrySauceRecipe
#CranberrySauceRecipeForTheHoliday
#CranberrySauceRecipes
#thanksgiving2022
#thanksgivingrecipe
#thanksgivingdinner
#christmas
#christmasdinner
#freshcranberrysauce
#CranberrySauceRecipe
#HowToMakeCranberrySauce
#HowToCookCranberrySauce
#BestCookingChannelOnYoutubeForBeginners
#CookingChannel
#HowTo
#HowToCook
#QuickMealIdeas
#RecipesForTwo
#BestCookingChannelOnYoutubeForBeginners
#EasyRecipes
#MealsOnABudget
#FoodRecipes
#DinnerRecipes
29
views
How to Make Cranberry Sauce From Fresh Cranberries for Thanksgiving and Christmas Dinner!
In this video I will show you my cranberry sauce recipe and how to make cranberry sauce starting with fresh cranberries, sugar, water and a large orange. Imagine it’s Thanksgiving day the table is set with all shades of brown and there is your cranberry sauce like a bright red beacon of flavor calling people to eat it! This cranberry sauce recipe is simple to make and a pleasure to eat. Your Thanksgiving dinner (Thanksgiving 2022) or Christmas dinner will be elevated to the next level. People will also be impressed to find out that cranberry sauce does not have to come from a can! In fact never buy the canned cranberry sauce again… make cranberry sauce fresh! Your family will thank you for it. Trust me this is not Ocean Spray Canned cranberry sauce... this is the real thing.
The best cranberry sauce recipe
Ingredients:
12 oz bag of cranberries (fresh)
2/4 cup of white sugar (more if you like it sweeter!)
1 large orange
Water
Instructions:
Using a microplane slowly and carefully remove the zest from the surface of the orange being very careful to not include any of the bitter white material located just under the zest. Set the zest aside for now.
In to a medium saucepan add the cranberries and just enough filtered water so that you can see it between the cranberries. Turn on the heat and allow the water temperature to rise to a near boil. At this time blend in the sugar, zest and orange juice. Allow the water to return to a near boil. At this time with a firm silicone spatula press the cranberries against the side of the pot until all of them are burst open to liberate all that amazing cranberry color and flavor. Keep doing this until all the cranberries are crushed. At this point the cranberry sauce should look like a thin red soup, do not worry it will thicken into a jam-like consistency once it cools. Allow to cool for at least a few hours. For the best results transfer the cranberry sauce to a glass bowl and place it in the fridge overnight! Serve with your thanksgiving meal or your Christmas Dinner or just do what we do and enjoy it all the time with ice cream!
Subscribe to our YouTube channel:
https://www.youtube.com/channel/UCOHncCRBkOxB3mqi6ylIt4w
Follow Rina and I on social media!
Facebook: Cafe Amora
instagram: Cafe Amora
YouTube: Cafe Amora Kitchen
#cranberrysauce
#cranberries
#cranberrysaucerecipe
#DeliciousCranberrySauce
#EasyCranberrySauceRecipe
#QuickCranberrySauce
#thanksgivingdessert
#thanksgiving_recipe
#HolidayCranberrySauceRecipe
#CranberrySauceRecipeForTheHoliday
#CranberrySauceRecipes
#thanksgiving2022
#thanksgivingrecipe
#thanksgivingdinner
#christmas
#christmasdinner
#freshcranberrysauce
#CranberrySauceRecipe
#HowToMakeCranberrySauce
#HowToCookCranberrySauce
#BestCookingChannelOnYoutubeForBeginners
#CookingChannel
#HowTo
#HowToCook
#QuickMealIdeas
#RecipesForTwo
#BestCookingChannelOnYoutubeForBeginners
#EasyRecipes
#MealsOnABudget
#FoodRecipes
#DinnerRecipes
58
views

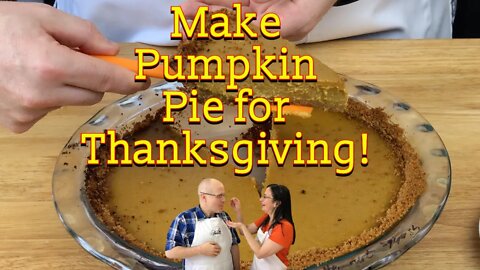
Making the Pumpkin Pie From Fresh Pumpkin! Easy Dessert for any Thanksgiving Party! Short
In this video we will answer a very important question how do you make the best pumpkin pie do I use a pumpkin or a squash?
What makes the best pumpkin pie? A squash or a pumpkin? When I was a boy my grandmother would always make pumpkin pie for Thanksgiving and Christmas and I would always ask her how she made the pies so good. To my surprise she said it was not using a pumpkin at all but instead using a squash! What? Squash? So for all these years I was eating a Squash Pie not a Pumpkin Pie? May as well call it Gourd Pie, but that does not have a nice ring to it.
Ok Grandma we are putting pumpkin pie and squash pie to the taste test!
The best time of the year is upon us. It is PIE SEASON! More specifically its pumpkin pie season! So to celebrate this amazing time of the year and just in time for Thanksgiving and Christmas, Rina and I decided to test my grandmothers "Pumpkin Pie" against traditional pumpkin pie made with actual pumpkin the way God intended! Fun Fact: Pumpkins are in the same biological family as squashes so... technically my Grandma is already correct that squash makes the best pumpkin pie because both squashes and pumpkins are in the same family... but that's not the point lol...
Rina and I will make pumpkin pies with test two types of pumpkins (jack-o-lantern and sugar pumpkin also known as pie pumpkin or sugar pie pumpkin) and two types of squash (butternut and acorn). So, to be clear, for this test we will make four pies with exactly the same ingredients except for the the type of pumpkin or squash used. We were going to try canned pumpkin puree to make a pie but experience told us to stay far away from canned pumpkin puree. Then, with fresh pies in hand, we will do a taste test with as many family and friends as possible!
The results were clear and a winner was crowned! Watch the video until the end to see if pumpkins or squash make a better pumpkin pie!
These pies us a ginger snap crust.
Here are the instructions on how to make this amazing pie!
To begin we cut each pumpkin or squash in half and cleaned out the seeds and other bright fibers from the hollow center. Coat each half of the pumpkin or squash with a bit of olive oil, sprinkle generously with kosher salt and bake in the over at 400 °F for one hour. The pumpkin or squash flesh should be easily pierced with a fork. If not bake for an additional 10 minutes until tender. Once the squash or pumpkin is baked it is critical that you allow it to cool for at least one hour. At this point your entire house will smell amazing and you will want to eat the squash or pumpkin! RESIST this temptation! We need all the squash or pumpkin to make pie!
Once cooled use a spoon and your hands to remove the flesh of the pumpkin or squash and place it into a food processor and blend the flesh of the pumpkin or squash into a puree. If you wanted to you could eat the puree now.... it is really delicious! But wait we are making pie so forget that...
At this point is is time to make the crust. For these pumpkin pies I decided to use a ginger snap crust. To make it take about 50 ginger snaps, ground ginger, brown sugar and salt and pulverize them in a food processor until they have the consistency of sand. At 3 table spoons of melted butter and pulse the food processor 6 to 10 times. the ginger snap mixture should now resemble wet sand.
Transfer the ginger snap mixture to a 9.5 inch glass pie plate and with a clean hand pat the ginger snap mixture until it coats the bottom and sides of the pie plate evenly. Bake the pie crust in a 350 °F oven for 12 minutes. Remove and allow to cool for at least 15 minutes.
While the crust is cooling transfer the pumpkin or squash puree to medium sauce pan. Heat the pumpkin or squash puree, while stirring, until it begins to gently simmer. Add half and half, cinnamon and nutmeg and return to a gentle simmer while stirring. Remove form the heat and allow to cool for at least 10 minutes.
Now in a large bowl add brown sugar, two eggs and one additional egg yoke. Using a wire whisk blend the ingredients until you get a smooth looking mixture. Add the pumpkin or squash puree to the egg mixture and whisk to combine. Trans from this very liquidy mixture into the pie plate containing the ginger snap crust and put in a 350 °F over for 60 minutes. You will know the pie is done if the side of the pie are firm but the center giggles slightly. Allow to cool for a few hours before serving. Personally I allowed all the pies to sit over night in the refrigerator.
Subscribe to our YouTube channel:
https://www.youtube.com/channel/UCOHncCRBkOxB3mqi6ylIt4w
Follow Rina and I on social media!
Facebook: Cafe Amora
instagram: Cafe Amora
YouTube: Cafe Amora Kitchen
Recipe adapted from the Recipe book Good Eats volume 3 by Alton Brown
#pumpkin
#pumpkinpie
#squash
#squashpie
#butternutsquash
#acornsquash
#jackolantern
#goodeats
#foodie
#experiment
#foodexperiment
110
views
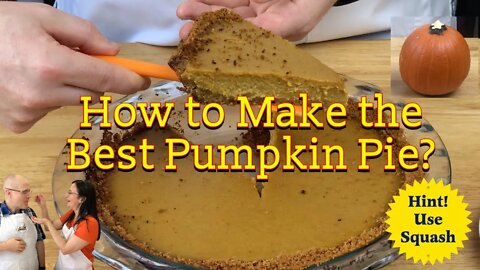
How to Make the Best Pumpkin Pie ? Do I use a Pumpkin or a Squash?
In this video we will answer a very important question how do you make the best pumpkin pie do I use a pumpkin or a squash?
What makes the best pumpkin pie? A squash or a pumpkin? When I was a boy my grandmother would always make pumpkin pie for Thanksgiving and Christmas and I would always ask her how she made the pies so good. To my surprise she said it was not using a pumpkin at all but instead using a squash! What? Squash? So for all these years I was eating a Squash Pie not a Pumpkin Pie? May as well call it Gourd Pie, but that does not have a nice ring to it.
Ok Grandma we are putting pumpkin pie and squash pie to the taste test!
The best time of the year is upon us. It is PIE SEASON! More specifically its pumpkin pie season! So to celebrate this amazing time of the year and just in time for Thanksgiving and Christmas, Rina and I decided to test my grandmothers "Pumpkin Pie" against traditional pumpkin pie made with actual pumpkin the way God intended! Fun Fact: Pumpkins are in the same biological family as squashes so... technically my Grandma is already correct that squash makes the best pumpkin pie because both squashes and pumpkins are in the same family... but that's not the point lol...
Rina and I will make pumpkin pies with test two types of pumpkins (jack-o-lantern and sugar pumpkin also known as pie pumpkin or sugar pie pumpkin) and two types of squash (butternut and acorn). So, to be clear, for this test we will make four pies with exactly the same ingredients except for the the type of pumpkin or squash used. We were going to try canned pumpkin puree to make a pie but experience told us to stay far away from canned pumpkin puree. Then, with fresh pies in hand, we will do a taste test with as many family and friends as possible!
The results were clear and a winner was crowned! Watch the video until the end to see if pumpkins or squash make a better pumpkin pie!
Here are the instructions on how to make this amazing pie!
To begin we cut each pumpkin or squash in half and cleaned out the seeds and other bright fibers from the hollow center. Coat each half of the pumpkin or squash with a bit of olive oil, sprinkle generously with kosher salt and bake in the over at 400 °F for one hour. The pumpkin or squash flesh should be easily pierced with a fork. If not bake for an additional 10 minutes until tender. Once the squash or pumpkin is baked it is critical that you allow it to cool for at least one hour. At this point your entire house will smell amazing and you will want to eat the squash or pumpkin! RESIST this temptation! We need all the squash or pumpkin to make pie!
Once cooled use a spoon and your hands to remove the flesh of the pumpkin or squash and place it into a food processor and blend the flesh of the pumpkin or squash into a puree. If you wanted to you could eat the puree now.... it is really delicious! But wait we are making pie so forget that...
At this point is is time to make the crust. For these pumpkin pies I decided to use a ginger snap crust. To make it take about 50 ginger snaps, ground ginger, brown sugar and salt and pulverize them in a food processor until they have the consistency of sand. At 3 table spoons of melted butter and pulse the food processor 6 to 10 times. the ginger snap mixture should now resemble wet sand.
Transfer the ginger snap mixture to a 9.5 inch glass pie plate and with a clean hand pat the ginger snap mixture until it coats the bottom and sides of the pie plate evenly. Bake the pie crust in a 350 °F oven for 12 minutes. Remove and allow to cool for at least 15 minutes.
While the crust is cooling transfer the pumpkin or squash puree to medium sauce pan. Heat the pumpkin or squash puree, while stirring, until it begins to gently simmer. Add half and half, cinnamon and nutmeg and return to a gentle simmer while stirring. Remove form the heat and allow to cool for at least 10 minutes.
Now in a large bowl add brown sugar, two eggs and one additional egg yoke. Using a wire whisk blend the ingredients until you get a smooth looking mixture. Add the pumpkin or squash puree to the egg mixture and whisk to combine. Trans from this very liquidy mixture into the pie plate containing the ginger snap crust and put in a 350 °F over for 60 minutes. You will know the pie is done if the side of the pie are firm but the center giggles slightly. Allow to cool for a few hours before serving. Personally I allowed all the pies to sit over night in the refrigerator.
Subscribe to our YouTube channel:
https://www.youtube.com/channel/UCOHncCRBkOxB3mqi6ylIt4w
Follow Rina and I on social media!
Facebook: Cafe Amora
instagram: Cafe Amora
YouTube: Cafe Amora Kitchen
Recipe adapted from the Recipe book Good Eats volume 3 by Alton Brown
#pumpkin
#pumpkinpie
#squash
#squashpie
#butternutsquash
#acornsquash
#jackolantern
#goodeats
#foodie
#experiment
#foodexperiment
180
views
Mango's ARE Delicious But How Do You Eat it? Best Way to Peel and Eat a Mango?
In this video I will show you how to peel and process a mango. Mango is delicious but it can be messy. Is it worth the hassle? YES! Here is the best way I have found to peel and slice a mango!
Subscribe to our YouTube channel:
https://www.youtube.com/channel/UCOHncCRBkOxB3mqi6ylIt4w
Follow Rina and I on social media!
Facebook: Cafe Amora
instagram: Cafe Amora
YouTube: Cafe Amora Kitchen
#mango
#peelmango
#yummy
#fruit
#fruitprocessing
#summertreat
#goodeats
#goodfood
#tropics
#tropicalfruit
#tropic
3
views

Rina Carving Her First Jack-o-Lantern for Halloween!
In this video Rina will be carving her first Jack-o-Lantern. Before we use this pumpkin make pumpkin pie we decided to carve it into a Jack-O-Lantern! Spook Halloween fun! Carving a Jack-O-Lantern.
Subscribe to our YouTube channel:
https://www.youtube.com/channel/UCOHncCRBkOxB3mqi6ylIt4w
Follow Rina and I on social media!
Facebook: Cafe Amora
instagram: Cafe Amora
YouTube: Cafe Amora Kitchen
#halloween #jackolantern #carving #pumpkin #scary #notsoscary
2
views
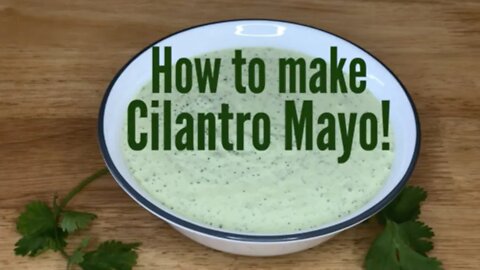
How to Make Cilantro Mayonnaise For Dipping, Sandwiches, Arapes or Your Favorite Snack!
How do I make Cilantro Mayonnaise? It's easy and so tasty! Cilantro mayo will elevate any sandwich to new heights of flavor. Spread cilantro on any sandwich, burger, fries, arapes, or any Latin or American food you enjoy.
Ingredients
1 large bunch of cilantro
1.5 cups of mayonnaise
the juice of one lime
salt to taste
Procedure
Clean and dry the cilantro.
Place the entire bunch into a food processor. Chop the cilantro into fine pieces buy using the pulse feature on your food processor. Add the mayonnaise and blend. Add the lime juice and salt and pulse to blend.
Store in the refrigerator for up to one week.
Subscribe to our YouTube channel:
https://www.youtube.com/channel/UCOHncCRBkOxB3mqi6ylIt4w
Follow Rina and I on social media!
Facebook: Cafe Amora
instagram: Cafe Amora
YouTube: Cafe Amora Kitchen
#mayo #venezuela #mayonnaise #cilantro
#latina #latinfood #latina #yummy #recipe #goodeats #delicious
12
views
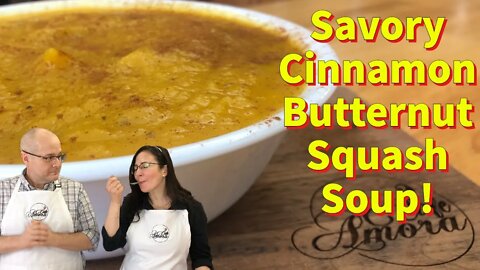
The Best Butternut Squash Soup Recipe Simple Delicious
In this video I will show you how to make butternut squash soup. Fall is the best time of year! Crisp cool air and a nice hot soup makes the soul feel complete. This soup incorporates a butternut squash with cinnamon, nutmeg, onion, garlic and maple syrup! This flavor combination is amazing and yummy!
Hi and welcome to Cafe Amora! My name is Russ and along with my wife Rina we want to welcome you to Cafe Amora! Before we get started I ask that you subscribe to our YouTube channel. Subscribing really does help out small creators like Rina and I. Now… Let's cook!
Fall has arrived! and for me nothing is more delicious than a bowl of soup on a brisk autumn day! Today I am going to show you how to make Cinnamon Butternut Squash Soup!. It's just the right amount of savory, silky flavorful and it hits you right in the hunger! I guarantee you won't be able to stop after one spoonful. So let's stop talking about it and let's cook it!
To make Cinnamon Butternut Squash Soup you will need:
1 Large butternut squash (5 lbs)
1 large onion chopped
2 tablespoons of maple syrup
4 Cloves garlic minced
8 cups water
4 tablespoons of olive oil
2 tablespoons of unsalted butter
4 tablespoons of cinnamon
1 tsp Pepper
Procedure
Preparing the butternut squash:
After washing the squash, cut the squash in half lengthwise. For this you will need to use a large knife… protect those fingers! Using a spoon, scoop out the sides from the small opening.
Place the two halves on a baking sheet lined with a silicon baking mat cut side up.
Using a basting brush coat each half of the butternut squash with olive oil and coat liberty with salt, pepper and cinnamon.
Place the baking dish into an oven preheated to 400 °F and bake for 60 minute or until you can easily pass a fork through the flesh of the squash. At this time the squash is ready and your whole house smells delicious!
Remove the squash from the oven and let it cool for at least one hour.
While the squash is cooling, chop the onion and mince the garlic.
Using a spoon scoop out the cooled squash into a bowl and set aside. The squash should scoop very easily.
Assemble the soup!
To assemble the soup, melt the butter in a large pot. Add the onions and let them cook until the start to soften and smell soooo gooooodd.
Now add the squash and stir to combine
Add the maple syrup
Add the garlic
Allow this mixture to simmer for 30 minutes.
Now for the magic step! Place the contents of the pot into a blender. Do not fill your blender to the top. Leave a bit of room for expansion as blending will combine the soup with air to give it the silky texture! Do this in batches if your blender is not large enough to hold everything. Consult your blenders user manual for tips on how to blend hot food. There may be a hot fill line on your blender and other safety tips!
Turn the blender on too high and allow it to blend for 3 to 5 minutes. Man I love the color of this soup!
Once blended pour the soup into a different pot for storage or serving….. Enjoy as is or will some nice crusty bread!
Subscribe to our YouTube channel:
https://www.youtube.com/channel/UCOHncCRBkOxB3mqi6ylIt4w
Follow Rina and I on social media!
Facebook: Cafe Amora
instagram: Cafe Amora
YouTube: Cafe Amora Kitchen
#soup
#soupseason
#yummy
#souprecipe
#butternutsquashsoup
#recipe
#fall
#goodeats
#goodfood
#mealtime
126
views
1
comment

How to make a Quesillo (Venezuelan Flan)! Easy Dessert Recipe!
In this video Rina and I will show you how to make a quesillo, the Venezuelan version of a Flan. Quesillo is made from eggs, sugar, sweetened condensed milk, whole milk, vanilla extract and Venezuelan rum. It is light, slightly sweet with an amazing texture and a delicious rum flavor. If you are wondering what to make for a dinner try a quesillo. It is super easy to make and the pay off is amazing! Your family and friends will ask for this dessert over and over again!
Quesillo is firm yet has a delicate texture coupled with a melt in your mouth feeling just sets this desert apart. Although similar to flan, quesillo is not exactly the same. A flan used eggs and additional egg yokes while a quesillo uses only the whole egg. Flan is creamy while quesillo is more spongy in consistency. Both are delicious, just not the same.
Easy Quesillo Recipe
To make a quesillo you will need:
Ingredients
6 eggs
¾ cups of white sugar
14 oz sweetened condensed milk
14 oz whole milk
½ cup of Venezuelan rum
1 teaspoon vanilla
Procedure
Making the sugar topping:
In a medium sauce pan add the sugar and turn the heat to medium high.
With constant stirring heat the sugar until it melts.
Once the sugar has melted, pour it into a 10 inch baking pan.
Rotate the baking pan so that the melted sugar covers the bottom and sides of the pan. Make sure you are wearing oven mitts when you do this!
Allow the pan to cool while you make the filling for the quesillo
Making the filling:
Preheat the over to 350 °F.
In a blender mix together the eggs, sweetened condensed milk, whole milk, vanilla and rum.
Once blended pour the filling in to the sugar lined baking pan.
Baking the quesillo:
Cover the quesillo pan with aluminum foil as tightly as possible.
The quesillo must be baked in a Bain-Marie (water bath). To do this place the quesillo pan into a large roasting pan. The quesillo pan must sit flat inside the roasting pan.
Add water to the roasting pan until the level reaches about half way up the quesillo pan.
Bake in the oven for 45 to 60 minutes.
You will know its done when an inserted knife comes back clean.
Turn the quesillo out by placing a plate on top of the baking pan and inverting quickly. you must turn out the quesillo before it cools too much as the sugar topping may re-solidify. If the quesillo will not move freely when you twist the pan be sure to insert a small spatula between the quesillo and the quesillo pan and slowly move the spatula around the circumference of the quesillo so that none of the quesillo is sticking to the sides.
Allow to cool and serve…
Quesillo can be served chilled
Subscribe to our YouTube channel:
https://www.youtube.com/channel/UCOHncCRBkOxB3mqi6ylIt4w
Follow Rina and I on social media!
Facebook: Cafe Amora
instagram: Cafe Amora
YouTube: Cafe Amora Kitchen
#dessert #venezuela #venezueladessert
#latina #latinfood #latina #yummy #recipe #goodeats #delicious #flan #custard #egg
46
views

How to Make an Apple Crisp Using the Best Apple Crisp Recipe.
Its fall and fall to me means apples! So i thought I would make my favorite dessert - apple crisp… the apple pies little brother! Its delicious and so easy to make. Its the perfect dessert... with cinnamon, nutmeg and sugar covering delicious apples and an amazing crust that makes your smile grow big and hit you right in the hunger!
This video will teach you how to make an apple crisp with simple easy to follow directions. It's easy, fun and delicious. Make this for your loved ones, friends or family parties. It is guaranteed to be a crowd favorite. Rina loves it and that is really makes me happy!
Apple Crisp recipe is the perfect fall dessert! Its similar to apple pie but much easier to make. Its perfect warm and perfect cold. Eat it warm with some vanilla ice cream and watch the smile cross your wife's face! Enjoy with a warm apple cider!
Apple crisp is a perfect dessert for a party. Guaranteed no left overs!
Apples are everywhere and they are delicious!
Apple Crisp Recipe
4 large apples
1 cup oats
1 cup flour
1 cup light brown sugar
½ cup of dark brown sugar
8 tablespoons of unsalted butter
2 tablespoons cinnamon
12 planes of fresh nutmeg
1 teaspoon white sugar
Welcome back to Cafe Amora.
Its fall and fall to me means apples! Apples are everywhere and they are delicious! So i thought I would make my favorite dessert apple crisp… Apple pies little brother! Its delicious and so easy to make. Rina loves it and that is really all that matters to me!
So lets get busy baking!
Preheat your oven to 375 °F.
For this recipe I selected 2 honeycrisp, 2 gala and 1 envy apples. Wash and dry the apples. Peel and slice the apples and place them into a bowl.
Add the white sugar, 1 tablespoon of cinnamon, 6 grinds of fresh nutmeg. Using your hand combine these ingredients.
Set aside while you make the dough for the crisp.
Into a medium bowl add the light and dark brown sugar, flour, 1 tablespoon of cinnamon, 6 plans of nutmeg, and butter. Using your hand blend all of these ingredients together.
In a 12 x 8 inch baking dish sprinkle about 25% of the dough evenly on to the bottom.
Now add the apples and top with the remainder of the dough mixture.
Bake in a 375 °F oven for 1 ½ hours or until the apples are soft. A fork can easily pass through.
Subscribe to our YouTube channel:
https://www.youtube.com/channel/UCOHncCRBkOxB3mqi6ylIt4w
Follow Rina and I on social media!
Facebook: Cafe Amora
instagram: Cafe Amora
YouTube: Cafe Amora Kitchen
00:00 Introduction
01:07 Ingredients
01:36 Prepping the apples
02:22 Prepping the Crisp
02:55 Assembling the Crisp
03:47 Taste Testing
#dessert
#goodeats
#apple
#applecrisp
#applesong
#homemade
#homebaker
#yummy
#dessert idea
#howto
63
views

How to Make a Lime Drop Cocktail with Fresh Limes! Lemon Drop But with Limes!
The Lemon Drop is a popular cocktail that is enjoyed all over! However, Rina prefers limes to lemons so in our house we make Lime Drop! Its exactly the same as the classic Lemon Drop just with Limes. If you ask me I think Lime Drop is better! A Lime Drop is a refreshing cocktail that is perfect for a cold winter night, a hot summer day, a brisk fall afternoon or a warm spring day.
In this video I will show you How to Make a Lime Drop the Easy with Fresh Limes! At Cafe Amora we strive to make easy delicious food and drinks using healthy fresh ingredients on a budget!
Recipe:
1 ounce of vodka
the juice of one fresh lime
1/2 teaspoon of sugar (more if you want it sweeter)
sugar for rim
ice
Place the vodka, sugar and ice into a bar shaker. Shake vigorously to combine all the ingredients. Pour into a low ball glass with a sugar coated rim. Add additional ice and sugar to taste.
Amazing and fresh!
Subscribe to our YouTube channel:
https://www.youtube.com/channel/UCOHncCRBkOxB3mqi6ylIt4w
Follow Rina and I on social media!
instagram: cafeamorak
YouTube: Cafe Amora Kitchen
#lemondrop
#limedrop
#vodka
#limedrink
#happywifehappylife
#cocktail
#sociable
#limecocktail
#drinking #drink #adulting #homebar #homebartender
7
views

How to Make Tequeños at Home! Cheese Sticks Only Better! A Gringo Making Latin Food!
How to Make Tequeńos at home! Como Hacer Toqueńos en casa! This video will teach you how to make Tequeños! Cheese wrapped in dough and the deep fried! Deep fried Tequeños are the best and this Tequeños recipe is delicious. Tequeños are a food found in Latin America especially Venezuela and Colombia! This is Venezuelan food and Colombian food at its finest. Tequeños are sometimes called Venezuelan cheese sticks or Latin Cheese sticks. However, they are much more than a cheese stick! They are amazingly delicious! Enjoy the day with an ice cold beer while dipping Tequeños into a nice cilantro mayo! Tequeños are a great party snack. Tequeños are a great football party food. Tequeños are a great tailgate party food.
So if you are tired of the same old boring snacks try tequeños! Take some to a football party with some cilantro mayo and watch them disappear!
Today I am making something special for Rina. She has been working so hard and she really needs a treat. So I am making Tequeños! What are Tequeños you ask?... traditional Tequeños are cheese wrapped in dough although there are other types… but my girl likes tradition so I am going to stick with cheese wrapped… but I have a surprise.. I am going to use two different types of cheese!
queso blanco (white cheese basically fresh cheese) and queso de frier (frying cheese). Call me a wild man! Lol
So let’s stop talking about it and let’s cook!
For today's recipe you will need:
2 cups of all purpose flour
½ teaspoon of salt
2 tablespoons of white sugar
6 tablespoons of water
5 tablespoons of butter
1 large egg
Apx 8 oz of queso de frier
Apx 8 oz of queso blanco
Procedure:
Dissolve the sugar and salt in the water and set aside.
Cut the cheese into small pieces about 1.5 inches long and a quarter of an inch thick.
On a clean surface form the flour into a small mound. Using two fingers make a hole down the center of this mound. Into this hole place the butter and egg.
Using your fingers incorporate the butter, egg and the flour until they have sand like appearance.
Add the water mixture to the flour and knead to combine until the dough comes together. Keep adding the water and combining until a soft dough forms.
Roll the dough out to a thickness of about ⅛ inch. Cut the dough into strips about 1 to 1 ½ inch width about 6 inches long.
Take a piece of cheese and wrap it with the dough, making sure the dough over laps and the ends are sealed off by pinching the ends of the dough. Repeat this until you either run out of dough or out of cheese.
Pour an entire bottle of canola oil into a large pot. Turn the heat to medium and allow the oil to warm slowly to 350 °F.
While the oil is heating, get a cooling station ready by placing a wire rack on a baking sheet lined with a paper towel.
Place up to 6 or 8 Tequeños into the oil at one time. After 5 minutes in the oil place them on the cooling station. Allow to cool for five minutes and enjoy.
Alternatively you can cook the Tequeños in the air fryer. Preheat the air fryer to 400 °F. Place up to 6 Tequeños in the basket of the air fryer and allow bake for up to 5 minutes. Be sure to check on the Tequeños after every minute as they may cook faster! Allow to cool and enjoy!
Tequeños go great by themselves or dipped in cilantro mayonnaise. Of course always served with a beer!
#tequeños
#tequenos
#latinfood
#cheesesticks
#latino
#latina
#venezuela
Subscribe to our YouTube channel:
https://www.youtube.com/channel/UCOHncCRBkOxB3mqi6ylIt4w
Follow Rina and I on social media!
Facebook: Cafe Amora
instagram: Cafe Amora
YouTube: Cafe Amora Kitchen
53
views

How to Make Arepas With Only Three Ingredients! My Aprepa Tutorial & Recipe
Arepas are an excellent example of Venezuelan food, Colombian food and latin food. olombian arepas and Venezuelan arepas are delicious and can be made with only three ingredients! They are crunchy on the inside and soft on the inside. Stuff them with any filling you like and enjoy!
This video will show you how to make Arepas venezolanas and how to make apepas venezolanas in the air fryer.
An easy ideas for dinner that will make the entire family happy.
This video will teach you how to make arepas Venezolanas. Arepas the Venezuelan way! An arepa is a corn flower cake that is crispy on the outside and fluffy on the inside. It can be filled with any that you like. In this video we fill the arepas with our favorite tomato and cheese with cilantro mayonnaise. The best! Arepas are easy to make and can take the place of bread in your daily life. They certainly have in our home!
Arepas are common in Colombia and Venezuela. Once you try one it will become common in your home as well. They are that delicious.
Arepas are made from corn flour, water and salt. That's it! Three ingredients that make an amazing arepa that can be stuffed with anything your heart desires!
Ingredients:
2.5 cups of water
2 cups of corn flour (masarepa)
two pinches of salt
Subscribe to our YouTube channel:
https://www.youtube.com/channel/UCOHncCRBkOxB3mqi6ylIt4w
Follow Rina and Russ on social media!
Facebook: CafeAmoraKitchen
instagram: CafeAmoraKitchen
YouTube: Cafe Amora Kitchen
00:00 introduction
01:07 ingredients
01:18 Procedure
02:57 cooking the Arepas
04:17 stuffing the Arepas with cheese and tomatoes
04:53 tasting and recipe
65
views
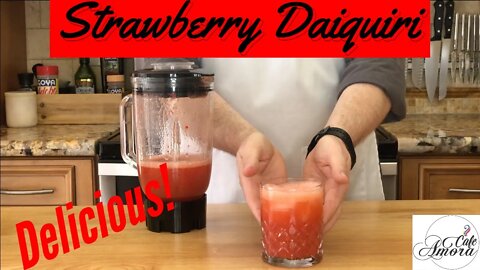
How to Make a Strawberry Daiquiri the Easy Way with Fresh Strawberries!
Strawberry Daiquiri is a delicious summer time cocktail that is best made with fresh strawberries! In this video I will show you How to Make a Strawberry Daiquiri the Easy with Fresh Strawberries! At Cafe Amora we strive to make delicious food and drinks using healthy fresh ingredients on a budget!
The strawberry daiquiri is a great summer time treat for anyone over 21! if you want to make it without rum substitute water or lemon/lime soda.
Recipe:
3/4 lbs of fresh strawberries
3/4 cup white rum
sugar for rim
ice
Using a blender puree the strawberries. Add the rum and combine with the blender.
Place a small amount of sugar onto a small plate. Using a lime wedge, wet the rim of a serving glass with lime juice. Place this glass rim side down in to the sugar to coat the rim.
Pour in the daiquiri and serve with or without ice.
Amazing and fresh!
Subscribe to our YouTube channel:
Follow Rina and I on social media!
instagram: cafeamorak
YouTube: Cafe Amora Kitchen
00:00 Intro
00:45 Ingredients
01:02 Procedure
01:44 Serving
02:21 Tasting
03:14 conclusion and recipe