
Enjoyed this channel? Join my Locals community for exclusive content at
straightarrowrepair.locals.com!
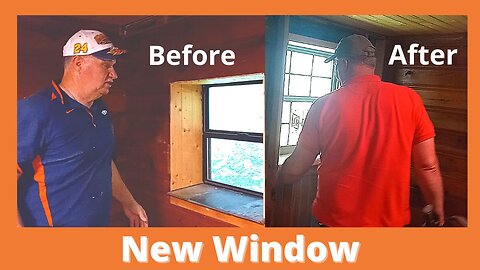
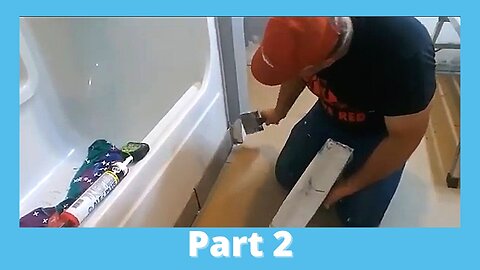
Replacing A Mobile Home Window Second Window Part 2
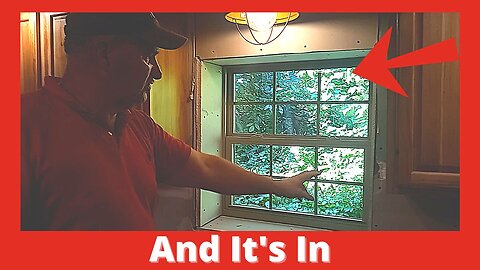
Phil is replacing a window in a difficult area. The previous owners built out the wall to install the window. We'll need to pull down the wall, cut an area for the new window, and then put it all back together. This is the second part of the video.
⏱️⏱️Chapters⏱️⏱️
00:00 Intro
00:12 Installing the 2x4 to support the window weight
01:00 May need to shim it up
01:10 Will need to support upper boards
01:40 Question is: Is it level?
02:10 Securing the top 2 by
03:05 Measurements for the other boards needed
03:30 Putting the 2 bys in
04:00 Even the best have boards drop
04:25 And our camera man need to lend a hand
04:55 Is it square?
05:15 Remeasuring the window to make sure we have enough room
05:40 Looks like the wall is angled, things you run into during remodels
06:40 We need to fill in one side of the window
07:05 Decided to put two layers of drywall
07:35 Back after checking the fit of the window
08:00 Got the window in. Now to screw it
08:35 Shimmed, still need to do corner bead and finishing
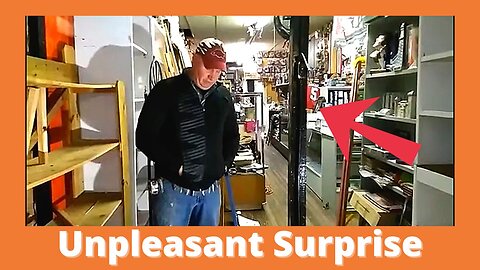
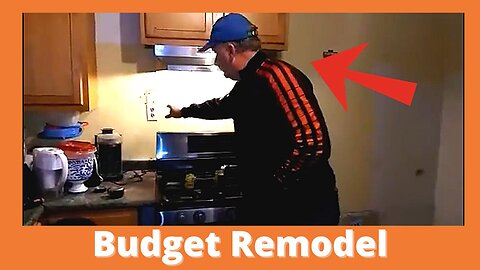
09:00 A larger cabinet that was special ordered
09:10 If you're shorter, you can look up and see the bluff line
🙏 Subscribe, 👍, it helps a lot!!
➤❓/ 💬: ask@straightarrowrepair.com
➤ Follow https://straightarrowrepair.com/pipf
➤➤I get a little for the channel-no charge for you if you use the links:
➤➤Shop Amazon https://amzn.to/3CxD1T4
➤➤Tool lists & recommended products🧰 https://straightarrowrepair.com/0lvf
➤➤Services We use
➤➤MORNINGFA·ME https://morningfa.me/invite/StraightArrowRepair
➤➤A2 Hosting http://www.a2hosting.com/refer/140244
➤➤Tubebuddy https://www.tubebuddy.com/StraightArrowRepair
➤➤Apsumo http://fbuy.me/v/philbridges
➤➤VidIQ: https://vidiq.com/straightarrowrepair
#windowremoval #windowreplacement #newmobilehomewindow
Transcript:
This is going to go up here. I may end up having to shim this up a little bit. I also need to fasten this. Which uh.. bottom up. 33 and three quarters. 33 and 7/8 about right. Might go up a little bit on that. That’s providing this is square or level. Which it probably is not. You can come up more if you want to. It’s up high. So, this one just a little up high too and I'll put one right there to. All right. Now let's see. 33 inches have him go cut that and we also need one six and a quarter.
Six and three-eighths. 33 and six and 3/8. We'll put those in. Looks like you got to come down on this end. Yeah, I’ll have to cheat a little bit. Put a handle on it. But let me get this side done first. And it came out. Oh, now I need a handle on the other side, probably. You look good there. I'm sure dropsy. I’m going to say it’s going to come out. And then... Looks good. It's like I need to come down.
Mm hmm. I can see a lip the whole way. Does it look straight through here? We’ll square it off here in a minute. I mean, this is lower. Well, we're at three and three quarters. Measure that window. I want to have a little bit of room around it, but 33 and a half. Okay, So we're at 33 and three quarters there, probably need to change this. So. Need to come down? Probably, let’s see here. No, it’s pretty good. It's showing like it's right. This might need to come down. Maybe this is angled. Yeah, easily. So I got to pull this down a little bit. That looks better. Yeah. All right.
Measure the let's measure the width of this thing. As I recall it was 30 no less than 32. And I think I've got to fill in this side almost an inch. So we need to build this up. Probably, put some plywood in that. Or I could just put drywall. Two layers of drywall is half inch. Okay, ten and a half. All right, take a break. We'll have the drywall. I we'll bring you back, see what it looks then. Looks like then.
All right. So what we've done is put this thing up to make sure we didn't look too terrible on film. I'd do it anyway. Decided we wanted to raise it up a little bit to center it. We put these shims in. Seems to work pretty good. Now we got camera on it. It won't. Hey now, put screws on it, and we'll just screw it all the way off. Go inside, hang drywall, see what it looks like. We'll let you see what it looks like. Then.
So shimming and such. Still got to do corner bead around it and finishing. But if you notice this is an inch seven-eighths inch and that's two inch. I think it's something like that. Two and 7/8 and two and 7/8, actually. So this is a larger cabinet that was ordered to fit that area and make it look even. This is lined up with the sink.
And now if you're shorter, you can see up in and see the bluff line, which is what the goal was that and to line it up with the sink and make the cabinets all fall out. So it's going to end up looking good. It was a good choice on their part. And it's only my job to make them happy.
102
views

Replacing A Mobile Home Window Second Window Part 1
Phil is replacing a window in a difficult area. The previous owners built out the wall to install the window. We'll need to pull down the wall, cut an area for the new window, and then put it all back together.
⏱️⏱️Chapters⏱️⏱️
00:00 Intro
00:12 Here's the second window in the kitchen
00:25 Putting a larger cabinet in there
00:38 Outside starting to pull out the window
01:00 Measuring for the new window
02:08 Going to mark and then cut the window out
02:30 Cutting it out with a Sawzall
03:00 Will finish it cutting up with the skill saw
03:30 Now to tear that out
04:45 Usually you want to check where your electrical lines are
05:00 Prying the boards out
05:15 Hit a nail or screw with the saw
05:40 Removing the 2 by
06:55 Won't put a full length 2x4 in there
07:40 Put a 48" in there
🙏 Subscribe, 👍, it helps a lot!!
➤❓/ 💬: ask@straightarrowrepair.com
➤ Follow https://straightarrowrepair.com/pipf
➤➤I get a little for the channel-no charge for you if you use the links:
➤➤Shop Amazon https://amzn.to/3CxD1T4
➤➤Tool lists & recommended products🧰 https://straightarrowrepair.com/0lvf
➤➤Services We use
➤➤MORNINGFA·ME https://morningfa.me/invite/StraightArrowRepair
➤➤A2 Hosting http://www.a2hosting.com/refer/140244
➤➤Tubebuddy https://www.tubebuddy.com/StraightArrowRepair
➤➤Apsumo http://fbuy.me/v/philbridges
➤➤VidIQ: https://vidiq.com/straightarrowrepair
#windowremoval #windowreplacement #newmobilehomewindow
Transcript:
But I’ve moved over to even tougher one where this window here was going to go here. And we're going to put a larger cabinet in here right now. We're going to go outside and take the siding off and make the opening the same size as this. And that's quite the journey. So here we go outside.
Yeah. All right, you got. All right, Now I'm going to get this little head. Three screws on each side. All these windows, nothing on the bottom and nothing on the top. Just caulking. So now,
Six inches over here. Order up. I'm going to mark and cut this right here. And then mark across here and from here to here. Cut this out and then I'll see what I got to do with the two by right here I got to cut. It's quite the journey anyway. We'll show you as we go along.
Way over the line. Okay. I'll do the rest of it with a skill saw. Set the depth so it’s not very deep. Look, all animals can going back and forth or water. I don't think it's water. All right, let me get the saw behind you.
Back to tearing up stuff.
Let me hear it from the inside. Now I get my favorite pry bar. Your favorite ones? One and dropped in the sewer tank that was beloved but is gone. Like all things. The only thing stays the same as everything changes. Like the weather. Like the weather. You got a screw up thing? Yeah. Just smack those boards out behind. We're not going to need them.
I don't know if I cut all the way through. Got a saw right next to you. Yeah.
Now, usually you want to do that before. You know where your electrical lines always look where the electrical is. I don't like surprises that way.
Metal? Hit a nail or something. That's going to run that blade
All right. I need to cut that off or I'll just pry this apart. Right. So I'm not going to put a full length 2x4 in here.
I'm going to put one up to about here. So I'll measure to here. I'll fasten that all off and then I'll put another one on top of that sort of weight will go all the way to the floor. It's not gonna let me... I think I’ll do 48 inches and that way I can hit on that one by that they put on it. So he's going to go cut me a 48 inch two before and bring it on back. Well, screw it all.
52
views
Removing A Skylight On A Doublewide Mobile Home
Taking a skylight out of a double-wide mobile home.
⏱️⏱️Chapters⏱️⏱️
00:00 Woops should have cut that out... Bad editor
00:10 Used to be a skylight
00:30 Good thing I've gotten better at editing
00:50 What it looks like done
🙏 Subscribe, 👍, it helps a lot!!
➤❓/ 💬: ask@straightarrowrepair.com
➤ Follow https://straightarrowrepair.com/pipf
➤➤I get a little for the channel-no charge for you if you use the links:
➤➤Shop Amazon https://amzn.to/3CxD1T4
➤➤Tool lists & recommended products🧰 https://straightarrowrepair.com/0lvf
➤➤Services We use
➤➤MORNINGFA·ME https://morningfa.me/invite/StraightArrowRepair
➤➤A2 Hosting http://www.a2hosting.com/refer/140244
➤➤Tubebuddy https://www.tubebuddy.com/StraightArrowRepair
➤➤Apsumo http://fbuy.me/v/philbridges
➤➤VidIQ: https://vidiq.com/straightarrowrepair
#MobileHomeRepair, #SkylightRemoval, #DIYHomeRepair
Transcript:
But with me and my mom, she went. This used to be a skyline that's been patched in with plywood. And they asked me to fix the shingles in. What I’m going to do is pull all of this back, that they're trying to keep it from leaking. I’m going to pull this back and I’m going to weave it back in. So we'll take you along with us as we did and go to that charger for what they were. You can go near the border.
Okay. That's what it looks like. We got through with it. See how the... everything is staggered all the way up. That's where they're trying to stop the leaks probably had cracks in the plastic skylight, but they you are.
22
views

Removing Tile Floor
Complete Bathroom Remodel 1 3-20
⏱️⏱️Chapters⏱️⏱️
00:00 Intro
00:12 Removing tile
01:40 Pulling up the Hardy board that was screwed down
🙏 Subscribe, 👍, it helps a lot!!
➤❓/ 💬: ask@straightarrowrepair.com
➤ Follow https://straightarrowrepair.com/pipf
➤➤I get a little for the channel-no charge for you if you use the links:
➤➤Shop Amazon https://amzn.to/3CxD1T4
➤➤Tool lists & recommended products🧰 https://straightarrowrepair.com/0lvf
➤➤Services We use
➤➤MORNINGFA·ME https://morningfa.me/invite/StraightArrowRepair
➤➤A2 Hosting http://www.a2hosting.com/refer/140244
➤➤Tubebuddy https://www.tubebuddy.com/StraightArrowRepair
➤➤Apsumo http://fbuy.me/v/philbridges
➤➤VidIQ: https://vidiq.com/straightarrowrepair
#bathroomremodeling #bathroom #bathroomrenovation
Transcript:
You're right on. It's going to pull it all.
Slide that under there.
It’s fine. for.
What we’re doing is pulling up the hardy board that was screwed down. Hardy board will give even though the screws were there.
You’ve got to be careful though. Ceramic tile will definitely cut you.
Do those exact certain ends. Yeah. You want to help? Pull a screw? You want to do that? There’s one right there. That you can do. Wanna do it? You got to hold it, and pull that trigger. Know you're trying to go over.
Here and we're taking this out here on the now I guess.
58
views

How To Remove Toilet
Phil shows you the easiest way to remove a toilet and avoid spilling water.
⏱️⏱️Chapters⏱️⏱️
00:00 Intro
00:12 Remodeling the bathroom, floor and closet
00:35 First thing is to setup outside
00:45 Part he missed when estimating
01:00 Where he was losing all the time
01:25 First thing is to take the door off
01:40 Taking out the toilet
02:00 Shut the water off, flush the toilet
02:10 Majority of the water will be gone
02:25 You'll still have some more water
02:43 When that's lose we'll disconnect the rusty bolts, if we can
02:55 Pick the toilet up and put it into the tub on a towel
03:05 Towels he picked up at Goodwill
03:15 Want to ease the tub in, when put it back you want to rock it and make sure all the water is out
03:30 The trap, water gets hung up in there
🙏 Subscribe, 👍, it helps a lot!!
➤❓/ 💬: ask@straightarrowrepair.com
➤ Follow https://straightarrowrepair.com/pipf
➤➤I get a little for the channel-no charge for you if you use the links:
➤➤Shop Amazon https://amzn.to/3CxD1T4
➤➤Tool lists & recommended products🧰 https://straightarrowrepair.com/0lvf
➤➤Services We use
➤➤MORNINGFA·ME https://morningfa.me/invite/StraightArrowRepair
➤➤A2 Hosting http://www.a2hosting.com/refer/140244
➤➤Tubebuddy https://www.tubebuddy.com/StraightArrowRepair
➤➤Apsumo http://fbuy.me/v/philbridges
➤➤VidIQ: https://vidiq.com/straightarrowrepair
#bathroomremodeling #bathroom #bathroomrenovation
Transcript:
Hey friends, we're going to remodel this bathroom. Drew, if you can pan around and we're going to go through to the floor and the closet. So today we're going to tear up this ceramic, pull up the trim and move this cabinet, move this toilet and first thing we do is we set up outside, got materials. I need to take you guys all the way through the journey, because a lot of times, like when I first started out, I would bid jobs.
I didn't do, man. I knew exactly how long it would take. I might take less time, but I always forgot how much time it took to go to the store and gather up all the tools and bring it here and then take it back. That would be the part that I missed. And then I was like, Man, where are my losing all this time? So if you had to go to a job for two weeks and I didn't have all that gas money and figured out I just had it all focused on the job, which is good as an estimator but not good. And considering you have to go get materials. Okay, so at some point I'll show you guys all the things that I do from start to finish so that you can do the same thing.
But the first thing we're going to do is take the door off. So I'm going to beat it up and it doesn't get in your way. Take out this cabinet and take out the toilet and then we'll start on the trim and then the floor. This will be messy. So this is a lot of people's buddy. You end up hugging him when you're driving a bus or whatever, when you don't feel good.
Porcelain feels really nice on a hot fever day because you know, the cold buddy like this. Anyway, this buddy has got to be removed so that we put new ceramic tile. So the first thing we do is we shut the water off here, flush the toilet here, which I might not take credit for. The guy behind the camera, Drew, did.
And that means that the majority of the water's gone. There's still be some. So then we're going to disconnect this line and disconnect this line because this is a hard line well it’s flexible. We can leave it, but we're going to disconnect. They’re will be some more water, because there's a little bit in here that'll probably dribble out. Generally, when I do that, I'll leave a little towel to, you know, pick up that water.
So we'll have it right there. And then when we get that loose, we'll disconnect these rusty bolts, if we can, without cutting them. And then we're going to pick this toilet up and we'll see how we get a towel in here. We will put the toilet in here now why have we got that towel? First of all, the wax ring and whatever else is on the wax ring will get on the tub, that means work.
This towel is something I picked up of goodwill and garage sales and such. So also that toilet could easily scratch or damage this tub, we’re going that ease it in. And before we take it out of here, put it back over there, some days later, we rocket back and forth. That water will come out of the trap that's built into the toilet.
And we show you where that’s at: right down water gets hung up in here. So you rock that toilet back and forth before you bring it out of there. That's why you got the towel in there, because you're going to have that action. So we'll do all that and we'll come back to you.
246
views
Unitech Downlight Review and Installation
Phil's reviewing a downlight he's been using a lot here lately and runs through how to install it.
⏱️⏱️Chapters⏱️⏱️
00:00 Intro
00:12 Utiltech Downlights
00:20 Sold at Lowes
00:35 How to adjust the lumens
00:45 Likes all the choices it offers you
01:25 What the others do with wiring
01:35 Three ways to install it
02:30 You can connect and do a junction box in there
03:30 The neat thing is all the choices and the size
04:00 What they've done
04:35 The finished product
04:45 Tools you need
05:15 Wiring
🙏 Subscribe, 👍, it helps a lot!!
➤❓/ 💬: ask@straightarrowrepair.com
➤ Follow https://straightarrowrepair.com/pipf
➤➤I get a little for the channel-no charge for you if you use the links:
➤➤Shop Amazon https://amzn.to/3CxD1T4
➤➤Tool lists & recommended products🧰 https://straightarrowrepair.com/0lvf
➤➤Services We use
➤➤MORNINGFA·ME https://morningfa.me/invite/StraightArrowRepair
➤➤A2 Hosting http://www.a2hosting.com/refer/140244
➤➤Tubebuddy https://www.tubebuddy.com/StraightArrowRepair
➤➤Apsumo http://fbuy.me/v/philbridges
➤➤VidIQ: https://vidiq.com/straightarrowrepair
#downlight #canlight #unitechreview
Transcript:
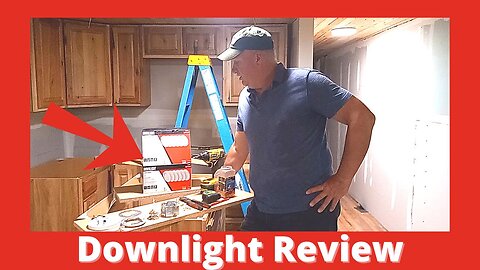
Hey. Imagine having you here. Guess what? We've got a little product here. We've been using them. Really happy with it. It's sold at Lowe's, for sure, but it's made by a Utilitech u t l i t e c h, And it's a down light with the choices of 2700-6500 lumens that is adjustable right here. We'll switch four positions.
Now, one of the things I like about this is all the different choices you have. You can put this to the replacement for the the old incandescent bulb connection. But look here, you can disconnected here and then I give you one to replace it. And then you have wire push in wire like wire nuts. You just push, pull and has to more spaces on the neutral and two more spaces on the...
On the hot, on line side. So that's kind of cool. Normally you would just be here and I would just cut that off. But that's a little pretty thoughtful for what they did there. Now, after that, they called it a three in one because you can put it in with that or you can use one of their brackets on a hole.
That's what we've been using. This bracket has two screw holes here and they give you some little screws. I mean, they are small and that holds the bracket. And now, on the bracket. You got a 50-50 chance of doing it wrong. So the wrong way is with that metal down, you want to do it this way. So it's rounded, in this way.
The clips on the side here will snap right into that. It does really well. The third choice you have is you put this in a hole and then you put it actually has a place for the ground, which is okay, that allows you to connect and make a junction box in here if you have the room. I don't have the room and I'm in that area about that big.
So this would never fit in here. So but that's pretty cool. All these choices, I guess a third one would be. And I say third is these little clips here. So now you would make the hole this size here and then you put these little clips in. See the slot right there that sticks in there. And then there's a hole right there.
Again, these little screws screw into that. And then you have these clips all the way around that allows you to clip into a hole that you've made and they give you a size that you need.
So all you do is put the screws in there and snap it in. The neat thing about this is the choices also, and that's how small it is. You can put this underneath a cabinet. If you'd be a little creative, you probably have to put a little bit of room on the bottom of this so that you know what you can do as a build up the sides that way you have room to put your wire in.
Just a thought. What we have done is cut in a hole here, and it's a very, very small room. We put the those clips in and now all we've got to do is plug up that after we put the metal clip, not a metal clip. Like I said, again, ends up going like, right there and you put the screws in these holes right here, in here.
And then you just plug it up and snap it in the finished product. It looks like right here in a minute, when we get it all wired up, we'll show you what they look like. I think you'd be pleased. What tools? Is that all you need? What's that all you need for tools? Well, the tools. You could use it all. A razor knife, a tape measure and a hand screwdriver.
But we've got linemen pliers, wire nuts, a pencil tape measure and a screw gun. You can do it with a just a razor knife and a hand, a Phillips screwdriver. And you can put all this together. So pretty cool. Remember, your white is your neutral, your black is your hot. It's pretty simple. Add to that. Hope you guys got a kick out of it like I did.
You should try it out. See ya.
52
views
Floor Support For Second Floor Fix
How we fixed the problems with the floor.
⏱️⏱️Chapters⏱️⏱️
00:00 Intro
00:12 Taken the floor up
00:22 We're going to put 4x4s on the floor joists to support the upper floors
00:40 Pre-drilling holes and securing it all with 3" screws
01:00 This wouldn't be possible in 1914 when the building was built
01:43 End of the job
🙏 Subscribe, 👍, it helps a lot!!
➤❓/ 💬: ask@straightarrowrepair.com
➤ Follow https://straightarrowrepair.com/pipf
➤➤I get a little for the channel-no charge for you if you use the links:
➤➤Shop Amazon https://amzn.to/3CxD1T4
➤➤Tool lists & recommended products🧰 https://straightarrowrepair.com/0lvf
➤➤Services We use
➤➤MORNINGFA·ME https://morningfa.me/invite/StraightArrowRepair
➤➤A2 Hosting http://www.a2hosting.com/refer/140244
➤➤Tubebuddy https://www.tubebuddy.com/StraightArrowRepair
➤➤Apsumo http://fbuy.me/v/philbridges
➤➤VidIQ: https://vidiq.com/straightarrowrepair
#floorsupport, #floorrepair, #woodenfloor
Transcript:
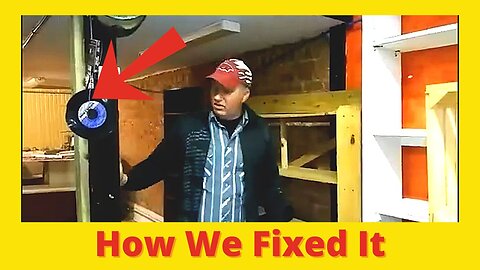
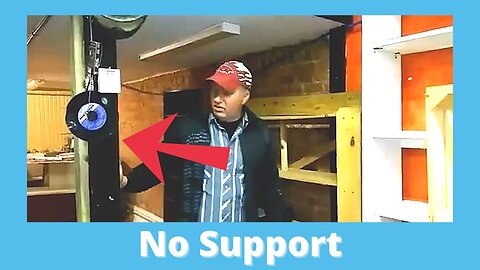
We've taken the floor up and we found out, like I said before, that the 4x4’s are in the wrong place, are in between the floor joists. We're going to end up putting 4x4 on the floor joists, here and over there.
And before we do that, we're going to support a line of blocks from between the 4x4s here and along that side and along this side, just because we can, well, we'll make things better. So that's what we're doing. We're digging it out. We're going to wedge it up tight.
We're pre drilling holes after wedging up everything and blocks. We’re pre-drilling the holes into this hardwood. And then we're putting three inch screws. Which it did not have. It just had one nail on each end tongue groove to hold it together. So we're making things better. Not the same as it was. In 1914, they didn't have battery power, didn't have very much in the way of screws. So this would have been something that really wasn't possible. You need a pry bar there?
Probably, yeah. But we have one over here. Did we find a board to fit that Tim? I sure did. But I was going to say who knows where it went. There it is. Ok Drew.
Everything is fastened now we put in a new 4x4s, where... On the top of the floor joists. So, it won't let the floor buckle up. We put two of them because both of those 4x4s were in between floor joists. And it was buckling up the floor, all the floors are now fastened with screws and all in this area anyway.
And we have wood underneath areas where there's holes. Somebody had put a metal tin can nailed it over there. So we're put a piece of wood in there later, but now we've got solid floor. And a way we go. See you guys later.
35
views
Floor Support For Second Floor
Phil repairs the floor and stabilizes the upper levels of our shop.
⏱️⏱️Chapters⏱️⏱️
00:00
00:12 106-year-old building
00:30 Weight on the floor was so heavy it did something to the floor
00:55 We're going to cut and repair it
01:20 Wanting to use 16' boards
02:10 100 years ago a one by was one inch
02:40 Not near as much room under as he thought
03:45 Floor is bowing because the 4x4s are in the wrong place
🙏 Subscribe, 👍, it helps a lot!!
➤❓/ 💬: ask@straightarrowrepair.com
➤ Follow https://straightarrowrepair.com/pipf
➤➤I get a little for the channel-no charge for you if you use the links:
➤➤Shop Amazon https://amzn.to/3CxD1T4
➤➤Tool lists & recommended products🧰 https://straightarrowrepair.com/0lvf
➤➤Services We use
➤➤MORNINGFA·ME https://morningfa.me/invite/StraightArrowRepair
➤➤A2 Hosting http://www.a2hosting.com/refer/140244
➤➤Tubebuddy https://www.tubebuddy.com/StraightArrowRepair
➤➤Apsumo http://fbuy.me/v/philbridges
➤➤VidIQ: https://vidiq.com/straightarrowrepair
#floorsupport, #floorrepair, #woodenfloor
Transcript:
Hello, here we are with another problem that we're trying to take care of. This is a 106 year old building. First use was the World War One draft board, 1914. Anyway, the weight on this wall was so heavy that it did something to the floor, if you notice, the floor’s got a pretty good size hump, say three or four inches goes all the way down here, pretty thick floor, and we're going to cut over here and make a doorway that you can get rolling in and out.
Because there's no way to get under here. We'll see what we got. So we'll mark out the doorway area and and we'll cut a door that will fit. I need to make sure I can get pretty good sized boards say, 16 foot. So that's why I chose to be right here. This is 1012, so I can almost hit 16 foot.
I go all the way to right here. I want like a four foot area. So, we’re going to mark maybe from this are here to straight you go about a foot and then go four foot. And that way we get longer boards, beams in here. So first thing we do is measure the width of this walkway, which is quite thick. It is straight up one and an eighth inches.
So a one inch then, was one inch and more. Let’s see how far down, it doesn't look that's very far down, not very far down to dirt. Oh, I was thinking there's going to be a lot more room. Well, now we can tell where the floors joists are. And go from there.
So what we determined was the floor joists and moving, not moving, the floor covering, which is actually an inch and an eighth thick is moving because these 4x4s, they put them in with no idea that they needed to sit on top of the floor joints. So all the weight sitting in between the floor joists is here, and it's right here. And it was kind of...
The floor joists are not particularly running square and there's no support through the middle here. So what we're going to do is cut the floor out here to here. We're going to support underneath that side because we can reach it and we're going to put support down through the middle and we'll probably put some support on this side. And then I'll talk to the owner and see if he's okay with me moving the post where it sits on the floor joists.
Getting another post, and putting it there. That would probably support a lot of weight.
27
views
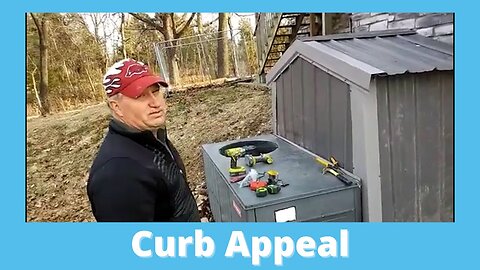
Covering Ductwork on A Budget End
Here Phil's cleaning and dressing up some ductwork on a budget. Using metal roofing materials to replace what the customer had.
⏱️⏱️Chapters⏱️⏱️
00:00 Intro
00:12 Working on the ductwork
00:40 Covering up the front now that all ductwork is sealed up
00:55 Everything is sealed and covered up
01:15 Now, they have something that will last a while
01:30 And will improve property value
🙏 Subscribe, 👍, it helps a lot!!
➤❓/ 💬: ask@straightarrowrepair.com
➤ Follow https://straightarrowrepair.com/pipf
➤➤I get a little for the channel-no charge for you if you use the links:
➤➤Shop Amazon https://amzn.to/3CxD1T4
➤➤Tool lists & recommended products🧰 https://straightarrowrepair.com/0lvf
➤➤Services We use
➤➤MORNINGFA·ME https://morningfa.me/invite/StraightArrowRepair
➤➤A2 Hosting http://www.a2hosting.com/refer/140244
➤➤Tubebuddy https://www.tubebuddy.com/StraightArrowRepair
➤➤Apsumo http://fbuy.me/v/philbridges
➤➤VidIQ: https://vidiq.com/straightarrowrepair
#ductwork #roofover #metalroofing
Transcript:
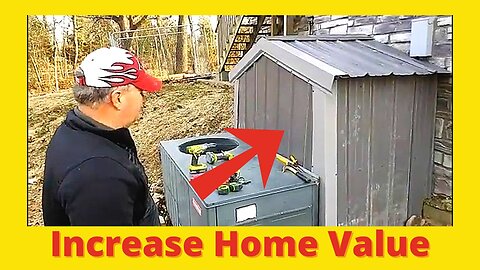
So now, we're now we're getting all the ductwork sealed up. There's no exposed pipes or anything. Everything's wrapped up. All the edges are that insulation is sealed with foil type. And there's a lot of problems all the way through there, underneath. So we're getting there now. We'll be covering up the front of this and it won't be particularly high dollar because I'm trying to keep us on budget, but it will look way better than it did.
Profile is the best side. So anyway, the metal makes it look a lot better. If you notice everything is kind of square. It’s now. Animal proof, probably person proof. That would have been a great hide-hole for a homeless person. Animals made a mess of all the ductwork. We spent hours sealing that all up, but now it's got something that is going to last for a while.
Everything's going to be appraising for better. So whenever the appraisers come out to say hey, this property looks like it's worth this much. Doesn't look as bad as what they had before. Frankenstein, “It’s ALIVE!!” kind of thing. So, here we are on a budget. I'll probably charge him $200 for the materials and and then labor and then more. We'll have a better situation. We can go to the bank with.
35
views

Covering Ductwork on A Budget
Here Phil's cleaning and dressing up some ductwork on a budget. Using metal roofing materials to replace what the customer had.
⏱️⏱️Chapters⏱️⏱️
00:00 Intro
00:12 Owner asked us to do something better than what they have
00:27 The idea was to prevent animals and weather from getting on it
00:42 Several places the animals got in anyway
00:57 Decided could keep the plywood, keep a budget
01:27 We're a way into the project
01:42 Fastened metal all around
🙏 Subscribe, 👍, it helps a lot!!
➤❓/ 💬: ask@straightarrowrepair.com
➤ Follow https://straightarrowrepair.com/pipf
➤➤I get a little for the channel-no charge for you if you use the links:
➤➤Shop Amazon https://amzn.to/3CxD1T4
➤➤Tool lists & recommended products🧰 https://straightarrowrepair.com/0lvf
➤➤Services We use
➤➤MORNINGFA·ME https://morningfa.me/invite/StraightArrowRepair
➤➤A2 Hosting http://www.a2hosting.com/refer/140244
➤➤Tubebuddy https://www.tubebuddy.com/StraightArrowRepair
➤➤Apsumo http://fbuy.me/v/philbridges
➤➤VidIQ: https://vidiq.com/straightarrowrepair
#ductwork #roofover #metalroofing
Transcript:
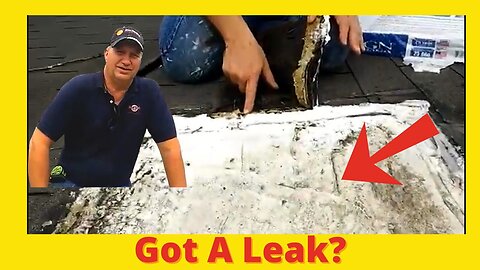
Hey guys. This is a project that somebody evidently several somebodies started and the owners asked me to see if I can figure out a better way to do this. But uh, they put a roof over the ductwork. And the idea was to keep animals and the weather off of it and of course they didn’t do the shingles. Any metal on there. And then the animals got in there anyway. This area and ductwork there’s several places where the animals climbed in throughout. So we're going to take this down, do something different, and you'll watch this as we do that.
So what we decided is we can keep the plywood. And I saved the guy a lot of money. We're going to put a metal here, metal here, metal here. And so we're going to have to take apart one of those rafters that they used and to fill in this area. We’ll have something to screw to. And it's getting his problem, taking care for a budget close to bankruptcy. So that's what we're doing.
Well, we come a long ways. We’re putting metal, after we cut the front off. What we've done is moved one of the rafters that was on the front near here, put a little bit of wood in here.
We’re fastened metal on the side and we're putting metal on the roof put a ridge cap. We'll take you through it as we go. But we’re going to have to go inside before we close this up and wrap up the duct work so we won't finish it right away. But we're going to get we're going to finish it today.
39
views

Glory Hole Falls In Arkansas #Shorts
Ya, we know, horrible name, but beautiful spot.
🙏 Subscribe, 👍, it helps a lot!!
➤❓/ 💬: ask@straightarrowrepair.com
➤ Follow https://straightarrowrepair.com/pipf
➤➤I get a little for the channel-no charge for you if you use the links:
➤➤Shop Amazon https://amzn.to/3CxD1T4
➤➤Tool lists & recommended products🧰 https://straightarrowrepair.com/0lvf
➤➤Services We use
➤➤MORNINGFA·ME https://morningfa.me/invite/StraightArrowRepair
➤➤A2 Hosting http://www.a2hosting.com/refer/140244
➤➤Tubebuddy https://www.tubebuddy.com/StraightArrowRepair
➤➤Apsumo http://fbuy.me/v/philbridges
➤➤VidIQ: https://vidiq.com/straightarrowrepair
#gloryholefalls #arkansaswaterfalls #hiking
Transcript:
So they call it Glory Hole Falls that I used to call it hole in the rock we used to come out here when there was no path. Now there's a parking area and a path no signs. It came down to limestone, hit this boulder. Swirled around here and made a hole through it. We'll take you down below and see what it looks like on underneath. There you go.
After some walking. I guess we’ll do a video coming out. This is what we come to. Why don’t you walk over there and show them. How much rock it went through.
53
views
Replacing A Mobile Home Window
Phil is replacing a window in a difficult area. The previous owners built out the wall to install the window. We'll need to pull down the wall, cut an area for the new window, and then put it all back together.
⏱️⏱️Chapters⏱️⏱️
00:00 Intro
00:12 First thing we need to do
00:30 Back after taking all the siding off
00:45 We'll replace the boards for support
01:00 We'll have to go outside take siding off, window out, and open it up
01:30 We weren't able to take you along, but here's what we ended up doing
01:50 Moved the whole window over more than we planned
🙏 Subscribe, 👍, it helps a lot!!
➤❓/ 💬: ask@straightarrowrepair.com
➤ Follow https://straightarrowrepair.com/pipf
➤➤I get a little for the channel-no charge for you if you use the links:
➤➤Shop Amazon https://amzn.to/3CxD1T4
➤➤Tool lists & recommended products🧰 https://straightarrowrepair.com/0lvf
➤➤Services We use
➤➤MORNINGFA·ME https://morningfa.me/invite/StraightArrowRepair
➤➤A2 Hosting http://www.a2hosting.com/refer/140244
➤➤Tubebuddy https://www.tubebuddy.com/StraightArrowRepair
➤➤Apsumo http://fbuy.me/v/philbridges
➤➤VidIQ: https://vidiq.com/straightarrowrepair
#windowremoval #windowreplacement #newmobilehomewindow
Transcript:
Now, what I'm going to do first is pull this off, pull this off, and then start pulling all the siding off and that will be where we show you what the wall looks like. When we get that done, we'll take you back to.
Well, here's here it is. We've uncovered the aluminum siding and moved the board over to this level where the window needs to be. We're going to put a new board here because this is pretty bad. I want to support it better under here. This will go all the way up into here. 36 inches up. This is just the mobile home side.
Then we're going to go outside, takes the siding off, take the window out, and maybe take the plywood. I'll open it up first and see what we see. But right now, I'm going to take a Sawzall, and cut right here. And cut right here. That way I can figure out where I need to put in. Quite the journey.
I ended up removing this one over here out of the way, because this 4x4 back here was so far on level and the owner came out and he didn't want me to or she didn't want me to either one move that 4x4. So we moved the whole window over and then went outside and and pulled it all off. So I'm sorry I didn't take you guys along with me.
55
views
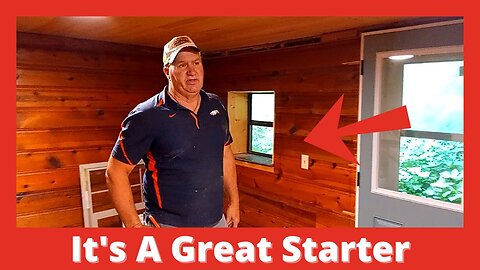
What You Can Do With A Small Mobile Home
Phil walks you through a project we have improving an old late 60's early 70's mobile home. He shows you where the original owners added to it over a 20 year period. Then walks you through some of the things we have done and are doing to improve the property even more.
⏱️⏱️Chapters⏱️⏱️
00:00 Intro
00:12 A wall we're going to remove, the original owners built it up
00:30 Believe it or not, this is a mobile home
00:55 1960's mobile home
01:15 Where they added onto the master bedroom
01:30 We're moving the windows for our customer
02:00 An addition onto the mobile home
02:20 Another add-on area
02:35 We'll be adding decks so each bedroom can step out on a deck
02:55 Bluff line that they are going to add a deck an staircase to
03:15 Changing what used to be an open air sewer into a deck
03:35 End of the mobile home with an add-on
04:20 Totally changed the kitchen cabinets, windows and doors
04:50 More bluff line, amazing views to this property
05:10 Possibly add another deck up on the bluff line
05:40 We will remove the cut-down trees
06:00 An example of what you can do with a small mobile home over 20 years
06:25 One thing he offers is you can change your mind
06:40 They want to sit in a dining area and be able to see the bluff line
07:15 What we're going to do with that wall
07:25 Also put new flooring into the place
🙏 Subscribe, 👍, it helps a lot!!
➤❓/ 💬: ask@straightarrowrepair.com
➤ Follow https://straightarrowrepair.com/pipf
➤➤I get a little for the channel-no charge for you if you use the links:
➤➤Shop Amazon https://amzn.to/3CxD1T4
➤➤Tool lists & recommended products🧰 https://straightarrowrepair.com/0lvf
➤➤Services We use
➤➤MORNINGFA·ME https://morningfa.me/invite/StraightArrowRepair
➤➤A2 Hosting http://www.a2hosting.com/refer/140244
➤➤Tubebuddy https://www.tubebuddy.com/StraightArrowRepair
➤➤Apsumo http://fbuy.me/v/philbridges
➤➤VidIQ: https://vidiq.com/straightarrowrepair
#SmallHome #StarterHome #RemodelWalkthrough
Another journey. This particular wall is a wall that starts off being two and a half inches, and then they added on to it. So they put another two by four wall out beyond it. So. And the reason for that is this is a mobile home. If you look around, it may not look like a mobile home. And. And it's a little tiny window whenever they put it in.
It was pretty, pretty fancy, the whole thing. It's definitely not the window that went to a mobile home because this is a sixties mobile home and maybe late sixties, early seventies. And I can tell because I've been around a lot of them. Here let me show you something, in this master bedroom, they add on, and you can see the rounded roof mobile home right there. They folded the tin back and then they added all this section taller and they never finished the room.
They had a window there and a window there and we end up putting bigger windows and there will be a log cabin, a log bed here. So we're really trying to lend the windows so that it will let the outdoors in and not interfere and focus on the log cabin. Anyway, this is an addition onto this mobile home, so you can start with something small and add on like in the kitchen, which we're not finished with.
I guess we can show you some later as we go along. Down through here, this is added on and it's a log cabin look, we put it in a bathroom over here. They added on the bedroom. We put doors at the end so that we'll have decks out there in the so they'll be you can step out of your own particular bedroom and, and out on to the deck and out back here...
I don’t know if you can zoom in but you see the big rocks there and up that way is all bluff line. And down there is the War Eagle River which again you can, you could just barely see it through the trees. What this used to be was an open air sewer. Of course, that's all been eliminated. We'll fill all that in. But the deck will be here all the way, pretty much all the way across.
And there'll be a trail to a waterfall over that way. So this is the end of the mobile home again, right here. And we took it back. It used to be a bathroom and a shower, but turn that side into a closet. And this slide right here is a stackable washer dryer area with the hookups. And this used to have a shower in it, and now we've got a bathtub shower mix.
We're going to put an on demand water heater, electric water heater going to put in a window there and put these cabinets in so it doesn't look anything like it did. Totally changed the cabinets was a window here took that out, put a refrigerator there and pantry here. But this used to be a smaller door. They had a piece of wood to block it from.
I guess bears, maybe. If you can go that way you can show the bluff line and there's some discussion about putting lights up there so we can shine lights at night on the bluff line. And we may do different colors. And there's an idea about putting the deck over this way, up high with the staircase going up. And then you can look out over the whole area, the river, the the trees and still be up next to the the bluffs and have lights on that.
Um, but there's a bunch of trees have been cut down on these big boulders on the side of the hill and we got to get those cleared off so that we can do all that. In the meantime, we're back to what we were doing this this is just like, you know, somebody started off with a little sixties mobile home and then over 20 years added to it and then these people bought it teeter totter on the idea of tearing it all down and building the house here.
They decided that they would like to get this done and they felt like I was the guy to help them accomplish things. One of the things that I offer is you can change your mind, change your mind as many times you want it to. Until you find what you like. So that's what we're doing here. Don’t like this window would like to have the ability to sit at a dining area and see the bluff line.
So, this was a solid door. When we put in this door. Again, we'll clear that tree out and you can see the bluff line when you sit in this area. So, here we go. Changing out a window in a very odd area. Now, first thing we’ll do they don't want this. They want drywall. We’re going to use this that's there as an accent wall. Oh, we put the flooring in a little bit early, but you need, it needed to get done.
So. So we got to be careful that we don't drop nails and screws and scratches floor, which is one of the things I don't like about this flooring is if you scratch it, which is 1/32 of an inch, you got no real option because you take it part of the fall apart. Pieces of wood that lock together they don’t, they don’t generally come apart properly.
81
views
Kitchen Makeover & Floor Support
Kitchen Revamp & Supporting Floor 2020
⏱️⏱️Chapters⏱️⏱️
00:00 Problem with the floor breaking
00:20 We're going to put wood across the ends
00:30 Asked if we could raise the ductwork up a little, change part of the kitchen
01:10 Dealing with water puddles under the house
01:25 Letting the young bucks handle the tools to increase their skill level
01:50 Boys are moving the water line
04:45 The fun of finding supplies under a house
05:10 Explaining to Phil why a 90
05:30 Bright light
07:00 Getting the water line where they need it
08:00 Deciding exactly where the hole needs to be, and talking to the customer
09:25 Phil giving directions to keep the boys on track
09:40 The guys kidding around while Tim gets the hole cut in the wall
11:15 What we used to get rid of cockroaches
13:40 Still working on the hole
15:00 How to do the hole, knock out the grout
15:30 Cut away and back, need to move a cabinet
15:55 Measuring everything
16:25 The cabinets were pretty far out of level
16:45 Pulling the cover off
17:45 Moving the cabinet
20:30 The frame has 2-foot centers
20:55 Measuring the hood vent to the center
22:00 Marking for installation
22:15 Each job has to be adjusted for, things are never exact
22:30 Cutting a hole so can adjust the install
23:15 Cut away to get the hole drilled
24:05 Next job, moving a cabinet
24:30 Cover the vent and build a box to vent outside the cabinet
25:00 Measured from the stove
25:30 Have to build a frame in the cabinet
26:20 He marked out where the vent goes, and they are drilling it out
26:45 You could use a Sawzall, but shakes the cabinet pretty bad
26:55 If you drill the corners you can go any way
27:05 Doesn't have to look pretty just be there
28:03 Moving the cabinet over to where it goes
29:20 Putting the top back on
29:35 Set the little vent
30:30 Putting the drawers back
🙏 Subscribe, 👍, it helps a lot!!
➤❓/ 💬: ask@straightarrowrepair.com
➤ Follow https://straightarrowrepair.com/pipf
➤➤I get a little for the channel-no charge for you if you use the links:
➤➤Shop Amazon https://amzn.to/3CxD1T4
➤➤Tool lists & recommended products🧰 https://straightarrowrepair.com/0lvf
➤➤Services We use
➤➤MORNINGFA·ME https://morningfa.me/invite/StraightArrowRepair
➤➤A2 Hosting http://www.a2hosting.com/refer/140244
➤➤Tubebuddy https://www.tubebuddy.com/StraightArrowRepair
➤➤Apsumo http://fbuy.me/v/philbridges
➤➤VidIQ: https://vidiq.com/straightarrowrepair
#KitchenMakeover, #BudgetKitchenRemodel #DIYHomeRepair
55
views

How To Make A Water Level To Relevel A House
How to make a water level that can roll with the punches. He makes these to survive crawling under houses.
⏱️⏱️Chapters⏱️⏱️
00:00 How he makes a water level
00:25 4" Sewer to drain adapter
00:45 DWV Test cap
01:00 Use rain or shine to glue the cap into place
01:30 The water will sit in this area
01:40 Need 3/8 clear line need 50'
02:00 Put that on a 3/8" threaded barb
02:25 Want to drill a hole and put the barb in it
03:05 Your going to put silicone around it
03:25 Things you can use the water level for
03:48 The cost of this is $13 plus the cost of the hose
04:20 Only fragile part is inside
🙏 Subscribe, 👍, it helps a lot!!
➤❓/ 💬: ask@straightarrowrepair.com
➤ Follow https://straightarrowrepair.com/pipf
➤➤I get a little for the channel-no charge for you if you use the links:
➤➤Shop Amazon https://amzn.to/3CxD1T4
➤➤Tool lists & recommended products🧰 https://straightarrowrepair.com/0lvf
➤➤Services We use
➤➤MORNINGFA·ME https://morningfa.me/invite/StraightArrowRepair
➤➤A2 Hosting http://www.a2hosting.com/refer/140244
➤➤Tubebuddy https://www.tubebuddy.com/StraightArrowRepair
➤➤Apsumo http://fbuy.me/v/philbridges
➤➤VidIQ: https://vidiq.com/straightarrowrepair
#Tools, #relevelingtools #waterlevel
Transcript:
I told you guys that I would show you how I make a water level. I've used the ones that are for acoustical ceiling, and they're fragile after a while. These are pretty rugged. The way I make them. And what I use is this is a four inch adapter. It's called a four inch d w v 4” sewer to drain adapter DWV.
Then this costs $6.28. This is a test kit, a four inch D.W. v t a D.W. v test cap and that will fit right in there. We're going to glue that you're just using some rain or shine glue. It can be any kind of PVC glue, could be silicone. But in this case, this is what I have very readily available.
This will make it seal up and hold water. Okay. Now to get, since the water is going to sit in this area and this is your platform, we need to get some clear line like this. This seems to be quarter inch, but you need 3/8 line. This 100 foot of this, which you only need 50 is $22 at Lowes.
So you would get 3/8 instead of quarter inch. In this case, that's quarter and that's because you're going to put it on this three eight inch barb right there. And then we're going to use a half inch threaded right there. This, as I recall, was $4.50. I think the whole thing costs about $13 at Lowe's. I think I had the receipt, as a matter of fact, in my wallet.
I don't have the drill bit this size, but this is something I do have and we want to drill this just above where that sitting so that this sits just like so. Okay, So that'll be at the bottom. So you kind of of the drill, just add the water a little bit, but you can literally tighten it up in there that it can be a little looser because you're going to put the silicone all the way around that, and seal that that is the basis for water level.
Now you need to use the three eights because this is going to be too small, a quarter inch, 3/8 inside diameter, that's ID. So it'll slip over this and you really only need 50 foot. You put this in the center of a house and you can go or you can do a soffit or ceiling use benchmarks and go up.
Or you can you can set concrete grade and dirt grade with it by setting it a certain height, putting a mark on a stick and go around, say, okay, this needs to go up, but this is $13 plus the cost of the hose, which has got to be clear. Then you put colored water in. That food coloring is all you need in a gallon water, a little bit of food coloring, and it changes it to red, green, maybe if you find orange, but usually red, green or blue, a darker color. If it’s yellow you might see it.
So again, that is how you do a water level that's really rugged and drop it. Don't break only fragile part is in here. And believe it or not, we actually crank the one to the other. One will go one in there and hit it and we sealed it back up. But you can bang on it, throw things on it.
That's going to be really, really, really rugged. And it's the last one I made last for ten years. So far more than that maybe one before that got stolen. So I can imagine 20 years you could make it last. Must be some value because somebody stole it. Had to be. Somebody didn't know what it was. So this is your old type of water level and you can use it for any number of issues and you'll see me using it on when I re level houses and such. And there you go, guys.
68
views

Start of Leveling Floors In A House
House Re-Level 2020
⏱️⏱️Chapters⏱️⏱️
00:00 Releveling house
00:20 Cap blocks & other supplies
01:15 Under the house
01:33 Why you don't want to let animals get underneath your house
01:45 Watch the lines under there
02:25 First thing to do is check the frame with water level
02:40 20 ton level left down there from someone else
🙏 Subscribe, 👍, it helps a lot!!
➤❓/ 💬: ask@straightarrowrepair.com
➤ Follow https://straightarrowrepair.com/pipf
➤➤I get a little for the channel-no charge for you if you use the links:
➤➤Shop Amazon https://amzn.to/3CxD1T4
➤➤Tool lists & recommended products🧰 https://straightarrowrepair.com/0lvf
➤➤Services We use
➤➤MORNINGFA·ME https://morningfa.me/invite/StraightArrowRepair
➤➤A2 Hosting http://www.a2hosting.com/refer/140244
➤➤Tubebuddy https://www.tubebuddy.com/StraightArrowRepair
➤➤Apsumo http://fbuy.me/v/philbridges
➤➤VidIQ: https://vidiq.com/straightarrowrepair
#HomeRepair, #RelevelHouse, #DIYHomeRepair
Transcript:
Hey, guys. We're getting ready to do a project where we're raising a house that was out of level to begin with, and then they put blocks around it. And then put an addition for it. But we're going to try to raise it to center. And we've got blocks here already. Blocks and cap blocks. These would be cap blocks 4” thick 8” wide, 60 inches long. They go on top or the bottom solid. We have 20 ton jacked. We have 4x4s where oak wedges, other... got lights, headlamps, coveralls, gloves so that we don't get as dirty. There's a lot of hustle, a lot of dirty hard work, and it's no fun. But it does have some responsibility to us, some skill, a lot of skill.
So I'll try to take you with me as we go underneath this house and see what we can do to make people's lives better. So come along with me on this great adventure down the rathole.
Hey, we're underneath here. It's quite interesting. You can see what's, animals what's coming in here and pulling down the insulation. That would be this insulation here.
And if you followed me before, you've seen it before, you'll see some of over work. And that's why you don't want to let animals get underneath your house because they are trying to take care of themselves in the cold weather. Also, you want to be careful when you walk in, when you're crawling underneath here, you wouldn’t be walking because this is not a free line.
If it was, you were still and I want to pinch it. This is a gas line, propane line. So you don't want to bend that pinch it and then have a problem and scramble up, turn the gas on, or we're using these magnetic lights that we got from Harbor Freight that are adjustable. Kind of neat. It’s the first time I've used them, I've used a lot of different other magnetic, but these were pretty good, too.
So what we're doing now, setting up the water level and what I'm gonna probably do is put a 2 by here and then bring the reservoir up to the level of that frame, which I'll do with the other part of the level. First thing we've got to do is pour water in there and get all the air bubbles out, and then we'll bring the one level and tuck it up in here and we'll see where we're at as far as on the frame.
So by the way, there's a jack that somebody else left down here for I don’t know how long. And that's a good example of what will happen to the cylinder. If you see if you leave it up, it will rust like that. I don't know if it's that bad, but that then will tear up the rubber gasket. It keeps oil from spilling out.
So you don't want to leave your jack up? We definitely don't want to leave Jack underneath the house like that. And maybe there's something wrong with. I don't know, but here we go. We'll take you along with us.
51
views
Remove A Roof Vent
Phil wanted to carefully remove the roof vent for this mobile home because it will save the customer money, and time. If we couldn't reuse the vent, we would have to find and order another one.
⏱️⏱️Chapters⏱️⏱️
00:00 Intro
00:12 12 sheets in 30 mins, to a vent
00:35 Right now, need to get under it
01:10 If we needed to replace the vent you would need to order it
02:28 Follow us
🙏 Subscribe, 👍, it helps a lot!!
➤❓/ 💬: ask@straightarrowrepair.com
➤ Follow https://straightarrowrepair.com/pipf
➤➤I get a little for the channel-no charge for you if you use the links:
➤➤Shop Amazon https://amzn.to/3CxD1T4
➤➤Tool lists & recommended products🧰 https://straightarrowrepair.com/0lvf
➤➤Services We use
➤➤MORNINGFA·ME https://morningfa.me/invite/StraightArrowRepair
➤➤A2 Hosting http://www.a2hosting.com/refer/140244
➤➤Tubebuddy https://www.tubebuddy.com/StraightArrowRepair
➤➤Apsumo http://fbuy.me/v/philbridges
➤➤VidIQ: https://vidiq.com/straightarrowrepair
#metalroofing, #metalovershingles #metalroofingadvice
Transcript:
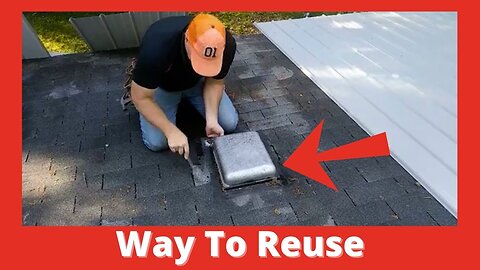
Now, we've got 12 sheets up in 30 minutes. That are tacked off. Some are a little more than tacked off. We're getting to a vent here. There's probably for a bathroom since it’s not on the outside wall, and I'm probably going to reuse this. Well, I know I am. And I'll show you how to.
Right now. We've got to get underneath it. Pull it up, and then we put metal and cut around it. And it smells like a sewer vent or something.
If we were to try to find one of these, we’d have to order it most likely. And I can easily shape this for looks without actually building too much of a curve in the staples and nails into the vent. We're going to use the caulking, or not caulking but tape. Great big vent.
“For a teeny tiny hole.”
But that’ll work. We’ve got to make sure that all the nails and down the staples are down all the junk out of there. In reality, we only need a hole this big. So we’ll get to you and we’ll show you all that as we come along.
69
views

Mobile Home Metal Roof Overhang #Shorts
I wanted an overhang because they don't want water to run into the windows anymore, or do damage to the masonite siding this house is never going to move. If it had to be moved, then you could have to cut metal siding up because you couldn’t have the overhang. But we're trying to hurry it up for the rain gets here.
🙏 Subscribe, 👍, it helps a lot!!
➤❓/ 💬: ask@straightarrowrepair.com
➤ Follow https://straightarrowrepair.com/pipf
➤➤I get a little for the channel-no charge for you if you use the links:
➤➤Shop Amazon https://amzn.to/3CxD1T4
➤➤Tool lists & recommended products🧰 https://straightarrowrepair.com/0lvf
➤➤Services We use
➤➤MORNINGFA·ME https://morningfa.me/invite/StraightArrowRepair
➤➤A2 Hosting http://www.a2hosting.com/refer/140244
➤➤Tubebuddy https://www.tubebuddy.com/StraightArrowRepair
➤➤Apsumo http://fbuy.me/v/philbridges
➤➤VidIQ: https://vidiq.com/straightarrowrepair
#MobileHomeRepair, #MobileHomeMetalRoof #Metalroofoverhang
17
views
Hoarders Clean Up Working Our Way In
We had to go in and clean up a horder's house. We finally got all the sheds and outside. Now, the guys have to clean their way into the trailer home.
⏱️⏱️Chapters⏱️⏱️
00:00 Intro
00:12 Working into the door
03:45 Follow us
🙏 Subscribe, 👍, it helps a lot!!
➤❓/ 💬: ask@straightarrowrepair.com
➤ Follow https://straightarrowrepair.com/pipf
➤➤I get a little for the channel-no charge for you if you use the links:
➤➤Shop Amazon https://amzn.to/3CxD1T4
➤➤Tool lists & recommended products🧰 https://straightarrowrepair.com/0lvf
➤➤Services We use
➤➤MORNINGFA·ME https://morningfa.me/invite/StraightArrowRepair
➤➤A2 Hosting http://www.a2hosting.com/refer/140244
➤➤Tubebuddy https://www.tubebuddy.com/StraightArrowRepair
➤➤Apsumo http://fbuy.me/v/philbridges
➤➤VidIQ: https://vidiq.com/straightarrowrepair
#MobileHome #hoarderhouse #hoarders
31
views
Mobile Home Hoarders Clean Up Still Outside
We are still working outside. Can you imagine how bad it will be in the house?
⏱️⏱️Chapters⏱️⏱️
00:00 Intro
00:12 Still working on the outside
03:15 Follow us
🙏 Subscribe, 👍, it helps a lot!!
➤❓/ 💬: ask@straightarrowrepair.com
➤ Follow https://straightarrowrepair.com/pipf
➤➤I get a little for the channel-no charge for you if you use the links:
➤➤Shop Amazon https://amzn.to/3CxD1T4
➤➤Tool lists & recommended products🧰 https://straightarrowrepair.com/0lvf
➤➤Services We use
➤➤MORNINGFA·ME https://morningfa.me/invite/StraightArrowRepair
➤➤A2 Hosting http://www.a2hosting.com/refer/140244
➤➤Tubebuddy https://www.tubebuddy.com/StraightArrowRepair
➤➤Apsumo http://fbuy.me/v/philbridges
➤➤VidIQ: https://vidiq.com/straightarrowrepair
#MobileHomeRepair, #hoarderhouse #hoarders
45
views
Bathroom Remodel DIY 2
Second part of a complete bathroom remodel. We pull out the toilet, tear out the tile and get ready to tile the floor.
⏱️⏱️Chapters⏱️⏱️
00:00 Mixing thin set
00:30 Instructions on how to mix the thin set
00:55 Put water in first, outside to control the mess
01:15 Putting water first will help with your clean up
01:30 Goal is a consistency between peanut butter and soup
02:10 If it's a little heavy you can do cups instead of picking the bag up
02:30 Use an electric drill to mix it
03:00 Get all the lumps out of there
03:30 The drill is getting a work out
03:45 You might want to use a heavier electric drill
04:30 Random marriage advice lol
04:55 When you mix a lot you kind of know
05:25 He'll use a 6" finishing knife to pull that out
05:55 Chalk line that he popped
06:10 Size of trowel they are using
06:40 You need more there if you can see the dots
07:15 He provides the knowledge of how it's supposed to be done
07:30 Decided to lay tile in thirds
08:00 Cut at 6 and half inches for the stagger
08:23 Cutting the tile
08:45 This particular saw how it works
09:40 The speed of the motor
09:50 Want to watch the speed near edges, it will break the tile
10:00 You don't have to have this fancy of a saw
10:45 Already lined the tiles up
11:00 You don't want to be too far away or you'll end up squeezing the grout up
11:20 They make a little rubber hammer
11:55 The other third of tile
12:55 Don't have to be that close because going to put trim on it
13:05 Complex cut
13:30 How to measure for the tile
13:50 Measuring like drywall, just faster
14:40 Tough cut, have to help Clay with that
15:15 You can use a speed square to mark it
15:50 The way he cut the tile
16:05 Will use nibblers to complete the cut
16:30 Now can set the tile
16:40 Need to cut depth from the tile
17:33 Back after all the tile has been set
17:45 Made sure the customer was happy with the color
17:55 He's used to using drywall tools
18:15 Forcing the grout in the cracks
18:25 He suggested the kids get to pull the spacers out
18:45 How we mix our grout
18:55 Don't want to mix a lot because got to get it down it 45 mins
19:15 Wiping down the tile with a sponge
19:40 Using thrift store towels to clean
20:00 After the towel leaves a fine dust
20:30 Come back in an hour and knock the dust off all of this
20:40 Cover the tile paint the walls and ceiling
21:00 Using 5 min mud to fill in holes in the walls
21:50 If you're not a good finisher you don't have to use 5 min mud
🙏 Subscribe, 👍, it helps a lot!!
➤❓/ 💬: ask@straightarrowrepair.com
➤ Follow https://straightarrowrepair.com/pipf
➤➤I get a little for the channel-no charge for you if you use the links:
➤➤Shop Amazon https://amzn.to/3CxD1T4
➤➤Tool lists & recommended products🧰 https://straightarrowrepair.com/0lvf
➤➤Services We use
➤➤MORNINGFA·ME https://morningfa.me/invite/StraightArrowRepair
➤➤A2 Hosting http://www.a2hosting.com/refer/140244
➤➤Tubebuddy https://www.tubebuddy.com/StraightArrowRepair
➤➤Apsumo http://fbuy.me/v/philbridges
➤➤VidIQ: https://vidiq.com/straightarrowrepair
#bathroomremodeling #bathroom #bathroomrenovation
86
views

Bathroom Remodel Diy 1
First part of a complete bathroom remodel. We pull out the toilet, tear out the tile and get ready to tile the floor.
⏱️⏱️Chapters⏱️⏱️
00:00 Remodeling the bathroom, floor and closet
00:25 First thing is to setup outside
00:35 Part he missed when estimating
00:50 Where he was losing all the time
01:15 First thing is to take the door off
01:30 Taking out the toilet
01:50 Shut the water off, flush the toilet
02:00 Majority of the water will be gone
02:15 You'll still have some more water
02:33 When that's lose we'll disconnect the rusty bolts, if we can
02:45 Pick the toilet up and put it into the tub on a towel
02:55 Towels he picked up at Goodwill
03:05 Want to ease the tub in, when put it back you want to rock it and make sure all the water is out
03:20 The trap, water gets hung up in there
03:35 Disconnected the drain
04:15 Have a bolt on the toilet that just spins
04:25 You can use a regular hacksaw to cut the bolt off
05:12 Toilet is out. Plug the hole--Short
05:50 We're going to put a new toilet in
06:00 We need to rock the toilet back and forth to be able to take it outside--Short
06:40 Removing tile
08:10 Pulling up the Hardy board that was screwed down
09:30 Laid down the concrete board, and screwed it down
09:40 Choosing a layout, and size of the grout joints
10:00 Measured so you won't have partial pieces where it would look bad or cause problems
10:15 What he will probably do
10:30 He'll pop a line from one wall to the other
10:40 Come off of this wall and measure in sections
🙏 Subscribe, 👍, it helps a lot!!
➤❓/ 💬: ask@straightarrowrepair.com
➤ Follow https://straightarrowrepair.com/pipf
➤➤I get a little for the channel-no charge for you if you use the links:
➤➤Shop Amazon https://amzn.to/3CxD1T4
➤➤Tool lists & recommended products🧰 https://straightarrowrepair.com/0lvf
➤➤Services We use
➤➤MORNINGFA·ME https://morningfa.me/invite/StraightArrowRepair
➤➤A2 Hosting http://www.a2hosting.com/refer/140244
➤➤Tubebuddy https://www.tubebuddy.com/StraightArrowRepair
➤➤Apsumo http://fbuy.me/v/philbridges
➤➤VidIQ: https://vidiq.com/straightarrowrepair
#bathroomremodeling #bathroom #bathroomrenovation
65
views

How To Charge A Dead Ryobi Battery
Phil shows you how to jump a battery that isn't charging
⏱️⏱️Chapters⏱️⏱️
00:00 Rechargeable batteries can be jumped
00:30 Several batteries that aren't charging
00:45 No explosions
01:00 Maybe takes more than a few seconds
01:25 Should light up
02:00 Next
02:55 Not as bad as shocking a person
03:10 Went green, is charging
03:30 Includes DeWalt, Ryobi and other brands
03:50 Why it works
🙏 Subscribe, 👍, it helps a lot!!
➤❓/ 💬: ask@straightarrowrepair.com
➤ Follow https://straightarrowrepair.com/pipf
➤➤I get a little for the channel-no charge for you if you use the links:
➤➤Shop Amazon https://amzn.to/3CxD1T4
➤➤Tool lists & recommended products🧰 https://straightarrowrepair.com/0lvf
➤➤Services We use
➤➤MORNINGFA·ME https://morningfa.me/invite/StraightArrowRepair
➤➤A2 Hosting http://www.a2hosting.com/refer/140244
➤➤Tubebuddy https://www.tubebuddy.com/StraightArrowRepair
➤➤Apsumo http://fbuy.me/v/philbridges
➤➤VidIQ: https://vidiq.com/straightarrowrepair
#ryobirechargeablebattery #tipsandtricks #ryobi
Transcript:
Supposedly this is not my thing that these batteries can be jumped that are bad with a volt jump. I’ve see people that do three batteries in a row. I’ve seen people that do scissors from one battery to the other. And I've seen people use other things like battery chargers to jump, and that's what I'm going to do. We'll see. These are batteries that are not charging properly.
Got a positive and negative. This is a battery charger. That's better than I expected. Yeah, No explosion. Yeah, that's what I was thinking. Okay, well, that's green, but that might be because that one's taking the main charge there. Just jumps off each. That one is staying red. Yeah, it's taken all the charge off. You’re stuff went on. Yeah. Humph, not a strong green. Got this one. Went to red. Something wrong with that one. It’s positive, negative. Looking red, it’s still not working.
Maybe we’ll do it some more. Feel like working on a heart person patient. There it goes. Hey we got green. Yeah. This is fairly new and we’ve had problems with it. It’s blinking green. You know what? It's going to get a jump start, whether it needs it, this patients getting attention, whether it needs or not. Treat. It’s had problems before. At least it’s not as violent as when you jump start somebody’s heart. Be like Frankenstein ‘He’s alive.’
We're going green. Okay. There you go. That's what I've done. It seems to work. So things that you can learn on YouTube are pretty amazing. And hopefully I can share this with other people. It's working for me so I can jump start. Batteries that won't charge. That doesn't include only Ryobi, it’s others also. Mm hmm. Yeah. The ones with scissors were Dewalt, some other brands.
It might be the old ones. I've had problems with the old ones in the past, so. Like, Hitachi, firestorm, possible that maybe they just needed that. What I'm understanding is inside the batteries, there's. There's has to have a connection all the way through the charge and it gets a little bit of corrosion, as one guy said it gets whiskers. I don't know if that's an electronic or electric term whiskers. It’s not one I’ve used, but I have to use electrical terms and read you.
You know, I'm a journeyman, slash whatever, read the books, pass tests, never use whiskers, but whiskers are not. You knock out that electric corrosion by some sort of a jump and evidently the batteries go a little further and we'll see. I'll let you know if it ends up being like a temporary. You know: here's a pill you can live a little bit longer and you make one more day.
One more day. But I mean, you pay that much money for battery one more day is pretty cool.
16
views
Fixing Uneven Floors 100-Year-Old Building Gets A Make Over
Phil repairs the floor and stabilizes the upper levels of our shop.
⏱️⏱️Chapters⏱️⏱️
00:00 106-year-old building
00:20 Weight on the floor was so heavy it did something to the floor
00:45 We're going to cut and repair it
01:10 Wanting to use 16' boards
02:00 100 years ago a one by was one inch
02:30 Not near as much room under as he thought
03:35 Floor is bowing because the 4x4s are in the wrong place
04:30 Taken the floor up
04:45 We're going to put 4x4s on the floor joists to support the upper floors
05:05 Pre-drilling holes and securing it all with 3" screws
05:25 This wouldn't be possible in 1914 when the building was built
06:05 End of the job
🙏 Subscribe, 👍, it helps a lot!!
➤❓/ 💬: ask@straightarrowrepair.com
➤ Follow https://straightarrowrepair.com/pipf
➤➤I get a little for the channel-no charge for you if you use the links:
➤➤Shop Amazon https://amzn.to/3CxD1T4
➤➤Tool lists & recommended products🧰 https://straightarrowrepair.com/0lvf
➤➤Services We use
➤➤MORNINGFA·ME https://morningfa.me/invite/StraightArrowRepair
➤➤A2 Hosting http://www.a2hosting.com/refer/140244
➤➤Tubebuddy https://www.tubebuddy.com/StraightArrowRepair
➤➤Apsumo http://fbuy.me/v/philbridges
➤➤VidIQ: https://vidiq.com/straightarrowrepair
#floorsupport, #floorrepair, #woodenfloor
Transcript:
Hello, here we are with another problem that we're trying to take care of. This is a 106 year old building. First use was the World War One draft board, 1914. Anyway, the weight on this wall was so heavy that it did something to the floor, if you notice, the floor’s got a pretty good size hump, say three or four inches goes all the way down here, pretty thick floor, and we're going to cut over here and make a doorway that you can get rolling in and out.
Because there's no way to get under here. We'll see what we got. So we'll mark out the doorway area and and we'll cut a door that will fit. I need to make sure I can get pretty good sized boards say, 16 foot. So that's why I chose to be right here. This is 1012, so I can almost hit 16 foot.
I go all the way to right here. I want like a four foot area. So, we’re going to mark maybe from this are here to straight you go about a foot and then go four foot. And that way we get longer boards, beams in here. So first thing we do is measure the width of this walkway, which is quite thick. It is straight up one and an eighth inches.
So a one inch then, was one inch and more. Let’s see how far down, it doesn't look that's very far down, not very far down to dirt. Oh, I was thinking there's going to be a lot more room. Well, now we can tell where the floors joists are. And go from there.
So what we determined was the floor joists and moving, not moving, the floor covering, which is actually an inch and an eighth thick is moving because these 4x4s, they put them in with no idea that they needed to sit on top of the floor joints. So all the weight sitting in between the floor joists is here, and it's right here. And it was kind of...
The floor joists are not particularly running square and there's no support through the middle here. So what we're going to do is cut the floor out here to here. We're going to support underneath that side because we can reach it and we're going to put support down through the middle and we'll probably put some support on this side. And then I'll talk to the owner and see if he's okay with me moving the post where it sits on the floor joists. Getting another post, and putting it there. That would probably support a lot of weight.
Now, we've taken the floor up and we found out, like I said before, that the 4x4’s are in the wrong place, are in between the floor joists. We're going to end up putting 4x4 on the floor joists, here and over there.
And before we do that, we're going to support a line of blocks from between the 4x4s here and along that side and along this side, just because we can, well, we'll make things better. So that's what we're doing. We're digging it out. We're going to wedge it up tight.
We're pre drilling holes after wedging up everything and blocks. We’re pre-drilling the holes into this hardwood. And then we're putting three inch screws. Which it did not have. It just had one nail on each end tongue groove to hold it together. So we're making things better. Not the same as it was. In 1914, they didn't have battery power, didn't have very much in the way of screws. So this would have been something that really wasn't possible. You need a pry bar there?
Probably, yeah. But we have one over here. Did we find a board to fit that Tim? I sure did. But I was going to say who knows where it went. There it is. Ok Drew.
Everything is fastened now we put in a new 4x4s, where... On the top of the floor joists. So, it won't let the floor buckle up. We put two of them because both of those 4x4s were in between floor joists. And it was buckling up the floor, all the floors are now fastened with screws and all in this area anyway.
36
views
Complete Covering Ductwork on A Budget
Here Phil's cleaning and dressing up some ductwork on a budget. Using metal roofing materials to replace what the customer had.
⏱️⏱️Chapters⏱️⏱️
00:00 Owner asked us to do something better than what they have
00:15 The idea was to prevent animals and weather from getting on it
00:30 Several places the animals got in anyway
00:45 Decided could keep the plywood, keep a budget
01:15 We're a way into the project
01:30 Fastened metal all around
01:45 Working on the ductwork
02:10 covering up the front now that all ductwork is sealed up
02:30 Everything is sealed and covered up
02:50 Now, they have something that will last a while
03:05 And will improve property value
🙏 Subscribe, 👍, it helps a lot!!
➤❓/ 💬: ask@straightarrowrepair.com
➤ Follow https://straightarrowrepair.com/pipf
➤➤I get a little for the channel-no charge for you if you use the links:
➤➤Shop Amazon https://amzn.to/3CxD1T4
➤➤Tool lists & recommended products🧰 https://straightarrowrepair.com/0lvf
➤➤Services We use
➤➤MORNINGFA·ME https://morningfa.me/invite/StraightArrowRepair
➤➤A2 Hosting http://www.a2hosting.com/refer/140244
➤➤Tubebuddy https://www.tubebuddy.com/StraightArrowRepair
➤➤Apsumo http://fbuy.me/v/philbridges
➤➤VidIQ: https://vidiq.com/straightarrowrepair
#ductwork #roofover #metalroofing
Transcript:
Hey guys. This is a project that somebody evidently several somebodies started and the owners asked me to see if I can figure out a better way to do this. But uh, they put a roof over the ductwork. And the idea was to keep animals and the weather off of it and of course they didn’t do the shingles. Any metal on there. And then the animals got in there anyway. This area and ductwork there’s several places where the animals climbed in throughout. So we're going to take this down, do something different, and you'll watch this as we do that.
So what we decided is we can keep the plywood. And I saved the guy a lot of money. We're going to put a metal here, metal here, metal here. And so we're going to have to take apart one of those rafters that they used and to fill in this area. We’ll have something to screw to. And it's getting his problem, taking care for a budget close to bankruptcy. So that's what we're doing.
Well, we come a long ways. We’re putting metal, after we cut the front off. What we've done is moved one of the rafters that was on the front near here, put a little bit of wood in here.
We’re fastened metal on the side and we're putting metal on the roof put a ridge cap. We'll take you through it as we go. But we’re going to have to go inside before we close this up and wrap up the duct work so we won't finish it right away. But we're going to get we're going to finish it today.
So now, we're now we're getting all the ductwork sealed up. There's no exposed pipes or anything. Everything's wrapped up. All the edges are that insulation is sealed with foil type. And there's a lot of problems all the way through there, underneath. So we're getting there now. We'll be covering up the front of this and it won't be particularly high dollar because I'm trying to keep us on budget, but it will look way better than it did.
Profile is the best side. So anyway, the metal makes it look a lot better. If you notice everything is kind of square. It’s now. Animal proof, probably person proof. That would have been a great hide-hole for a homeless person. Animals made a mess of all the ductwork. We spent hours sealing that all up, but now it's got something that is going to last for a while.
Everything's going to be appraising for better. So whenever the appraisers come out to say hey, this property looks like it's worth this much. Doesn't look as bad as what they had before. Frankenstein, “It’s ALIVE!!” kind of thing. So, here we are on a budget. I'll probably charge him $200 for the materials and and then labor and then more. We'll have a better situation. We can go to the bank with.
21
views