Build a DIY Water Filtration Station
HOW TO BUILD A GRAVITY FED FIELD EXPEDIENT WATER FILTRATION PROCESSING STATION.
Whether being prepared for summer storm season or a wilderness outpost, setting up a semi-permanent DIY water processing station can take a lot of the effort out of keeping fresh safe water available for you and your crew.
Materials Required:
- 1 Two-Liter Soft Drink Bottle
- Large Capacity Container (clean water. we used a 89 ounce Orange Juice container)
- Any size container or cup (dirty water. We used a 1.4 liter Nalgene bottle)
- 12 Feet of Small Diameter Cord
- Black Marker
- Duct Tape
- Scissors
- Hole Punch or Sharp Knife/Point
Knots Required:
- Overhand Knot
- Stopper Knot (Double Overhand Knot)
- Offset Overhand Bend
- Two Half-Hitches Knot
- Tautline Hitch
Time Required: About 15 Minutes
Step 1: Mark a cut line as close to the bottom of the bottle as possible.
Step 2: Mark three punch points at approximately 120 degree intervals on the 1 liter bottle 1 inch below the cut line on the bottom of the bottle.
Step 3: Punch a hole with the nail/punch at the marked points. Use one arm of the scissor to increase the size of the hole and round it to a size slightly larger than your cord. BE BERY CAREFUL not to cut too big of a hole or yourself!
Step 4: Cut the bottom off the bottle as close to the bottom as possible.
Step 5: Put a wrap of duct tape around the edge of the bottle. This will provide additional rigidity for the bottle, cover the edge of the bottle to prevent scrapes of cuts and reinforce the anchor points. Ensure you’ve made holes in the tape where your punched holes are located.
Step 6: Cut three lengths of cord about 18 inches long. Secure all three loose ends together with an Triple Overhand Bend (really just an overhand knot with three cords). Secure one end of each piece with a Double Overhand Knot. Feed the loose end of each cord from the OUTSIDE of the bottle through each hole. .
Step 7: Attach the end of the remaining cord to the bottle and cord by tying two Half Hitches around the overhand knot made with the three 18” pieces of cord.
Step 8: Suspend the soft drink bottle, neck down, from a hook, shelf, tree limb or pot rack like we did.
Step 9: Attach your Dragoon Unlimited Lancer Mini Survival & Backpacking Water Filter to the end of the soft drink bottle. Use the taunt line hitch to adjust the height of your processing station to the container you’re using.
Step 10: Position the processing bottle and filter inline with the Clean Water Container. We used a reused an OJ Bottle, due to its size and the mouth is the perfect size to receive the DU Mini Water Filter.
Step 11: Add water to your processing station and let gravity do it work.
NOTES:
A. You’ll be able to filter approximately 1 liter of water every 7.5 minutes or 8 liters an hour with this method.
B. While you can filter directly from an uncut bottle, due to suction created by the water leaving the bottle, you’ll have squeeze the bottle which, while a faster way to process water, it take effort and energy you could spend doing other things.
C. Marking you CLEAN and DIRTY water containers helps avoid cross contamination. ALWAYS use t he same containers for each purpose
D. Be careful not to overfill your processing bottle attached to the filter, or you’ll have to do a “quick change” bottle swap in progress or you can just remove the filter quickly and place the attached rubber cap on it.
E. By using standard/universal connections the DU Lancer Filter allows you to use items you have at the house or can readily procure. This allows you to utilize “dual use” items such as OJ containers and soft drink containers rather than spending $20-50 on proprietary connections and containers.
#dragoonunlimited
-
 5:25
5:25
Practical Preparedness
4 months agoBuild DIY 5-Gallon Berkey Water Purification System
51 -
 23:34
23:34
PurposeDrivenHomestead
1 year ago $0.06 earned$50 DIY Berkey Style Water Filtration System 👀👀👀
4391 -
 9:26
9:26
Survival Dispatch
5 years ago2019 Updated Water Filtration System
44 -
 0:40
0:40
BattlBox
11 months agoBuild Your Own Water Dispenser: Easy DIY Project
21 -
 0:59
0:59
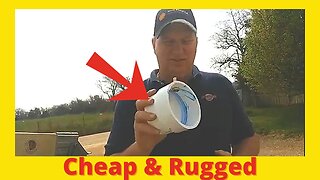
WaterFilterGuru
18 days agoHow to make a DIY Water Filter SHORT
5 -
 37:37
37:37
CountryRoadCure
2 years agoBest way to get clean water | DIY Water Filter Install | Couple Builds Dream Home In The Forest
127 -
 8:22
8:22
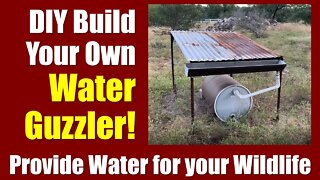
Apache Ranch
3 years ago💧Build Your Own WATER GUZZLER! ♻ Provide Supplemental Water for Wildlife ● DIY & Lasts a Lifetime
18 -
 8:29
8:29
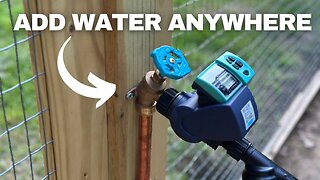
Organic Backyard Gardening
7 months ago $0.18 earnedAdd a Water Spigot Anywhere In Your Yard, Extend a Hose Bib Water Faucet and Install Drip Irrigation
8522 -
 5:14
5:14
StraightArrowRepair
11 months agoHow To Make A Water Level To Relevel A House
68 -
 27:15
27:15
AquariumDomain
10 months agoHuge 4,500 Gallon DIY River Aquarium Build Progress and Wetland Bog Filter Build!
26