#4 Hook Not-A-Muddler #fishing #flyfishing #shorts #bassfishing #redfishonfly #bass #trout #flytying
Tiemco 811S
Danville Monofilament Thread
Hareline Painted Dumbbell Eyes - Yellow, Large
Hareline Extra Select Craft Fur - Tan
Hareline Variant Neck Hackle
Loctite Super Glue Brush-On Superglue
Hareline Dyed Deer Belly Hair
Step one:
Start your thread and attach your Dumbbell Eyes. Create a thread bump about 1/3 of the way back on the hook shank and tie your eyes in using a series of figure-8 wraps. Secure your Dumbbell Eyes with Superglue to add durability to the fly.
Step Two:
Select a chunk of Tan Craft Fur, strip out the short fuzzy fibers, and tie it on top of the hook shank. Measure the Craft Fur so it extends roughly two hook lengths beyond the bend of the hook. Tie it in right behind the eyes and wrap the thread all the way back to secure the Craft Fur.
Step Three:
Grab a Hackle Feather that matches the general color scheme of the fly, tie it in, and wrap it forward. Tie it in right in front of the Craft Fur and wrap the stem up right behind the eyes with your thread. Then wrap the Hackle forward using nice, evenly spaced, open turns. Tie it off right behind the eyes and cut off the excess Hackle.
Step Four:
Tie in the Deer Hair collar. Cut a chunk of Deer Hair that's a little larger than the diameter of a pencil and strip out the errant fibers. Lightly stack the Deer Hair then measure the hair so it extends past the hook point and almost to the bend of the hook. Tie it in by catching the hair with two loose wraps then pulling down to flare the Deer Hair. Advance your thread through the Deer Hair in front of the eyes.
Step Five:
Grab another chunk of Deer Hair and spin it around the hook shank in front of the Dumbbell Eyes. Lay the hair down at a 45-degree angle, throw two loose wraps, then pull tight on the thread and spin the hair. After the hair is spun around the hook shank, throw another wrap or two around the hair to fully secure it in place. Advance the thread to just behind the hook eye and whip finish.
Step Six:
Start trimming the head of the fly by making a cut just off the hook eye and right on top of the Dumbbell Eyes. Be careful not to cut the collar of the fly.
Step Seven:
Invert the hook and make the same cut on the other side of the fly. Continue to trim the head of the fly so you create a rounded head without trimming the collar. Leaving the collar intact will help the fly push more water and have a larger profile.
Step Eight:
After the initial cuts are made using a razor blade, continue trimming the fly with scissors. Take out the hard edges of the fly and make sure it's well-rounded and trimmed nicely. Add Superglue to the thread wraps to reinforce the fly.
#saltwaterflyfishing #flyfishing #flytying #catchandrelease #fishing #tarpon #flatsfishing #tarpononfly #saltwaterflies #bonefish #saltwaterfishing #permit #permitonfly #bonefishonfly #snookonfly #snook #redfish #flyfishingtravel #tarponflies #flyfishingaddict #bonefishflies #redfishonfly #flyfishingjunkie #permitflies #snookflies #crabflies #flytyingjunkie #streamartdesigns #flyfishingnation #streamartcompany
#flyfishinglife #saltwaterfly #crabyflex #saltwaterflytying #fishinglife #flyfish #fish #flytyingaddict #redfishflies #flyfishingphotography #seewhatsoutthere #flugfiske #onthefly #thetugisthedrug #hav #sightfishing #ahrexhooks #orvisflyfishing #tightlines #inshorefishing #outdoors #trout #fluefiske #saltwater #tarponfishing #seatrout #bonefishing #simmsfishing #bassfishing #skinnywaterculture
-
 1:51
1:51
KillerFuzz
1 year ago#4 Hook Squimpish Hair Winter Minnow #fishing #flyfishing #bass #bassfishing #shorts #flytying #fish
64 -
 2:38
2:38
KillerFuzz
1 year ago#4 Hook Deceiver #shorts #flyfishing #fishing #fish #flytying #bass #trout #fishinglife #catch
95 -
 16:16
16:16
Michigan fishing videos
3 years ago $0.01 earnedFathers Day Crappie Fishing 2020 / Michigan Crappie & Big Largemouth Bass Fishing With Speck Minnows
197 -
 16:17
16:17
Hardman Fishing Adventures
1 year ago $0.14 earnedFly Fishing for Beginners || 5 Things I Wish I Knew When I Started!
9278 -
 15:19
15:19
Michigan fishing videos
1 year ago $0.02 earnedWinter Steelhead Fishing In Michigan / Steelhead & Trout Smack Down! Float Fishing Jigs Beads & Bags
105 -
 24:27
24:27
Michigan fishing videos
1 year agoBrown Trout Smack Down Part 2 / Brown Trout & Steelhead Fishing With Beads / Centerpin Float Fishing
151 -
 0:18
0:18
Michigan fishing videos
1 year agoBrown Trout Caught and Released #shorts #trout #troutfishing #browntrout #browntroutfishing #fish
1191 -
 9:55
9:55
Michigan fishing videos
3 years agoFloat Fishing For Trout With Skein / Brown Trout Fishing And Rainbow Trout Fishing Videos
154 -
 6:46
6:46
Michigan fishing videos
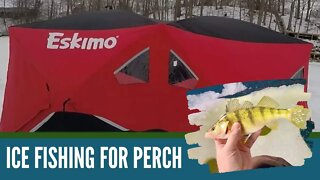
3 years agoIce Fishing For Perch / Eskimo Fatfish Shanty / Ice Fishing Michigan / Rainbow Lake Ice Fishing 2021
237 -
 18:33
18:33
Michigan fishing videos
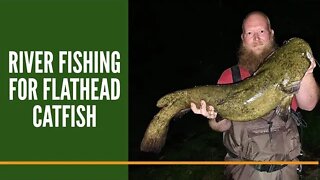
3 years agoRiver Fishing For Flathead Catfish + Channel Cats, Bass & Carp / Flathead Catfish Fishing Michigan
31