Next level DIY Penny Table
In this video, I'll show you how to make a one-of-a-kind floating coffee table wrapped with pennies.
Materials used
• Lots of pennies
• Epoxy resin kit - https://amzn.to/3zhukwF
• Mixing bucket - https://amzn.to/3JlF8i6
• Silicone brush - https://amzn.to/3bjzRLo
• Battery-powered LED light strip kit - https://amzn.to/3BusR95
• Rechargeable battery pack - https://amzn.to/3vvxv2L
• 3/4in plywood sheet
• Sheathing Tape - https://amzn.to/3PQJdNM
Tools used
• Drill - https://amzn.to/3OGqcfz
• Nail gun - https://amzn.to/3OHe3GZ
• Torch - https://amzn.to/3JlF8i6
• Heat gun - https://amzn.to/3Jpa2WU
• Hot glue gun - https://amzn.to/3Bqghrq
• Orbital Sander - https://amzn.to/3BKsDuP
• Sandpaper -
• Woodworking router - https://amzn.to/3JgBxlc
Coffee table dimension
Table dimensions
(1) Tabletop (25inx37inx3/4in)
(2) Long side (37inx7inx3/4in)
(2) Short side (25inx7inx3/4in)
(4) Base (5inx5inx3/4in)
(4) Base support (5-5/8inx3-1/2inx3/4in)
(12) Wood bracket parts (2-1/4inx2-1/4in)
Base dimension
(2) Long side 16inx12inx3/4in
(2) Short side 10.5inx12x3/4in
(2) Mount surface 10.5inx3inx3/4in
Steps overview
Step 1.) Build a table, paint it white or the color of choice.
Step 2.) Apply a coat of epoxy, and let harden.
Step 3.) Then build up the epoxy on all sides.
Step 4.) Sand the table down and exam to see if all pennies are covered.
Step 5.) Pour one final layer of epoxy.
Step 6.) Add LEDs to the inner frame
Step 7.) Build, paint the base and Attach the base and exp
********** Support my work **********
My Woodworking Plans: https://gumroad.com/diycreators
Help me make more Video: https://www.patreon.com/diycreators
YouTube: Subscribe & "RING the Bell": http://bit.ly/1PtWJEd
Instagram: https://instagram.com/morediycreators
Pinterest: https://www.pinterest.com/diycreators/
-
 13:50
13:50
DIY Creators
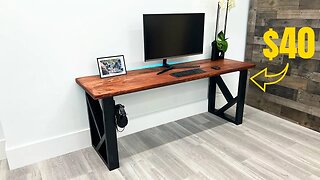
5 months agoDIY Desk for under $40 - How to make
151K27 -
 11:26
11:26
Blue Siesta ASMR
1 day agoBETWEEN LIFE AND DEATH IN CANCUN
14.3K8 -
 15:36
15:36
Landed Fishing
1 day agoCatching Tarpon with Crab in Boca Grande! The Silver King Capital of the World New Fishing Gear 2024
14K1 -
 6:28
6:28
JoBlo Horror Originals
1 day agoWe Remember Roger Corman
6.37K2 -
 5:29
5:29
Michael Heaver
1 day agoDutch Finally Make ASTONISHING Decision
15.5K19 -
 30:42
30:42
Southwest Mushrooms
1 day agoMushroom Mycelium Tissue Culturing in Liquid and Agar Media | Southwest Mushrooms
11.9K -
 3:47
3:47
tksgarage
1 day agoTim Kuniskis Out As Dodge CEO!
9.94K3 -
 27:52
27:52
The Bitcoin Family
1 day ago $0.01 earnedBITCOIN 66K, NEXT TARGET IS CLEAR!!!
8.1K7 -
 12:06
12:06
Crypto Crew University
1 day ago $0.02 earnedWARNING: BITCOIN JUST ENTERED RED ZONE ON WAVE TREND – DO THIS NOW
5.62K -
 56:53
56:53
LFA TV
15 hours agoRenata Moon | UNCOMMON SENSE IN CURRENT TIMES | 5.18.24 @5pm EST
21K23