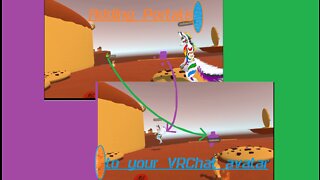
Adding a High Five to your VRChat avatar using the VRChat Contacts system.
This video will demonstrate the basics of VRChat's Contacts system by walking you through the process of adding a "high five" feature to your avatar.
We'll start by adding a Contact Receiver.
>Right click your avatar in the Hierarchy.
>Create Empty.
>Name this object "High Five".
>Click the High Five object to bring it up in the Inspector.
>Click "Add Component".
>Search for "Contact Receiver" and add it.
VRChat's Contacts system uses two components: the Sender and the Receiver.
The Receiver is the component that will interact with your code and animations, triggering changes to various Parameters when they're activated through contact with a Sender component that has at least one matching tag assigned to it.
The Sender is used only to activate the Receivers. They can be given custom tags, which are referenced when the Sender and Receiver touch in order to decide whether or not to trigger the Parameter attached to the Receiver.
Hopefully, that brief explanation wasn't too convoluted and confusing; seeing it in action should help to clear it up, so let's continue.
>Click "Add" under the "Collision Tags" section.
>Click the drop-down menu that says "Custom", and change it to "Hand".
This will make it activate any time a Sender with the Hand tag touches it. However, since it will be attached to our own hand, this current setup will make it trigger immediately and perpetually, so we need to prevent that.
>Uncheck the box that says "Allow Self".
Now, we make it trigger a Parameter.
>In the Parameters field, type in "High Five".
We want the high five to only activate when you really slap another person's hand, not just softly touch it.
>For Contact Type, click the drop-down and select "On Enter".
>In the Velocity field, change the number to 0.5.
I haven't done enough experimentation to tell you what *exactly* this number means in terms of calculation, but this value seems to work for me.
Lastly, we need to attach it to the avatar's hand.
>Click "Add Component".
>Search for "Parent Constraint" and add it.
>Click the + button underneath the "Sources" box.
>Expand your avatar's armature in the Hierarchy until you find whichever bone corresponds to your hand. In my case, it's actually the Wrist; generally speaking, it will be the Parent bone to your fingers.
>Click the High Five object.
>Click and drag the Hand bone into the "Source" field in the Parent Constraint.
>Click the "Zero" button.
>If necessary, adjust the Radius and Position until the sphere in the viewport comfortably fits in your avatar's hand.
As an extra note, you can actually place the bone in the Contact Receiver component's "Root Transform" field, and the receiver will follow that bone as though it were attached to the bone. However, we're using the Parent Constraint method so that we can attach the audio to this same object.
We need a slapping sound that will trigger when the high five occurs. I've linked one in the description that you can grab, but you can use whatever sound you like.
( https://freesound.org/people/oldhiccup/sounds/567605/ )
Once you've gotten a file ready, we can bring it into the project.
>At the top left of the Unity window, click "Assets".
>Select "Import New Asset".
>Locate the audio file you want to use and click "Import".
>Click High Five in the Hierarchy.
>Click "Add Component".
>Search for "Audio Source" and add it.
>Click the circle to the right of the "AudioClip" field.
>Search for the file you just imported, and add it.
The default Audio Source settings will emit this sound to the entire world. While that is indicative of a truly epic high five, it's likely to be disruptive, and the lack of a reverberating echo effect would fail to truly convey its world-quaking intensity. That was a joke. I apologize.
>Set the "Spatial Blend" slider all the way to 3D on the right side.
>Expand the 3D Sound Settings.
>Click the drop-down menu and change it from "Logarithmic Falloff" to "Linear Falloff". I don't know why, but Logarithmic Falloff makes the audio *extremely* quiet.
>Set the maximum distance to 2.
>Lastly, disable the Audio Source component so that it doesn't play as soon as the avatar loads. We'll turn it on via the animation that we're about to make.
That's all of the object work done. Now we can get started on the animation; we only need one, and there's very little involved with it.
>Right click in Unity's file explorer.
>Create, Animation.
>Name this animation "high five".
>Click and drag "high five" onto your avatar in the Hierarchy.
>Double click "high five" to bring up the Animation window.
>>If you haven't already, I recommend dragging the Animation tab into the spot beside the Project and Console tabs to make it easier to access.
>Click your avatar in the Hierarchy to make it the focus of the Animation window.
>Select "high five" from the drop-down menu at the top-left of the Animation window.
>Click the Record button.
>Click the "High Five" object in the Hierarchy.
>Scroll down in the Inspector, and activate the Audio Source component.
>In the Animation window, set the active Frame to 60 using the number field to the right of the Play and Record buttons.
>Click the checkbox here to have the animation turn off the Audio Source at frame 60. This is the one-second mark, which gives the sound effect enough time to play fully before being shut off.
>Click the Preview button to stop recording and stop previewing.
Final stretch, just need to set up the Animator and we'll be ready to go.
>Click your avatar in the Hierarchy.
>Scroll down in the Inspector until you find the "Playable Layers" section of your VRC Avatar Descriptor component.
>Double-click the field to the right of "FX" to bring up your avatar's Expressions Animator.
>Click the Parameters top near the top-left.
>Click the + button, and add a Bool parameter.
>Name this new parameter "High Five", or whatever name you set in the Parameter field of your Contact Receiver earlier.
>Also add "GestureRight" as an Int parameter if it's not already in the list. You can use GestureLeft instead if you'd prefer to high five with your left hand.
>Click the Layers tab.
>Click the + button to add a new layer.
>Name this layer "High Five".
>Click the gear icon on this layer, and set its Weight to 1.
>Right click in the grid to the right.
>Create State, Empty.
>Click this new State, and use the Inspector to name it "Off".
>Create another new State.
>Name this one "On".
>Right click the "Off" state, Make Transition, to On.
>Expand the Settings in the Inspector.
>Deselect "Has Exit Time".
>Set "Transition Duration" to 0.
>Click the + button under "Conditions" two times, as we'll want two different parameters to be true for the sound effect to activate.
>Set the first Condition's drop-down menu to "High Five", and set the drop-down beside it to "True".
>Set the second Condition to "GestureRight", "Equals", "2". The number 2 corresponds to the open hand gesture. By adding this, you ensure that the sound only activates if your hand is open for the high five.
>Create another Transition from On to Off.
>Set the Exit Time to 1, and the Transition Duration to 0. This allows the animation to play all the way through before it Transitions back to the Off state.
>Lastly, select the "On" state, click the dot to the right of the "Motion" field, search for the "high five" animation, and add it.
Unlike most features, parameters activated via Contacts don't need to be included in your avatar's synchronized parameter list. By that same token, you don't need to do anything with your Expression Menu, either. Which means, we're done! You can use Build & Test and get someone else's help to test if it's been set up properly, but bear in mind that the other person won't hear the high five until you've actually uploaded the avatar.
For a little bit of added fun, you could add "Head" to the Receiver's list of Collision Tags in order to deliver some face slaps, as well.
We didn't use any Contact Senders in this project, but I assure you that they're very easy to work with. They're laid out almost identically to the Contact Receiver, with the exception of the Receiver's Parameter control. You can add whatever Collision Tag you wish to the Contact Sender, and use it to activate any Contact Receiver with the same tag, even if that Contact Receiver is on someone else's avatar. Use this for custom interactions with a friend's avatar, like a pair of Contacts using the "Sword" tag to take off a limb! Or something less violent if you're so inclined.
Enjoy high-fiving your friends! If you want to make your high fives more interesting with explosions or other particle effects, or want some other feature added, I do both commissions and tutoring. You can reach me via my Discord channel, which I've linked in this video's description ( https://discord.gg/aFpkcXxra7 ), or contact me at ToolboxMotley#0372.
-
 17:11
17:11
ToolboxMotley
1 year ago $0.01 earnedHow to add portals to your VRChat avatar.
455 -
 6:22
6:22
AI Tools Arena
1 year ago $0.01 earnedAI Video Generator : Create Realistic Avatar Video with ChatGPT
136 -
 0:28
0:28
Freakoverse
1 year agoAdding Your Name On Your VRChat Avatar
4 -
 5:04
5:04
AI Tools Arena
1 year ago $0.01 earnedText to Video AI : ChatGPT To Video Generator | AI Talking Avatar
200 -
 14:52
14:52
Learn to Teach Online with Dr. Deutsch
11 months agoHow to Create an Avatar and Use Virtual Reality
7 -
 5:39
5:39
Alarm Grid Home Security DIY Videos
10 months agoTotal Connect 2.0 - Creating a Scene Using a Phone
10 -
 7:06
7:06
Muzammil VagoZz TRICKS
3 years agoHow To Create Your Own Avatar On Facebook
22 -
 3:35
3:35
SigmaSuccour
4 years agoPlugging MV #19 Displaying Speech Balloons Over Characters | The BIG Red Button
5 -
 0:29
0:29
Channel
1 year agoHow to make an avatar on facebook messenger?
5 -
 17:57
17:57
Olabrass
11 months agoText to Talking Avatar for YouTube Video | Step-by-Step Tutorial
22