Tips for Adding Electricity to a basement (How to Finish a Basment Ep. 3)
Here are my Tips for adding electricity to a basement. In this video, I will show you how I ran electricity in my basement as part of my basement finishing process. This video will outline how to install electrical outlets, how to installed recessed lighting, how to install an LED mirror, how to install light switches, and many other electrical items related to finishing a basement.
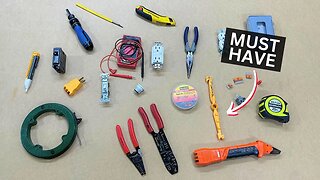
Here are a few of the tools you will need to install electricity in your basement 🛠🧰:
- 12/2 Romex Cable: https://amzn.to/3jsc6Vd
- LED Recessed Lights: https://amzn.to/3vg5bRr
- Wire Strippers (High End): https://amzn.to/3FWEDto
- Wire Strippers: https://amzn.to/3WIVmXX
- Chalk Line: https://amzn.to/3YGqjxK
- Hammer Drill: https://amzn.to/3G8tuqP
- Electrical Staples: https://amzn.to/3YRBIeq
- Electrical Tape: https://amzn.to/3ve5hZJ
- Recessed Light Mounting Frame: https://amzn.to/3veafWH
Below are a few of my tips and tricks for installing electricity in your basement. Again, this is for entertainment purposes only and all electrical work must be performed by a licensed electrician.
1. Establish outlet receptacle hight and spacing
2. Drill holes through studs and joists for electrical cable
3. Installed Recessed Lighting Electrical Boxes
4. Install Electrical Switches
5. Install a dedicated circuit for each room (optional)
6. Staple and secure electrical cable according to code.
7. Install wire protection plates on studs.
8. Have licensed electrician perform electrical inspection
This is Episode 3 in my "How to Finish a Basement" Youtube Series. In this series, I will show you how to finish a basement (DIY) from start to finish. Below are the previous videos in the series:
Episode 1: How to Install Rigid Foam Insulation
https://youtu.be/Qt4mvnVrCpE
Episode 2: How to Frame Basement Walls
https://youtu.be/ERJxLOlUSz0
Be sure to subscribe and hit the notification bell so you don't miss any future videos that are part of the Basement Renovation Series!
Follow me on Instagram: https://www.instagram.com/atimprovements/
Check out my Blog: Atimprovements.com
Subscribe to my YouTube Channel ⬇️ https://www.youtube.com/c/AndrewThronImprovements?sub_confirmation=1
Check out my Website for additional DIY Content: https://atimprovements.com
▬▬▬▬▬▬▬▬▬▬▬▬▬
🎥 MY YOUTUBE GEAR
Camera (Iphone Max): https://amzn.to/3d5HxSo
Microphone (Maono Condenser Mic): https://amzn.to/3RCAb7N
Tripod: https://amzn.to/3Rz5Gj3
Mini Tripod: https://amzn.to/3Rvt2WM
Lighting: https://amzn.to/3d4QdZ5
▬▬▬▬▬▬▬▬▬▬▬▬▬
🛠🧰 TOOLS THAT I USE
Carbide Tipped Drill Bit: https://amzn.to/3S0hdIM
Tapcon Screws: https://amzn.to/3OxEWxh
Drill: https://amzn.to/3JICKkk
Tape Measure: https://amzn.to/3HaTWgE
Circular Saw: https://amzn.to/3BFotC4
Masonry Drill: https://amzn.to/36yP1JW
Level: https://amzn.to/3HowUDn
Hammer: https://amzn.to/35fIpiT
Chalk Line: https://amzn.to/3MwSDg8
Clamps: https://amzn.to/3HLqwpK
Drill: https://amzn.to/3JICKkk
Sawzall: https://amzn.to/3HcdeSI
Circular Saw: https://amzn.to/3BFotC4
Jig saw: https://amzn.to/3I6lcyd
Air Compressor: https://amzn.to/34TatJf
Framing Nailer: https://amzn.to/3JGpBYU
Roofing Nailer: https://amzn.to/3BEAuYF
Orbital Sander: https://amzn.to/34UwlUD
Bar Clamps: https://amzn.to/3JjFrJe
▬▬▬▬▬▬▬▬▬▬▬▬▬
Thank you so much for watching!
*All content on the Andrew Thron Improvements YouTube channel reflects my own opinions. ALL electrical work must be performed by a licensed electrician. Information presented in this video is for entertainment purposes only. Please seek out guidance of professionally trained and licensed individuals before making any decisions. Links in the description may be affiliate links.
-
 6:51
6:51
Andrew Thron Improvements
1 year ago $0.01 earnedDIY Basement Wall Framing (How to Finish a Basement Ep. 2)
93 -
 11:27
11:27
Andrew Thron Improvements
1 year ago $0.03 earnedBasement Drywall Tips and Tricks (How to Finish a Basement Episode 5)
3262 -
 38:53
38:53
EPro - Electric Pro Academy
2 years agoHow To Fix Low Basement Wires
34 -
 5:53
5:53
smaxwell1963
10 years ago $0.01 earnedHow to Finish a Basement Properly
8 -
 7:48
7:48
Top Homeowner
10 months ago $0.01 earnedTop 10 Essential DIY Electrical Tools for Homeowners
11 -
 10:15
10:15
James Biggar
3 years agoHow To Build An Electric Motorcycle Ep 2: The Fairing
34 -
 27:38
27:38
Electrician U
9 months agoHow to Wire an Electrical Panel - Good Workmanship
2.74K2 -
 5:57
5:57
EPro - Electric Pro Academy
2 years agoA Master Electrician's Site Prep - Part 4
4 -
 1:07:46
FlockFingerLakes
2 years agoLaying a 1000 FT. UNDERGROUND FIBER CABLE, Step-by-Step — Ep. 067
30 -
 4:00
4:00
The Greg Luchak Show
2 years agoEPS 74 - A 110 Year-Old Basement Renovation Part Two
22