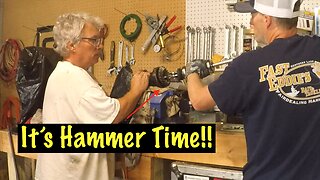
Johnson Outboard Lower Unit Crack Repair/Rebuild #1
This boat was in winter storage in a Wisconsin garage and the oil was never checked for water prior to winter setting in. The result was a cracked lower unit case the water that was in the lower unit froze and broke the case. Depending on where the break is in the case will determine to what extent, and if the case can be repaired. This repair does not run through the oil/water sealing area but is very close, though it does run into the snap ring area, I will not have to weld inside the case on this unit, but I will carefully polish the sealing area for the new o-ring to seal, this repair was very doable. You just have to take your time be careful, and think about what you’re doing before doing it, if it doesn’t feel right stop and think it through. Bottom line is a new lower unit case is not cheap, some models are no longer available, and I know a few people who have bought rebuilt aftermarket lower units and have had many problems with them. I cover all the steps without any sped up sections so the videos may seem long but everything is covered. I completed this work in the spring of 2016. Video #1 of the Johnson GT 150 lower unit crack repair/rebuild is on identification of the needed repair, removing the shift rod bolt, draining the lower unit, and removal of the lower unit. Some of what you will see done in this series of videos will be questionable to many, this is the second lower unit I have repaired in this same fashion, and both went on for many more years of service, and saved the owners in the $1000.00 range, if you attempt this I cannot stress enough do not force anything, take your time. You will need to buy the parts for the rebuild, all seals gaskets water pump etc will need to be replaced so you will have to locate and identify the model and serial numbers of your specific outboard. After you have that information you will need to search the best parts outlet (if you can buy the original manufacturer part)/tutorial videos, and exploded view diagrams, the link below is a good website for information and tooling as you will also have to purchase some tools to complete the task. http://www.sterndrive.info/outboardmotor/index.html
Read the description of this video it will give you some useful information and a link to look at some exploded views, parts, and tools you will need for this project.
The trickiest part about removing the lower unit is removing this bolt that holds the shift rod it is inside the engine cover.
These are the tools you will need to remove/re-install the bolt.
The red arrow is where you need to look to locate the bolt.
This red arrow is the bolt you are looking for.
I do not show the actual process of bolt removal, you would not see in there as I could not fit the camera, tools, and my head all in the same space.
Leave one of the four lower unit attaching bolts in about four turns so when the rest of the bolts are removed the lower unit does not drop.
I am taking the last bolt out now while holding the lower unit in place. I hit a tight section of the bolt and need a wrench, be right back.
That’s it the lower unit is removed see you in video #2. Please like and subscribe.
Great information including videos and exploded views of many different OMC models: http://www.sterndrive.info/outboardmotor/index.html
https://www.youtube.com/@HRIservicesllcSturgeonBay
https://www.instagram.com/hri_services/
https://www.facebook.com/HRIServicesllc/
https://www.millerwelds.com/
-
 8:40
8:40
HRI Services
1 year agoJohnson Outboard Lower Unit Crack Repair/Rebuild #2
125 -
 10:52
10:52
HRI Services
1 year agoJohnson Outboard Lower Unit Crack Repair/Rebuild #7
59 -
 11:41
11:41
Fixin2Ride-Official
2 months ago02 Arctic Cat ZR 800 CC Rebuild Part 1 || I Can't BELIEVE the Damage
13 -
 3:00
3:00
Nthefastlane
6 months agoFixing A Water Leak With JB Water Weld On A Old Aluminum Jon Boat (It Really Worked!)
201 -
 20:44
20:44
HawksDIY
1 year agoMercury 225 Optimax Lower Unit Repair Part 2 DIY #diyrepair #mercuryoutboards #mercurymarine
78 -
 13:39
13:39
SeidelRanch
3 years agoTesting Out My JCB 208s After Rebuild | Low on Power? | SeidelRanch
1631 -
 11:12
11:12
Jose's Extreme DIY
7 months agoEpoxy Resin Fiberglass Repair - Large Anchor Locker Hole - Boston Whaler Restoration Part 3
40 -
 12:29
12:29
Jose's Extreme DIY
7 months agoFiberglass Transom Repair - Boston Whaler 13 Restoration Part 5
16 -
 25:47
25:47
HawksDIY
1 year agoMercury 225 Optimax Lower Unit Repair Part 1 DIY #diyrepair #mercuryoutboards #mercurymarine
91 -
 26:40
26:40
Midwest Synthetic
1 year agoJeep Liberty Rear Axle and Pinion Seal Replacement - AMSOIL Severe Gear 75W-140 Synthetic Gear Lube
49