New Rain Water Collection Tank & Pallet Wood Home Heat
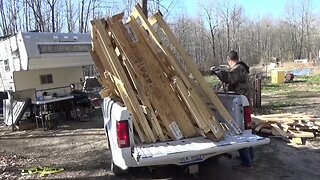
I am improving the rain water collection system in the off grid tiny home. Chris has been cutting up pallets for use as fuel to heat our tiny house on wheels this winter.
We are still cleaning up the off grid homestead this week. We hope to fully finish the project by the weekend. Plus we are making some improvements to the tiny house on wheels.
It was cold in the morning, about 50 degrees F, which was too cold to go out without a jacket but too warm to work with a jacket. So I fired up the log splitter and worked a bit on splitting fire wood for the tiny home.
I managed to split about two wheel barrow loads of fire wood before the drive belt flew off the machine, ending my work for now.
We are getting quite a nice stack of fire wood together this year. When all the trees are down in the area we are clearing I figure we will have about 10 years worth of fire wood put away.
Chris has been cutting pallet wood into pieces that will fit our tiny house wood stove. Someone in the comments is saying that nothing ever leaves the property and that we just move it around but that is not true. We are burning the pallet wood. This is mostly oak or other hard wood and is a good fuel source for off grid home heating.
With the trees gone I am getting some more early morning sunlight on the tiny home solar panels. I still have to cut a few more trees for maximum sunlight hours on the solar panels but for now we are seeing an increase in overall usable solar power for the tiny house.
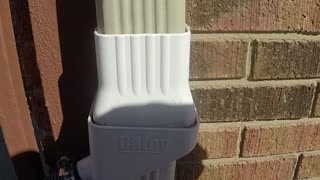
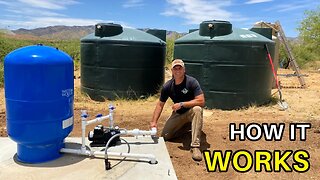
One improvement that we are making is to increase the total water capacity for the off grid tiny home. When I set up the plumbing in the rain water shed I left expansion room for more tanks. I had set a tank in place but never connected it because the tank had collapsed a bit.
I removed that tank and brought over a clean tank from our stash of 275 gallon totes. I put a bit of water and bleach in the tank and let it sit for a while. I rolled it all over to bleach the entire inside of the rain water tank.
Then I brought over a garden hose connected to my off grid tiny house RV water pump and pressure sprayed the inside of the tank to remove any little bits of algae that was growing in there.
Then I left it to let the bleach do its job for a while as I worked on the tiny house rain water plumbing.
I had never connected the second tank although I had the materials to do it. Now was the time for that.
I also brought over a pallet which seems to be perfect for the job. I cut out a slot for the IBC tank valve to rest through. I have discovered that the valve sits a little lower than the bottom of the tank and this is why the last tank collapsed on me.
A test tank fit perfectly in place.
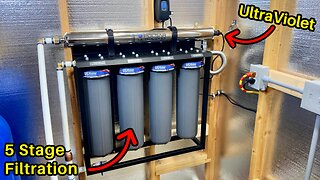
Inside the off grid rain water and battery shed I finished gluing the PVC plumbing pieces together which will connect the new rain water tank.
When that was done, I put the prepared pallet in place and then placed the new rain water collection tank on top. Then I connected the fittings. I am leaving it to rest a while for the PVC cement to cure though before I use it.
I want to put some bleach in the other tank and let it kill off any bacteria and algae in it. The sun has reached into the battery and water shed through the open door all summer and a little bit of algae has grown inside. I will bring over a spare tank of water to fill this one to the top and let the bleach do its job.
Then I will run some bleach water through the plumbing in the off grid tiny home.
And then I will fill the other tank with fresh, pure mountain creek water and open the valves to allow both rain water tanks to connect to one another.
Thanks for watching. Please Subscribe & follow my daily videos.
Troy
http://www.thedoityourselfworld.com
http://www.theoffgridproject.com
Note: Copying this video, in part or in full, is a violation of copyright unless the user has express permission from the owner. Violation of this copyright will be pursued to the fullest extent of the law.
-
 14:39
14:39
TheDoItYourselfWorld
8 years agoHomestead Work & Gray Water Recirculation System
40 -
 12:41
12:41
TheDoItYourselfWorld
8 years ago275 Gallon IBC Tote Rain Water Tank For The Off Grid Homestead
14 -
 6:46
6:46
Papa Bear Patriot
2 years agoRain water collection with tank heater
66 -
 8:52
8:52
Farming And More
3 years agoDIY Solar Water Heater. A Homemade "flat panel" COPPER COIL Solar Water heater
1261 -
 4:03
4:03
YourFishGuide
3 years agoFish Tank Heaters ~ WATCH BEFORE BUY YOUR HEATER
138 -
 19:39
19:39
Homesteadonomics
5 months ago $0.45 earnedWhole House Water Filter Install for my Rainwater Harvesting System
6.99K5 -
 14:21
14:21
Homesteadonomics
10 months ago $0.17 earnedPump House Tour of My Rainwater Harvesting System - How It Works
9.47K10 -
 17:59
17:59
Clarity Off-Grid
3 years agoInstalling our Propex HS 2000 HEATER in the HEAT of Summer//EP 10 OFF-GRID ProMaster Van Conversion
114 -
 15:02
15:02
PurposeDrivenHomestead
2 years ago $0.01 earnedSpring Sale on Big Buddy Heater (plus a fix for no fan models)
176 -
 18:40
18:40
Clarity Off-Grid
3 years agoNo Power! No Water!//EP 3 Seeking the Winter Sun in our Converted ProMaster Van 136
32