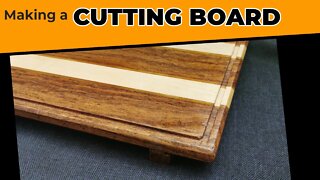
LARGE CUTTING BOARD
Order a Cutting Board!
https://hesswoodworks.com/
Walrus Oil
Use Promo code for 10% off: HESSWW
walrusoil.sjv.io/LPeeyL
Custom Branding Iron
https://www.custombrandshop.com/r?id=0nr5du
I made this cutting board mainly with Cherry wood. I added Walnut and Maple strips in the center. I put cardboard down on my table, so the glue would not drip on my table. I put the clamp on top of the cardboard. I lay the strips on the clamps and leave the first one upright. The reason I do this, is because I only glue one side, and the second piece will have the glue to connect the first and second piece together. I use Titebond 3 for my cutting boards, because the glue allows for longer set up time and the glue is waterproof. I spread the glue out using a silicone roller. I use K style clamps the Bessy brand. I put two clamps on top to try to prevent the boards from bowing. I scrap any extra glue before it dries because it is easier. I let the glue cure usually overnight to ensure proper strength. After I take the clamps off, I scrap the glue around the clamps. I send the cutting board through the planer. It usually takes about 8-10 time through the planer. I make one edge straight with the jointer, then I trim it to the width the customer wanted. This cutting board is 30 inches long, 16 inches wide, and 1.5 inches thick. I used my table saw sled to cut it to the right length. I use 80 grit on my drum sander to remove any chip out left from the planer. After the drum sander, I sand with 80 grit on my random orbital sander. Then I route the edges with a router with a chamfer bit. The next step is the juice groove. I had to modify my juice groove jig because my jig is only big enough to make cutting boards 24 inches long. I use a box bit to make the juice groove. I do the juice groove in two passes to prevent chip out, burning, or other mistakes. After the juice groove, I do the handle grooves. I was glad I had my handle jig large enough to make the handle grooves in this cutting board. I use the same box bit for both the juice groove and handle groove. I also do the handle groove in two passes. After the grooves, I sand the edges with 120 grit sand paper and a sanding block. Then I sand the rest of the board with 120 grit using my random orbital sander. Then I spray water on the cutting board to raise the grain. Raising the grain is a technique in woodworking to keep the finished product smooth. It is important to do this to cutting boards, because if the cutting boards are washed, they may get rough. After the cutting board dries, I burn my logo with a custom brand I got made. If you are interested in a custom brand, the link is above. Then I sand the edges and the whole board with 220 grit. I blow all of the dust and it is ready for the oil. I use cutting board oil, and the company is Walrus Oil. If you are interested in making your wood cutting board look like new, the link is above for the cutting board oil. I apply the cutting board oil, and let it soak in overnight. The next day, I wipe any extra oil off, and it is ready to ship. This cutting board is being shipped to California.
-
 4:58
4:58
saiful8802
2 years ago $0.01 earnedBest 5 Cutting Boards Review
130 -
 9:35
9:35
Raven Fine Woodworking
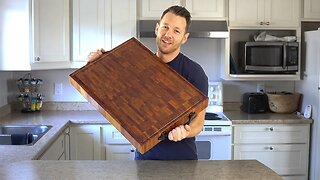
2 years agoMaking a Cutting Board
44 -
 29:26
29:26
RyanHawkins
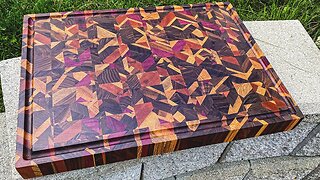
2 years agoBuilding Unique End Grain Cutting Boards
35 -
 5:36
5:36
RyanHawkins
1 year ago $0.01 earnedHow to Care for a Wood Cutting Board
22 -
 26:48
26:48
RyanHawkins
2 years agoBuilding 3D Patterned Cutting Boards
11 -
 10:01
10:01
Alexander Bros Woodworking
3 months agoMaking End Grain Cutting Boards All Parts
64 -
 24:04
24:04
RyanHawkins
2 years agoTurning Wood Scraps into End Grain Cutting Boards
882 -
 1:10
1:10
Alexander Bros Woodworking
4 months agoMaking End Grain Cutting Boards From Scrap Wood / Part 2
34 -
 13:36
13:36
Home Built Workshop
2 years agoNew to Woodworking? Build a Cutting Board | How to make a Cutting Board
1 -
 25:00
25:00
RyanHawkins
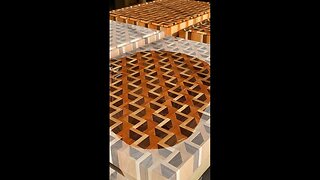
2 years agoHow It's Made - Optical Illusion End Grain Cutting Board
10