I Built TWO Epoxy River Tables - Here is Everything I learned (How to Build a DIY Epoxy River Table)
🛠 Tools and Materials Used to Build these Epoxy River Tables: https://www.amazon.com/shop/andrewthronimprovements/list/2XIHEHPD90M5B?ref_=aip_sf_list_spv_ons_mixed_d
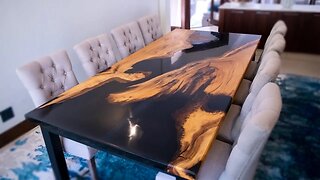
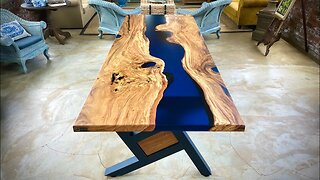
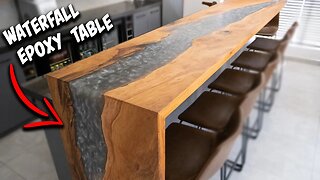
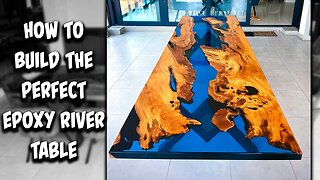
Learn How to Build a DIY Epoxy River Table with this DIY guide! I recently built TWO epoxy river tables as a complete beginner and I learned a ton. I am really happy with one of the live edge epoxy river tables and the other one is just OK. I finished one of the Epoxy River Tables using Tabletop Epoxy and I finished the other table with Rubio Monocoat. This video will outline every step of the DIY Live Edge Epoxy River Table building process from Start to Finish.
Here are the Tools and Materials Needed to Complete this Project:
- Thickset Epoxy: https://amzn.to/3Oqe852
- Tabletop Epoxy: https://amzn.to/3pWVhFr
- Rubio Monocoat: https://amzn.to/3Dr8cCM
- Table Legs: https://amzn.to/3Y54wQh
- Threaded Inserts for Table Legs: https://amzn.to/3K9ubBG
- CA Glue: https://amzn.to/3OqBgAn
To Build an Epoxy River Table, you will want to follow these basic steps:
1. Plan Out Your Epoxy River Table Project
Like any project, the first step in an epoxy river table project is to plan out the table size, layout, style, etc. I highly recommend that you spend some time on Pinterest looking at various epoxy river table designs to get inspired.
2. Purchase your Live Edge Lumber
A simple “Live Edge Slabs (my City)” search on Google should yield plenty of results for local live edge slab suppliers. However, I also recommend using Craigslist to find smaller, “mom and pop” lumber yards that will be able to sell you live edge slabs for a fraction of the cost.
3. Remove bark, dust, etc. from the live edge lumber
After purchasing your live edge slabs, you will often need to remove bark, dust, burls, soft sections, etc.
4. Cut your live Edge Lumber to Size
After purchasing your live edge slabs, you will need to cut/trim them to size base on your desired table layout.
5. Build the Melamine Table Form
Once you have cut your live edge slabs to the desired length and width, it’s time to build the “form” box for the epoxy. The “form” box for the epoxy river table is typically constructed using a 4’x8’ sheet of melamine.
6. Prepare For the Epoxy Pour
It is recommended that you cover the form with Tyvek tape/Tuck Tape since it will help to ensure that the epoxy does not bond to the form. Additionally, you will want to caulk the edges of the form to prevent the epoxy from leaking.
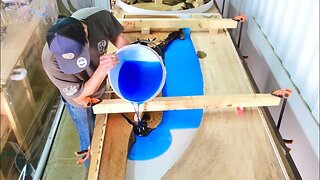
7. Mix the Epoxy and Pour
Mix the Epoxy according to the manufacturer’s recommendations in terms of mix ratio (resin:hardener) and based on the recommended mixing duration.
8. Allow the Epoxy to Cure
After pouring the epoxy and removing the air bubbles, you will need to wait anywhere from 2 hours to 72 hours for the epoxy to fully cure. The total cure time will depend on the epoxy type, pour depth, and temperature of the room.
9. Remove the Epoxy Table From the Melamine Form
After giving the epoxy sufficient time to cure, it’s time to remove the table from the melamine form.
10. Plane, Route, and Sand the Epoxy Table as Desired.
After removing the epoxy table from the form, it is time to perform the final touch-up work. This includes planing, sanding, and routing the edges.
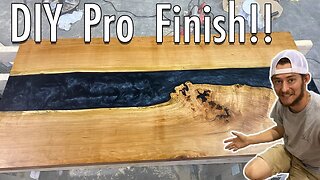
11. Finish the Surface of the Epoxy Table.
At this stage, the epoxy river table is nearly complete. However, you will almost always want to apply a protective finish coat to the surface of your table. A few of the most common epoxy table finishes are Tabletop Epoxy, Rubio Monocoat Finish, or Stain.
12. Attach the Table Legs
The final step in the DIY Epoxy River Table Project process is to attach the table legs. I ordered my table legs from Amazon and I attached them to the bottom of the table using threaded inserts and bolts.
Follow me on Instagram: https://www.instagram.com/atimprovements/
Check out my Blog: Atimprovements.com
Subscribe to my YouTube Channel ⬇️ https://www.youtube.com/c/AndrewThronImprovements?sub_confirmation=1
Check out my Website for additional DIY Content: https://atimprovements.com
▬▬▬▬▬▬▬▬▬▬▬▬▬
🛠🧰 TOOLS THAT I USE
Drill: https://amzn.to/3JICKkk
Tape Measure: https://amzn.to/3HaTWgE
Circular Saw: https://amzn.to/3BFotC4
Level: https://amzn.to/3HowUDn
Hammer: https://amzn.to/35fIpiT
Clamps: https://amzn.to/3HLqwpK
Drill: https://amzn.to/3JICKkk
Sawzall: https://amzn.to/3HcdeSI
Circular Saw: https://amzn.to/3BFotC4
Jig saw: https://amzn.to/3I6lcyd
Air Compressor: https://amzn.to/34TatJf
Framing Nailer: https://amzn.to/3JGpBYU
Orbital Sander: https://amzn.to/34UwlUD
Bar Clamps: https://amzn.to/3JjFrJe
▬▬▬▬▬▬▬▬▬▬▬▬▬
Thank you so much for watching!
*All content on the Andrew Thron Improvements YouTube channel reflects my own opinions. Please seek out guidance of professionally trained and licensed individuals before making any decisions. Links in the description may be affiliate links.
-
 11:52
11:52
DIY With Greg
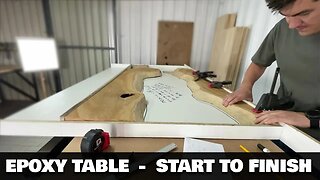
2 years agoBuilding an Epoxy Table | DIY
3 -
 23:56
23:56
Wood Rookie
8 months agoDIY Epoxy River Table Build
15 -
 22:15
22:15
DIY With Greg
2 years agoHow To Build EPOXY TABLE | START TO FINISH
12 -
 16:03
16:03
DIY With Greg
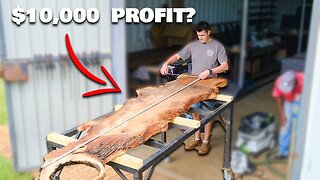
1 year agoI made $10,000 profit building this epoxy table...
7 -
 14:36
14:36
WoodWorkWeb
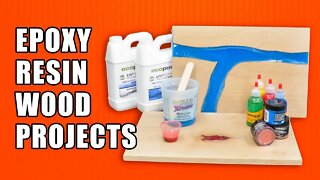
5 years agoA Primer to Epoxy Resin Wood Projects / Simple River Tables
23 -
 16:13
16:13
DIY With Greg
2 years ago$30,000 Epoxy Table Build
15 -
 18:30
18:30
DIY With Greg
1 year agoDIY Blue Epoxy Table Build
4 -
 27:14
27:14
GoodView Woodworks
3 years agoHow to Have a Professional Finish On an Epoxy River Table
4 -
 11:17
11:17
DIY With Greg
2 years agoDIY Waterfall Epoxy River Table | Fixing a HUGE MISTAKE
24 -
 21:21
21:21
DIY With Greg
2 years agoBuilding The PERFECT Epoxy Table | STEP BY STEP INSTRUCTIONS
10