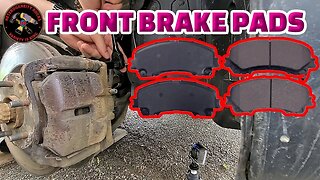
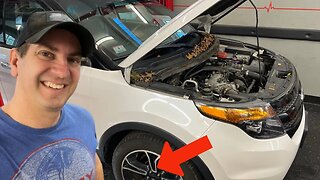
DIY Guide: Front Brake Pad and Rotor Replacement on 2011-2019 Ford Explorer
🔧 Ready to tackle your own brake maintenance? In this step-by-step tutorial, we'll guide you through the process of replacing the front brake pads and rotors on a 2011-2019 Ford Explorer. Save money on labor costs and gain the satisfaction of doing it yourself!
BUY New Ford Explorer Front Brake Pads and Rotors: https://amzn.to/3QWxQGT
BUY Penetrating oil: https://amzn.to/3smTP0l
BUY Caliber Pin Grease: https://amzn.to/479TIUK
BUY Anti Seize Lubricant: https://amzn.to/3FSjWzn
🛠️ Tools and Parts Used:
- Jack and Jack Stands
- Lug Wrench
- C-Clamp or Brake Caliper Tool
- Socket Set
- Torque Wrench
- Brake Cleaner
- Brake Grease
- New Brake Pads
- New Brake Rotors
🚗 Vehicle Compatibility: 2011-2019 Ford Explorer
📌 Step-by-Step Guide:
1️⃣ **Prepare Your Workspace:** Ensure your vehicle is on a flat surface. Use the lug wrench to loosen the lug nuts before lifting the front of the vehicle with a jack. Secure it on jack stands for safety.
2️⃣ **Remove the Wheel:** Completely remove the lug nuts and take off the wheel to access the brake components.
3️⃣ **Remove the Caliper:** Use the appropriate socket to loosen and remove the caliper bolts. Once free, suspend the caliper using a wire or bungee cord to avoid putting stress on the brake line.
4️⃣ **Remove Old Brake Pads and Rotor:** Take out the old brake pads and rotor. Use a C-Clamp or brake caliper tool to compress the caliper piston back into the caliper housing.
5️⃣ **Install New Brake Rotor:** Slide on the new brake rotor, ensuring it sits flush. Clean the rotor surface with brake cleaner to remove any protective coating.
6️⃣ **Install New Brake Pads:** Apply brake grease to the back of the new brake pads. Slide them into the caliper bracket, ensuring they align correctly with the rotor.
7️⃣ **Reinstall the Caliper:** Lower the caliper onto the new brake pads. Tighten the caliper bolts to the manufacturer's specifications using a torque wrench.
8️⃣ **Repeat on the Other Side:** Follow the same process for the other front wheel.
9️⃣ **Reinstall the Wheels:** Put the wheels back on and hand-tighten the lug nuts. Lower the vehicle, then tighten the lug nuts in a criss-cross pattern using the lug wrench.
🔧 **Final Checks:** Pump the brake pedal before driving to ensure proper brake pad seating. Check brake fluid levels and adjust if necessary.
👍 Congratulations, you've successfully replaced the front brake pads and rotors on your 2011-2019 Ford Explorer! Don't forget to like this video, subscribe for more DIY tutorials, and leave any questions in the comments below. Drive safely! 🚗💨 #DIYBrakeReplacement #FordExplorerMaintenance #CarRepairTutorial
Disclaimer
Our videos are for entertainment purposes only. It is recommended that you seek advice or help from a qualified professional while attempting any and all repairs.
Do-it-yourself repairs can involve risk and injury, we assume no responsibility or liability for losses, damages, or injuries that include but are not limited to direct, indirect, special, incidental, actual, consequential, or punitive. All repairs performed by our viewers are at your own risk.
While we do review products that we use daily or have even used for years, we also review and test products for companies that have compensated us to try their product out. We are independently owned, the opinions expressed are our own from personal experience while using any and all products.
We are a participant in the Amazon Services LLC Associates Program, an affiliate advertising program designed to provide a means for us to earn fees by linking to Amazon.com and affiliated sites. Recommended products with links may be commission-based when products are purchased from them.
-
 18:19
18:19
Ridout
9 months agoHow to replace your front brake pads. #brake #mechanic
77 -
 33:40
33:40
Learn How To Fix Everything You Own
6 months agoAre The Brakes Toast On Your Ford Explorer? Learn How To Replace Them!
30 -
 4:30
4:30
Fix it Angel Car Repair Channel
7 years agoFRONT Brake Pads Rotors REPLACEMENT FORD FIESTA √ Fix it Angel
5 -
 11:13
11:13
RodsShop Automotive How To Tutorials
3 years ago $0.01 earnedHow to Replace Front Brake Pads and Rotors on a 2004 Mazda 6
52 -
 8:54
8:54
Militarized Citizen
1 year agoHow to Replace Front Rotors and Brake Pads on Your 2006-2011 Honda Civic
303 -
![[SIMPLE] front brake pads rotors REPLACEMENT Ford Focus √ Fix it Angel](https://hugh.cdn.rumble.cloud/s/s8/1/t/C/N/F/tCNFj.0kob-small-SIMPLE-front-brake-pads-rot.jpg) 4:59
4:59
Fix it Angel Car Repair Channel
9 years ago[SIMPLE] front brake pads rotors REPLACEMENT Ford Focus √ Fix it Angel
1 -
 20:08
20:08
Barbour's Auto Help
1 year agoRear Hub Bearing Assembly Replacement 07 Ford Edge 3.5L N/A Front Wheel Drive
21 -
 14:16
14:16
4DIYers
7 months agoHow to Replace the Front Wheel Bearings on a Dodge Ram 1500 4wd
152 -
 7:26
7:26
Fix it Angel Car Repair Channel
7 years agoGRINDING NOISE Front brake pad Replacement RESURFACE Rotors DODGE CALIBER √ Fix It Angel
2 -
 9:59
9:59
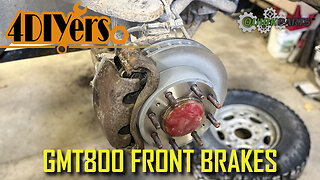
4DIYers
10 months agoHow to Replace the Front Brakes on a GMC Sierra 1500HD GMT800
49