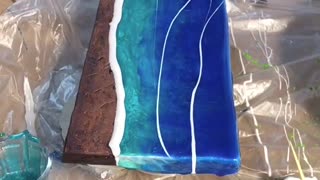
Easy to make epoxy resin heels with floral design
#Easytomakeepoxyresinheelswithfloraldesign #diyshoes #diyaccessories #epoxy #unique #mindblowing
Creating epoxy resin heels with a floral design can be a fun and creative project. Here's a step-by-step guide to help you make epoxy resin heels with a floral design:
### Materials Needed:
1. **High-Heeled Shoes:** Choose a pair of heels with a smooth surface for better resin adhesion.
2. **Epoxy Resin:** Opt for a high-quality epoxy resin suitable for your project.
3. **Pigments or Alcohol Inks:** These will add color to your resin.
4. **Dried or Pressed Flowers:** Choose small dried or pressed flowers that will fit the heel's surface.
5. **Disposable Mixing Cups and Stirring Sticks:** For mixing resin and pigments.
6. **Paintbrushes:** Fine-tipped brushes for applying resin and arranging flowers.
7. **Masking Tape or Painter's Tape:** To protect certain areas of the shoe.
8. **Disposable Gloves and Protective Gear:** For safety while working with resin.
### Steps:
1. **Preparation:**
- Clean the heels thoroughly to remove any dirt or residue.
- Use masking tape to cover areas you don’t want resin to adhere to, such as the sole or certain parts of the shoe.
2. **Mixing Resin:**
- Follow the instructions on your epoxy resin packaging for the correct mixing ratio.
- Wear gloves and protective gear.
- Pour the required amounts of resin and hardener into a disposable mixing cup.
- Mix thoroughly for the specified time to avoid any uncured spots.
3. **Adding Color:**
- Once the resin is mixed, add pigments or alcohol inks to achieve the desired colors.
- Mix the pigments thoroughly into the resin.
4. **Applying Resin:**
- Carefully apply a thin layer of resin onto the heel surface using a brush.
- Place the shoes on a leveled surface to ensure the resin spreads evenly and doesn't drip.
- Let this layer partially cure until it becomes tacky.
5. **Arranging Flowers:**
- While the resin is still tacky, gently place the dried or pressed flowers onto the tacky surface.
- Use a fine-tipped brush to adjust the position of the flowers.
- You can create a pattern or design of your choice with the flowers.
6. **Sealing with Resin:**
- Once the flowers are arranged, carefully pour another layer of resin over the flowers to seal them in place.
- Use a brush to spread the resin evenly and remove any air bubbles.
- Allow the resin to cure according to the manufacturer's instructions. This may take several hours or longer.
7. **Finishing Touches:**
- After the resin has completely cured, remove any masking tape carefully.
- Check for any rough edges or uneven surfaces. You can sand the edges lightly for a smooth finish if needed.
8. **Final Cure:**
- Let the heels cure for the recommended time before wearing them. This ensures the resin fully hardens.
Remember to work in a well-ventilated area and follow safety precautions when working with epoxy resin. Additionally, practice on a small area or test piece before working on your heels to get comfortable with the process.
-
 15:08
15:08
Crafty Crafters
1 year agoEpoxy Resin Flowers
322 -
 16:34
16:34
Stone Coat Countertops
10 months ago $0.03 earnedEpoxy Resin for Beginners - Easy Countertop Design Ideas
83 -
 0:32
0:32
Nice8180
2 years agoHow to Make Epoxy Resin - Resin Art - NICE Amazing Resin Art... 😍 ...
149 -
 0:59
0:59
1GiftWorld
1 year agoHow to Make Unique 'Flory' Necklace | DIY | Recycled Materials | #shorts
4 -
 5:08
5:08
1GiftWorld
2 years agoHow to make a Floral Choker Necklace Yourself and Easy
5 -
 1:56
1:56
DIY Crafts, Felt Flowers Bouquets and Tutorials
1 year agoDIY Felt Flower Kits | Felt Flowers Made Easy for Beginners
39 -
 13:21
13:21
1GiftWorld
2 years agoHow to make a classy ivory necklace with glass beads & lace flowers with re-cycled materials
2 -
 7:42
7:42
1GiftWorld
2 years agoHow to make a Flowered Crown Necklace with Recycled Material
6 -
 9:18
9:18
Totally Handy
1 year agoHow To Make a Stunning Epoxy Resin Egg | Epoxy Resin Project
35 -
 17:04
17:04
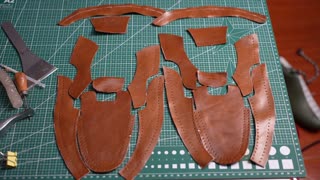
TalabaWood
3 months ago47 How It's Made - Handmade shoes without glue
5