I Turn My Bench Grinder To Belt Sander!
DIY Bench Grinder to Belt Sander Conversion
hello everyone in this video I show you
how I turn my bench grinder into a
dope belt sander.
this whole bench grinder has served me well over the years,
but I needed a sending configuration for my small workshop
that allows me to quickly remove more
material when working with metal,
and the stone discs just don't cut it anymore I
decided to retrofit this Bench grinder which I also restored instead of
buying a proper 2 by 72 belt sander
because one 2 by 72 belt Sanders are way out of my budget and 2 I don't have
the shot real estate to accommodate the
footprint in order to fit the
retrofitted components I remove the covers from both sides of
the bench grinder. I modeled everything on
fusion 360 and printed the sketches to
scale so I could use them as templates
be included a link in the description to
the plans so if you want to retrofit
your own grinder the plans are totally
free. But only one LIKE Required
using spray adhesive I stuck the
template on 3/16 inch steel plate and
roughly cut them out with my angle
grinder.
moving over to the drill press I
drilled out all of the mounting holes
first using a small bit as a pilot, then
drilling them to size with a step in.
Then I make Belt Grinder 4"x36" Wheel Set for 4" Drive 5/8" Bore 4" Track 4" Idler using wood on wood Lathe.
using a nut as a spacer between the pivot arm and the mounting bracket for the top pulley.
I welded a makeshift hinge using
an m6 bolt and some nuts.
I also welded a nut onto the pivot arm for the belt tracking adjustment bolt.
Then I remove the sticky paper and did the
final shaping for all the pieces with a
flat disc on my angle binder.
with everything prepped, I can dry fit
all of the pieces the first thing is
securing the main body by the three
bolts.
and with a quick coat of paint, I have
this Beautiful table sander. and the moment I've been waiting.
please hit the like button above and
consider subscribing thanks for watching.
You can download the templates by clicking the link to our website below: https://imeemade.com/blog/diybeltsander
I hope you enjoy the video!
I am happy to receive your feedback, advice, suggestions to improve myself.
--------Thank you so much for Likes & Comments-------
Subscribe https://bit.ly/2klQknQ
If you want to help me create more cool videos you can support me on
PATREON: https://www.patreon.com/user?u=46295862
Follow me on Instagram https://www.instagram.com/stuckytuberestoration/
My Facebook Page: https://m.facebook.com/Restorationcircle786
If you like the video must share it with your friends who might be interested. Also, share your opinions in the comment section.
SUBSCRIBE @Restoration Circle to show your Love
THANK YOU
BEST WISHES
Restoration Circle
#Diy #Beltgrinder #beltsander
0:00 Introduction
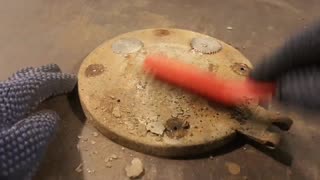
0:38 This is my Little workshop bench grinder.
1:01 Making three holes to attach the main body.
1:21 making threads
1:41 Applying a cut on the shaft for locking so that wheel does not touch the body
4:06 measure the whole space correctly.
8:35 making a hole for the shaft
8:49 and making 2* Idler wheels
10:00 I used 6201 barrings.
12:45 epoxy glue
14:01 I welded a makeshift hinge using an m6 bolt and some nuts..
14:10 making a hole for Idler wheel.
15:09 I welded a nut onto the pivot arm for the belt tracking adjustment bolt.
15:19 making a belt tracking adjustment bolt.
15:34 belt cover
16:15 I test-fit the pulley and the adjustment bolt to make sure nothing binds
#DIY #ToolTransformation #BenchGrinderHack #BeltSanderConversion #CreativeCrafting #Upcycling #DIYTools #PowerToolHack #ToolInnovation #HomeWorkshop #CraftyProjects #HandymanHacks #DIYCrafts #ToolModifications #WoodworkingHacks #InnovativeDIY #PowerToolDIY #ToolTransformation #CraftingInnovation #BenchGrinderToBeltSander
-
 18:44
18:44
Old Is Gold
2 months agoVERY RARE OBJECT - RESTORATION - The complete story
214 -
 1:52:59
The Quartering
4 hours agoWoke Disney/Pixar Collapses, Game Journalism SHUT DOWN, Windows Spying On You & More
28.1K17 -
 DVR
DVR
Edge of Wonder
6 hours agoModern Art Psyop, Money Laundering & CIA’s Hidden Art Collection
1.3K4 -
 12:21
12:21
Brad Polumbo
1 day agoFemale TikToker targets Harrison Butker with (WILD) rant!
1.99K13 -

The Big Mig™
22 hours ago‘BORDERGEDDON’ An American Crisis w/ Hernando Arce
12.1K16 -
 11:05
11:05
Breaking Points
8 hours agoTrump DEMANDS Biden DRUG TEST Before Debate
16.3K45 -
 1:15:55
Redacted News
6 hours agoBREAKING! WEF'S Klaus Schwab drops BOMBSHELL, Zelensky becomes a Dictator | Redacted News Live
102K286 -
 2:55:44
FRENCHY4185
5 hours agoROAD TO 100 FOLLOWERS !!! TRYING "XDEFIANT", IS IT A COD-KILLER ?!?!?!?!
30.1K3 -

Major League Fishing
5 days agoLIVE Bass Pro Tour, Heavy Hitters, Day 4
88.1K3 -
 1:57:31
Revenge of the Cis
5 hours agoEpisode 1346: Summer Body
41.9K16