TechGuide Fixing A Cracked MacBook Pro A1989 #stepbystep
How to Repair a Broken Screen on MacBook Pro A1989 Step by Step
Are you in a panic because your MacBook Pro A1989 screen is shattered? Don't worry, repairing a broken screen on a MacBook Pro A1989 is possible with the right tools and a bit of know-how. In this guide, we will walk you through the steps you need to take to fix your broken screen like a pro.
Gather Your Tools
Before you begin the repair process, you'll need to gather a few essential tools. Make sure you have a screwdriver set, a spudger tool, a replacement screen, and a clean microfiber cloth. You can easily find these tools online or at your local electronics store.
Step 1: Power Off Your MacBook Pro
The first step in repairing a broken screen on your MacBook Pro A1989 is to power off the device. Make sure to shut down your computer properly before proceeding with the repair to avoid any damage to the internal components.
Step 2: Remove the Bottom Case
Next, you'll need to remove the bottom case of your MacBook Pro A1989. Use your screwdriver set to carefully unscrew the bottom case and set it aside. Be sure to keep track of the screws so you can easily put them back in place later.
Step 3: Disconnect the Battery
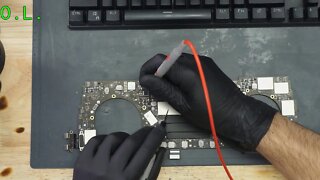
To prevent any electrical mishaps, it's crucial to disconnect the battery before you start working on the screen. Use your spudger tool to carefully disconnect the battery connector from the logic board.
Step 4: Remove the Broken Screen
Once the battery is disconnected, you can proceed to remove the broken screen from your MacBook Pro A1989. Use the spudger tool to pry off the screen bezel and carefully unscrew the screen from the frame. Gently lift the broken screen out of the device.
Step 5: Install the Replacement Screen
With the broken screen removed, it's time to install the replacement screen. Carefully align the new screen with the frame and secure it in place with the screws. Make sure the screen is securely attached before moving on to the next step.
Step 6: Reconnect the Battery
After installing the replacement screen, reconnect the battery connector to the logic board. Ensure that the connection is secure to avoid any future issues with your MacBook Pro A1989.
Step 7: Replace the Bottom Case
Once the battery is reconnected, it's time to replace the bottom case of your MacBook Pro A1989. Secure the case with the screws you removed earlier and make sure everything is properly aligned.
Congratulations! You have successfully repaired the broken screen on your MacBook Pro A1989. Turn on your device to ensure that the new screen is functioning correctly. If you encounter any issues, it's best to seek professional help to avoid further damage to your device.
#technology #stepbystep #doityourself #techsupport #techtutorial #laptoprepair #howtofix #stepbystepguide #techtutorials #techsolutions #techhacks #techsavvy #appleproducts #techguide #howtorepair /geeklife /screenreplacement /screenrepair /diyrepair /diytech /technologylover /techhelp /techrepair /applefan /screenfixer /laptoplover /ifixit/repairsolution /laptopdiy /techfix /aatallabouttech
https://aatallabouttech.com
https://youtu.be/lBcZnGq8jWg
00:00 Introduction
01:10 How to remove back cover MacBook pro
02:48 Disconect battery MacBook pro
10:19 Hinges repair on MacBook pro
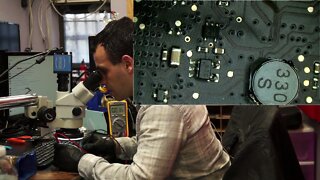
11:08 Wifi MacBook pro repair
11:53 Screen cracked replacing for MacBook pro
25:31 Flashing battery light on screen
-
 21:55
21:55
Louis Rossmann
9 years agoUltrasonic cleaner for repairing Macbook logic boards.
13 -
 27:46
27:46
Louis Rossmann
3 years agoA simple A1502 Macbook Pro board repair
7 -
 24:57
24:57
Louis Rossmann
6 years ago820-3662 Macbook board repair
5 -
 1:11:36
Louis Rossmann
9 years agoMacbook Pro Retina screen repair - LCD ONLY for A1502 models.
10 -
 1:44:14
Louis Rossmann
7 years agoWarranty repair on a nightmare board :'( 820-4924 Macbook Pro Retina
18 -
 34:39
34:39
Louis Rossmann
2 years agoA1502 Macbook Pro logic board repair, 820-4924
17 -
 1:04:39
Louis Rossmann
7 years ago2017-01-26 Dead 820-2850 Macbook logic board repair
11 -
 19:14
19:14
Louis Rossmann
3 years agoA1706 Macbook Pro 5v 200 mA logic board repair
11 -
 20:47
20:47
Louis Rossmann
3 years agoMacbook Pro logic board repair
6 -
 0:33
0:33
Louis Rossmann
5 years agoA happy thought about the future of Macbook repair.
5