How I Made these Adorable Birth Stat Signs
These are my first Birth Stat Signs! I was so excited when I was asked to make my version of these and when I saw these adorable unfinished wood signs at Hobby Lobby, my wheels started spinning!
Supplies I Used for these birth stat signs
2 White Beveled Beaded Wood Wall Decor
Dixie Belle Products: Cotton, Soft Pink, Peony and Satin Clear Coat
1 Hello Baby Transfer, specifically the flowers, by ReDesign with Prima
Jute Rope
STENCILING THE BIRTH STAT SIGNS
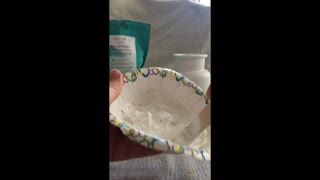
Before I got started, I removed the wood beads and string from the signs and put the beads in a safe place to reattach later.
Then, I flipped the signs over and added my special touch to the backside.
This Spring, I was inspired to add a start adding a little prayer on the backside of my personal requests.
Some are stenciled on, sometimes I apply them as vinyl decals.
For this particular project, I used my Silhouette Cameo 3 to cut this design and used clear duck contact paper as transfer tape to apply the decals to the backside.
Click here for more details on how to apply vinyl decals.
Once this decals were applied, I used some Mod Podge to apply my business card and also seal the vinyl decals in place.
Next, I turned my sign back over and applied one coat of Cotton over the entire sign.
When this was dry, I grabbed my stencils I designed and applied them onto the signs.
For more ideas and blog post on how to use contact paper as stencils and painting signs, click here.
Now the pink was another matter!
We had the flower transfers figured out and Dixie Belle’s Soft Pink matched wonderfully with one of the flowers, but I was worried it was going to be too light.
So we decided to do a little paint mixing.
For these Birth Stat signs, I mixed a little Dixie Belle’s Peony to Soft Pink.
It was about 1/4 Peony to 3/4 Soft Pink blended together.
I painted them on, and since it’s pretty humid here in Iowa, I pulled the stencil before the paint had time to dry.
When pulling the stencil “wet”, as always, do it slowly to help prevent splattering wet paint on the board.
APPLYING TRANSFERS TO THE BIRTH STAT SIGNS
Once the paint is dry, I was ready to add the flower transfers to the Birth Stat signs.
Before we get started, to get more ideas on how to apply transfers, check out these blog posts!
These are so easy to apply, once you have an idea where you want them to be applied, take the backing off, line them up where you want them.
And put them in place.
Pretty much, once you lay them down you’re committed to that area.
Grab the squeegee the transfers come with and start pressing or rubbing the transfers on.
I’ll start pulling up one layer to see how well it’s adhered, if part of it pulls up, lay it back down and keep rubbing your squeegee over it until it’s adhered.
When the transfers were all applied, I applied three coats of Satin sealer over the signs.
I think with transfers, satin sealer works best since the transfers have a little shine to them also.
And once I grabbed some new jute rope, I threaded them back through the holes of the sign and reapplied the beads and tied the ends in a double knot to secure.
That’s it!
-
 5:05
5:05
MPDtribe
2 years agoHow I Upcycled my Mother's Day Vase
63 -
 1:18:43
Kim Iversen
20 hours agoAmbassador Chas Freeman "Israel Has Never Put Forward A Peace Proposal"
44.7K89 -
 48:34
48:34
Breaking Points
2 days agoMAGA Lawyer DEBATES Liberal Analyst On Trump Legal Cases
17.4K22 -
 19:09
19:09
Scammer Payback
4 days agoConfronting Scammer Payback Imposters
73K25 -
 9:07
9:07
shaneyyricch
23 hours agoAddressing my beef with Harry Sisson
55.4K96 -
 1:52:46
Game On!
18 hours agoBoston Celtics Can't Win Game 2! | Sports Morning Espresso Shot
41.8K33 -
 1:00:01
Trumpet Daily
1 day agoMarxist Left Continues to Imprison Trump’s Inner Circle - Trumpet Daily | June 7, 2024
38.1K57 -
 LIVE
LIVE
The Amber May Show
11 hours agoReAwaken America Tour Detroit, MI - DAY 2 | Join General Flynn, Eric Trump, Kash Patel, Mayor Giuliani & Team America + Request Tickets for October 18-19 Selma, NC At: TimeToFreeAmerica.com
1,426 watching -
 12:23
12:23
Freakin' Reviews
1 day agoRice Robot Review: One-Touch Rice Cooker? | As Seen on TV
73.8K30 -
 5:45
5:45
Game Developer
1 day agoHow To Become A Game Dev (While Working A Full Time Job)
67.4K15