Check Out My Hello Baby Growth Charts
Here is my Hello Baby Growth Chart! Have you noticed a theme? Each Hello Baby transfer comes with cute critters and flowers that are perfect to decorate a nursery. But they are also perfect personalizing signs!
Supplies I Used for my Hello Baby Growth Chart
1″ x 10″ x 72″ Pine board, painted in your choice of background color.
Dixie Belle Products: Cotton, Dried Sage (#1 growth chart background), Vintage Duck Egg (#2 growth chart background), Palmetto (leaves), Chocolate, Mud Puddle and Satin Clear Coat
DIY Paint: Fancy Farmgirl and Apothecary also for leaves.
1 Hello Baby Transfer, specifically the animals, by ReDesign with Prima
Round artist paint brush, large paint brush (I used an old one) and mister bottle (optional)
PREPPING MY HELLO BABY GROWTH CHART
I had a vision of neutral themed growth charts with flowing branches with leaves and cute forrest animals.
To begin with, I painted the first growth chart background in Dried Sage.
Then with a large paint brush I lightly pounced Dixie Belles Cotton in random patterns and used my mister.
I misted these areas with water to break up the paint and give a “cloudy” or blurred effect.
This pattern was repeated until the entire board had the effect I liked.
Then I painted the second board background in Vintage Duck Egg and repeated the same steps.
When these were all dry, I prepared to stencil the growth chart measurements.
STENCILING MY HELLO BABY GROWTH CHART
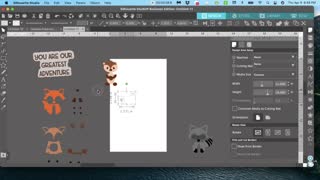
Next I used my Silhouette Cameo 3 to cut my growth chart stencil.
If you join MPD tribe the basic Growth Chart cut file, is in the MPD Library free for your use.
To see how I apply these long stencils, check out my Woodland Growth Chart Blog.
Once I burnished the stencil with the same background paint, I then used Mud Puddle to paint the measurements and numbers on the growth chart.
Here in Iowa, things are a little humid.
So to help prevent pulling paint off when removing the stencil, I carefully removed the stencil with the paint still wet.
If you do this, go slow so the paint does splatter onto the board below.
When this is all dry, we can start adding those cute transfers!
APPLYING TRANSFERS TO THE BIRTH STAT SIGNS
Before we get started, to get more ideas on how to apply transfers, check out these blog posts!
I had all my animals from the Hello Baby transfer cut apart from each other.
Just to get an idea where I wanted these animal transfers, I just moved these around until I liked what I saw.
Then I removed the backing, grabbed my favorite squeegee and started applying them.
ADDING DETAILS TO THE HELLO BABY GROWTH CHART
I decided once I had the animal transfers applied, I wanted the measurements and numbers a darker color.
So I grabbed my round brush, Dixie Belle’s Chocolate and a small glass of water.
The Chocolate paint was watered down and I painted over the measurement and numbers.
I love how this gave them a water-colored effect.
Keep your boards flat after painting with water until it dries, or you may have color running where you don’t want it!
PAINTING THE LEAVES FOR MY HELLO BABY GROWTH CHART
Then came my multi-colored leaves.
If you check out my short video below, you’ll see how I painted my leaves.
I even slowed it down, in part of the video so you could get a better look!
Basically I paint a squiggly ovals.
And the best part, there are no mistakes!
Don’t forget to layer the colors to add a little depth.
And once you have these all painted and they are dry, add three coats of your sealer.
That’s it!
-
 1:12
1:12
MPDtribe
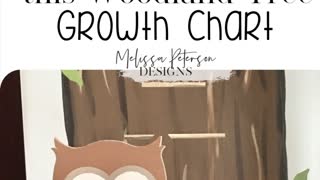
3 years agoFinal: How I Painted this Woodland Tree Growth Chart
280 -
 7:27
7:27
MPDtribe
3 years agoPart 2: How I Painted this Woodland Tree Growth Chart
314 -
 1:11
1:11
SWNS
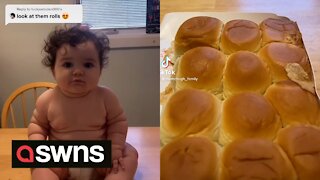
2 years ago10-month-old baby mistaken for toddler as he weighs a whopping 29 pounds
81 -
 6:24
6:24
BabyRelax - Mozart Effect
1 year agoAmazing Baby Sensory Video: Watch Your Little One's Mind Grow with Shapes and Colors
62 -
 23:31
23:31
Sewing Report
3 years agoEasy Baby Gift Ideas 🍼 5 Free Sewing Patterns + Tutorials
4411 -
 2:20
2:20
Chicken For Chicks
1 year agoBaby Chicks Growing June 9, 2022
1182 -
 4:06
4:06
Swimming Pools
11 months agoIntex Mushroom baby Pool, 40" x 35", for Ages 1-3
34 -
 3:40
3:40
rumblestaff
8 years agoCheck Out This Adorable Compilation Of Babies Making Funny Faces
41.5K7 -
 0:03
0:03
KidsAndBabies
1 year agolook how the baby is looking,😊😊😊
3 -
 27:29
27:29
EnchantingLife
2 years agoToys and activities 0 - 6 months baby
100