

Helping others to learn new things and experience other parts of the world.
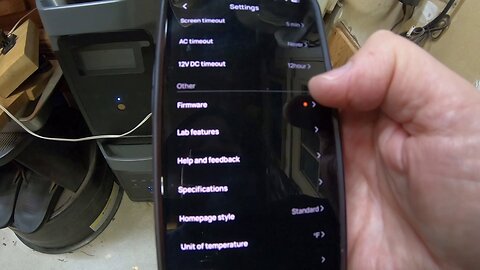
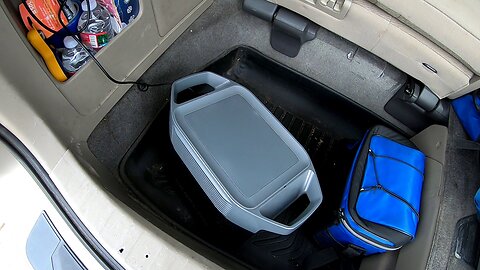
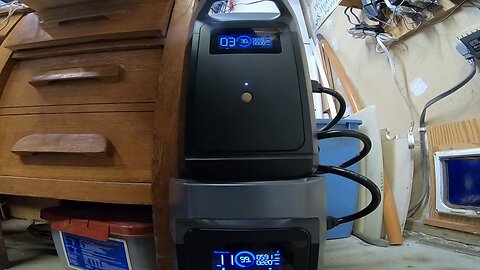
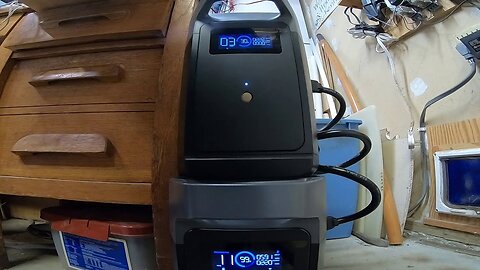
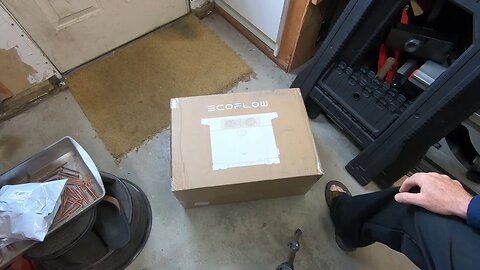
EcoFlow Delta II PowerStation/Extra Battery - Updating the Firmware
The EcoFlow Delta II PowerStation & Extra Battery is a fairly new product and EcoFlow seems to upgrade the firmware for them pretty regularly. I have a reminder once every 3 months to check for new firmware.
New firmware is important to fix bugs in the software controlling the power station & battery as well as improve performance and ease of use.
This video shows the process of checking for new firmware and the upgrade process.
NOTE: Unplug everything getting power from your PowerStation before upgrading the firmware. The power output is going to go off during the upgrade.
ALSO: Upgrading the firmware may turn of the setting that keeps the A/C power output on no matter how long it's been since there's been any load on it. Even though the app said that settings was still set to "Never", it shut the power off after 12 hours (which is the default value). I show how to reset this value to "Never" and check it the next morning (after 12 hours) make sure it is set correctly.
The lesson is: reset any non-default parameters to what you want after upgrading the firmware. Hopefully EcoFlow will fix this bug in a future release. The app could save all the current settings and set them again after updating the firmware.
Link to EcoFlow Delta II:
https://us.ecoflow.com/products/delta-2-portable-power-station
------------------------------
Link to EcoFlow Delta 2 Smart Extra Battery:
https://us.ecoflow.com/products/delta-2-smart-extra-battery
------------------------------
Link to my Etsy Store:
https://betacygnidesigns.etsy.com/
-------------------
End Screen Video Acknowledgement:
Cosmic Reef Video produced by NASA and the Space Telescope Science Institute (STScI).
https://hubblesite.org/contents/media/videos/2020/16/1277-Video
7
views
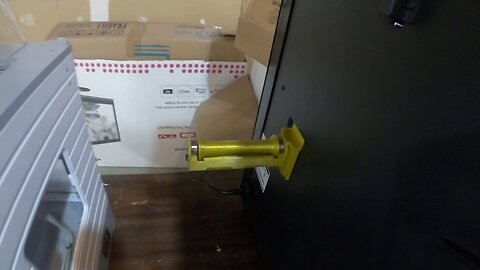
FlashForge Guider II - Make Spool Holder Bracket Compatible With the Filler Filament Roller - Part 2
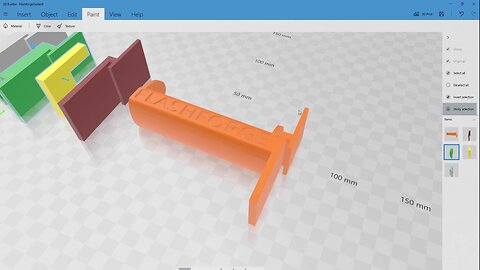
This video series shows how I used 3dBuilder to create a Filler Filament Roller compatible bracket that would fit the Guider II.
Part 1 covers using 3dBuilder to modify existing models to make a Filler Filament Roller compatible bracket that would fit the Guider II.
Part 2 covers printing that bracket and the rest of the parts needed for the Filler roller while not being able to use the spool holder bracket that came with the printer. The spool holder that comes with the Guider II doesn't fit the reels of filament I'm using. So I'm boot strapping a new spool holder.
I really like the "Filler" filament roller. I used it with my NX and I wanted to use with the Guider II as well.
I like the "self-centering" mod for that spool holder. Here's my remix of a Filler-compatible, self-centering filament roller):
https://www.thingiverse.com/thing:5336884
I can use the same roller, I just need to print a bracket that fits into the back of the Guilder II that's will accept the fixture on the end of the roller. But I'm printing another one just in case the first one breaks which has happened in the past!
The first bracket I printed had some problems. The weight of the reel and thin metal back of the Guider II housing would tilt the roller down slightly and the reel had a tendency to move away from the printer which caused some tangled filament when loops of filament came off the reel too soon.
So I added some bumpers on the inside top and outside bottom to tilt the bracket slightly upward. That keeps the reel from drifting away from the back of the printer.
Here's a link on Thingiverse to my bracket specific for the Guider II:
https://www.thingiverse.com/thing:6340784
------------------------------
Link to my Etsy Store:
https://betacygnidesigns.etsy.com/
--------------------
Music:
"Blippy Trance" Kevin MacLeod (incompetech.com)
Licensed under Creative Commons: By Attribution 4.0 License
http://creativecommons.org/licenses/by/4.0/
-------------------
End Screen Video Acknowledgement:
Cosmic Reef Video produced by NASA and the Space Telescope Science Institute (STScI).
https://hubblesite.org/contents/media/videos/2020/16/1277-Video
2
views
FlashForge Guider II - Make Spool Holder Bracket Compatible With the Filler Filament Roller - Part 1
This video series shows how I used 3dBuilder to create a Filler Filament Roller compatible bracket that would fit the Guider II.
Part 1 covers using 3dBuilder to modify existing models to make a Filler Filament Roller compatible bracket that would fit the Guider II.
Part 2 covers printing that bracket and the rest of the parts needed for the Filler roller while not being able to use the spool holder bracket that came with the printer. The spool holder that comes with the Guider II doesn't fit the reels of filament I'm using. So I'm boot strapping a new spool holder.
I really like the "Filler" filament roller. I used it with my NX and I wanted to use with the Guider II as well.
I like the "self-centering" mod for that spool holder. Here's my remix of a Filler-compatible, self-centering filament roller):
https://www.thingiverse.com/thing:5336884
I can use the same roller, I just need to print a bracket that fits into the back of the Guilder II that's will accept the fixture on the end of the roller. But I'm printing another one just in case the first one breaks which has happened in the past!
The first bracket I printed had some problems. The weight of the reel and thin metal back of the Guider II housing would tilt the roller down slightly and the reel had a tendency to move away from the printer which caused some tangled filament when loops of filament came off the reel too soon.
So I added some bumpers on the inside top and outside bottom to tilt the bracket slightly upward. That keeps the reel from drifting away from the back of the printer.
Here's a link on Thingiverse to my bracket specific for the Guider II:
https://www.thingiverse.com/thing:6340784
------------------------------
Link to my Etsy Store:
https://betacygnidesigns.etsy.com/
--------------------
Music:
"Blippy Trance" Kevin MacLeod (incompetech.com)
Licensed under Creative Commons: By Attribution 4.0 License
http://creativecommons.org/licenses/by/4.0/
-------------------
End Screen Video Acknowledgement:
Cosmic Reef Video produced by NASA and the Space Telescope Science Institute (STScI).
https://hubblesite.org/contents/media/videos/2020/16/1277-Video
2
views

Star Wars Camtono Review, Fix the Door Opening Speed, Storage Solution, and "Toy" Darksaber Review
This video discusses the Star Wars "Camtono" which is a portable "safe" to store your most valuable Star Wars possessions.
It has 5 chapters:
1) Quick review of Camtono
2) How to make an easy modification to the door opening speed to make it smoother
3) Quick review of the "toy" version of the Mandalorian Dark Saber and explains the 3 different power switch settings
4) My Storage Solution (available on my Etsy Store, see link below) to the storage issues with the Camtono. The oddly shaped opening was a challenge, but I've come up with a solution to storing a lot more things safely in your Camtono!
5) Tip over and "barrel roll" testing of my storage solution.
Here's a link to my Camtono Container on my Etsy store:
https://betacygnidesigns.etsy.com/listing/1552726362/star-wars-camtono-container-set
Here's a link to the Camtono on Shop Disney:
https://www.shopdisney.com/camtono-safe-star-wars-461032924878.html
Here's a link to the Darksaber on Shop Disney:
https://www.shopdisney.com/mandalorian-darksaber-star-wars-461064839799.html
------------------------------
Link to my Etsy Store:
https://betacygnidesigns.etsy.com/
-------------------
End Screen Video Acknowledgement:
Cosmic Reef Video produced by NASA and the Space Telescope Science Institute (STScI).
https://hubblesite.org/contents/media/videos/2020/16/1277-Video
23
views

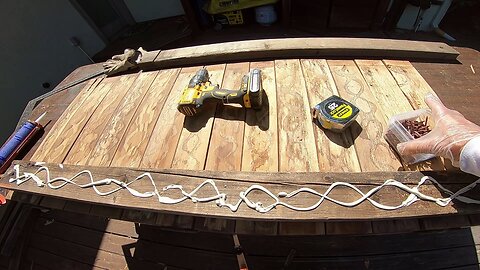
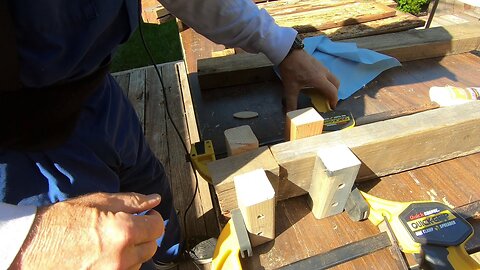
Repairing 30-year old Redwood Deck Cabinet - Part 4
This video series shows how I repaired the 30-year old redwood deck cabinet where we store our emergency generator. The doors were built with high quality redwood & outdoor plywood. Over time, the outdoor plywood, rotted away even though I stained it.
The redwood was still in great shape, I decided to replace the plywood with some scrap 2x4 redwood left over from 30 years ago when we built the deck. That redwood was in good shape. Some pieces were too short, so I used my biscuit joiner to combine pieces into one solid piece.
Part 1 explains the project and the removal of the doors.
Part 2 covers using the biscuit joiner to connect two pieces of scrap 2x4 redwood so (combined) they are long enough.
Part 3 covers sanding the back of the old redwood (where it was glued to the plywood) and assembling the doors.
Part 4 covers test fitting the doors, staining them, and the final installation.
-------------------
Link to disposable Vinyl Gloves:
https://smile.amazon.com/gp/product/B086GFY55C/
-------------------
Link to my Etsy Store:
https://betacygnidesigns.etsy.com/
--------------------
Music:
"Blippy Trance" Kevin MacLeod (incompetech.com)
Licensed under Creative Commons: By Attribution 4.0 License
http://creativecommons.org/licenses/by/4.0/
---------------------
End Screen Video Acknowledgement: Cosmic Reef Video produced by NASA and the Space Telescope Science Institute (STScI).
https://hubblesite.org/contents/media/videos/2020/16/1277-Video
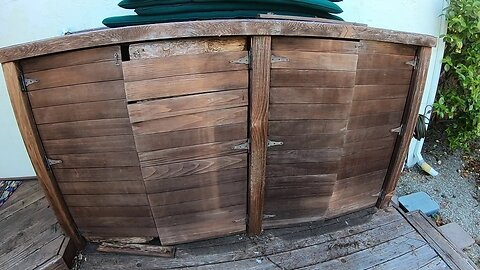
Repairing 30-year old Redwood Deck Cabinet - Part 3
This video series shows how I repaired the 30-year old redwood deck cabinet where we store our emergency generator. The doors were built with high quality redwood & outdoor plywood. Over time, the outdoor plywood, rotted away even though I stained it.
The redwood was still in great shape, I decided to replace the plywood with some scrap 2x4 redwood left over from 30 years ago when we built the deck. That redwood was in good shape. Some pieces were too short, so I used my biscuit joiner to combine pieces into one solid piece.
Part 1 explains the project and the removal of the doors.
Part 2 covers using the biscuit joiner to connect two pieces of scrap 2x4 redwood so (combined) they are long enough.
Part 3 covers sanding the back of the old redwood (where it was glued to the plywood) and assembling the doors.
Part 4 covers test fitting the doors, staining them, and the final installation.
-------------------
Link to disposable Vinyl Gloves:
https://smile.amazon.com/gp/product/B086GFY55C/
-------------------
Link to my Etsy Store:
https://betacygnidesigns.etsy.com/
--------------------
Music:
"Blippy Trance" Kevin MacLeod (incompetech.com)
Licensed under Creative Commons: By Attribution 4.0 License
http://creativecommons.org/licenses/by/4.0/
---------------------
End Screen Video Acknowledgement: Cosmic Reef Video produced by NASA and the Space Telescope Science Institute (STScI).
https://hubblesite.org/contents/media/videos/2020/16/1277-Video
Repairing 30-year old Redwood Deck Cabinet - Part 2
This video series shows how I repaired the 30-year old redwood deck cabinet where we store our emergency generator. The doors were built with high quality redwood & outdoor plywood. Over time, the outdoor plywood, rotted away even though I stained it.
The redwood was still in great shape, I decided to replace the plywood with some scrap 2x4 redwood left over from 30 years ago when we built the deck. That redwood was in good shape. Some pieces were too short, so I used my biscuit joiner to combine pieces into one solid piece.
Part 1 explains the project and the removal of the doors.
Part 2 covers using the biscuit joiner to connect two pieces of scrap 2x4 redwood so (combined) they are long enough.
Part 3 covers sanding the back of the old redwood (where it was glued to the plywood) and assembling the doors.
Part 4 covers test fitting the doors, staining them, and the final installation.
-------------------
Link to disposable Vinyl Gloves:
https://smile.amazon.com/gp/product/B086GFY55C/
-------------------
Link to my Etsy Store:
https://betacygnidesigns.etsy.com/
--------------------
Music:
"Blippy Trance" Kevin MacLeod (incompetech.com)
Licensed under Creative Commons: By Attribution 4.0 License
http://creativecommons.org/licenses/by/4.0/
---------------------
End Screen Video Acknowledgement: Cosmic Reef Video produced by NASA and the Space Telescope Science Institute (STScI).
https://hubblesite.org/contents/media/videos/2020/16/1277-Video
Repairing 30-year old Redwood Deck Cabinet - Part 1
This video series shows how I repaired the 30-year old redwood deck cabinet where we store our emergency generator. The doors were built with high quality redwood & outdoor plywood. Over time, the outdoor plywood, rotted away even though I stained it.
The redwood was still in great shape, I decided to replace the plywood with some scrap 2x4 redwood left over from 30 years ago when we built the deck. That redwood was in good shape. Some pieces were too short, so I used my biscuit joiner to combine pieces into one solid piece.
Part 1 explains the project and the removal of the doors.
Part 2 covers using the biscuit joiner to connect two pieces of scrap 2x4 redwood so (combined) they are long enough.
Part 3 covers sanding the back of the old redwood (where it was glued to the plywood) and assembling the doors.
Part 4 covers test fitting the doors, staining them, and the final installation.
-------------------
Link to disposable Vinyl Gloves:
https://smile.amazon.com/gp/product/B086GFY55C/
-------------------
Link to my Etsy Store:
https://betacygnidesigns.etsy.com/
--------------------
Music:
"Blippy Trance" Kevin MacLeod (incompetech.com)
Licensed under Creative Commons: By Attribution 4.0 License
http://creativecommons.org/licenses/by/4.0/
---------------------
End Screen Video Acknowledgement: Cosmic Reef Video produced by NASA and the Space Telescope Science Institute (STScI).
https://hubblesite.org/contents/media/videos/2020/16/1277-Video
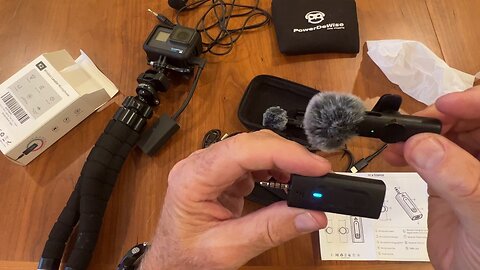
K2 Lavalier Wireless Microphone Unboxing and Review with GoPro Camera
I've been using a wired microphone with my GoPro Hero 6 which works fine with the GoPro microphone adaptor, but for videos where I'm working outside with power tools, etc. it would be better/safer to use a wireless microphone.
In this video, I unbox and test the K2 Lavalier Wireless Microphone with my GoPro.
NOTE: You have to use the 4-pole to 3-pole adaptor that comes with the K2 for it to work with the GoPro microphone adaptor.
Link to the K2 Lavalier Wireless Microphone on Amazon:
https://www.amazon.com/Microphone-Professional-Plug-Play-Recording-Interview/dp/B0C5925ZB4/
-----
I used a Hero GoPro 6:
https://smile.amazon.com/gp/product/B074X5WPC5/
-----
Link to GoPro microphone adaptor on Amazon:
https://www.amazon.com/gp/product/B01L2CPPH2/
-------------------
Link to my Etsy Store:
https://betacygnidesigns.etsy.com/
---------------------
End Screen Video Acknowledgement: Cosmic Reef Video produced by NASA and the Space Telescope Science Institute (STScI).
https://hubblesite.org/contents/media/videos/2020/16/1277-Video
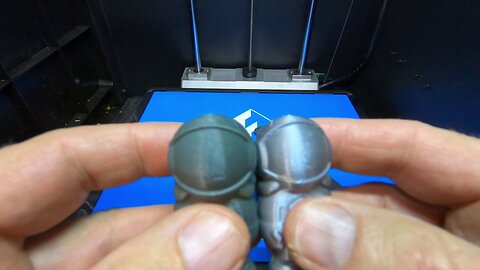
HZST3D Gunmetal PLA 1.75mm Filament Testing - Part 2
This two-part video shows the testing of HZST3D Gunmetal PLA 1.75mm Filament. It's hard to find true gunmetal colored PLA so I picked this one to see if it will for a product I'm working on.
Part 1 shows unboxing, and using a Temperature Tower to evaluate the best extrusion temperature to use.
Part 2 covers Bed and Layer Adhesion testing and having to go to an even lower extruder temperature. It finishes off with a print of #3DPhil to compare it to other ones we've printed.
Link to the product I'm using this for on my Etsy Store:
https://betacygnidesigns.etsy.com/listing/1157516314/star-wars-the-book-of-boba-fett-new
Link to HZST3D Gunmetal PLA Filament 1.75mm on Amazon:
https://www.amazon.com/gp/product/B07Q347FV3/
Link to Temperature Tower Thingiverse Project:
https://www.thingiverse.com/thing:4356906
Link to Bed Adhesion and Layer Cracking Test
https://www.thingiverse.com/thing:4536632
Link to 3DPhil:
https://www.matterhackers.com/store/l/matterhackers-mascot-phil-a-ment/sk/M6DV4FS2
These are the spatulas I used to help remove the pieces from the print bed:
https://smile.amazon.com/gp/product/B075SLTY8B/
These are the tweezers I used to help remove dripping filament from the print head:
https://smile.amazon.com/gp/product/B0845SKD7Z/
This is the wire brass brush I use to clean the nozzle tip:
https://smile.amazon.com/gp/product/B01J2BS92S/
Flashforge Guider II on the Flashforge Website:
https://www.flashforge.com/product-detail/flashforge-guider-2-3d-printer
OpenSCAD website:
https://www.openscad.org/
I used Simplify3D slicer software for the test:
https://www.simplify3d.com/
-------------------
Link to my Etsy Store:
https://betacygnidesigns.etsy.com/
---------------------
Music:
"Blippy Trance" Kevin MacLeod (incompetech.com)
Licensed under Creative Commons: By Attribution 4.0 License
http://creativecommons.org/licenses/by/4.0/
---------------------
End Screen Video Acknowledgement: Cosmic Reef Video produced by NASA and the Space Telescope Science Institute (STScI).
https://hubblesite.org/contents/media/videos/2020/16/1277-Video
6
views
HZST3D Gunmetal PLA 1.75mm Filament Testing - Part 1
This two-part video shows the testing of HZST3D Gunmetal PLA 1.75mm Filament. It's hard to find true gunmetal colored PLA so I picked this one to see if it will for a product I'm working on.
Part 1 shows unboxing, and using a Temperature Tower to evaluate the best extrusion temperature to use.
Part 2 covers Bed and Layer Adhesion testing and having to go to an even lower extruder temperature. It finishes off with a print of #3DPhil to compare it to other ones we've printed.
Link to the product I'm using this for on my Etsy Store:
https://betacygnidesigns.etsy.com/listing/1157516314/star-wars-the-book-of-boba-fett-new
Link to HZST3D Gunmetal PLA Filament 1.75mm on Amazon:
https://www.amazon.com/gp/product/B07Q347FV3/
Link to Temperature Tower Thingiverse Project:
https://www.thingiverse.com/thing:4356906
Link to Bed Adhesion and Layer Cracking Test
https://www.thingiverse.com/thing:4536632
Link to 3DPhil:
https://www.matterhackers.com/store/l/matterhackers-mascot-phil-a-ment/sk/M6DV4FS2
These are the spatulas I used to help remove the pieces from the print bed:
https://smile.amazon.com/gp/product/B075SLTY8B/
These are the tweezers I used to help remove dripping filament from the print head:
https://smile.amazon.com/gp/product/B0845SKD7Z/
This is the wire brass brush I use to clean the nozzle tip:
https://smile.amazon.com/gp/product/B01J2BS92S/
Flashforge Guider II on the Flashforge Website:
https://www.flashforge.com/product-detail/flashforge-guider-2-3d-printer
OpenSCAD website:
https://www.openscad.org/
I used Simplify3D slicer software for the test:
https://www.simplify3d.com/
-------------------
Link to my Etsy Store:
https://betacygnidesigns.etsy.com/
---------------------
Music:
"Blippy Trance" Kevin MacLeod (incompetech.com)
Licensed under Creative Commons: By Attribution 4.0 License
http://creativecommons.org/licenses/by/4.0/
---------------------
End Screen Video Acknowledgement: Cosmic Reef Video produced by NASA and the Space Telescope Science Institute (STScI).
https://hubblesite.org/contents/media/videos/2020/16/1277-Video
3
views
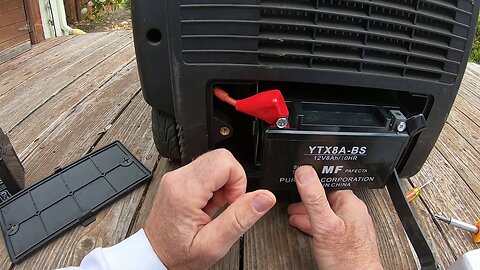
Champion 3400-Watt Dual Fuel Generator: Replacing the Battery the Easy Way (After the *Hard* Way)
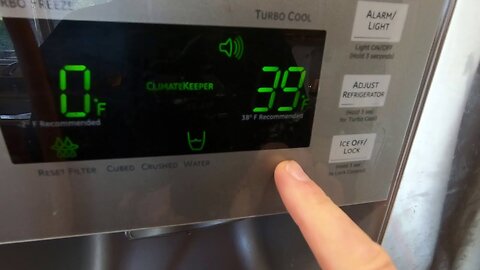
We use our Champion 3400-Watt Dual Fuel Generator running on propane in a hybrid mode with our EcoFlow Delta II battery & Smart Extra Battery to power our fridge and other key items in our home during a power outage.
We've had it for about 4 years and the battery recently wouldn't hold a charge. So I replaced it as shown in this video.
There's a trick to install the new battery which I go over in the video.
IMPORTANT: You need to get the very specific battery that fits inside the Champion generator.
Link to the battery I bought on Amazon:
https://www.amazon.com/gp/product/B08P4VNVKB/
Link to generator:
https://www.amazon.com/gp/product/B01FAWMMEY/
Link to EcoFlow Delta II:
https://us.ecoflow.com/products/delta-2-portable-power-station
Link to EcoFlow Delta 2 Smart Extra Battery:
https://us.ecoflow.com/products/delta-2-smart-extra-battery
-------------------
Link to my Etsy Store:
https://betacygnidesigns.etsy.com/
-------------------
End Screen Video Acknowledgement: Cosmic Reef Video produced by NASA and the Space Telescope Science Institute (STScI).
https://hubblesite.org/contents/media/videos/2020/16/1277-Video
9
views
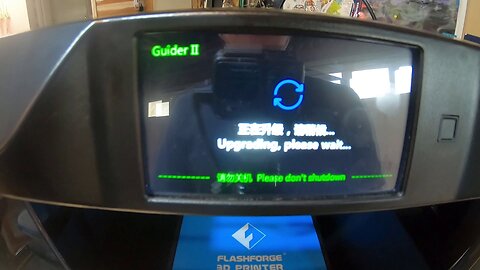
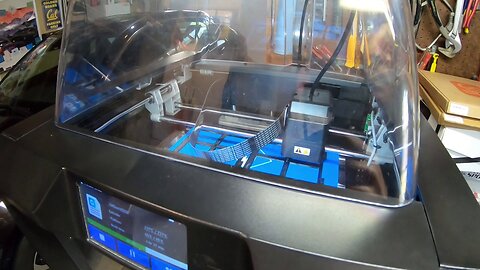
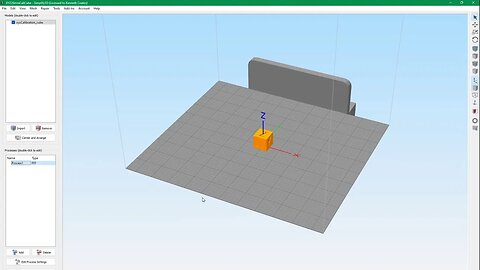
Flashforge Guider 2 - Upgrading the Firmware
This video shows how to upgrade the Firmware on the Flashforge Guider II.
The date on the version listed on the FlashForge site was later than the version that was on my new Guider II printer, so I upgraded the firmware to see if it would fix what I thought was a *bug*.
Unlike some of Flashforge's other 3d printers (like the Dreamer NX), the Guider 2 doesn't share the pre-heat extruder temperature setting with the extruder temperature for loading and unloading the filament. You have to set it separately.
So I guess it's not a *bug*, but a feature! :(
Another difference (for the worse in my opinion) is that the Guider II doesn't remember the last pre-heat or filament load/unload temperature settings between power off/on cycles.
Flashforge Guider II on the Flashforge Website:
https://www.flashforge.com/product-detail/flashforge-guider-2-3d-printer
-------------------
Link to my Etsy Store:
https://betacygnidesigns.etsy.com/
---------------------
End Screen Video Acknowledgement: Cosmic Reef Video produced by NASA and the Space Telescope Science Institute (STScI).
https://hubblesite.org/contents/media/videos/2020/16/1277-Video

Harvesting Green Algae Slime From Your Sidewalk Gutter For Free Compost #Shorts
This video shows how to harvest the green algae slime that grows in your gutter for free compost.
You get rid of the slime and you get free compost.
It's a win-win!
Info about freshwater algae:
https://www.doc.govt.nz/nature/native-plants/freshwater-algae/
-------------------
Link to my Etsy Store:
https://www.etsy.com/shop/BetaCygniDesigns
EcoFlow Delta II Powerstation - Charging it With Your Car
This video shows how to safely recharge your EcoFlow Delta II Powerstation using the 12V outlet in your car.
Link to EcoFlow Delta II:
https://us.ecoflow.com/products/delta-2-portable-power-station
Link to EcoFlow Delta II on Amazon:
https://smile.amazon.com/gp/product/B0B9XB57XM/
-------------------
Link to my Etsy Store:
https://www.etsy.com/shop/BetaCygniDesigns
---------------------
End Screen Video Acknowledgement: Cosmic Reef Video produced by NASA and the Space Telescope Science Institute (STScI).
https://hubblesite.org/contents/media/videos/2020/16/1277-Video
2
views

EcoFlow Delta II Powerstation/Extra Battery - Review and as a Hybrid Power Source for Fridge Part 5
NOTE: When you first plug your EcoFlow Delta II into the wall, make sure it's on a circuit that doesn't have a lot of load on it. The default charging rate is 10 amps which is 66.7% of a normal 15 amp circuit. I used the dedicated 20 amp circuit my washing machine runs is plugged into. You can use the EcoFlow App to set the charging rate for the future.
In the past, I've used my Champion 3400-Watt Dual Fuel Generator as an emergency power source in case of extended blackouts. But leaving the generator running all the time or having to start and stop it periodically to keep the refrigerator cold or when we wanted to use the microwave is a pain.
I realized with the EcoFlow Delta II Powerstation I could set up a hybrid power system. The EcoFlow could power the refrigerator all night without having to have the generator running. During the day, I could utilize the fast charging feature of the Delta II (80% in 1 hour at 10 amps) to recharge the battery as needed much like a hybrid car. I test that system in parts 3 & 4 of this review.
Here's a review of my Champion 3400-Watt Dual Fuel Generator I used to recharge the Delta 2:
https://youtu.be/Vt4xNBPt2-k
Part 1 covers: Unboxing, Initial charging, Setting up the EcoFlow app, Changing the charging rate using the app, Measuring the noise level while charging at different rates
Part 2 covers: Setting up the EcoFlow power station for day-to-day use as an Emergency Power for my 3d printer, why I use a standard computer UPS in between my EcoFlow and my 3d printer
Part 3 covers: Seeing if the battery will power the refrigerator for 8 hours (simulating overnight power), fast recharging during the day using a generator.
Part 4 covers: Charging the EcoFlow Delta 2 Powerstation using a car while driving, Unboxing the EcoFlow Delta 2 Smart Extra Battery, Hooking the extra battery to the base EcoFlow Delta 2 Powerstation.
Part 5 covers: Seeing if the Powerstation and the extra battery will power the refrigerator for 8 hours (simulating overnight power), simultaneous powering of refrigerator and microwave while charging using a generator during the day.
Link to EcoFlow Delta II:
https://us.ecoflow.com/products/delta-2-portable-power-station
Link to EcoFlow Delta 2 Smart Extra Battery:
https://us.ecoflow.com/products/delta-2-smart-extra-battery
Link to EcoFlow Delta II on Amazon:
https://smile.amazon.com/gp/product/B0B9XB57XM/
Link to 20 amp Extension Cord on Amazon:
https://www.amazon.com/gp/product/B00KC108K4/
-------------------
Link to my Etsy Store:
https://www.etsy.com/shop/BetaCygniDesigns
---------------------
End Screen Video Acknowledgement: Cosmic Reef Video produced by NASA and the Space Telescope Science Institute (STScI).
https://hubblesite.org/contents/media/videos/2020/16/1277-Video
2
views
EcoFlow Delta II Powerstation/Extra Battery - Review and as a Hybrid Power Source for Fridge Part 4
NOTE: When you first plug your EcoFlow Delta II into the wall, make sure it's on a circuit that doesn't have a lot of load on it. The default charging rate is 10 amps which is 66.7% of a normal 15 amp circuit. I used the dedicated 20 amp circuit my washing machine runs is plugged into. You can use the EcoFlow App to set the charging rate for the future.
In the past, I've used my Champion 3400-Watt Dual Fuel Generator as an emergency power source in case of extended blackouts. But leaving the generator running all the time or having to start and stop it periodically to keep the refrigerator cold or when we wanted to use the microwave is a pain.
I realized with the EcoFlow Delta II Powerstation I could set up a hybrid power system. The EcoFlow could power the refrigerator all night without having to have the generator running. During the day, I could utilize the fast charging feature of the Delta II (80% in 1 hour at 10 amps) to recharge the battery as needed much like a hybrid car. I test that system in parts 3 & 4 of this review.
Here's a review of my Champion 3400-Watt Dual Fuel Generator I used to recharge the Delta 2:
https://youtu.be/Vt4xNBPt2-k
Part 1 covers: Unboxing, Initial charging, Setting up the EcoFlow app, Changing the charging rate using the app, Measuring the noise level while charging at different rates
Part 2 covers: Setting up the EcoFlow power station for day-to-day use as an Emergency Power for my 3d printer, why I use a standard computer UPS in between my EcoFlow and my 3d printer
Part 3 covers: Seeing if the battery will power the refrigerator for 8 hours (simulating overnight power), fast recharging during the day using a generator.
Part 4 covers: Charging the EcoFlow Delta 2 Powerstation using a car while driving, Unboxing the EcoFlow Delta 2 Smart Extra Battery, Hooking the extra battery to the base EcoFlow Delta 2 Powerstation. Seeing if the Powerstation and the extra battery will power the refrigerator for 8 hours (simulating overnight power), simultaneous powering of refrigerator and microwave while charging using a generator during the day.
Part 5 covers: Seeing if the Powerstation and the extra battery will power the refrigerator for 8 hours (simulating overnight power), simultaneous powering of refrigerator and microwave while charging using a generator during the day.
Link to EcoFlow Delta II:
https://us.ecoflow.com/products/delta-2-portable-power-station
Link to EcoFlow Delta 2 Smart Extra Battery:
https://us.ecoflow.com/products/delta-2-smart-extra-battery
Link to EcoFlow Delta II on Amazon:
https://smile.amazon.com/gp/product/B0B9XB57XM/
-------------------
Link to my Etsy Store:
https://www.etsy.com/shop/BetaCygniDesigns
---------------------
End Screen Video Acknowledgement: Cosmic Reef Video produced by NASA and the Space Telescope Science Institute (STScI).
https://hubblesite.org/contents/media/videos/2020/16/1277-Video
15
views
EcoFlow Delta II Powerstation/Extra Battery - Review and as a Hybrid Power Source for Fridge Part 4
NOTE: When you first plug your EcoFlow Delta II into the wall, make sure it's on a circuit that doesn't have a lot of load on it. The default charging rate is 10 amps which is 66.7% of a normal 15 amp circuit. I used the dedicated 20 amp circuit my washing machine runs is plugged into. You can use the EcoFlow App to set the charging rate for the future.
In the past, I've used my Champion 3400-Watt Dual Fuel Generator as an emergency power source in case of extended blackouts. But leaving the generator running all the time or having to start and stop it periodically to keep the refrigerator cold or when we wanted to use the microwave is a pain.
I realized with the EcoFlow Delta II Powerstation I could set up a hybrid power system. The EcoFlow could power the refrigerator all night without having to have the generator running. During the day, I could utilize the fast charging feature of the Delta II (80% in 1 hour at 10 amps) to recharge the battery as needed much like a hybrid car. I test that system in parts 3 & 4 of this review.
Here's a review of my Champion 3400-Watt Dual Fuel Generator I used to recharge the Delta 2:
https://youtu.be/Vt4xNBPt2-k
Part 1 covers: Unboxing, Initial charging, Setting up the EcoFlow app, Changing the charging rate using the app, Measuring the noise level while charging at different rates
Part 2 covers: Setting up the EcoFlow power station for day-to-day use as an Emergency Power for my 3d printer, why I use a standard computer UPS in between my EcoFlow and my 3d printer
Part 3 covers: Seeing if the battery will power the refrigerator for 8 hours (simulating overnight power), fast recharging during the day using a generator.
Part 4 covers: Charging the EcoFlow Delta 2 Powerstation using a car while driving, Unboxing the EcoFlow Delta 2 Smart Extra Battery, Hooking the extra battery to the base EcoFlow Delta 2 Powerstation.
Part 5 covers: Seeing if the Powerstation and the extra battery will power the refrigerator for 8 hours (simulating overnight power), simultaneous powering of refrigerator and microwave while charging using a generator during the day.
Link to EcoFlow Delta II:
https://us.ecoflow.com/products/delta-2-portable-power-station
Link to EcoFlow Delta 2 Smart Extra Battery:
https://us.ecoflow.com/products/delta-2-smart-extra-battery
Link to EcoFlow Delta II on Amazon:
https://smile.amazon.com/gp/product/B0B9XB57XM/
Link to 20 amp Extension Cord on Amazon:
https://www.amazon.com/gp/product/B00KC108K4/
-------------------
Link to my Etsy Store:
https://www.etsy.com/shop/BetaCygniDesigns
---------------------
End Screen Video Acknowledgement: Cosmic Reef Video produced by NASA and the Space Telescope Science Institute (STScI).
https://hubblesite.org/contents/media/videos/2020/16/1277-Video
15
views

EcoFlow Delta II Powerstation/Extra Battery - Review and as a Hybrid Power Source for Fridge Part 3
NOTE: When you first plug your EcoFlow Delta II into the wall, make sure it's on a circuit that doesn't have a lot of load on it. The default charging rate is 10 amps which is 66.7% of a normal 15 amp circuit. I used the dedicated 20 amp circuit my washing machine runs is plugged into. You can use the EcoFlow App to set the charging rate for the future.
In the past, I've used my Champion 3400-Watt Dual Fuel Generator as an emergency power source in case of extended blackouts. But leaving the generator running all the time or having to start and stop it periodically to keep the refrigerator cold or when we wanted to use the microwave is a pain.
I realized with the EcoFlow Delta II Powerstation I could set up a hybrid power system. The EcoFlow could power the refrigerator all night without having to have the generator running. During the day, I could utilize the fast charging feature of the Delta II (80% in 1 hour at 10 amps) to recharge the battery as needed much like a hybrid car. I test that system in parts 3 & 4 of this review.
Here's a review of my Champion 3400-Watt Dual Fuel Generator I used to recharge the Delta 2:
https://youtu.be/Vt4xNBPt2-k
Part 1 covers: Unboxing, Initial charging, Setting up the EcoFlow app, Changing the charging rate using the app, Measuring the noise level while charging at different rates
Part 2 covers: Setting up the EcoFlow power station for day-to-day use as an Emergency Power for my 3d printer, why I use a standard computer UPS in between my EcoFlow and my 3d printer
Part 3 covers: Seeing if the battery will power the refrigerator for 8 hours (simulating overnight power), fast recharging during the day using a generator.
Part 4 covers: Charging the EcoFlow Delta 2 Powerstation using a car while driving, Unboxing the EcoFlow Delta 2 Smart Extra Battery, Hooking the extra battery to the base EcoFlow Delta 2 Powerstation. Seeing if the Powerstation and the extra battery will power the refrigerator for 8 hours (simulating overnight power), simultaneous powering of refrigerator and microwave while charging using a generator during the day.
Part 5 covers: Seeing if the Powerstation and the extra battery will power the refrigerator for 8 hours (simulating overnight power), simultaneous powering of refrigerator and microwave while charging using a generator during the day.
Link to EcoFlow Delta II:
https://us.ecoflow.com/products/delta-2-portable-power-station
Link to EcoFlow Delta 2 Smart Extra Battery:
https://us.ecoflow.com/products/delta-2-smart-extra-battery
Link to EcoFlow Delta II on Amazon:
https://smile.amazon.com/gp/product/B0B9XB57XM/
-------------------
Link to my Etsy Store:
https://www.etsy.com/shop/BetaCygniDesigns
---------------------
End Screen Video Acknowledgement: Cosmic Reef Video produced by NASA and the Space Telescope Science Institute (STScI).
https://hubblesite.org/contents/media/videos/2020/16/1277-Video
10
views
EcoFlow Delta II Powerstation/Extra Battery - Review and as a Hybrid Power Source for Fridge Part 3
NOTE: When you first plug your EcoFlow Delta II into the wall, make sure it's on a circuit that doesn't have a lot of load on it. The default charging rate is 10 amps which is 66.7% of a normal 15 amp circuit. I used the dedicated 20 amp circuit my washing machine runs is plugged into. You can use the EcoFlow App to set the charging rate for the future.
In the past, I've used my Champion 3400-Watt Dual Fuel Generator as an emergency power source in case of extended blackouts. But leaving the generator running all the time or having to start and stop it periodically to keep the refrigerator cold or when we wanted to use the microwave is a pain.
I realized with the EcoFlow Delta II Powerstation I could set up a hybrid power system. The EcoFlow could power the refrigerator all night without having to have the generator running. During the day, I could utilize the fast charging feature of the Delta II (80% in 1 hour at 10 amps) to recharge the battery as needed much like a hybrid car. I test that system in parts 3 & 4 of this review.
Here's a review of my Champion 3400-Watt Dual Fuel Generator I used to recharge the Delta 2:
https://youtu.be/Vt4xNBPt2-k
Part 1 covers: Unboxing, Initial charging, Setting up the EcoFlow app, Changing the charging rate using the app, Measuring the noise level while charging at different rates
Part 2 covers: Setting up the EcoFlow power station for day-to-day use as an Emergency Power for my 3d printer, why I use a standard computer UPS in between my EcoFlow and my 3d printer
Part 3 covers: Seeing if the battery will power the refrigerator for 8 hours (simulating overnight power), fast recharging during the day using a generator.
Part 4 covers: Charging the EcoFlow Delta 2 Powerstation using a car while driving, Unboxing the EcoFlow Delta 2 Smart Extra Battery, Hooking the extra battery to the base EcoFlow Delta 2 Powerstation.
Part 5 covers: Seeing if the Powerstation and the extra battery will power the refrigerator for 8 hours (simulating overnight power), simultaneous powering of refrigerator and microwave while charging using a generator during the day.
Link to EcoFlow Delta II:
https://us.ecoflow.com/products/delta-2-portable-power-station
Link to EcoFlow Delta 2 Smart Extra Battery:
https://us.ecoflow.com/products/delta-2-smart-extra-battery
Link to EcoFlow Delta II on Amazon:
https://smile.amazon.com/gp/product/B0B9XB57XM/
Link to 20 amp Extension Cord on Amazon:
https://www.amazon.com/gp/product/B00KC108K4/
-------------------
Link to my Etsy Store:
https://www.etsy.com/shop/BetaCygniDesigns
---------------------
End Screen Video Acknowledgement: Cosmic Reef Video produced by NASA and the Space Telescope Science Institute (STScI).
https://hubblesite.org/contents/media/videos/2020/16/1277-Video
13
views
EcoFlow Delta II Powerstation/Extra Battery - Review and as a Hybrid Power Source for Fridge Part 2
NOTE: When you first plug your EcoFlow Delta II into the wall, make sure it's on a circuit that doesn't have a lot of load on it. The default charging rate is 10 amps which is 66.7% of a normal 15 amp circuit. I used the dedicated 20 amp circuit my washing machine runs is plugged into. You can use the EcoFlow App to set the charging rate for the future.
In the past, I've used my Champion 3400-Watt Dual Fuel Generator as an emergency power source in case of extended blackouts. But leaving the generator running all the time or having to start and stop it periodically to keep the refrigerator cold or when we wanted to use the microwave is a pain.
I realized with the EcoFlow Delta II Powerstation I could set up a hybrid power system. The EcoFlow could power the refrigerator all night without having to have the generator running. During the day, I could utilize the fast charging feature of the Delta II (80% in 1 hour at 10 amps) to recharge the battery as needed much like a hybrid car. I test that system in parts 3 & 4 of this review.
Here's a review of my Champion 3400-Watt Dual Fuel Generator I used to recharge the Delta 2:
https://youtu.be/Vt4xNBPt2-k
Part 1 covers: Unboxing, Initial charging, Setting up the EcoFlow app, Changing the charging rate using the app, Measuring the noise level while charging at different rates
Part 2 covers: Setting up the EcoFlow power station for day-to-day use as an Emergency Power for my 3d printer, why I use a standard computer UPS in between my EcoFlow and my 3d printer
Part 3 covers: Seeing if the battery will power the refrigerator for 8 hours (simulating overnight power), fast recharging during the day using a generator.
Part 4 covers: Charging the EcoFlow Delta 2 Powerstation using a car while driving, Unboxing the EcoFlow Delta 2 Smart Extra Battery, Hooking the extra battery to the base EcoFlow Delta 2 Powerstation. Seeing if the Powerstation and the extra battery will power the refrigerator for 8 hours (simulating overnight power), simultaneous powering of refrigerator and microwave while charging using a generator during the day.
Part 5 covers: Seeing if the Powerstation and the extra battery will power the refrigerator for 8 hours (simulating overnight power), simultaneous powering of refrigerator and microwave while charging using a generator during the day.
Link to EcoFlow Delta II:
https://us.ecoflow.com/products/delta-2-portable-power-station
Link to EcoFlow Delta 2 Smart Extra Battery:
https://us.ecoflow.com/products/delta-2-smart-extra-battery
Link to EcoFlow Delta II on Amazon:
https://smile.amazon.com/gp/product/B0B9XB57XM/
-------------------
Link to my Etsy Store:
https://www.etsy.com/shop/BetaCygniDesigns
---------------------
End Screen Video Acknowledgement: Cosmic Reef Video produced by NASA and the Space Telescope Science Institute (STScI).
https://hubblesite.org/contents/media/videos/2020/16/1277-Video
16
views

EcoFlow Delta II Powerstation/Extra Battery - Review and as a Hybrid Power Source for Fridge Part 2
NOTE: When you first plug your EcoFlow Delta II into the wall, make sure it's on a circuit that doesn't have a lot of load on it. The default charging rate is 10 amps which is 66.7% of a normal 15 amp circuit. I used the dedicated 20 amp circuit my washing machine runs is plugged into. You can use the EcoFlow App to set the charging rate for the future.
In the past, I've used my Champion 3400-Watt Dual Fuel Generator as an emergency power source in case of extended blackouts. But leaving the generator running all the time or having to start and stop it periodically to keep the refrigerator cold or when we wanted to use the microwave is a pain.
I realized with the EcoFlow Delta II Powerstation I could set up a hybrid power system. The EcoFlow could power the refrigerator all night without having to have the generator running. During the day, I could utilize the fast charging feature of the Delta II (80% in 1 hour at 10 amps) to recharge the battery as needed much like a hybrid car. I test that system in parts 3 & 4 of this review.
Here's a review of my Champion 3400-Watt Dual Fuel Generator I used to recharge the Delta 2:
https://youtu.be/Vt4xNBPt2-k
Part 1 covers: Unboxing, Initial charging, Setting up the EcoFlow app, Changing the charging rate using the app, Measuring the noise level while charging at different rates
Part 2 covers: Setting up the EcoFlow power station for day-to-day use as an Emergency Power for my 3d printer, why I use a standard computer UPS in between my EcoFlow and my 3d printer
Part 3 covers: Seeing if the battery will power the refrigerator for 8 hours (simulating overnight power), fast recharging during the day using a generator.
Part 4 covers: Charging the EcoFlow Delta 2 Powerstation using a car while driving, Unboxing the EcoFlow Delta 2 Smart Extra Battery, Hooking the extra battery to the base EcoFlow Delta 2 Powerstation.
Part 5 covers: Seeing if the Powerstation and the extra battery will power the refrigerator for 8 hours (simulating overnight power), simultaneous powering of refrigerator and microwave while charging using a generator during the day.
Link to EcoFlow Delta II:
https://us.ecoflow.com/products/delta-2-portable-power-station
Link to EcoFlow Delta 2 Smart Extra Battery:
https://us.ecoflow.com/products/delta-2-smart-extra-battery
Link to EcoFlow Delta II on Amazon:
https://smile.amazon.com/gp/product/B0B9XB57XM/
Link to 20 amp Extension Cord on Amazon:
https://www.amazon.com/gp/product/B00KC108K4/
-------------------
Link to my Etsy Store:
https://www.etsy.com/shop/BetaCygniDesigns
---------------------
End Screen Video Acknowledgement: Cosmic Reef Video produced by NASA and the Space Telescope Science Institute (STScI).
https://hubblesite.org/contents/media/videos/2020/16/1277-Video
8
views

EcoFlow Delta II Powerstation/Extra Battery - Review and as a Hybrid Power Source for Fridge Part 1
NOTE: When you first plug your EcoFlow Delta II into the wall, make sure it's on a circuit that doesn't have a lot of load on it. The default charging rate is 10 amps which is 66.7% of a normal 15 amp circuit. I used the dedicated 20 amp circuit my washing machine runs is plugged into. You can use the EcoFlow App to set the charging rate for the future.
In the past, I've used my Champion 3400-Watt Dual Fuel Generator as an emergency power source in case of extended blackouts. But leaving the generator running all the time or having to start and stop it periodically to keep the refrigerator cold or when we wanted to use the microwave is a pain.
I realized with the EcoFlow Delta II Powerstation I could set up a hybrid power system. The EcoFlow could power the refrigerator all night without having to have the generator running. During the day, I could utilize the fast charging feature of the Delta II (80% in 1 hour at 10 amps) to recharge the battery as needed much like a hybrid car. I test that system in parts 3 & 4 of this review.
Here's a review of my Champion 3400-Watt Dual Fuel Generator I used to recharge the Delta 2:
https://youtu.be/Vt4xNBPt2-k
Part 1 covers: Unboxing, Initial charging, Setting up the EcoFlow app, Changing the charging rate using the app, Measuring the noise level while charging at different rates
Part 2 covers: Setting up the EcoFlow power station for day-to-day use as an Emergency Power for my 3d printer, why I use a standard computer UPS in between my EcoFlow and my 3d printer
Part 3 covers: Seeing if the battery will power the refrigerator for 8 hours (simulating overnight power), fast recharging during the day using a generator.
Part 4 covers: Charging the EcoFlow Delta 2 Powerstation using a car while driving, Unboxing the EcoFlow Delta 2 Smart Extra Battery, Hooking the extra battery to the base EcoFlow Delta 2 Powerstation. Seeing if the Powerstation and the extra battery will power the refrigerator for 8 hours (simulating overnight power), simultaneous powering of refrigerator and microwave while charging using a generator during the day.
Part 5 covers: Seeing if the Powerstation and the extra battery will power the refrigerator for 8 hours (simulating overnight power), simultaneous powering of refrigerator and microwave while charging using a generator during the day.
Link to EcoFlow Delta II:
https://us.ecoflow.com/products/delta-2-portable-power-station
Link to EcoFlow Delta 2 Smart Extra Battery:
https://us.ecoflow.com/products/delta-2-smart-extra-battery
Link to EcoFlow Delta II on Amazon:
https://smile.amazon.com/gp/product/B0B9XB57XM/
-------------------
Link to my Etsy Store:
https://www.etsy.com/shop/BetaCygniDesigns
---------------------
End Screen Video Acknowledgement: Cosmic Reef Video produced by NASA and the Space Telescope Science Institute (STScI).
https://hubblesite.org/contents/media/videos/2020/16/1277-Video
8
views
EcoFlow Delta II Powerstation/Extra Battery - Review as a Hybrid Power Source for Fridge Part 1
NOTE: When you first plug your EcoFlow Delta II into the wall, make sure it's on a circuit that doesn't have a lot of load on it. The default charging rate is 10 amps which is 66.7% of a normal 15 amp circuit. I used the dedicated 20 amp circuit my washing machine runs is plugged into. You can use the EcoFlow App to set the charging rate for the future.
In the past, I've used my Champion 3400-Watt Dual Fuel Generator as an emergency power source in case of extended blackouts. But leaving the generator running all the time or having to start and stop it periodically to keep the refrigerator cold or when we wanted to use the microwave is a pain.
I realized with the EcoFlow Delta II Powerstation I could set up a hybrid power system. The EcoFlow could power the refrigerator all night without having to have the generator running. During the day, I could utilize the fast charging feature of the Delta II (80% in 1 hour at 10 amps) to recharge the battery as needed much like a hybrid car. I test that system in parts 3 & 4 of this review.
Here's a review of my Champion 3400-Watt Dual Fuel Generator I used to recharge the Delta 2:
https://youtu.be/Vt4xNBPt2-k
Part 1 covers: Unboxing, Initial charging, Setting up the EcoFlow app, Changing the charging rate using the app, Measuring the noise level while charging at different rates
Part 2 covers: Setting up the EcoFlow power station for day-to-day use as an Emergency Power for my 3d printer, why I use a standard computer UPS in between my EcoFlow and my 3d printer
Part 3 covers: Seeing if the battery will power the refrigerator for 8 hours (simulating overnight power), fast recharging during the day using a generator.
Part 4 covers: Charging the EcoFlow Delta 2 Powerstation using a car while driving, Unboxing the EcoFlow Delta 2 Smart Extra Battery, Hooking the extra battery to the base EcoFlow Delta 2 Powerstation.
Part 5 covers: Seeing if the Powerstation and the extra battery will power the refrigerator for 8 hours (simulating overnight power), simultaneous powering of refrigerator and microwave while charging using a generator during the day.
Link to EcoFlow Delta II:
https://us.ecoflow.com/products/delta-2-portable-power-station
Link to EcoFlow Delta 2 Smart Extra Battery:
https://us.ecoflow.com/products/delta-2-smart-extra-battery
Link to EcoFlow Delta II on Amazon:
https://smile.amazon.com/gp/product/B0B9XB57XM/
Link to 20 amp Extension Cord on Amazon:
https://www.amazon.com/gp/product/B00KC108K4/
-------------------
Link to my Etsy Store:
https://www.etsy.com/shop/BetaCygniDesigns
---------------------
End Screen Video Acknowledgement: Cosmic Reef Video produced by NASA and the Space Telescope Science Institute (STScI).
https://hubblesite.org/contents/media/videos/2020/16/1277-Video
4
views
Flashforge Guider II Unboxing and Review - Part 4
This video series documents my experience with unboxing and setting up my new Flashforge Guider II 3d printer.
Part 1: Unboxing and comparison with Flashforge Dreamer NX
Part 2: Further comparison with the Dreamer NX (print head differences), Setup, Bootstrapping a Reel Holder
Part 3: Assisted Bed Leveling
Part 4: Test Print and How to Set the Load/Unload Extruder Temperature
I'm upgrading from the Flashforge Dreamer NX to the Flashforge Guider 2. I'm printing items for sale on my Etsy store (see link below) and I run my printer 10-15 hours/day 6-7 days/week all year round.
After about 2 years of printing, I recently had my second Dreamer NX fail (heater core wire shorted out after already being replaced once). In addition, the bearings were squeaking a lot and had to be lubricated frequently. I had a 3rd Dreamer NX in the box ready to go so I could keep printing.
So I faced the choice of buying a 4th Dreamer NX to have as a spare or upgrade to something better. After a lot of research I selected the Flashforge Guider 2 as the printer that would work best for my application.
It shares a similar design of printhead (although the Guider 2's printhead is higher quality), has a much more robust Z-axis, a larger print bed so I can print more items/print, and higher quality bearings.
Other considerations:
I mostly print with a 0.4mm nozzle, but I also have some items that require a 0.2mm nozzle.
I mostly print on the standard Flashforge print surface sticker, but some items require printing on glass.
I wanted to use a magnetic removable print bed to make it easier to remove items from the print surface and to swap in a second one to get the next print started sooner.
Flashforge Guider II on Amazon:
https://www.amazon.com/gp/product/B077QLTFF4/
Here's a link to XYZ Calibration Cube on Thingiverse:
https://www.thingiverse.com/thing:1278865
These are the spatulas I used to help remove the pieces from the print bed:
https://smile.amazon.com/gp/product/B075SLTY8B/
These are the tweezers I used to help remove dripping filament from the print head:
https://smile.amazon.com/gp/product/B0845SKD7Z/
This is the wire brass brush I use to clean the nozzle tip:
https://smile.amazon.com/gp/product/B01J2BS92S/
These are the 0.4mm needles I use to clean the nozzle:
https://www.amazon.com/gp/product/B0797XV8ZK/
Flashforge Dreamer NX on Amazon:
https://smile.amazon.com/gp/product/B07DPBRCYZ/
OpenSCAD website:
https://www.openscad.org/
I used Simplify3D slicer software for the test:
https://www.simplify3d.com/
-------------------
Link to my Etsy Store:
https://www.etsy.com/shop/BetaCygniDesigns
---------------------
Music:
"Blippy Trance" Kevin MacLeod (incompetech.com)
Licensed under Creative Commons: By Attribution 4.0 License
http://creativecommons.org/licenses/by/4.0/
---------------------
End Screen Video Acknowledgement: Cosmic Reef Video produced by NASA and the Space Telescope Science Institute (STScI).
https://hubblesite.org/contents/media/videos/2020/16/1277-Video
8
views