

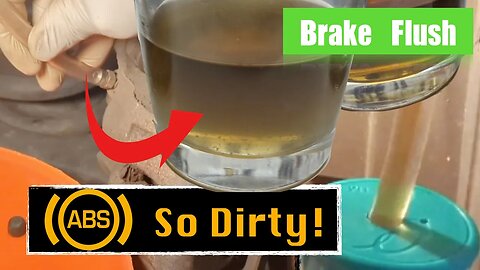
COMPLETE brake flush w/ ABS bleeding. How dirty the fluid! - Honda
Steps for a complete brake fluid flush with ABS bleeding.
Tools and supplies:
- Brake fluid (recommended DOT 3 or DOT 4)
- Clear tubing
- Box wrench
- Brake bleeding kit (if not using clear tubing)
- A scanner (Xtool D7 or Launch CRE205)
Links to ABS bleeding scanners that I mentioned in the video--
LAUNCH Creader Elite 205 OBD2 Scanner:
https://ebay.us/b2kUTb
XTool D7 Bi-directional OBD2 Scanner:
https://ebay.us/vDwoU4
Also available on Amazon:
* Launch CRE205: https://www.amazon.com/gp/search?ie=UTF8&tag=professors-20&linkCode=ur2&linkId=9046f7466ee4524a6c28c789c76d222c&camp=1789&creative=9325&index=automotive&keywords=LAUNCH%20Creader%20Elite%20205%20OBD2%20Scanner
* XTool D7: https://www.amazon.com/gp/search?ie=UTF8&tag=professors-20&linkCode=ur2&linkId=3251fb426b6844ccf0cdb16b44171ddb&camp=1789&creative=9325&index=automotive&keywords=XTool%20D7%20Scanner
96
views

Budget Advanced ODB2 scanner?! #cardiagnostics #obd2 #automatictransmission
BAFX OBD2 scanner in the video:
https://www.youtube.com/redirect?event=comments&redir_token=QUFFLUhqa2d0SG5CZUdLNW5zVjRXS1Fqcy05dkxFUFp3Z3xBQ3Jtc0trN3JWY2JqdlNjb1N5QW0zQzFvQ1RrdnItTWpXa1BpVEplZUM0RlBBTktEWkhjNDM4c3JrLTRRUUVXNnYzQ3ZpNWRfakpRNGNfaWE4VGVVbnBYMjVPUVMtT2hIbEhMb2xIZUpxZkdjNnBoR2Z6R2x4QQ&q=https%3A%2F%2Fwww.amazon.com%2Fgp%2Fsearch%3Fie%3DUTF8%26tag%3Dprofessors-20%26linkCode%3Dur2%26linkId%3D0e17736bc35b44ed7cd5df02390395ac%26camp%3D1789%26creative%3D9325%26index%3Dautomotive%26keywords%3DBAFX%2520OBD2&stzid=UgxDkhvRT3NP2PLyu8N4AaABAg
49
views

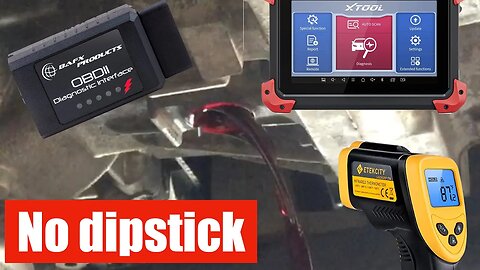
Settled: Can a $30 OBD II Scanner Measure ATF Temperature? Cheap & Accurate on Toyota and Lexus?!
If you consider changing automatic transmission fluid (ATF) on your own, you probably know that accurately measuring ATF temperature is crucial to ensuring it's at the correct level. This typically means using specialized software or a professional OBD2 scanner with brand-specific modules. These scanners can be expensive, like the Xtool D7 priced at $400.
But here's the question: Can you achieve the same results with a more affordable scanner? Specifically, can a basic OBD II scanner, such as the $30 BAFX Bluetooth interface, accurately measure ATF temperature?
Links to 3 OBD2 scanners in the video:
1. BAFX OBD2: https://www.amazon.com/gp/search?ie=UTF8&tag=professors-20&linkCode=ur2&linkId=0e17736bc35b44ed7cd5df02390395ac&camp=1789&creative=9325&index=automotive&keywords=BAFX%20OBD2
2. Launch CRP129E: https://www.amazon.com/gp/search?ie=UTF8&tag=professors-20&linkCode=ur2&linkId=f432fcceb1ebaebd5c6d74c881b2b173&camp=1789&creative=9325&index=automotive&keywords=Launch%20CRP129E
3. XTool D7: https://www.amazon.com/gp/search?ie=UTF8&tag=professors-20&linkCode=ur2&linkId=3251fb426b6844ccf0cdb16b44171ddb&camp=1789&creative=9325&index=automotive&keywords=XTool%20D7%20Scanner
ATF sensor PIDs for Lexus RX350 and Toyota Highlander:
- Name: ATF Temperature on RX350 or Highlander
- Shortname: ATF Temp on RX
- Mode and PID: 221627
- Min Value: -40.0
- Max Value: 350.0
- Scale: x1
- Unit type: F
- Equation: (A*459/255)+(B*1.6/255)-40
65
views
2
comments
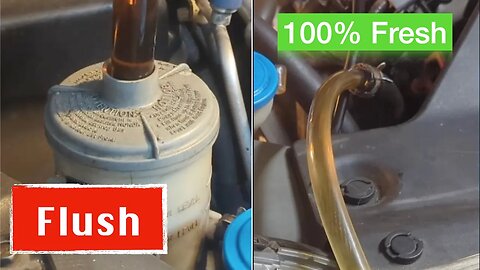
Heavy Steering? Simple steps to replace 100% PS fluid on a Honda
Power Steering Fluid Flush
There are situations when you do need to replace (flush) power steering fluid completely, e.g. when your steering wheel becomes very heavy, after power steering pump replacement, or if you want to remove any debris in the fluid. It is actually okay to flush PS fluid, and it's rather safe to do it.
32
views
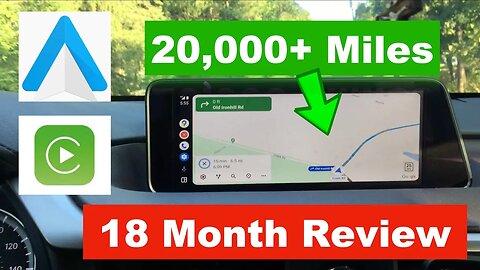
Android Auto & CarPlay Review / Tips 18 Months after Upgrade - 2017 Lexus RX350
A brief update of a Carplay upgrade on 2017 Lexus RX350 after 18 months of use, plus the latest on Android Auto use and tips.
17
views
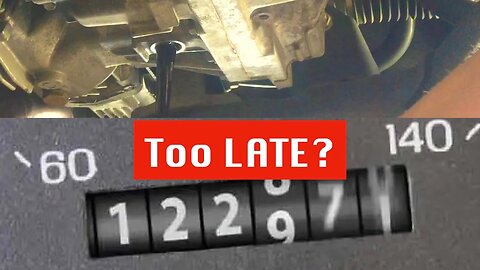
Sealed ATF: To Change Or NOT to Change? Advice on Toyota/Lexus automatic transmission fluid.
I have a different perspective on when you should refrain from changing the fluid. For a vehicle at a higher mileage, e.g. at 120,000 miles, I believe there are still potential benefits to consider a fluid change.
Disclaimer: The information shared in this video is based on
personal opinion and available evidence. Every vehicle and
situation is unique, and there is always a risk associated
with any maintenance procedure. Always consult your vehicle's
manual and consider seeking professional advice when making
decisions regarding your vehicle's maintenance.
23
views
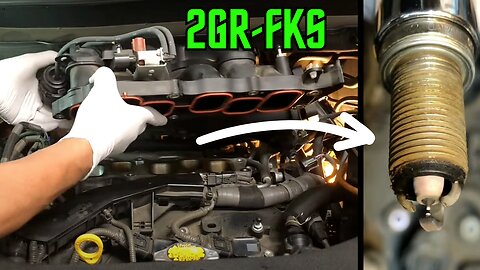
Toyota V6 Rear Spark Plug Replacement on Lexus RX350 - 2GR-FKS
Rear spark plug replacement on Lexus RX350 with the 2GR-FKS engine, with a change interval of 60,000 miles.
18
views
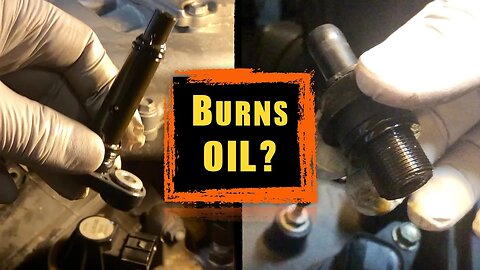
Oil Burning Engine? A Common Culprit and an EASY Fix on Honda & Toyota
If your car burns oil, there can be many different reasons, sometimes costly reasons. But there is one thing you should check first. PCV is a common culprit for oil burning and is very inexpensive and often easy to fix.
13
views
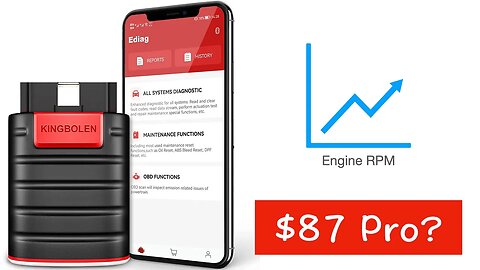
$87 OBDII Scanner with professional features. Worth it?
I received this Kingbolen Ediag OBD2 scanner for a review. The list price on Amazon is $117 minus $30 discount. An $87 scanner with basic OBD features, vehicle-specific software updates, 15 special functions, and bidirectional controls. Is it worth the money? Let's find out.
The Good:
1. Solid built scanner;
2. Software works on both iPhone and Android phones.
3. Basic OBD functions to scan code, clear code, and real-time generic data such as engine RPM, throttle position, coolant temperature, etc.
4. 15 special reset functions such as oil reset, TPMS reset, etc.
The Great:
1. Vehicle specific modules and specialized features such as to monitor transmission fluid temperature and to put electric parking brake into the service mode.
2. Bi-directional controls that allow you to test and control things from door locks and wipers to the activation of ABS solenoid (for brake bleeding).
The Not So Good:
1. Besides basic OBD features, it offers one-year free subscription for advanced features/software.
2. $80 per year subscription starting second year.
It's a dilemma! Either pay annually for $80 to keep/update software. Or don't subscribe and end up with a basic OBD scanner, which is equivalent to a $20-30 basic scanner.
To compare: XTool D7 which I paid about $400 with 3-year free update for is equivalent of 5 years ownership of this scanner ($87 purchase with 1 year free plus $80/year times 4 years).
KINGBOLEN also offers other models such as K7, K8, K10, which provide free updates for 2-3 years.
Is this Kingbolen Ediag scanner a good deal? It really depends on your need and plan to use it. I am curious about your thoughts and comments below.
31
views
Sealed Life-time Transmission Fluid Change & Temperature Level Check - Toyota Lexus - Step by Step
# Sealed Life-time Transmission Fluid Change and Two Methods to Check Temperature & Level - Toyota Lexus
Vehicle in video: 2017 Lexus RX350 Base
## Supplies
1. Toyota WS ATF: 4 quarts
2. Filler plug washer, #90430-A0003
3. Drain plug o-ring, 96721-24018
4. Overflow tube o-ring, 90301-06196
## Tools
1. Ratchet and/or breaker bar, likely 3/8'' drive AND 1/2'' drive
2. Torque wrench (to set at 6, 35, 36, and 76 ft-lbs)
2. 10mm, 21mm and 24mm sockets
3. 17mm allen bit
4. T40 torx bit
5. Funnel and/or fluid pump
6. Infared temperature gauge (used in this video)
* Or scan tool to monitor transmission temperature, used in this video
* Or a paper clip (jumper), not used in this video
7. Extensions
## Safety and Preparation
1. Raise car.
2. Make sure it's level.
3. Safety check!!!
## Remove Filler Cap
1. Remove transmission side cover with 10mm socket.
2. Take off the filler cap with 24mm socket, with an extension.
## Remove Drain Plugs
1. Place catch pan under the transmission.
2. Remove transmission overflow tube plug ("drain" plug) with T40 torx bit.
3. Let it drain... This is only the overflow so it isn't a lot.
## Remove Overflow Tube
4. Once drained, remove overflow tube with 17mm allen bit.
5. Let it drain again...
6. Replace the overflow tube with a new o-ring, lube it with fluid, put it back after drained, and torque it to 36 ft-lb.
7. Replace the tube plug ("drain" plug) with new o-ring, and put it back (not too tight)
8. Add from funnel, OR pump about 3.5 quarts of WS ATF via the filler hole.
9. Replace the filler cap washer with a new one, and put the cap back (torqued to 36 ft-lbs).
10. Start the engine, and monitor transmission temperature until it reaches 104 F (NOT operating temperature):
* Transmission fluid level should be measured in the temperature range 94 - 114 F
* Note this is only a WARM (low) temperature. So don't get the engine/transmission too hot.
* You can use a SCAN tool (e.g. Tech Stream) with features to read transmission temperature.
* Or, you can use an Infrared gun to measure it (compared in this video).
* Or, use a paper clip as a jumper to the OBD port for the D indicator procedure (not shown in this video).
11. With engine running and transmission temperature reaches 104 F, remove the tube plug ("drain" plug) until the fluid trickles.
12. Replace the "drain" plug, and tighten it to 7 ft-lb.
## Final Comments
1. There is NO need to replace the transmission strainer:
* It is a high-quality strainer, NOT a filter, which will last a VERY long time (perhaps a life-time of 300,000+ miles if fluid is replaced regularly).
* Need to remove pan bolts and perhaps replace pan gasket, and you may break them.
* If you have to replace strainer, DO these:
1. Get OE Toyota strainer and pan gasket, NOT any aftermarket parts.
2. Be super careful with the pan bolts. Spray penetrating oil on them and allow time for it to work before you attempt to take them off. If you snap them, it takes hours if not days to get them out. Don't ask me how I know.
2. Fluid change intervals
* First change at 60,000 miles
* Change every 30,000 miles afterwards
3. What fluid: best to use original factory fluid (Toyota WS) for that year & model
4. There is no need for a flush; if you change it every 30k miles, that's good for the transmission.
5. Fluid color means little; it becomes dark the moment you start the engine.
--
Be safe, stay dirty. Enjoy the work!
God bless!
73
views

Do this to avoid tragedy on highway
#shorts
Torque lug nuts to spec.
Check wheel bearing.
Check tire condition and seating.
Buckle up!
God bless!
10
views
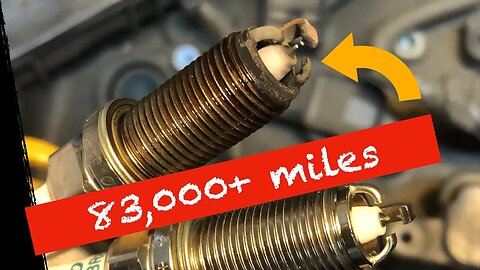
What do your spark plugs look like at 83,000 miles? Replacement guide and tips
## Problem
2017 Lexus RX350 with the new classic Toyota V6 engine 2GR-FKS:
+ 83,000 miles
+ with the factory spark plugs
Toyota recommends 60,000 miles interval for spark plug replacement.
Have to replace them but will start with the plugs in the front, which are easier to remove.
Will also see what the spark plugs look like after 6 years and more than 80 thousand miles.
## Procedure
1. Park your vehicle on a level surface and turn off the engine.
2. Open the hood and remove engine cover.
3. Disconnect the electrical connector from each ignition coil by pressing down on the release tab and pulling it away from the coil.
4. Remove the ignition coil by using a ratchet
* 10mm socket to unscrew the bolts that hold it in place.
* Pull the ignition oil from the tube.
5. Use a spark plug socket to remove the old spark plug from the cylinder head. Turn the socket counterclockwise to loosen and remove it.
6. Check the condition of the old spark plug.
* Wet/oil on the threads of one plug; should monitor possible oil leak of tube o-ring.
* Clean and no carbon deposit, gap still within spec.
7. Compare to the new plugs; they should have the same size and specs.
8. No anti-seize compound on the threads of the new spark plug. The new plugs are pre-gapped so no need to gap them.
9. Use the spark plug socket to thread the new spark plug into the cylinder head. Turn the socket clockwise until the spark plug is snug and seated properly.
10. Use a torque wrench to tighten the spark plug to the specified torque for your vehicle. For the 2GR-FKS engine, the torque specification for spark plugs is 13 lb-ft (18 Nm).
11. Repeat steps for each spark plug that needs to be replaced. We will replace the rear spark plugs in another video.
12. Reinstall the ignition coils by using the ratchet and socket to tighten the bolts that hold them in place.
13. Reconnect the electrical connectors to each ignition coil by pushing them into place until they click.
14. Start the engine to test the new spark plugs.
15. Reinstall engine cover, which makes the engine sound quieter.
## Notes
Again, Toyota recommends 60,000 miles interval for spark plug replacement on this engine another latest models. Spark plugs are cheap so do not delay in their replacement (like me) as worn spark plugs can stress out other more expensive components of the engine such as ignition coils.
Hope this is helpful.
God bless!
37
views
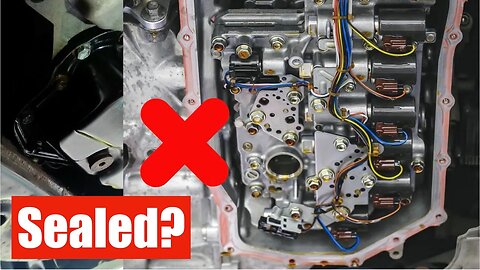
Sealed transmission, do you replace the fluid and filter?
It is a sealed transmission on a Toyota or Lexus. No dipstick on the transmission. Toyota says it is life-time transmission fluid?!
Is it really life time? Do you replace the transmission fluid? Do you also replace the filter (strainer) inside the transmission oil pan?
These are important questions for the life of your car.
16
views
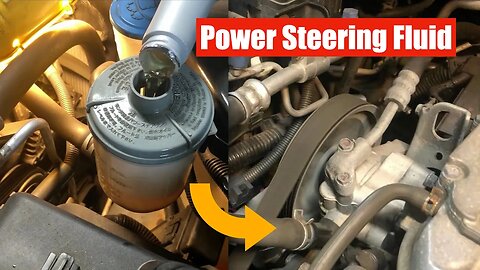
Lubricate your car's power steering before it's difficult to make a turn!
Replace power steering fluid regularly, every 30,000 miles or 2-3 years.
It is the hydraulic fluid that help you turn the wheel and a lubricant for the moving parts of your steering system, especially for the longevity of your steering pump and steering rack.
#powersteering #carmaintenancetips
8
views
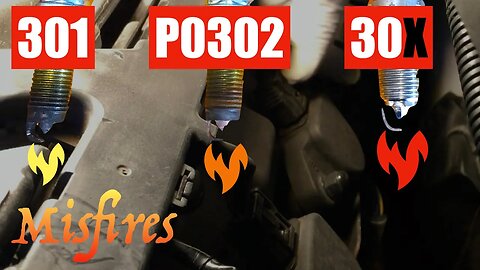
Engine misfires w/ code P0302. Spark plug or ignition coil pack? Diagnosis and fix.
# Check engine light P0302. Spark plug or ignition coil pack? Diagnosis and fix.
Or related code P0301, P0303, P0304, P0305, P0306, P0307, P0308.
Vehicle: 2010 Honda Odyssey Ex-L
Engine: Honda V6 J35A7
## Problem
Code: P0302 Cylinder 2 Misfire
## Analysis
Most common causes:
1. Spark plug; OR
2. Ignition coil pack;
## Test
1. Take out the ignition coil pack from a GOOD cylinder, e.g. cylinder 4.
2. Take out the ignition coil pack from the BAD cylinder, i.e. cylinder 2.
3. Swap the two coil pack, that is:
* Install coil pack \#2 to cylinder 4
* Install coil pack \#4 to cylinder 2
4. Clear code, start the engine, and scan engine.
## Result and Fix
### Scenario 1
IF the code changed to:
"P0304 cylinder 4 misfires"
meaning the GOOD cylinder is now bad with the new coil pack, replace the coil pack.
### Scenario 2
IF the code comes back with an unchanged misfire code:
"P0302 cylinder 2 misfires"
Then the coil is not the culprit, and it is most likely the spark plug in the BAD cylinder. Replace the spark plug:
1. With a spark plug socket, take out the old plug from the BAD cylinder, i.e. number 2.
2. Thread the new plug on with a small ratchet and fingers.
3. Torque to 13 ft-lb, or hand-tight.
* No grease (anti-seize)
* Do NOT over-tighten
4. Clear the code and have a test drive.
5. All done if code doesn't come back.
## Notes
On spark plug replacement:
1. If it has been a while since last spark plug replacement, you may consider replace them ALL.
2. If one starts to go out, it's likely the others will do too.
3. Don't stretch it as it can lead to more costly repairs later.
4. Examples on spark plug replacement intervals:
* Honda engines: no more than 100k miles
* Toyota engines (old): no more than 120k miles
* Toyota engines (latest): no more than 60k miles
On other causes of misfire:
1. Bad fuel
2. Bad fuel injection
3. Engine lubrication, oil getting into combustion
4. Others
Fix the problem ASAP as it can lead to more catastrophic problems on the engine and/or catalytic convertor, which are very costly.
--
I hope this video is helpful and informative.
Consider give us a like and subscribe!
God bless!
30
views
Your car needs a mask?
Your car's engine has an air filter and needs to be replaced every 20,000 miles or so. Otherwise, it collects dirt and the engine will have difficulty to breath. Change it regularly and your car will be strong as new.
#shorts
6
views
My 2 cents to fix electrical dryer with NO HEAT in 354 seconds - short term and long term
## Problem and Solution
Electrical dryer runs but WITHOUT HEAT. Cause:
* Broken heating element
Solutions:
1. Short-term (today): clamp broken heating element/coil together;
2. Long-term: replace with new heating elements (and thermostat and thermal cutoff)
## Steps
0. UNPLUG the dryer before doing any work!!!
1. Remove the cover to access the heating compartment.
2. Take a picture of the wiring before you disconnect the wires to remove the heating box.
3. Confirm broken heating element with: 1) multimeter continuity test, or 2) visual inspection.
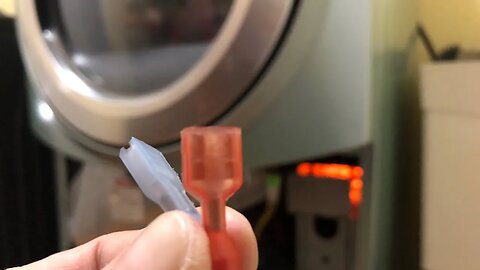
4. Find a terminal connector and remove any plastic wrapping.
5. Clamp the heating element coil (broken sides) with a metal connector. Make it tight!
6. Run another continuity test if possible.
7. Reassemble the heating box, and put it back.
8. Test run to see if the heating element works.
9. Put the cover back if all is working and safe.
10. For the long term: Get replacement parts and replace it with a NEW heating element.
## Notes
* This temporary solution with the terminal connector lasted 3 weeks for us, when we had laundries every other day.
* However, this is only for the short term, and you should monitor the dryer for safety and replace it with a NEW heating element for the long term.
## Final Greetings
I hope this video is helpful and informative.
Consider give us a like or subscribe!
God bless!
13
views
Why does your steering wheel shake (pulsation) when braking? Fix it in 6.57 minutes.
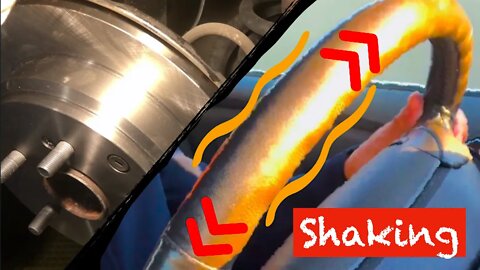
# Why your steering wheel shakes (pulsation) when braking and fix it in 6.57 minutes
Vehicle in the video: 2010 Honda Odyssey EX-L
## Concerns
Steering wheel pulsation when you brake/slow down... especially on the highway. Possible causes:
1. Likely uneven wear of brake pads and/or warped brake rotors.
2. Front brakes and/or rear brakes.
In the case of my 2010 Honda Odyssey, it was the rear brakes.
## Supply
1. Rear brake rotor x2
2. Rear brake pad x2
3. Brake lubricant / grease
4. Anti-seize paste
5. Brake cleaner
6. Thread locker (blue)
7. Optional: brake fluid
8. Optional: Penetrating oil, e.g. PB blaster or WD40
## Tools
1. Breaker bar or ratchet wrench x1
2. 12 mm, 17mm, 22mm sockets
3. Bungee cord x1
4. Torque wrench: 65 and 16 ft pounds
5. Caliper piston pressing tool (or a clamp)
6. Manual impact screw driver (recommended)
7. Wire brush
8. Optional: M8 x 1.25 bolt x2
## 1. Safety and Preparation
1. Engage parking brake first
2. Chocks
3. Pop the hood, take out some brake fluid
4. Loose the lug nuts (22 mm socket)
5. Raise the car, take off the nuts, and tires
6. Tires under car for additional protection
7. Safety check!!!
## 2. Rotor and Pad Removal
1. Remove brake calliper: bolts 12 mm x2
2. Hang calliper with bungee cord
3. Remove brake bracket: 17 mm bolts, it helps to use penetratig oil
4. With safety check and parking brake RELEASED, remove rotor:
I. Impact screw driver to remove factory screws
II. Run 8x1.25 bolts to separate the rotor
## 3. Rotor and Pad Installation
1. Wire brush / prep /clean the wheel bearing hub (remove rust for a clean surface)
2. Clean the rotor with brake cleaner
3. Align the set holes and put the factory screws back on
4. Wire brush / prep /clean the bracket
5. Install brake hardware (shims)
6. Regrease /lubricate the pins
7. Thread lock the bracket bolts (17mm) x2
8. Reinstall the bracket, and torque to 65 ft pounds
9. Grease the new pads: back, top, bottom
10. Install the new pads (slide in with an angle and rotate)
11. Note the brake with wear indicator is inside
12. Press the caliper piston:
I. Make sure they are fully seated in the rubber boots
II. Check brake fluid in the master cylinder (no overflow)
13. Clean and grease piston contact
14. Reinstall the caliper, with 12mm bolts thread-locked
15. Torque to 16 ft pounds
## 4. Finishing
1. Repeat the steps for the other side
2. Reinstall the wheels with lug nuts torqued to 94 ft pounds
3. Lower down the vehicle
4. Add brake fluid back to maximum
5. Pump brake pedals until it is firm
## 5. Breaking in
Follow instructions on the rotors/pads for breaking in procedures.
Hope this video is informative.
Be safe, stay dirty. Enjoy the work!
God bless!
57
views
Did you check your engine oil or have no surprise? #shorts
#shorts on car maintenance
Check engine oil level:
1. Park on level ground and shut off engine.
2. Wait for 5 minutes or so.
3. Pull out engine oil dipstick and reinsert all the way back.
4. Pull out dipstick again, and check.
5. Oil should register between min and max (the two dots/notches/lines).
6. If low:
1. Add oil to the top/max (not to exceed max);
2. Use the same grade of oil shown on the oil cap;
3. Keep an eye and check it more regularly;
4. You may have issues like such oil leak, oil consumption, etc. Address them for the long-term health of the engine.
The car is as good as the engine. Take care of it.
--
God bless!
19
views
1
comment
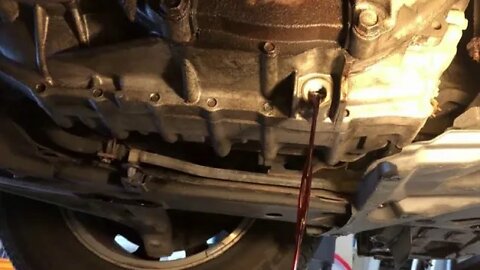
Honda Transmission Fluid Change - Simply Drain and Fill - with Dipstick
# Honda Transmission Fluid Change
Vehicle in video: 2010 Honda Odyssey EX-L
## Tools and Supply
1. 3/8'' rachet
2. OR, a 3/8'' breaker bar
2. 17 mm socket x1
4. Torque wrench (set at 29 and 36 ft pounds)
5. Honda ATF (DW-1), 3.3 quarts
6. Gaskets, for fill and drain plugs
* Honda fill cap washer part #90441-PK4-000 (24mm)
* Honda drain plug washer part #94109-20000 (I.D. 18mm)
## Safety and Preparation
1. Raise car
2. Pop hood
3. Chocks
4. Safety check!!!
## Fluid Change
1. Take off the fill cap with 17mm socket, long extension and perhaps a swivel
2. Put catch pan under transmission.
2. Take off the transmission drain plug with 3/8 ratchet or breaker bar.
3. Let it drain...
4. Clean the drain plug, shavings on the magnet.
5. Replace the drain plug with a new gasket, put it back after drained, and torque it to 36 ft-lb
6. With a long funnel, fill about 3.3 quarts of Honda DW-1 Transmission fluid.
7. Replace fill cap with a new washer, but don't tighten it yet.
8. Check fluid level on ground level, after vehicle reaches operating temperature, and engine OFF
9. Torque fill cap to 29 ft-lb
## Final Comments
1. Fluid change intervals
* First change at 60,000 miles
* Change every 30,000 miles afterwards
2. What fluid: best to use Honda fluid for that year & model
3. No flush; if you change it every 30k miles, that's good for the transmission.
4. Fluid color means little; it becomes dark once you put it in.
--
Be safe, stay dirty. Enjoy the work!
God bless!
39
views
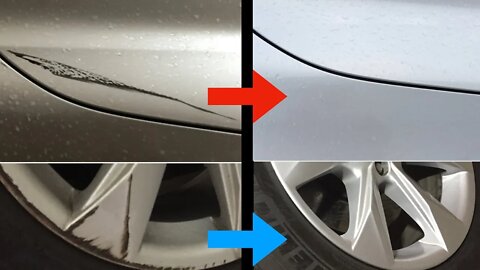
Easy Removal of Paint Transfer / Scuffs on Your Car
# Easy Removal of Paint Transfer / Scuffs on Your Car
## Reason
* I have multiple paint scuffs on the beautiful Lexus RX350. Some of these look terrible (see what happened at the end).
* Fortunately, they are very easy to remove and you only need very simple tools/supplies.
## Paint Transfer or Scratch?
How do you know it is paint transfer and not a scratch?
1. Paint transfer is a different color of paint on top of your car's paint/clear coat.
2. You can feel the "bump" when rubbing your finger on it.
3. Or, if you rub it with a wet finger, it may come off a bit.
## Tools or Supplies
* [ ] Microfiber towels
* [ ] WD40
* [ ] Mr. Clean MagicEraser (Durafoam)
* [ ] Polishing Compound
* [ ] Optional: Rubbing Compound
## Steps
1. [ ] Park your car in garage, under the shade, or do this on a cloudy day (NO Direct Sunlight)
2. [ ] Clean the surface with water (and soapy water if necessary)
* [ ] Make sure there is NO Dirt
* [ ] Clean, rinse, and wipe off with microfiber towels
3. [ ] Spray WD40 on the transferred paint
* [ ] Let it soak for a minute if possible, and repeat the spray
* [ ] WD40 will soften the paint and lubricate the removal/rubbing process
4. [ ] Lightly rub the paint with Mr. Clean MagicEraser foam
* [ ] Follow the direction of the scuff
* [ ] Check your foam and make sure you only remove the transferred paint, NOT the paint of your car
5. [ ] Wipe off, spray WD40 again, and repeat the process until the paint transfer is removed.
6. [ ] Clean the surface, and polish it with some polishing compound on microfiber towel
* [ ] You may start with the rubbing compound first, before applying the polishing compound
* [ ] Use a circular motion to apply the compound, with light/moderate hand pressure
## What Happened and Caused the Paint Transfer?
1. Other cars rubbed/"scratched" your car in the parking lot, and left their paint on it.
2. What happened to the big scuffs on my Lexus:
Wife was at traffic lights when someone cut her off and rubbed the side of the car. That person did not have the courage to stop, and he ran away. My wife felt very upset with the terrible marks (thinking it were damages to the Lexus body paint) and couldn't believe it after I removed the scuffs 15 minutes later.
--
Be safe. Enjoy the work!
God bless!
36
views

Lexus Carplay Upgrade 4 Month Review and Tips
# Lexus Carplay Upgrade 4 Month Review and Tips
Link to installation video: https://youtu.be/I8eCbVxB6e0
* Have used it for 4 months and thousands of miles,
* on local, high-way, and out of state trips.
* Family members who like and don't like technology.
* Overall, very positive experiences.
## Tips and Settings
Correction first:
* Don't stick the Antenna to metal as there can be interference.
- The manual says that but I ignored it in my installation (not correct).
- Practically, I haven't noticed a problem and it may impact some of your installation/connections.
Tips:
1. AUX on the dash and wheel control; no need to long press Menu to switch back to the original Lexus infortainment.
2. Remote lever/touchpad setting, e.g. remote lever
3. Phone audio echo/loop (for the other party): change Mic Pre-config for IS or LX.
## Connection
1. Bluetooth and Wifi on, occassionally reconnect.
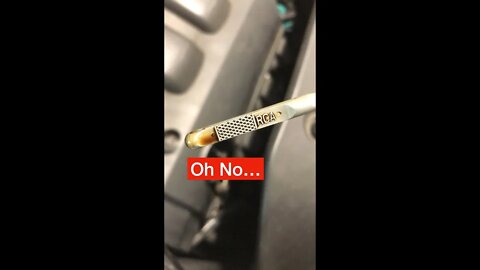
2. USB: charger and wired carplay, always works; but may have to give permission.
* USB cable does not affect opening or closing of the glove box.
3. Multiple devices, automatically connect to one; USB wired connection is picked up first.
## Control
1. On remote lever or joystick, make sure the setting is correct.
2. Left and right (most used) for horizontal and vertical navigation.
3. Up and down (rarely used) to FAST vertical scroll.
4. This is one feature I don't fully appreciate, but it works.
## Key Features
### SIRI
1. SIRI is the lifesaver, especially on the trip.
2. You can access almost everything available to Carplay via Siri.
3. Long press Remote Lever, Touch Pad or one of the Enter keys.
4. Lexus Voice Assistant on wheel remains the same, and cannnot be used to activate Siri.
### Phone Calls
1. Again, use Siri to make phone calls or read messages, etc.
2. Good news: On-wheel buttons to receive and reject (hang up) calls WORK!
* Use them to receive/reject incoming calls
* Or to activate the phone/contact page on Carplay.
3. You can still use Remote or Phone to look up and make calls.
### Maps and Modes
1. Google Maps and Apple Maps both work nicely.
2. Apple Maps works seamlessly with Siri
* There appears to be a way to activate Google Maps from Siri but I haven't figured that out.
3. I use TuneIn radio while on Maps:
* Full Maps or split with Maps and Now Playing
* Automatically mute/reduce the volume on radio, when there is voice guidance or incoming call.
* Sound quality is great! Though I normally only listen to talk show radio and can be biased.
4. Alternatively, with on-wheel control, you can easily (manually) switch to other media sources, e.g. AM/FM.
## Long Term and Long Trips
* Overheat? No problem with mine. But some people place the unit in the glove box.
* It is in the radio unit on the AC passage.
* On the road, Siri is handy, receive calls on the wheel, and other carplay control (brief) on the remote (right-hand side).
## Android Auto
1. Downloaded Autolink (third-party app) but that was not working/used.
2. Use the built-in Android Auto (on Android One device).
3. Tested USB and WiredAuto, worked fine.
4. Likewise to activate Hey Google/Assistant, by long press Remote Lever, Touch Pad or Enter.
5. Didn't use Android Auto extensively; tested it with an outdated Android One phone and Maps with offline (downloaded) data.
## Different Configurations
* Wiring can be different depending on your model and configuration. Make sure to check and get support from the seller.
* For example, for some models, there is an additional Audio Ground Wire to be connected separately.
* Some people reported having to update firmware on the carplay unit.
* It supports 360 cameras, either original Lexus cameras or aftermarket ones. But I haven't tested it as this is not part of my model/configuration.
## Things to Know
1. Installation can be tricky, and wiring varies on configurations.
2. Remote lever is not the best control but works just fine.
3. On-wheel buttons are not fully utilized, only the two phone-related buttons. Would be good to use other buttons such as arrow keys to navigate the carplay system.
4. If you have to use other audio sources such as AM/FM or other bluetooth audio input, you won't be able to have AUX and audio from carplay at the same time. Unlike the original Lexus infotainment, which can give your voice guidance regardless of your audio mode.
Overall, my experiences have been overwhelmingly positive so far.
--
Hope this is helpful and informative.
If there are other questions or issues not covered in this video, please feel free to ask in the comments.
Stay tuned as I will continue to share tips from my journey of car care and repairs. Appreciate your attention to Professor's Garage.
God bless!
46
views
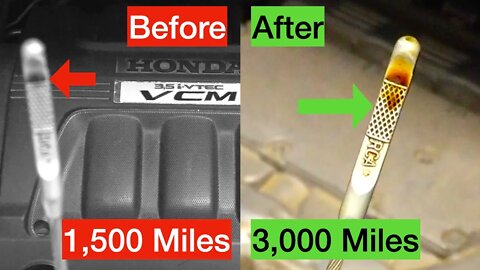
To Burn, or Not to Burn, Honda Engine VCM
# To Burn, or Not to Burn (Oil vs. Fuel), Honda Engine VCM
Honda V6 Engine with VCM (Variable Cylinder Management)
shown in the 2010 Odyssey Ex-L
## Problem
* Honda V6 (J35A7) burns oil, at least 1 quart every 1500 miles
## Reason
* VCM (Variable Cylinder Management) is the likely culprit
* VCM shuts off some of the cylinders to consume LESS FUEL, which is good in this time of high gas prices
* HOWEVER, it creates imbalances and vacuums in the engine with likely problems such as:
1. Engine and mount wear (and noise/failure over time)
2. OIL BURNING, bad for the engine, cat converter (costly), and the environment
3. It can ruin the engine if the oil level goes too low
* You can disable VCM by adding a muzzler (resistor) to the coolant temperature sensor:
* VCM is only turned on after the engine is WARMED up (at a certain coolant temperature)
* Added resistor increases sensor OHM and signals a temperature below the desired condition for VCM, which will not get turned on
## Supplies
1. Honda VCM Muzzler / DIPressor
2. OR, if you can make a resistor of varying 82-100 ohm, that may work as well.
Here is the one I purchased on eBay:
https://www.ebay.com/itm/265031739235
## Tools
Optional:
1. An OBD II Scanner to clear code, in case it appears
## Steps
1. Engine OFF
2. Pop the hood
3. Remove the engine cover
4. Remove the coolant temperature sensor
5. Chain the muzzler with sensor: sensor harness to muzzler to sensor connector on the engine block
6. Start with the lower DIP or ohm setting, e.g. at 82 ohms.
7. Test the car to see if ECO mode appears in any driving condition.
8. Adjust/increase ohm if necessary and test drive again, until VCM no longer returns.
Here are my DIP settings in Pennsylvania USA:
1. 82 ohms in the Winter
2. 92 ohms in the Summer
## Results
1. ECO never comes back with the above settings.
2. I no longer need to add oil between oil changes.
--
Be safe, stay dirty. Enjoy the work!
God bless!
20
views
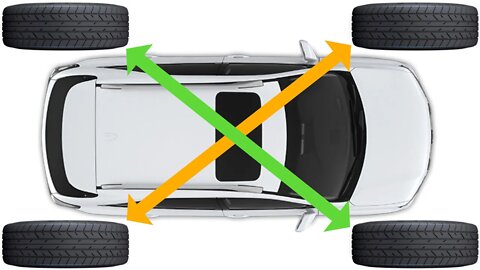
Visual Instructions on AWD Tire Rotation - X Pattern - Silent Video
# Tire Rotation for an AWD (X Pattern)
X Rotation for an All-Wheel Drive
## Tools
1. Breaker bar or impact wrench
2. Torque wrench
3. Floor jack, x1
4. Jack stands, x4
## Preparation
Note if you use a breaker bar, you may have to loosen (NOT remove) lug nuts before raising the vehicle.
1. Raise the vehicle, both the front and the rear.
2. Support the vehicle with jack stands (4).
## Rotation Steps
1. Remove the right front, and move it to the left rear.
2. Remove the left rear, and install the tire from the right front & secure lug nuts.
3. Remove the left front, and move it to the right rear.
4. Remove the right rear, and install the tire from the left front & secure lug nuts.
5. Lower the rear of the vehicle, and tighten the rear lug nuts to torque spec.
6. Install tire from right rear to left front, and secure with lug nuts.
7. Install tire from left rear to right front, and secure with lug nuts.
8. Lower the front of the vehicle and torque front lug nuts to spec.
9. Double-check torques.
10. Done.
## Notes
* I rotate the tires every 5000 miles or so.
* This procedure is for non-directional tires. This cannot be done on directional tires such as some winter tires.
--
Be safe, stay dirty.
Enjoy the work!
God bless!
15
views
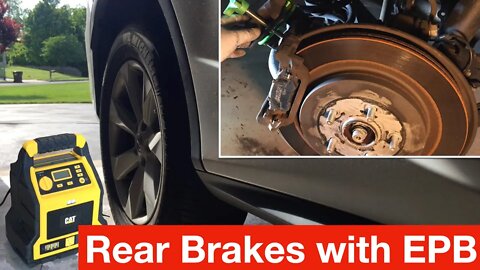
Toyota Lexus SUV Rear Brake Pad Replacement
Replacement of Rear Brake Pads on a 2017 Lexus RX350 AWD Base model
## Supplies
1. Rear brake pads: 2x2 for both sides
2. Brake hardware & lubricant/grease
3. Brake cleaner
4. Thread locker (blue)
## Tools
1. Breaker bar or ratchet wrench x1
2. 14mm and 21mm sockets, and preferably a 17 mm box wrench
3. Bungee cord x1
4. Torque wrench: 25 and 76 ft pounds
5. Syringe or turkey baster
6. 12 volt DC plus small test leads
## 1. Safety and Preparation
1. Loosen (but not remove) lug nuts on the rear wheels, with a 21 mm socket.
2. Jack up the car (rear) and support it with jack stands.
3. Make sure the support is stable. Safety check!
4. Pop the hood, and take out some brake fluid.
5. Remove the lug nuts, and remove the wheels.
6. Put wheels under the car for additional protection.
## 2. Brake Caliper Removal
1. Remove two mounting bolts (14 mm), with:
1. with a 17 mm box wrench to hold the pin in place
2. and ratchet with 14mm socket to loosen the bolt
2. Remove the connector from the electric parking brake (EPB) motor.
3. You may slide the pins (top and bottom) out to remove them.
4. Remove and secure the caliper with a bungee cord.
## 2. Disengage Electric Parking Brake (in Service Mode)
With a 12 volt DC power:
1. Put the brake pressing tool on the caliper, lightly touching the piston.
2. Connect battery negative (with a small test lead/clamp) to one pin on the EPB motor.
3. Connect/touch the positive lead to the other pin on the EPB motor, and you should hear the motor running sound.
4. Observe if the piston is pushing out (to tighten the pressing tool) or withdrawing (to loosen the pressing tool).
5. Once you know the correct connection to retract, repeat the following steps:
1. Activate the motor to retract;
2. Compress the piston;
6. Repeat the above until the piston is flush with the caliper surface.
7. The caliper/piston is ready to be reinstalled with new pads.
For other methods to put EPB in the service mode, you can watch this video:
https://www.youtube.com/watch?v=XgaRKr3vI
## 4. Brake Pad Replacement
1. Clean and grease /lubricate the pins.
2. Slide them back into the caliper bracket, boots on.
3. Remove the old pads, and pry off the existing hardware.
4. Apply a bit of grease on new hardware (on the pad touching contact), and install them.
5. Install the wear indicator hardware on the pad.
6. Slide the pad in an angel, turn, and push it in.
7. Apply some grease on the back/shim of the pad.
8. Replace the inside pad in the like manner. The same procedure but it is difficult to see and takes some patience. :)
9. Put the brake caliper back on the pads.
10. Apply blue thread locker on the mounting bolts.
11. Tighten the bolts (14 mm x2) to 25 ft-lb.
## 5. Finishing
1. Repeat the steps for the other side
2. Reinstall the wheels with lug nuts
3. Lower down the vehicle
4. Torque lug nuts to 76 ft pounds.
5. Check brake fluid level.
6. Start the car and pump the brake pedal several times.
## 5. Breaking in
Follow instructions on the pads for breaking-in procedures, if necessary.
--
Hope this video helps.
Be safe, stay dirty. Enjoy the work!
God bless!
57
views