
Homemade Electric Buggy, Ep 3: Powertrain - LiFePo4, ME1616
Homemade Electric Buggy, Ep 3: Powertrain - LiFePo4, ME1616
In this video I fit the powertrain components into the chassis of my homemade electric buggy. This buggy will be powered by a 55 kWp (72 hp) ME1616 motor from Motenergy, and a 14 kWh LiFePO4 battery pack. LiFePo4 cells are much safer than lithium ion and lithium polymer cells, and last much longer, up to 2000 cycles. Check out my blog for more details about the parts that I used and how they were installed:
https://renewablesystemstechnology.com/project-blog/building-an-e-crosskart-buggy-powertrain
Building An Electric Crosskart Buggy playlist:
https://youtube.com/playlist?list=PLdO3Wk-XPC_BYIyKzLDE410YO1IWXkHCI
Lithium (LFP) battery build video:
https://youtu.be/tL3TscrjgTA
Electric motorbike build:
https://www.youtube.com/watch?v=gYs_jYUyaoY&t=6s
Motor: https://www.electricmotorsport.com/ev-parts/motors/brushless-pmac-ipm-motors/me1616-brushless-65hp-liquid-cooled-ipm-motor-24-120v.html
Controller: https://kellycontroller.com/shop/kls-8080i-ips/
Cells: https://batteryhookup.com/products/new-battery-hookup-lifep04-32650-3-2v-5000mah-cells
BMS: https://www.aliexpress.com/item/1005002554042155.html
RST website: https://www.resystech.com
Support RST on Patreon or Youtube and earn membership perks:
http://www.patreon.com/resystech
https://www.youtube.com/channel/UCtrf6ZiE6hw3k77hGpnuQWg/join
Follow RST on Facebook:
https://www.facebook.com/RenewableSystemsTechnology
19
views
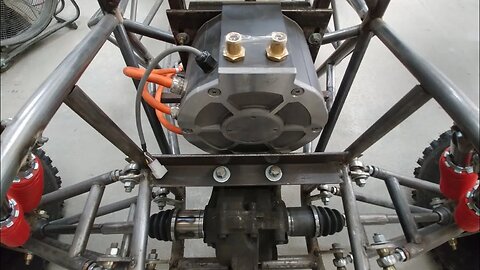
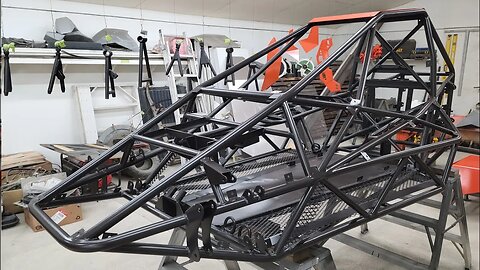
Sneak Peak @ The 72 Hp Electric Crosskart Powertrain
Just a quick video update showing the progress on the crosskart since the last upload. The drivetrain has been installed. In case you haven't read the details in my blog posts, the ME1616 motor is a 55 kW brushless, liquid cooled PMSM (permanent magnet synchronous motor). Connected to it via a 530 chain and 4.78:1 sprocket ratio is a 2007 Honda CR-V rear differential with matching cv axles. The battery will be LiFePo4 and somewhere between 10-12 kWh @ 96V, depending on how many parallel connections I can squeeze into the space that I've allowed for it. With regenerative braking and a total expected curb weight of 750 lbs when it's finished, that should provide close to 200 km's of range per charge in the trails.
I need to make some mounts for the rear (parking) brake caliper and the radiator, and then I'm going to focus on fitting the body panels and getting everything ready for paint this week. I'll upload another video covering this work in more detail for the build series on Sunday. The battery build and wiring will follow. Then the real fun starts lol. Until then, have a great week!
Lithium battery build video:
https://youtu.be/tL3TscrjgTA
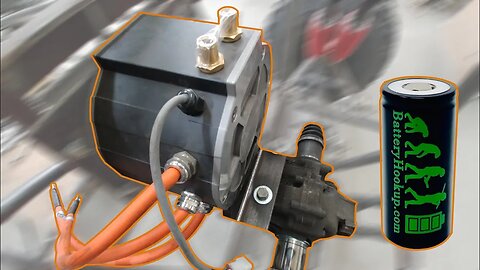
55 kW ME1616 motor:
https://www.electricmotorsport.com/me1616-brushless-65hp-liquid-cooled-ipm-motor-24-120v.html
LiFePo4 5000mah battery cells:
https://batteryhookup.com/products/new-battery-hookup-lifep04-32650-3-2v-5000mah-cells
RST website: https://www.resystech.com
Support RST on Patreon or Youtube and earn membership perks:
http://www.patreon.com/resystech
https://www.youtube.com/channel/UCtrf6ZiE6hw3k77hGpnuQWg/join
Follow RST on Facebook:
https://www.facebook.com/RenewableSystemsTechnology
16
views
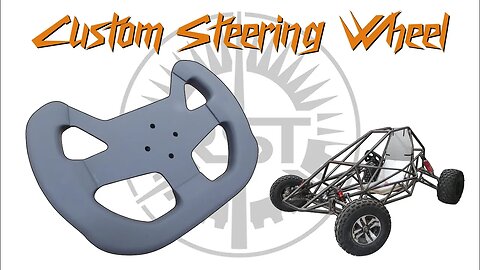
Making A Custom Steering Wheel For Crosskart/Go-Kart/Buggy
In this video I make a custom steering wheel for my electric crosskart buggy using 1/8" steel plate, 1/2" PVC foam board, and PL400 adhesive. If you haven't seen it, you can view the ongoing crosskart build series here:
https://www.youtube.com/watch?v=QO7OHrW5oYM&list=PLdO3Wk-XPC_BYIyKzLDE410YO1IWXkHCI
Check out my blog for details about how I made this steering wheel: https://renewablesystemstechnology.com/project-blog/custom-steering-wheel-for-crosskart-buggy
Website: https://www.resystech.com
Follow RST on Facebook:
https://www.facebook.com/RenewableSystemsTechnology
Support RST on Patreon or Youtube and get access to these videos AD FREE, as well as dozens of project plans:
http://www.patreon.com/resystech
https://www.youtube.com/channel/UCtrf6ZiE6hw3k77hGpnuQWg/join
Special thanks to the following supporters:
Rodrigo Quispe Sipe
Saravana Kumar
Michael Manning
Ashwin Jayaram
george
Lidio Páez
bill hayward
Levi Allen
Garrit Jacobson
MURAT AKSOZEK
Tim
Cian O'Malley
Don
Emeka Eruokwu
mklr
Craig Martin-Smith
sawyer90
Kevin Mccusker
Elias
David Morfin
Bruce King
Julien Dublin
FELIX DEHERRERA
Agalelei Toetu
Martin Lahm
nullstyle
Nikkiwuff
Anton Filonenko
steve stofiel
Leslie L. Isgrigg
David McAdams
John Walker
Remco Kok
יוסף כהן
antonio narciso
Rama Krishna
David Ponce
Jozef De Potter
grecco3631
Robert Smith
Ron Valerius
Alkhatim Almahdi
Andreas Dewatmoko
Joshua Burd
William Jewett
Jeremy H.
Islanderpc
David Franklin
63
views
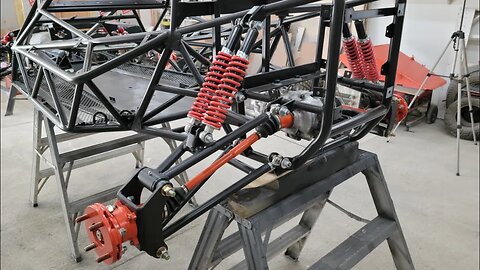
Homemade Electric Buggy, Ep 2: Suspension & Steering
Homemade Electric Buggy, Ep 2: Suspension & Steering
In this video I build and install the suspension and steering components in my homemade electric buggy. Check out my blog for a breakdown of what parts and materials I used and how I put it all together: https://renewablesystemstechnology.com/project-blog/building-an-electric-crosskart-the-chassis
Electric motorbike build:
https://www.youtube.com/watch?v=gYs_jYUyaoY&t=6s
Website: https://www.resystech.com
Follow RST on Facebook:
https://www.facebook.com/RenewableSystemsTechnology
Support RST on Patreon or Youtube and get access to these videos AD FREE, as well as dozens of project plans:
http://www.patreon.com/resystech
https://www.youtube.com/channel/UCtrf6ZiE6hw3k77hGpnuQWg/join
Special thanks to the following supporters:
Rodrigo Quispe Sipe
Saravana Kumar
Michael Manning
Ashwin Jayaram
george
Lidio Páez
bill hayward
Levi Allen
Garrit Jacobson
MURAT AKSOZEK
Tim
Cian O'Malley
Don
Emeka Eruokwu
mklr
Craig Martin-Smith
sawyer90
Kevin Mccusker
Elias
David Morfin
Bruce King
Julien Dublin
FELIX DEHERRERA
Agalelei Toetu
Martin Lahm
nullstyle
Nikkiwuff
Anton Filonenko
steve stofiel
Leslie L. Isgrigg
David McAdams
John Walker
Remco Kok
יוסף כהן
antonio narciso
Rama Krishna
David Ponce
Jozef De Potter
grecco3631
Robert Smith
Ron Valerius
Alkhatim Almahdi
Andreas Dewatmoko
Joshua Burd
William Jewett
Jeremy H.
Islanderpc
David Franklin
I really appreciate your help, you guys are awesome!
1" DOM tubing:
https://www.metalsdepot.com/steel-products/steel-round-tube-dom
Tires:
https://www.ebay.ca/itm/162915996770
Rear wheels:
https://www.ebay.ca/itm/401048540981
Front wheels:
https://www.ebay.ca/itm/332660137281
Steering rack:
https://www.ebay.ca/itm/114293091571
Steering U-joint:
https://www.ebay.ca/itm/272586563610
Heim joints with bungs and spacers:
https://www.ebay.ca/itm/151575208212
Ball joints:
https://www.ebay.ca/itm/362016179000
Weld on poly bushings:
https://www.ebay.ca/itm/152899622438
Rear shocks:
https://www.ebay.ca/itm/143977624282
Front shocks:
https://www.ebay.ca/itm/264901482773?
109
views
Tearing Up The Road With A DYU V1 Smart Electric Bike #DYU #Ebike
Get 25% off the purchase of a DYU V1 e-bike using the discount codes below:
V1 Black
25% OFF
Code: 8YELETMJ
End Date:2021-5-3123:59PDT
https://www.amazon.com/dp/B0936GPFYD
V1 White
25% OFF
Code: 8YELETMJ
End Date:2021-5-3123:59PDT
https://www.amazon.com/dp/B094VK3B34
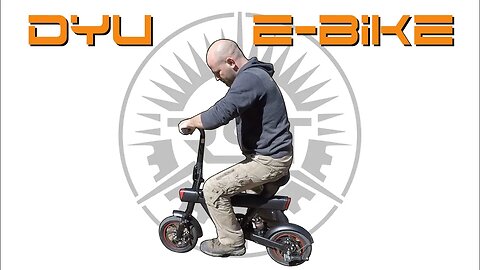
The DYU V1 is a smart electric bike from Fwheel that has a compact, minimalist design focused on comfort and convenience.
It features long, foldable handlebars and foldable pedals so that you can sit up straight while riding, but also fold the bike into a compact size to easily store it away in a closet, under a bed, or in the trunk of your car - almost anywhere.
The bike is powered by a 36V, 250 watt brushless rear hub motor and a 10 amp hour lithium battery which is neatly hidden in the backbone of the bike's 'V' frame. Top speed is limited to around 25 km/h, so it qualifies as a street legal e-bike here in Canada and other parts of North America and Europe without requiring licencing, insurance, etc.
The motor has lots of power to get over most hills around here on its own (max 15% slope), but with occasional pedaling the battery gives me around 20 km's per charge. It comes with a small 110VAC, 2A charger which takes around 5-6 hrs to fully charge the battery.
The drive system is also set up with cruise control. Just maintain throttle input for roughly 8 seconds and the bike will maintain speed on its own after, then twist the throttle or squeeze a brake lever to shut it off and take control again.
For safety and security, the bike is equipped with a bright LED headlight, reflective markers, and a red rear brake light, so you can see and be seen by others when you ride at night. It also has a horn and an anti-theft alarm system to alert you when someone is messing with your ride.
My impression of the bike so far is good. It's a fun and surprisingly comfortable little bike to ride. The suspension does a good job soaking up the many pot holes in our roads here and helps compensate for the unusually small tires that would otherwise transfer a lot of input from the bumps into the bars and seat. Speaking of which, the tires may be small but they're good quality. They grip the asphalt well, when I find a patch that isn't crumbling.
The steep headtube and short wheelbase give it a crazy tight turning radius, but the steering can be a little touchy at top speed as a result so you have to be mindful of that. The compact design is really convenient though. I can lug it in the house on one arm, and it's being stored in a boot closet right now, with room for the boots too.
The only real problem that I can find with it is that it's just a bit too small for me. I live in a rural community, so a 20 km range isn't quite enough to even get me to a corner store, and at 25 km/h it will take a while to get there. But for just $690, I think this would be a great bike for urban environments, especially for seniors and young adolescents. The top motor speed is less than what a human can pedal and the throttle response is soft so it isn't torquey and jarring. It's comfortable, sensible, and safe. Not to mention legal.
If you're interested in purchasing this bike, follow this link:
https://dyu.fwheel.cc/ebikes/dyu-smart-electric-bike-v1-deluxe/
If you're a retailer or distributor and want to learn more, follow this link:
https://www.fwheel.cc/product/dyu-smart-electric-bike-v1/
RST website: https://www.resystech.com
Inquire about a video promo for your product:
jbiggar@resystech.com
Support RST on Patreon or Youtube and earn membership perks:
http://www.patreon.com/resystech
https://www.youtube.com/channel/UCtrf6ZiE6hw3k77hGpnuQWg/join
Follow RST on Facebook:
https://www.facebook.com/RenewableSystemsTechnology
16
views
Homemade Electric Buggy, Ep 1: Steel Tube Chassis
Homemade Electric Buggy, Ep 1: Steel Tube Chassis
In this video I begin building my homemade electric buggy/crosskart. Crosskarts are basically large, powerful go karts that are typically raced on dirt and ice rally tracks, sometimes also called ralley karts. I'm not a pro racer, so mine will be designed with a bit more ground clearance for ripping up the off road trails around my home instead, and will sport a 55 kW (74 hp peak) electric powertrain consisting of a liquid cooled ME1616 IPM motor from Motenergy, a KLS96601-8080IPS controller from Kelly Controller, and a custom built 102V/14kW LiFePO4 battery.
A breakdown of how I made the chassis and with what materials can be found at my blog:
https://renewablesystemstechnology.com/project-blog/building-an-electric-crosskart-the-chassis
Crosskart specs:
Motor - 55 kW (74 hp) liquid cooled Motenergy 1616
Battery - 96V, 9.6 kWh LiFePo4
Controller - Kelly KLS96601-8080I/IPS sinusoidal wave
Transmission - Chain drive w/ Honda CR-V limited slip differential, CV axles
Wheelbase - 77" (196 cm)
Track - 60"
Suspension - front & rear independent double wishbone w/ coil over shocks, 8" (200 mm) travel
Ground clearance - 10" (280 mm)
Wheels & tires - 22x7-10 front, 22x10-9 rear, Wanda sport tires
Tube notcher build video: https://youtu.be/a4zL720_EDo
Electric motorbike build:
https://www.youtube.com/watch?v=gYs_jYUyaoY&t=6s
Support RST and get rewards like early access to ad free videos:
http://www.patreon.com/resystech
https://www.youtube.com/channel/UCtrf6ZiE6hw3k77hGpnuQWg/join
Follow RST on Facebook:
https://www.facebook.com/RenewableSystemsTechnology
19
views

Making A Tube Notcher (For The Electric Crosskart Build)
I built this tube notcher on the fly the other day with parts that I had on hand to help with the crosskart chassis build. It's not perfect but it was easy to put together, is rugged and can notch tubes ranging from 3/4" to 2" (19-50mm) in diameter at any angle.
Get the plans here: https://www.resystech.com/pipe--tube-notcher-plans.html
Parts & materials
Steel can be found here: https://www.metalsdepot.com/category/steel-products
2x2” (50x50mm), ¼” (6mm) thick steel angle, 8” (20cm) long
2.5x2.5” (63.5x63.5mm) 3/16’ (5mm) thick wall square tubing, 6” (152mm) long
1x1/4” (25x6mm) steel flat bar, 6” (152mm) long
1x1” (25x25mm), 3/16” (5mm) thick steel angle, 6” (152mm) long
2”x1/4” (50x6mm) steel flat bar, 18” (46cm) long
1 ¾” (44.5mm) OD DOM tubing, 1 ¼” (32mm) ID, 6” long
¾” (19mm) steel round bar, 6” (152mm) long
½” (12.5mm) threaded rod w/ lock nut and washer
5/16x1” (8x25mm) socket cap screw
¾” (19mm) ID linear bearing
https://www.bearingscanada.com/LBB12UU-3-4-inch-Linear-Motion-with-Seals-Bushing-p/LBB12UU-LINEAR.htm?g
clid=CjwKCAjw9MuCBhBUEiwAbDZ-7ijTfqE5IUUP2bo-LMWa7ZpHWAWkuTSEbT1mf-rTQU-0BiCcV0_vjhoCr6kQAv
D_BwE
Carbide tipped hole saw kit
https://www.canadiantire.ca/en/pdp/maximum-carbide-tipped-hole-saw-set-10-pc-0540314p.0540314.html?
Website: https://www.resystech.com
Facebook: https://www.facebook.com/RenewableSystemsTechnology
10
views

Building A Mini Porch Lift (For My Grandparents) - Plans Available
Get the plans: https://www.resystech.com/mini-porch-lift-plans.html
In this video I build a mini porch lift to attach to my grandparent's deck. This porch lift will allow them to bring items into their home without struggling to walk them up the ramp or stairs with a cane or having to install a full size wheelchair lift. Of course, this lift can be used by anyone for a plethora of lifting applications from a multi-level deck lift to a commercial dumb waiter. Max lifting capacity is approx. 100 lb.
Parts & materials used for this project:
Mild steel can be found here: https://www.metalsdepot.com/category/steel-products
2’x2’ (610x610x3mm) mild steel plate
1x1x24” (25x25x610mm) square steel tubing, ⅛”(3mm) thick wall
1x1” (25x25mm) steel angle, ⅛”(3mm) thick...32”(812mm) required for carriage PLUS 2X the lift height, ex: my lift height = 72”, so total needed was 32+(72x2) = 176”
8’ (245cm) of 1x1.5” (25x38mm) rectangular tubing, ⅛”(3mm) wall
3x3” (76x76mm) square tubing, 3/16” (5mm) thick wall, length = lift height
Two 2” (50mm) OD cable pulleys
https://www.princessauto.com/en/2-in-pulley-block-pulley/product/PA0008824831
120V electric winch
https://www.princessauto.com/en/1500-lb-120v-ac-winch/product/PA0008880429
Eight ⅜” ID V groove pulleys
https://www.bearingscanada.com/Set-of-8-RM2-2RS-3-8-V-Groove-Guide-Sealed-p/kit180022.htm
Four 5/16” ID roller bearings
https://www.bearingscanada.com/30-8ZZ-Angular-Contact-Double-Row-Bearing-8x22x11-p/30-8zz.htm
Eight ⅜” ID x ½” long steel bushings (get two pieces from link below and cut to size)
https://www.ebay.com/itm/Steel-Bushing-Spacer-5-8-OD-X-3-8-ID-X-3-Long-1-Pc-CRS-FREE-SHIPPING-/114480613421
Four ⅜”x2” zinc plated hex bolts with locking nuts and flat washers
Four 5/16”x2” zinc plated hex bolts with locking nuts and flat washers
Four ⅜”x1” zinc plated hex bolts with flat washers
One wire rope/cable thimble (size to fit cable diameter on your winch)
Primer & paint
Tools used to build this project:
DeWalt angle grinder:
https://www.homedepot.ca/product/dewalt-7-amp-4-12-inch-small-angle-grinder-with-one-touch-guard/1001015710?
Kickinghorse flux core welder:
https://kickinghorsewelders.ca/index.php?main_page=product_machines_info&cPath=133&products_id=440&zenid=320456b2019ec310110961afd3842529
Cut60HF plasma cutter:
https://www.ebay.com/itm/60A-IGBT-AIR-PLASMA-CUTTER-AG60-TORCH-DIGITAL-PLASMA-CUTTING-MACHINE-16MM-CUT/232710980173?
Mastercraft MAXIMUM 20V cordless drill:
https://www.canadiantire.ca/en/pdp/maximum-20v-li-ion-1-2-in-cordless-drill-driver-3996206p.html#srp
Pencil, chalk, or marker
Tape measure
Builder’s square
Files
Hammer
Clamps
Pliers
Allen key set
Combination wrenches
Step drill bit (up to 7/8”, or 22mm for metric)
Website: https://www.resystech.com
Facebook: https://www.facebook.com/RenewableSystemsTechnology
28
views
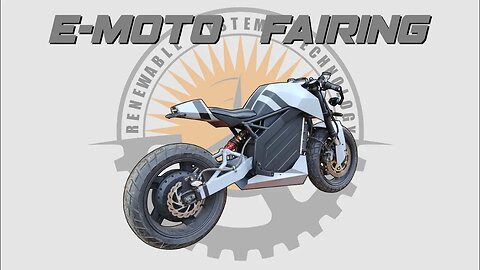
Build An Electric Motorcycle - DIY E-Moto From SCRATCH!
Build An Electric Motorcycle - DIY E-Moto From SCRATCH! Check out my blog for all the details on what parts and materials I used and how I put it all together:
https://renewablesystemstechnology.com/project-blog/how-i-built-an-electric-motorcycle
Get the plans here: https://www.resystech.com/electric-streetfighter.html
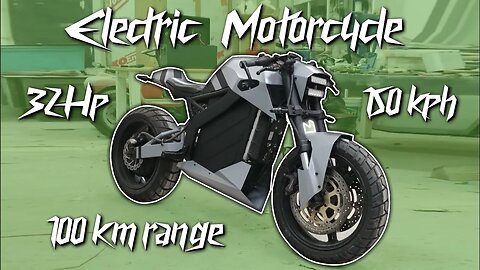
In this video I show how I built a torquey electric motorcycle from scratch in my home workshop using basic tools. I built this bike for less than HALF the price of an equally sized ZERO S (~$5000 Canadian). This aggressive looking streetfighter uses the same 24 kW (32 hp) drivetrain as the previous Cyber Trike project. The QS direct drive motor produces 250 ft-lb of instant torque, 150 km/h top speed at 120V, and the entire bike only weighs 300 lbs, making it comparable to most 300cc ICE bikes.
Power to weight ratio = 0.107hp/lb: https://goodcalculators.com/power-to-weight-ratio-calculator/
Acceleration rate using mass (136kg) and force (250 lb-ft starting torque) = 8.17 m/2^2
https://www.omnicalculator.com/physics/acceleration
0-60 time = 3.28 seconds:
https://www.omnicalculator.com/physics/velocity#:~:text=Multiply%20the%20acceleration%20by%20time,3.6%20%E2%89%88%20100%20km%2Fh%20.
For comparison, a Honda CBR 300r sport bike has 30.5 hp and weighs 364 lbs (165kg). Using the same resources we can calculate power to weight ratio = 0.082hp/lb. Acc rate = 3.439 m/s^2, and it's documented to do 0-60 in 7.8 sec.
Support RST to ditch the ads and get access to loads of project plans at no extra cost:
http://www.patreon.com/resystech
https://www.youtube.com/channel/UCtrf6ZiE6hw3k77hGpnuQWg/join
Follow RST on Facebook:
https://www.facebook.com/RenewableSystemsTechnology
ROI breakdown:
Cost of build = ~$5000 total
Nominal battery capacity = 4.3 kWh
Life span of LiFePo4 cells = ~5000 cycles
Range per charge = ~80km @ 80% DOD (up to 100 km @ 100% DOD)
Grid energy cost per kWh to charge at home with 110VAC = $0.12/kWh
Cost per full charge (100 km 'tank') = 0.12 * 4.3 = $0.52
Cost per km for energy for electric bike = 0.52 / 100 = $0.005
Avg price of gasoline in Canada today = ~$1.50/ liter
Energy in 1L of gasoline = 8.9 kWh
Fuel economy of the most efficient petrol bikes = ~60 miles per gallon, or 25.5 km per liter
Cost per km for fuel for gas bike = 1.5 / 25.5 = $0.06
Electric bike energy cost savings per km = $0.06 - $0.005 = $0.055
Savings per charge/cycle (80 km) = $0.055 * 80 km = $4.40
Payback period based on full cycle charges = $5000 / $4.40 =
1136 cycles
OR
Savings per day based on driving an avg 40 km per day as a daily commuter = $4.40 / 2 = $2.20
Payback period = $5000 / $2.20 = 2272 days, or 6.2 years.
Ie: it will pay for itself in ~6 years (or 1136 cycles, more specifically), completely. LONG before the LFP battery wears out at 5000 cycles. At ~$200/kWh, I could replace the battery almost 6 times with the cost savings to be had - not that I would need to, though. I didn't factor in my time since I don't tend to keep track of it when I'm having fun, but a good fabricator should be able to build this in 2-3 weeks. At an avg wage of ~$20/hr in Canada, that translates to an extra ~$2K in labour. So technically, I guess it'll take 8-9 years to pay back the $7000 investment, which could be used to replace the battery around 7x in that time span, though it should only have gone through around 2000 of its total 5000 max cycle life span by then, so that's all $ back into my pocket, my friends (update - these calculations were based on set fuel prices before they skyrocketed so the results are relatively conservative, but should serve as a good example). 80% fuel eff vs 35%. Doesn't take rocket appliances :)
Specs:
Power: 12 kw/ 24 kWp, 32 hp gross
Motor: QS273 70H brushless hub motor
Battery: 74V/4.3 kWh LiFePo4
Range: up to 100 km's
Top speed: ~115 kph (71 mph) @ 72V, 150 kph (93 mph) @ 120V
Max torque: 350 Nm (258 ft-lb)
Controller: Kelly KLS72601
Wheelbase: 55" (140 cm)
Rake angle: 26°
Trail: 4.9" (124.5 mm)
Turning radius: 72" (183 cm)
Weight: 300 lb (136 kg)
Front suspension travel: 5" (130 mm)
Rear suspension travel: 8" (203 mm)
Front tire: 120/70-17 Shinko 705
Rear tire: 180/55-17 Metzler Karoo Street
Music: 'Dark Epic Hybrid Rock' by Pegasus Music Studio
https://audiojungle.net/item/dark-epic-hybrid-rock/28838847
77
views
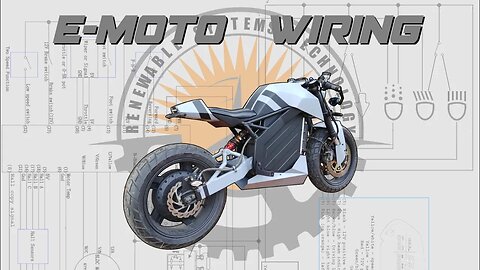
How To Build An Electric Motorcycle Ep 3: Wiring, Brakes & Seat
How To Build An Electric Motorcycle. Get the plans: https://renewablesystemstechnology.com/electric-streetfighter.html
In this video I install the brakes & electrical system in the bike, and make the seat. If you missed parts 1 & 2, you can watch them here:
Pt 1 Chassis & suspension - https://youtu.be/qdUaAszHZd4
Pt 2 Fairing - https://youtu.be/ZydUE797kBc
Bike specs:
Power: 12 kw/ 24 kWp, 32 hp gross
Motor: QS273 70H brushless hub motor
Battery: 74V/4.3 kWh Li-Po
Range: up to 100 km's
Top speed: ~115 kph (71 mph) @ 72V, 150 kph (93 mph) @ 120V
Max torque: 350 Nm (258 ft-lb)
Controller: Kelly KLS72601
Wheelbase: 55" (140 cm)
Rake angle: 26°
Trail: 4.9" (124.5 mm)
Turning radius: 72" (183 cm)
Weight: 300 lb (136 kg)
Front suspension travel: 5" (130 mm)
Rear suspension travel: 8" (203 mm)
Front tire: 120/70-17 Shinko 705
Rear tire: 180/55-17 Metzler Karoo Street
Electrical components:
72V motor
https://www.qsmotor.com/product/17-inch-12kw-hub-motor/
KLS72501 controller
https://www.kellycontroller.com/shop/kls-8080h/
72V/400A contactor
https://www.kellycontroller.com/shop/kzj-400a/
LiPoFe4 cells
https://batteryhookup.com/products/100-brand-new-lifep04-32650-3-2v-6000mah-cells
24S (72V) LiFePo4 BMS
https://www.aliexpress.com/item/32851397187.html?
72V-12V Converter
https://www.ebay.com/itm/Pro-Chaser-DC-DC-48V-60V-72V-Converter-Regulator-Step-Down-to-12V-120W-10A-/223130933726
12V horn
https://www.ebay.com/itm/12V-Loud-105db-Motorcycle-Car-Electric-Bike-ATV-Horn-replacement-with-Bracket-US/193074643965?
12V turn indicators
https://www.ebay.com/itm/12v-Flowing-LED-Motorcycle-Turn-Signal-Indicators-Blinkers-Amber-Light-Scooter/312746782364?
12V/18W LED bar lights
https://www.ebay.com/itm/LED-Work-Light-Bar-Spot-Flood-Roof-Lights-Driving-Lamp-Offroad-Car-SUV-ATV-18W/313191449785?
12V LED brake light
https://www.ebay.com/itm/2x-Bendable-2835-SMD-Red-Amber-17-LED-Strip-Lights-Tail-Turn-Signal-Brake-Lamp/222206388002?
Sicass Racing handlebar switch
https://www.ebay.com/itm/Sicass-Racing-Multi-Function-Handlebar-Switch-26-042/324309545679?
Support RST to ditch the ads and get access to dozens of project plans at no extra cost:
http://www.patreon.com/resystech
https://www.youtube.com/channel/UCtrf6ZiE6hw3k77hGpnuQWg/join
Follow RST on Facebook:
https://www.facebook.com/RenewableSystemsTechnology
15
views
How To Build An Electric Motorcycle Ep 2: The Fairing
How To Build An Electric Motorcycle. Get the plans: https://renewablesystemstechnology.com/electric-streetfighter.html
In this video I make the fiberglass fairing for the electric streetfighter motorcycle. I carved a plug - basically a full scale model of the fairing - from expanded polystyrene foam, then covered it with a couple of layers of 10 oz fiberglass and 2 part epoxy (note that polyester resin will melt polystyrene). I smoothed out the surface with polyester filler after the epoxy was cured, then sanded and primed with acrylic primer.
I made a silicone mold using the plug and 2 part platinum cure RTV mold silicone. I covered the plug in a thin layer of petroleum jelly to serve as a release agent. Nothing usually sticks to silicone, but sometimes things happen with fresh molds so it's better to be safe than sorry. I then poured 2 thin layers of silicone over the plug and allowed it to cure. Then I used a thickening agent in the silicone to make it more viscous so that I could build up the mold to greater than 1/4" thickness, faster.
Once the silicone molds were cured, I covered those with a thin layer of petroleum jelly and then 4 layers of 10 oz fiberglass and polyester resin to make the 'mother' molds - once cured, these fiberglass molds will provide reinforcement for the silicone molds so they retain their shape. I switched to using polyester resin instead of 2 part epoxy because the cure time is much quicker, and it works better in colder temperatures (winter is coming to Canada).
Once the molds were finished, I attempted to cast the fairing in one shot, but failed. The sides of the fairing mold were so steep that the glass kept collapsing, so I had to resort to splitting the molds into four pieces so the glass would lay in them properly. Once cured, I sanded the parts and then connected them with fiberglass 'tape' and more resin. Then the seams were sanded, puttied, sanded again, primed, puttied and sanded again, primed, then sanded AGAIN, then a couple coats of paint were applied....with sanding between each coat. Yeah, there was a LOT of sanding.
So, why did I do it this way? Why not vac injection instead? Simple - not enough time. As mentioned, cold weather is here and it was making it difficult to get this done without having heat in the workshop. I've used vac injection for other projects in the past, but have learned that it takes some time to work out the bugs and to expect a couple of fails in the process before getting it right. I didn't want to mess around. A little extra elbow grease making simple molds and casts helped me avoid this project potentially carrying on into the new year and costing me more than I can afford. If I were going to mass produce these, then I would have certainly spent the extra time making vac injection molds.
Anyway, if you have any questions just post them below. If you have any criticisms, save it. What's done is done and I have a plan to finish what I started. The best way to put your criticism to practice is to build your own bike.
Brakes, wiring, and seat left to do. Not sure if there will be a part 3 or if I'll just put the rest of the build in the complete build video instead. Either way, this project will be wrapped up in a roughly a week, so keep an eye out for the finished product.
Get the plans for this project here: https://renewablesystemstechnology.com/electric-streetfighter.html
Support RST to ditch the ads and get access to dozens of project plans at no extra cost:
http://www.patreon.com/resystech
https://www.youtube.com/channel/UCtrf6ZiE6hw3k77hGpnuQWg/join
Follow RST on Facebook:
https://www.facebook.com/RenewableSystemsTechnology
34
views
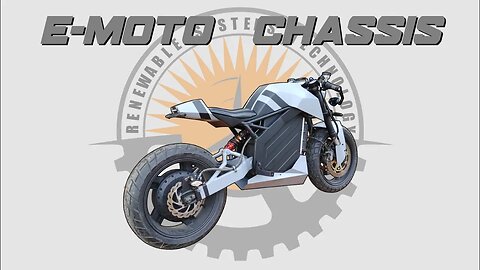
How To Build An Electric Motorcycle Ep 1: Chassis & Suspension
How To Build An Electric Motorcycle. Get the plans: https://renewablesystemstechnology.com/electric-streetfighter.html
In this video I build the chassis for a new electric streetfighter motorcycle. As some of you know, I've been planning and working on the design for most of the year. I took inspiration for some of the cosmetic elements from a few other bikes like the Magpul Ronin (a Beull 1125) and the KTM Duke, as well as my previous motorbike project.
The chassis is all steel. Yes, I know. Again. My flux core MIG limits me to working with steel because no one makes flux core aluminum MIG wire - some people sell it on Ebay and Amazon, but it's actually solid wire that requires gas. I do plan to upgrade to a more powerful arc welder in the near future so that I can use aluminum for projects like this. But for now the extra 15-20 lbs isn't going to make much of a difference, especially since this bikes total weight will still be 100 lbs less than a conventional bike in its class.
As you can guess from the title, I'll be uploading a series of videos for the build as it progresses, this being the first with two more to follow in an effort to establish a more regular uploading schedule for you folks. This week I'll be making the foam plug and sock and mother molds, then use them to cast the fairing components. Keep an eye out for that video in the next week or two. The final video will be the complete build from start to finish, with a short test drive at the end. As always, a complete set of plans with a material list will be available when the build is finished. Links for suppliers of the components featured in this video are below.
Get the plans for this project here: https://renewablesystemstechnology.com/electric-streetfighter.html
Specifications:
Power: 12 kw/ 24 kWp, 32 hp
Motor: QS273 70H brushless hub motor
Battery: 74V/4.3 kWh Li-Po
Range: up to 100 km's
Controller: Kelly KLS72601
Wheelbase: 55" (140 cm)
Rake angle: 26°
Trail: 4.9" (124.5 mm)
Turning radius: 72" (183 cm)
Weight: 300 lb (136 kg)
Front suspension travel: 5" (130 mm)
Rear suspension travel: 8" (203 mm)
Front tire: 120/70-17 Shinko 705
Rear tire: 180/55-17 Metzler Karoo Street
Steel tubing:
https://www.metalsdepot.com/category/steel-products
Hub motor:
https://www.qsmotor.com/product/17-inch-12kw-hub-motor/
Rear suspension:
https://www.ebay.com/itm/250mm-10-Rear-Shock-Suspension-for-SSR-SDG-Pit-Dirt-Bike-Project-980LBS/113714113355?
Front suspension:
https://www.ebay.com/sch/i.html?_from=R40&_trksid=p2057872.m570.l1313&_nkw=2002+suzuki+gsxr+750+front+suspension&_sacat=0
Front tire:
https://fortnine.ca/en/shinko-705-series-dual-sport-front-tire
Rear tire:
https://fortnine.ca/en/metzeler-karoo-street-rear-tire
Front wheel:
https://www.ebay.com/itm/17-x3-5-Alloy-Front-Wheel-Rim-for-Suzuki-GSXR750-92-95-GSF-1200-Bandit-97-05/143627872008?
Clip on handlebars:
https://www.ebay.com/itm/50mm-7-8-Tube-CNC-Motorcycle-Universal-Clip-On-Ons-Fork-Handle-Bar-Handlebars/182681550392?
Self lubricating bronze bushings:
https://www.fastenal.com/products/details/0435438;jsessionid=HC1deNskq4Q1FdJ6HYJ8jYYL.443d7b2e-1555-3602-a586-c0d73327934b
The tool guide used to cut the bearing races in the video:
https://youtu.be/yXQnydST9fw
Don't like ads? Neither do I. I hate them. That's why I signed up for a premium Youtube account for $12/month so that I never have to see another ad on this site again, and feel good knowing that I'm contributing to the creators I like so that they keep posting more great content. I highly recommend it. If you're just here to watch my videos, that's cool too. You can help support me specifically by signing up for a channel membership instead. Then just keep an eye on the community tab to watch these videos free of advertisements. You'll also get other perks, too. Check out the links below if you're interested.
Youtube premium account:
https://www.youtube.com/premium?ybp=Sg0IBhIJdW5saW1pdGVk
Support RST specifically:
http://www.patreon.com/resystech
https://www.youtube.com/channel/UCtrf6ZiE6hw3k77hGpnuQWg/join
Follow RST on Facebook:
https://www.facebook.com/RenewableSystemsTechnology
38
views

ELECTRIC CYBER TRIKE BURNOUT!
Busting the myth that hub motors suck with my custom built leaning reverse trike, powered by a 12-24 kW QS 273 hub motor with over 250 ft-lb of torque, and a 74V/4.3 kWh Grepow battery. Want to learn more about this project? Click the link to check out the build video: https://youtu.be/YMm3yrVhA88
8
views
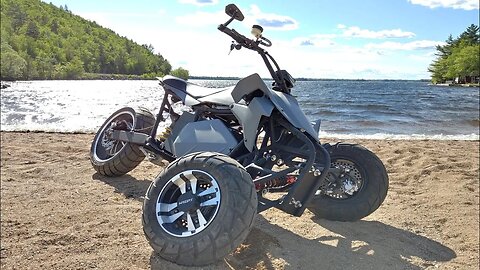
How To Build An Electric Leaning Reverse Trike
How To Build An Electric Leaning Reverse Trike. Get the plans: https://www.resystech.com/cyber-trike---electric-lrt.html
In this video I build a custom electric leaning reverse trike. Get the best of both worlds and hit the trail with this powerful electric reverse trike. With the leaning ability and twice the torque of an avg sport motorcycle, and double the traction and stability at the front wheels, you'll be cornering faster and can easily navigate around obstacles on the trail. This machine rides like a motorcycle, but handles better.
It's technically a (Frankenstein) conversion, using a modified late 1980's Suzuki 250 Quadrunner chassis, and Yamaha Banshee hubs, brakes, and steering knuckles, though a Banshee or Raptor chassis would be better because it would require less modification to adapt to a leaning suspension and incorporate a swingarm (I used what I already had for parts to keep the costs as low as possible).
The A arms are custom built to a certain specification to make the leaning suspension work properly without negatively affecting things like camber or caster, or create too much tire scrub/wear, which is detailed in the plans that are available at the link above. Their geometry can be adapted to almost any chassis you choose, just be sure that the original steering uses Ackerman geometry and maintain it with the new design mod's. This ensures that each front wheel is angled properly during a low speed turn. In other words, because the 'inside' wheel is travelling around a smaller radius than the outside wheel when turning left or right, it needs to be angled in the direction of the turn a few degrees more than the outside wheel to navigate the turn easily and minimize tire wear.
All of the heim joints in the front suspension are high quality/heavy duty, and incorporate high misalignment spacers where required to allow for a full 30° lean in either direction (there are different grades of heim joint - don't use the cheapest or they will break!). The swingarm is attached to and supports the main frame with a rear shock absorber from a Suzuki GSXR 1000 motorcycle, which includes a dog bone progressive dampening linkage (a KTM progressive dampening shock absorber is a good substitute for the GSXR shock and linkage). The plans include a full list of all of the components and materials needed to build the leaning suspension and the rest of the trike as shown in the video.
The drive system uses a 12 kW/24 kWp (30 hp) electric QS hub motor mounted in a 17"x6" alloy wheel:
https://www.qsmotor.com/product/17-inch-12kw-hub-motor/
The motor is controlled by a KLS72601-8080H programmable controller with regenerative braking, forward and reverse features from Kelly Controls:
https://www.kellycontroller.com/shop/kls-8080h/
Total cost for me to build this trike was around $4500 CAD. The build was spanned out over a few months, working the odd evening while waiting for parts to be delivered (COVID shipping delays). But I estimate that in total the work would haven taken approximately 2-3 weeks to finish if I had worked on it every day consecutively.
Trike Specs
Power: 12 kW continuous, 24 kW peak (~30 hp)
Top speed: 112 kph (programmable to 150 kph)
Torque: 300 nm (200 ft-lb)
Battery: Grepow LiFePo4, 74V, 4.3 kWh
Charge time: ~ 1 hour @ 59 amps
Driving range per charge: 100 km
Motor: brushless, gearless QS 273 12 kW/24 kWp, 17" hub motor
Controller: programmable Kelly KLS72601-8080H
w/ regenerative braking, forward & reverse features
Wheelbase: 59”
Front wheel track: 40”
Wheels:
front - 10x5” MASSFX Yamaha Banshee alloy rims (4x156 BP)
Pneumatico Deli tire 150/80-10
back - 17x6” alloy rim w/ QS 273 hub motor
Metzler Karoo Street tire 180/55-17
Lean angle: 30° in either direction
Don't like ads? Neither do I. I hate them. That's why I signed up for a premium Youtube account for $12/month so that I never have to see another ad on this site again, and feel good knowing that I'm contributing to the creators I like so that they keep posting more great content. I highly recommend it. If you're just here to watch my videos, that's cool too. You can help support me specifically by signing up for a channel membership instead. Then just keep an eye on the community tab to watch these videos free of advertisements. You'll also get other perks, too. Check out the links below if you're interested.
Youtube premium account:
https://www.youtube.com/premium?ybp=Sg0IBhIJdW5saW1pdGVk
Support RST specifically:
http://www.patreon.com/resystech
https://www.youtube.com/channel/UCtrf6ZiE6hw3k77hGpnuQWg/join
Follow RST on Facebook:
https://www.facebook.com/RenewableSystemsTechnology
73
views

How To Build The Modular Articulated Tool Guide System - Gen II
How To Build The Modular Articulated Tool Guide System. Get the plans: https://renewablesystemstechnology.com/cyber-trike---electric-lrt.html
Since the first build video was published, I've had a couple of years to think about improvements for the modular articulated tool guide prototype, and how to move forward with a metal version. I'd noticed that a few folks who've downloaded the plans have come up with their own metal versions, so I figured it's time to stop sitting on this design and take it from Sketchup to the real world.
The only tool attachment that I made this time was for the angle grinder, because the table that the tool guide is attached to is intended for metal working only. I'm building a much larger tool guide in the near future that will attach to a 4x8 table and be used for woodworking only, specifically crosscutting sheets of plywood and surface planing. But with the examples that are shown in the first build, I think you folks will easily understand the versatility and can appreciate the convenience of having something like this in the workshop or even for certain tasks on the job site.
If you haven't seen the original tool guide build, you can check it out here: https://www.youtube.com/watch?v=DPL57IxYcD8&t=5s
Don't like ads? Neither do I. I hate them. That's why I signed up for a premium Youtube account for $12/month so that I never have to see another ad on this site again, and feel good knowing that I'm contributing to the creators I like so that they keep posting more great content. I highly recommend it. If you're just here to watch my videos, that's cool too. You can help support me specifically by signing up for a channel membership instead. Then just keep an eye on the community tab to watch these videos free of advertisements. You'll also get other perks, too. Check out the links below if you're interested.
Youtube premium account:
https://www.youtube.com/premium?ybp=Sg0IBhIJdW5saW1pdGVk
Support RST specifically:
http://www.patreon.com/resystech
https://www.youtube.com/channel/UCtrf6ZiE6hw3k77hGpnuQWg/join
Follow RST on Facebook:
https://www.facebook.com/RenewableSystemsTechnology
3
views

Building Solar Heating Panels - Flat Black Paint Vs Thurmalox 'Selective Surface' (?) Coating
Check out my latest project: https://youtu.be/gYs_jYUyaoY
I needed a small array of solar thermal panels for some process heating projects around home, and thought it would be a good opportunity to compare the performance of standard flat black stove paint vs a selective surface coating. A selective coating has high absorbence and low emittance properties to help maximize the amount of solar energy the collector captures. Flat black paint has high absorbence, but also high emittance properties, so it 'reflects' more solar energy away from the collector than a selective surface coating would. Exactly how much depends on the manufacturer. Most selective surface coatings aren't available to the general public to use, however, I came across ThurmaIox 250 sold as a selective surface coating in a spray can, and thought I'd give it a try and compare it with standard Tremclad stove paint to see if there's much difference in performance and if the extra cost is worth it. Thurmalox is claimed to have an absorptivity value of 0.95 and emissivity value of 0.65. For context, black chrome - typically used on commercial evacuated tube solar collectors - has an absorptivity of 0.9 and emissivity of 0.09, and black paint has an absorptivity of 0.9 and emissivity of 0.9. So Thurmalox isn't necessarily a selective surface coating since the emissivity value is still relatively high compared to common commercial selective surfaces, but will it work better than standard paint? More details about the heaters and the results of the performance comparison can be found at the link below.
See the results: https://www.resystech.com/collector-coating-comparison.html
Support RST specifically:
http://www.patreon.com/resystech
https://www.youtube.com/channel/UCtrf6ZiE6hw3k77hGpnuQWg/join
Follow RST on Facebook:
https://www.facebook.com/RenewableSystemsTechnology
10
views

Making A Press Mold - Axial Flux Stator Casting
Check out my latest project: https://youtu.be/gYs_jYUyaoY
Hey guys! Just a quick video today, showing how I made a press mold for casting an 18 coil axial flux stator - or showing why I prefer using vacuum injection instead. I built the turbine back in December, but my guy wires are now froze in a few inches of ice, so I probably won't get to install it until spring. In the meantime, I thought I'd share the press mold with you. It doesn't make a perfect bubble free cast, but it's easy to make, can be used multiple times, and does a reasonable job for DIY turbines. Links for the materials used to make the mold can be found below.
If you like these smaller projects, let me know in the comments and I'll try to publish more of them between the big projects to help fill in the gaps. With that said, keep your eyes peeled for an electric trike. As some of you already know, Grepow is generously sponsoring the build. I've been working on it and another big project on the side, but I'm not going to reveal that one until the trike is ready ;) Some really cool projects are in the works, so stay tuned!
Learn how to design a wind turbine from scratch with the Wind Turbine Design Guide:
https://www.resystech.com/the-diy-wind-turbine-design-guide.html
Materials for the mold:
RTV silicone:
https://www.ebay.com/itm/RTV-PLATINUM-SILICONE-RUBBER-MOLDING-Two-Quarts-64oz-High-Strength/113705746066?_trkparms=aid%3D888008%26algo%3DDISC.CARDS%26ao%3D2%26asc%3D20131227121020%26meid%3D846d1744b9164462a3a0877763929ade%26pid%3D100009%26rk%3D1%26rkt%3D1%26sd%3D113705744040%26itm%3D113705746066%26pmt%3D0%26noa%3D1%26pg%3D2047675&_trksid=p2047675.c100009.m1982
Polycarbonate cover:
https://www.ebay.com/itm/POLYCARBONATE-CLEAR-1-2-thick-24-x-24/193057824544?ssPageName=STRK%3AMEBIDX%3AIT&_trksid=p2057872.m2749.l2649
Toggle clamps:
https://www.ebay.com/itm/GH-225-D-227Kg-Holding-Capacity-Quick-Holding-Horizontal-Type-Toggle-Clamp-Clip/233006427437?hash=item364043ed2d:g:GNEAAOSwNYtb7SSU
Don't like ads? Neither do I. I hate them. That's why I signed up for a premium Youtube account for $12/month so that I never have to see another ad on this site again, and feel good knowing that I'm contributing to the creators I like so that they keep posting more great content. I highly recommend it. If you're just here to watch my videos, that's cool too. You can help support me specifically by signing up for a channel membership instead. Then just keep an eye on the community tab to watch these videos free of advertisements. You'll also get other perks, too. Check out the links below if you're interested.
Youtube premium account:
https://www.youtube.com/premium?ybp=Sg0IBhIJdW5saW1pdGVk
Support RST specifically:
http://www.patreon.com/resystech
https://www.youtube.com/channel/UCtrf6ZiE6hw3k77hGpnuQWg/join
Follow RST on Facebook:
https://www.facebook.com/RenewableSystemsTechnology
24
views
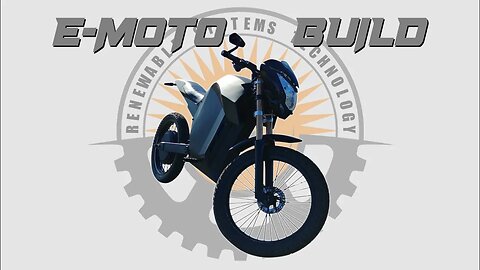
Build An Electric Motorbike - DIY E-Moto!
Build An Electric Motorbike - DIY E-Bike From SCRATCH! Get the plans to build your own diy motorbike: https://www.resystech.com/electric-motorbike.html
In this video I build a custom diy electric bike from scratch. This home built motorbike is equivalent to a 100-150cc gas powered bike with a top speed of 120 km/h @ 72V and a range of 100 km. The electric conversion kit that I used came with an 8kw continuous and 12 kWp QS hub motor and 150A Sabvaton controller, throttle and hydraulic brakes. It was super simple to hook up. It was all set up and ready to go when it left the factory - basically plug and play. I just needed a bike and decided to do something completely unique instead of a conversion. I powered everything with a custom 72V/4.2 kWh lifepo4 battery that I had built for me (sorry, no footage).
This electric bike build is only my second e-bike build and is far from perfect. There are a few things that need to be improved, as noted in the video. But it's still a lot of fun to ride and I learned a lot about how to build a motorcycle with this experience.
CHECK OUT MY NEW STREETFIGHTER BUILD: https://youtu.be/gYs_jYUyaoY
E bike specs:
Power: 8000W continuous, 12,000W peak
Weight: ~200 lbs (91 kg)
Top speed: 75 mph (120 kph)
Range: ~60 miles (100 km), average terrain
Wheelbase: 59”
Rake angle: 28°
Suspension travel: ~180mm
Wheels: 90/90/19 front and rear
Seat height: ~35”
Controller: 72V/150A
Motor: brushless/gearless hub motor
Kit available here: https://www.aliexpress.com/item/32881656316.html
Battery: 72V/60Ah (4.2 kWh)
www.batteryhookup.com
Follow RST on Facebook:
https://www.facebook.com/RenewableSystemsTechnology
10
views

How I Built An Electric Motorbike...Out Of Plywood?
How I Built An Electric Motorbike...Out Of Plywood? Get the plans: https://renewablesystemstechnology.com/wooden-e-bike.html
This was by far one of my favorite builds. Everything went well, and the e bike works great! As you can see in the video, the roads around here are so bad we'd almost be better off going back to dirt and grading it once a month instead (I had to drive on the shoulder of my street - that's how bad it is). They're rough, full of pot holes and raised culverts, and are a good test for the structural integrity of this bike. After 200+ km's, so far I've had 0 problems and don't anticipate any popping up in the future. This bike is solid. Its frame is basically a fiberglass reinforced glue-laminated beam, after all.
When it comes to weight, the frame is ~60 lb, and the bike in total weighs 120 lb. This is comparable to the LMX free ride motorbike which weighs 100 lb. A motorbike with an equally sized engine in terms of hp (100-125cc = ~6-8 hp at 1hp per ~15cc avg) will weigh around 200-250 lbs, so this bike has a big advantage in that regard.
The motor is rated for 3000 watts continuous output, 5000 watts peak. It has loads of torque (max 85 Nm) for accelerating and climbing steep hills, a lot more than what I need. Top speed is rated at around 90 kph, but I've only had it up to 80 kph on these roads - they're just too rough to go beyond that for a novice like me, I'm still getting used to driving that fast on two wheels lol. Regardless, it has no trouble keeping up to traffic or overtaking slow drivers, if need be.
The battery consists of ten lithium 40V/5Ah Greenworks yard tool battery packs, which are wired in a series-parallel configuration to create a 72V/25Ah bank (nominal voltage for the packs is actually 36V) - I kept the leads from the batteries to the terminal blocks exactly the same length so that the internal resistance is the same in each, that way the packs are all charged and discharged equally and maintain a perfect balance between them at all times. They have a BMS built into them, so that really minimized the job of making the bank. I've been using Greenworks yard tools for a few years, so I figured the versatility of using their battery packs with this bike would pay off. They were close to the same cost as purchasing individual 18650's, so the choice seemed like a no-brainer to me.
In the video I take the bike for a ~35 km round trip from home to town and back, which took around 40-45 minutes and only used around 60% of a full charge (the time lapse of the trip is sped up quite a bit to save time, so use the speed settings in the Youtube player to slow it down if you have trouble seeing the speed and power input on the display screen). If I pushed it to the limit, I could probably get between 45-50 km's per charge on avg terrain. Ideally, to make the battery life last as long as possible, they shouldn't be drained more than 75% before recharging. This could mean the difference between replacing them in 2 years vs 10 years.
In total this project cost me around $2000 (Canadian): $600 for the motor and controller, $900 for the batteries, and another ~$500 for the suspension, plywood, fenders, lights, etc. Some parts are recycled from my old downhill mtb too. For comparison, to buy a 3000W electric motorbike - like the LMX 161-H for example - would have cost me $7800 Euros, or nearly $12,000 Canadian! That's not gonna happen lol.
Specs:
Power: 3000W continuous, 5000W peak (~4 - 7 horsepower)
Weight: 120 lbs (54 kg)
Top speed: 56 mph (90 kph)
Range: 30 miles (~50 km), average terrain
Wheelbase: 53”
Head tube angle: 66°
Suspension travel: ~180mm
Wheels: 26”x3” front, 26”x3” rear
Seat height: ~35”
Controller: 72V/60A
Motor: brushless hub motor
Battery: 72V/25Ah
Don't like ads? Neither do I. I hate them. That's why I signed up for a premium Youtube account for $12/month so that I never have to see another ad on this site again, and feel good knowing that I'm contributing to the creators I like so that they keep posting more great content. I highly recommend it. If you're just here to watch my videos, that's cool too. You can help support me specifically by signing up for a channel membership instead. Then just keep an eye on the community tab to watch these videos free of advertisements. You'll also get other perks, too. Check out the links below if you're interested.
Youtube premium account:
https://www.youtube.com/premium?ybp=Sg0IBhIJdW5saW1pdGVk
Support RST specifically:
http://www.patreon.com/resystech
https://www.youtube.com/channel/UCtrf6ZiE6hw3k77hGpnuQWg/join
Follow RST on Facebook:
https://www.facebook.com/RenewableSystemsTechnology
48
views
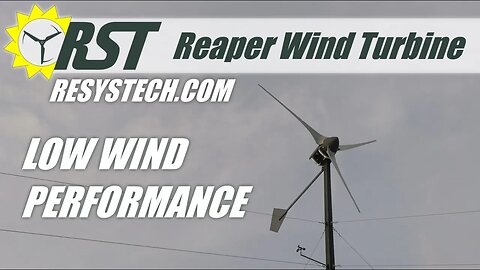
3 kW Off Grid Reaper Wind Turbine - Clean Low Wind Performance
Check out the build article and get the plans: https://renewablesystemstechnology.com/project-blog/how-i-built-a-3-kw-off-grid-wind-turbine
This is why I built an axial flux. Start up speed is under 1 mph, cut in speed is ~3 mph. Consistent production in low wind environments. There's no comparison. It doesn't get any better than this unless we go bigger. I love it!
Here's another (low quality) clip from the DVR showing how well it performs in clean wind. The wind blew from the east for a bit yesterday, which is the least obstructed side of my property, so there was little to no turbulence from the trees affecting the turbine. This will be the norm once the tower is extended to raise the turbine above the trees, where it belongs. Based on the coefficient of a typical radial flux turbine, this turbine should produce AT LEAST 600 kWh per month (in areas like mine with a mean annual wind speed of 5 mps, refer to the Canadian Wind Atlas map turbine performance calculator that claims up to 750 kWh per month). The avg Canadian household uses around 900 kWh per month, to put that in perspective. But radial flux turbines usually don't cut in until 6-8 mph, when this turbine is already producing a couple hundred watts. As some of you know, this is because of the cogging resistance that's inherent in their steel stator core design. This turbine doesn't have that problem. Once the battery bank is upgraded and the clipper is connected, then I'll turn the brakes off for good and start logging kWh production.
http://www.windatlas.ca/maps-en.php
http://www.windatlas.ca/rose-en.php?ni=1126&nj=340&height=50
Don't like ads? Neither do I. I hate them. That's why I signed up for a premium Youtube account for $12/month so that I never have to see another ad on this site again, and feel good knowing that I'm contributing to the creators I like so that they keep posting more great content. I highly recommend it. If you're just here to watch my videos, that's cool too. You can help support me specifically by signing up for a channel membership instead. Then just keep an eye on the community tab to watch these videos free of advertisements. You'll also get other perks, too. Check out the links below if you're interested.
Youtube premium account:
https://www.youtube.com/premium?ybp=Sg0IBhIJdW5saW1pdGVk
Support RST specifically:
http://www.patreon.com/resystech
https://www.youtube.com/channel/UCtrf6ZiE6hw3k77hGpnuQWg/join
Follow RST on Facebook:
https://www.facebook.com/RenewableSystemsTechnology
16
views
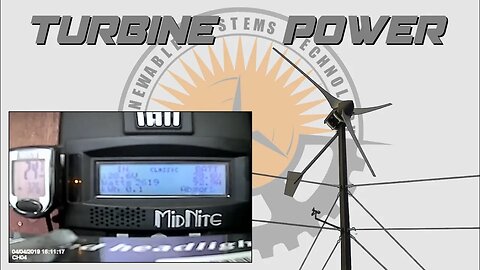
Off Grid Reaper Wind Turbine Producing 2.6 kW!
Check out the build article and get the plans: https://renewablesystemstechnology.com/project-blog/how-i-built-a-3-kw-off-grid-wind-turbine
In an area with a mean annual wind speed of 11 mph (5 mps) or higher, this turbine will produce 500 kWh+ of energy every month, nearly enough to take an avg home completely off the grid:
http://www.windatlas.ca/rose-en.php?ni=1117&nj=380&height=30
Apologies for the quality (recorded from my DVR system while I was away at work). This video shows the Reaper axial flux wind turbine exceeding the amp limit of the charge controller and producing ~2.6 kW in ~24 mph dirty wind (ie: turbulent wind - I need to raise the turbine another 20 ft to get above the tree canopy and into cleaner wind with more consistent speed). Exactly what the wind power equation P = 1/2ξpAV^3 says it should be producing with a 30% coefficient. Gotta love math.
As some of you know, the Midnite Classic 200 controller that I'm using can only handle a boost current of ~78 amps on 12-48V systems, which means that the maximum input power from the turbine while it's connected to my 24V battery bank is ~2200 watts. The maximum input voltage from the turbine that the controller can handle is 200V. When the turbine exceeds these limits or the batteries become charged, the controller will disconnect the turbine and - if no clipper/diversion control is hooked up for protection - it ends up free wheeling out of control at high speeds. Because I haven't yet installed a diversion load, that scenario is exactly what's shown near the end of this video. Those new blades dug in and the tower held its ground, though.
The next step will be to upgrade to a 48V battery bank as soon all this snow melts and I can get the rest of the PV installed and do it all at once. Then the controller can handle up to ~4400 watts from the turbine instead of 2200.
I need to add a bit of weight to the tail as well, because it seems to be furling in wind speeds somewhere between 15-20 mph, and would prefer that it furled at 30 mph instead.
I also want to try out a couple of new high voltage stators and see how much I can improve low wind production.
In the meantime, I'm already onto the next project. If you don't already, follow me on Facebook to catch the first glimpse of what it is. I'll be posting pics in a day or two.
Get the plans for this turbine: https://www.resystech.com/3-kw-wind-turbine
Don't like ads? Neither do I. I hate them. That's why I signed up for a premium Youtube account for $12/month so that I never have to see another ad on this site again, and feel good knowing that I'm contributing to the creators I like so that they keep posting more great content. I highly recommend it. If you're just here to watch my videos, that's cool too. You can help support me specifically by signing up for a channel membership instead. Then just keep an eye on the community tab to watch these videos free of advertisements. You'll also get other perks, too. Check out the links below if you're interested.
Youtube premium account:
https://www.youtube.com/premium?ybp=Sg0IBhIJdW5saW1pdGVk
Support RST specifically:
http://www.patreon.com/resystech
https://www.youtube.com/channel/UCtrf6ZiE6hw3k77hGpnuQWg/join
Follow RST on Facebook:
https://www.facebook.com/RenewableSystemsTechnology
26
views
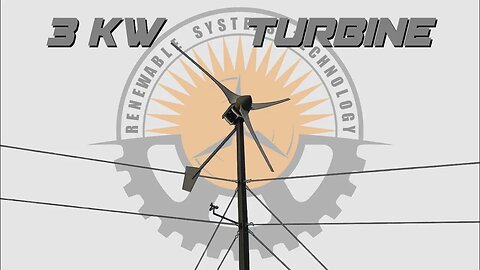
Build A Home Wind Turbine - DIY Turbine - Off Grid Living!
Build A Home Wind Turbine - DIY Turbine
For details about how to build, check out the build article:
https://renewablesystemstechnology.com/project-blog/how-i-built-a-3-kw-off-grid-wind-turbine
See this off grid turbine producing peak power: https://www.youtube.com/watch?v=Ef5nDuJD7kA
In this video I show how I built a home wind turbine for my property. This is an efficient DIY turbine that's built for low wind environments and is perfect for off grid living. It has a 12 ft (3.7 m) diameter rotor driving two 12 coil/16 pole axial flux air core (ie coreless) permanent magnet generators with a power potential of up to 3 kWp in a ~30 mph wind stream. Start up speed is around 2-3 mph, cut-in is around 5-6 mph. In an area with a mean annual wind speed of 11 mph (5 mps) or higher, this turbine will produce 500 kWh+ of energy every month with a mean output of 800-1000 watts, nearly enough to take an avg home off the grid (see links below).
The follow-up performance videos show over 2600 watts in a 26 mph wind stream. You can find them on my channel or at the end of this video. Pay attention to the controller AND anemometer display beside it. Refer to the wind power equation to compare the output and efficiency to what science says it should be:
P = π/2 * r² * v³ * ρ * η
where r² = rotor radius squared in meters
v³ = wind velocity cubed in m/s
ρ = is air density in kg/m³, typically ~1.23 kg/m³ but will vary slightly with temp and elevation
η = combined efficiency of the turbine (blades) and generator, typically between 30-45%
No wind turbine will ever be more than 59.3% eff. It's called the Betz limit. Google it for more info. But using my turbine specs to calculate theoretical output and compare it with actual peak output documented in the follow up video, we get this:
Turbine rotor diameter = 12 ft, or 3.65 m, radius = 1.83m
Wind speed = 26 mph, or 11.6 mps
Mean efficiency = ~32%
P = 3.1459/2 (1.83² * 11.6³ * 32%)
= 1.57 (3.35 * 1560.9 * 0.32)
= 1.57 * 1673.3
= 2627.06 watts
Be sure to check out the build article link above to learn more about how to build a wind turbine and get the plans.
Wind atlas
http://www.windatlas.ca/nav-en.php?field=E1&height=30&season=ANU&no=12
Energy production estimates
http://www.windatlas.ca/rose-en.php?ni=1117&nj=380&height=30
Plans w/ step by step instructions:
https://resystech.com/3-kw-wind-turbine.html
DIY modular tool guide system:
https://youtu.be/DPL57IxYcD8
DIY coil winder:
https://youtu.be/EQAbjVUMcCc
DIY vacuum injection stator mold:
https://youtu.be/J5sPsZR8i8A
DIY benchtop lathe:
https://youtu.be/BhVEN_Z3HHg
DIY fiberglass molds:
https://youtu.be/LAdMuZjicrs
Support RST:
http://www.patreon.com/resystech
https://www.youtube.com/channel/UCtrf6ZiE6hw3k77hGpnuQWg/join
Follow RST on Facebook:
https://www.facebook.com/RenewableSystemsTechnology
127
views

Hand Carved Wind Turbine Blades - 3 kW Axial Flux
Check out the build article and get the plans: https://renewablesystemstechnology.com/project-blog/how-i-built-a-3-kw-off-grid-wind-turbine
Support RST:
http://www.patreon.com/resystech
https://www.youtube.com/channel/UCtrf6ZiE6hw3k77hGpnuQWg/join
Follow RST on Facebook:
https://www.facebook.com/RenewableSystemsTechnology
3
views

☀️ Building A Solar Panel Laminator (Remastered)
Get the plans for this project here: https://renewablesystemstechnology.com/solar-panel-laminator.html
Check out my latest project: https://youtu.be/yXQnydST9fw
For a lot of folks, ordering a pallet of panels is convenient and relatively cheap. For others it's convenient, but not so cheap. Whether or not it's worth your time to make your own panels will depend on a few factors. Do you have experience working with electricity? How many panels do you need? What's the cost to ship panels from your local supplier or retailer, and what sort of warranty do they offer? Can you source affordable components for making your own panels, and what would be your net gain in savings after both material and labour are accounted for? These are just some of the questions that you'll need to consider.
For me personally, it's worth it. I can make my own panels for roughly half the cost of what I would pay to order them (after freight and markup is accounted for). ~70¢/w CAD (52¢/w USD) vs $1.50-$2.00/w CAD ($1.14-$1.50 USD) after freight. Being an experienced builder and entrepreneur, the decision to build this laminator and make my own panels was pretty easy for me. The laminator cost around $200 to build (+ $100 for the vacuum pump), and only uses ~500 watt hrs of energy to laminate a panel. If a person were to purchase that energy from the local grid, it would only amount to 5¢ per panel, so it's really cheap to operate. This laminator paid for itself twice with the first kW of panels that it produced.
If you liked this video, please let me know but hitting the like button. Don't forget to subscribe because new content is uploaded regularly. This channel is focused on promoting education and innovation in renewable energy technologies. If you're interested then you can learn more by visiting www.resystech.com, or help support and become a part of this endeavor by downloading plans for any project featured on the site, or by becoming a Patreon or Youtube channel member.
Don't like ads? Neither do I. I hate them. That's why I signed up for a premium Youtube account for $12/month so that I never have to see another ad on this site again, and feel good knowing that I'm contributing to the creators I like so that they keep posting more great content. I highly recommend it. If you're just here to watch my videos, that's cool too. You can help support me specifically by signing up for a channel membership instead. Then just keep an eye on the community tab to watch these videos free of advertisements. You'll also get other perks, too. Check out the links below if you're interested.
Youtube premium account:
https://www.youtube.com/premium?ybp=Sg0IBhIJdW5saW1pdGVk
Support RST specifically:
http://www.patreon.com/resystech
https://www.youtube.com/channel/UCtrf6ZiE6hw3k77hGpnuQWg/join
Follow RST on Facebook:
https://www.facebook.com/RenewableSystemsTechnology
2
views
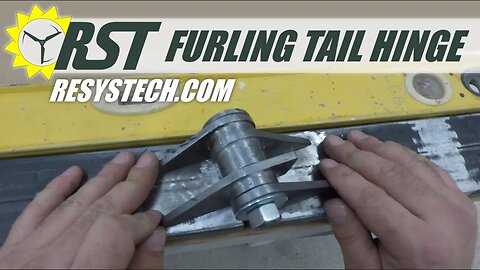
NEW Furling Tail Hinge Design For DIY Wind Turbines
Check out the build article and get the plans: https://renewablesystemstechnology.com/project-blog/how-i-built-a-3-kw-off-grid-wind-turbine
Support RST:
http://www.patreon.com/resystech
https://www.youtube.com/channel/UCtrf6ZiE6hw3k77hGpnuQWg/join
Follow RST on Facebook:
https://www.facebook.com/RenewableSystemsTechnology
4
views