
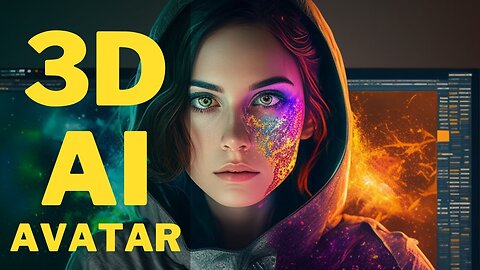
Text to Video AI : ChatGPT To Video Generator | AI Talking Avatar
Text to Video AI : ChatGPT To Video Generator | AI Talking Avatar #texttovideoai #chatgpt #aitools #texttovideo #ai #artificialintelligence
This AI Tool Makes ChatGPT Create TEXT TO VIDEO Content! Elai Not Bing. ChatGPT To Video Generator + Talking AI Avatar.
Bring your video ideas to life in no time! With ChatGPT's AI-based text-to-video generator, you can quickly create captivating videos that wow your viewers and help you gain a bigger audience on YouTube and Rumble
This AI Tool Makes ChatGPT Generate Text-to-Video in Seconds!
With this AI tool, you can create a video in minutes with just a single line of command. In this video, I will demonstrate how to do it and show you the results. Please stay tuned and consider subscribing to my channel to support me. Thank you!
Part 1 : REGISTER To Elai AI Tool
Open elai.io and Click Try Elai for Free to register. Fill the form and confirm your email to get started.
Part 2 : GENERATE VIDEO Elai Ai Tool
Step 1 : Click Using GPT3. And enter your prompt. in this video I asked GPT3 to create a video about AI in the next 20 years.
Step 2 : Click Select Template and choose your template. And click Create video to start generating your video.
Part 3: FINE-TUNE With Ai Tool
After your video created, check your video layout and content. You can edit and change if needed.
Step 1 : Select the best voice actor for your video. Click apply to all to apply audio to all video
Step 2 : You can improve your video by change its background with stock image or video provided by the website. Use search bar to search desired video. Select video, and click Add button to add this video to our project. Click apply as background to use this video as background
Step 3 : Edit title and text if needed, you can also add animation to it.
Step 4 : Edit video script if needed.
Step 5 : You can add music to from music library.
Step 6 : You can change video aspect ratio and add hardsub
Part 4 : RENDER & DOWNLOAD
If everything is good, click render button to start rendering process, you will get your video link in your email. It's need several minutes to get done. Check your email and download the video.
Text to Video AI Tool Tutorial Chapter :
00:00 Opening Text to Video AI : ChatGPT To Video Generator | AI Talking Avatar
00:19 Register to Text to Video Generator - ELAI Ai Tool
00:36 Create Text to Video with ChatGPT and Elai AI Tools
00:58 Choose Video Template
01:22 How to Change Video AI Tool Voice Over
01:44 How to Change AI Video Background
02:08 Edit AI Video Title & Text
02:18 Add Animation to AI Video
02:23 Edit AI Video Script
02:33 Enhance Your AI Video
02:54 Add Music to Your AI Video
03:08 Change Video Ratio & Add Hard Sub / Auto Video Subtitles
03:21 Render AI Video
03:41 Download Your AI-Generated Video
03:54 The Result of AI-Generated Video using ChatGPT and Elai.io
04:50 See You in The Next AI Video Tutorial!
chat gpt, ai tool, ChatGPT, ai tools, Text-to-Video, Text to Video, Text-to-Video Generator,Text to Video Generator, ai video, ai, artificial intelligence,elai,elai ai,elai io, youtuber,script to video, article to video, chatgpt video, chatgpt to video,how to use chatgpt, chat gpt tutorial, bing, bing bot, bing
By mastering this AI video creation tool, you can benefit in the following ways
1. Time and Cost Efficiency
This tool can help you create videos in a matter of minutes, saving you time and money that would have been spent on hiring professionals or using more time-consuming tools.
2. Increased Creativity
The ease of use and the range of features available in the tool can provide you with more opportunities to be creative with your videos and express your ideas in new and exciting ways.
3. Career Advancement
Mastering this AI tool can give you an edge in your career, especially in fields such as marketing, advertising, social media, and content creation.
4. Entrepreneurship
With the ease and speed of video creation, you can create videos more efficiently for your businesses or start your own video creation services.#chatgpt #aitools #texttovideo #ai
5. Personal growth
By learning new skills and mastering this tool, you can boost your confidence and enhance your personal and professional growth. GPT4
#aitools #texttovideo #ai
45
views
2
comments
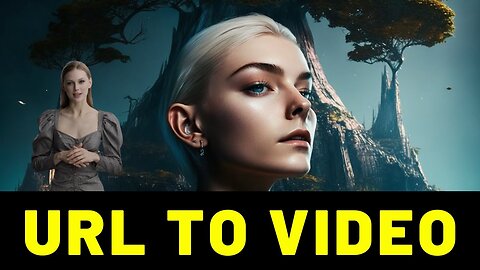
AI Video Generator : Create Text To Video | AI Generated Video
AI Video Generator : Create Text To Video | AI Generated Video
#ai #aitools #aivideo #texttovideo #aigeneratedvideo #aiavatar #artificialintelligence #chatgpt
Give your videos a professional finish with the AI Video Generator - the easy and fast way to create text-to-video! With the AI Video Generator, you can generate professional-looking videos from your text in just a few clicks. Get ready to take your content to the next level!
Welcome back to my channel! Today, I'll show you the easiest and fastest way to create an AI-generated video + Avatar from an online article. Let's get started!
Step 1: Search for the article you want to convert to video and copy its link.
Step 2: Open elai.io. You can use the link provided in the description below. If you don't have an elai account or don't know how to create one, you can watch my previous video about elai. The link is also in the description. From the elai home screen, click on "generate from URL" and paste your article link.
Step 3: Choose your video template and click on the "create video" button. Wait for the video generation process to complete.
Step 4: Once your video template is ready, you can either render it or customize the design. You can edit or remove video parts, change the position or background, avatar or avatar style, and voice-over style. You can also use stock videos and images for your video components or background. To set an image or video as a background, simply add the item to the design and click on "apply as background." For video background, it's recommended to turn on the loop option.
Step 5: You can add music to your video from the stock audio provided by the website.
Step 6: After everything is set up, click on the "render" button to start rendering your video. It may take several minutes to complete.
Step 7: Once the rendering process is finished, you will receive an email with a download link. Open the email and download your video.
Here's the video result from this tutorial.
Thank you for watching and don't forget to subscribe for more AI tools tutorials and info. Stay tuned!
Video Parts :
00:00 AI Video Generator : Create Text To Video | AI Generated Video
00:10 Select Online Article #aivideomaker
00:17 Open Elai AI Video Generator #ai
00:36 Create Online Text To Video #aitools
00:53 Edit AI Generated Video #aitutorial
02:02 Add Music To AI Generated Video #aiart
02:17 Render AI Generated Video #aivideo
02:28 Download & Play AI Generated Video #aitools
03:17 Closing AI Video Generator : Create Text To Video | AI Generated Video
Are you looking for a fast, easy way to create text to video conversions? Look no further than AI Video Generator! This software is perfect for beginner and expert video creators alike, and it's FREE to use!
ai video generator,text to video,ai video editor,text to video ai,ai video editing,ai video,video ai,ai generated video,free ai tools,ai tools,ai video tools,ai animation,ai video creator,ai video maker,ai video editing software,artificial intelligence,ai art,ai,chatgpt,chat gpt,elai,elai io,elai ai,midjourney
With AI Video Generator, you can easily create professional-looking text to video conversions in minutes. This software is easy to use and fast, making it the perfect tool for busy video creators. Whether you're a beginner or an expert, AI Video Generator is the perfect tool for all your video conversion needs!
20
views
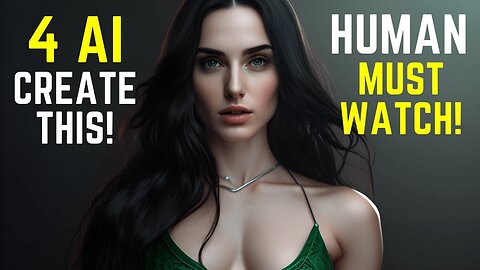
How 4 AI Tools Helped Us Create a Professional Video
How 4 AI Tools Helped Us Create a Professional Video - Results Inside. Explore the power of AI tools and learn how we used them to create a professional video. We'll take you through the entire process and share our results so that you can create your own amazing video. Join us as we uncover the secrets of AI-enhanced video creation!
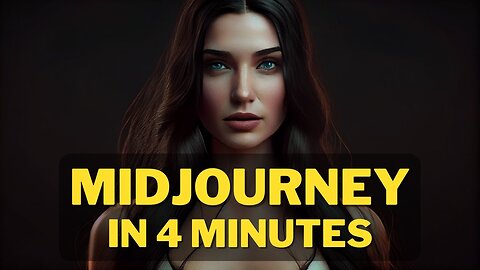
Midjourney Prompt Setting : most beautiful long black hair, pale skin, emerald green eyes, Greek attire Flawless skin show her full head, show her full face, show her half body. Dramatic lighting. Minimalist. wearing tank top realistic, cinematic, photography, natural skin, delicate, detailed, photo realistic, beauty photography, 4k, Sci fi --v 4 --ar 16:9 --upbeta --q 5
In this video, we'll share how 4 AI tools helped us create a professional video.
From video editing to text to video conversion, these AI tools have helped us create high-quality videos that look great and are easy to use. Watch this video to learn how these tools can help you create professional videos too!
STEPS:
This video was produced with the assistance of 4 AI tools. Midjourney for generating cool images. D-ID for animating and providing voiceover,
ChatGPT for converting my draft into a correct video script, and VidIQ for creating an optimized title, description, tags, and hastags for YouTube SEO.
Let me show you how I did it!
Tool 1 - Midjourney
Step 1: Open Midjourney to create a character for your video. If you don't know how to use it, watch my tutorial video about Midjourney (link in the video description).
Step 2: Generate an image using Midjourney version 4, beta upscaler, and a 16:9 aspect ratio (you can copy my prompt from the video description). Select the best image, upscale it, and save it to your computer.
Tool 2 - D-ID
Step 1: Go to D-ID.com and register using your Google, Facebook, or email account.
Step 2: Click "Create Video" and then "Add" to upload your character image.
Step 3: Add your script, select the language, voice actor, and style. After setting everything up, click "Generate Video" and wait for the generation process to complete.
Step 4: Play and check your video. If everything looks good, download your video.
Tool 3 - VidIQ
Step 1: Open your VidIQ extension. If you don't have one, you can install it in your browser (link in the video description).
Step 2: Ask VidIQ AI to make your title more SEO-friendly. You can ask for multiple options and choose the best one.
Step 3: Ask VidIQ AI to create a video description from your new title.
Step 4: Ask VidIQ AI to check AHREFS for the best keywords to create tags for your video.
Step 5: Ask VidIQ AI to create hashtags for your video. Copy them all to Notepad.
Tool 4 - ChatGPT
Create a draft script for your video and ask ChatGPT to create a production script for you.
Tool 5 - Audacity
Step 1: Open Audacity to record the text-to-speech voice. If you don't know how to record website audio, watch my tutorial video about this (link in the video description).
After completing all the steps, combine the video and audio and upload it to YouTube. Use all the AI-generated title, description, and tags. Congratulations! You have just created an AI-generated YouTube video. Thank you for watching, and please subscribe for more AI tips. See you in the next video.
#ai #midjourney #chatgpt #vidiq #aitools #videocreations #audacity #did #d-id #texttospeech #texttovideo #aivideo #imagetovideo #AIEnhancedVideo #videoproduction #AIPoweredVideo #makemoneyonline #earnmoneyonline #tutorial #howto #gpt4 #chatgpt4
34
views
UNBLOCK Any WEBSITE in Seconds WITHOUT a VPN
Are you struggling to access your websites because you live in a country where the government blocks access to websites?
Don't worry, you can unblock websites in seconds without a VPN. In this video, I'm going to show you how to access any website that's been blocked in your country (or anywhere else for that matter)!
By following these simple steps, you can unblock websites and regain access to the internet the easy way! So be sure to watch this video and learn how to unblock any website in seconds!
UNBLOCK Any WEBSITE in Seconds WITHOUT a VPN
#VPN #UnblockWebsite #NoVPN #chrome #chromebook #school #howto
Are you looking for an easy and fast way to unblock any website? With just a few clicks, you can now access any website without a VPN. Say goodbye to all your unblocking troubles with this simple and easy to follow guide. Get started now and unblock any website in no time!
how to unblock websites on school chromebook 2023. how to unblock websites on school chromebook 2022
8
views
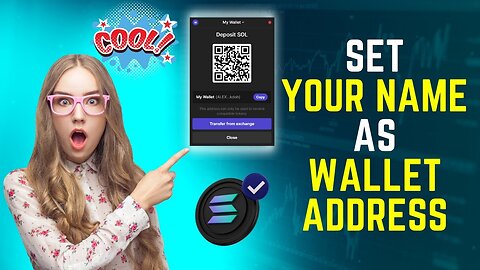
Set YOUR NAME as Your CRYPTO WALLET Address in 1 Minute
Set YOUR NAME as Your CRYPTO WALLET Address in 1 Minute
#cryptowallet #solana #crypto #cryptocurrency #cryptosecurity #cryptoguide #cryptotutorial #phantom
In this video, we'll show you how to set your name as your cryptocurrency wallet address in just 2 minutes!
Cryptocurrencies are growing in popularity, and for good reason. They offer a unique way to store and transfer money without having to involve banks or other third-party services. In this video, we'll show you how to set your name as your cryptocurrency wallet address in just 2 minutes! After watching this video, you'll be able to safely store your cryptocurrencies in a secure manner using your own name as the wallet address!
Are you looking for a way to secure your crypto wallet address with your name? Look no further! In just two minutes, you can have your name as your crypto wallet address. No more confusions or complications. Make your crypto wallet address secure and yours with this easy to follow guide. Get started now!
STEPS:
Step 1
Command 1 : cmd /c "curl https://release.solana.com/v1.15.2/so... --output C:\solana-install-tmp\solana-install-init.exe --create-dirs"
Command 2 : C:\solana-install-tmp\solana-install-init.exe v1.15.2
Step 5
solana --version
Step 6
solana-keygen grind --starts-with ALEX:1
Step 7
more "your wallet address.json"
3
views
How to DRAW ANIME with CANVA AI and Use ChatGPT to MAKE MONEY from it
Learn how to draw anime with CANVA AI and use ChatGPT to MAKE MONEY from it! This video is for anyone who wants to learn how to create and sell their own manga and anime drawings online.
With this drawing tutorial, you'll learn how to use CANVA AI to create high-quality manga and anime drawings. You'll also learn how to use ChatGPT to sell your drawings online, making money from your artistry! Whether you're a beginner artist looking to make some money, or a seasoned artist looking to expand your portfolio, this drawing tutorial is for you!
Learn the secrets to unlocking your creative potential with Canva AI and monetizing your art with ChatGPT. Use our step-by-step tutorial to create beautiful anime drawings and make money from them!
Canva AI Website : https://partner.canva.com/NKB9B7
Zazzle Website : https://www.zazzle.com
Welcome back to my channel! Today, I'll show you how to draw anime using Canva AI and how to make money from it. Let's get started!
Part 1: Canva AI.
Step 1: Go to Canva.com and register for an account if you don't have one, (link in the description).
Step 2: Click on Discover Apps and select Text to Image. Create a new design with a custom size of 2500x3500 pixel
Step 3: Set the orientation to portrait. choose drawing style option. type your prompt description, and don't forget to add transparent white background text. Generate the image, then resize it.
Step 4: Download the image as PNG and make it twice its original size.
Part 2: Canva Background Remover
Step 1: Go back to the Canva dashboard and click on Discover Apps again, select Background Remover. Create a new design with a custom size of 2500x3500 pixel.
Step 2: Select Upload Section, resize your image, and click Edit Image. Choose BG Remover and wait for the process to complete.
Step 3: Download the image as PNG and make it twice its original size, then save it to your computer.
Part 3: Zazzle
Step 1: Go to Zazzle.com and register using Google, Facebook, Apple ID, or email. Once you've registered, click on "Sell" and "Start Selling Today." Verify your email to continue.
Step 2: Enter your store details and use ChatGPT to create a SEO-friendly description (watch my previous video on ChatGPT for more information , link in the description).
Step 3: Select "T-shirt" from menu, choose a category, type, and color, and click "Customize this Design."
Step 4: Upload your design, customize its size and position, and click "Done."
Step 5: Preview your design on the mockup, and if everything looks good, click "Sell It."
Step 6: Complete the product title, description, and tags using ChatGPT.
Step 7: Set your royalty percentage and click "Post It."
Don't forget to share your product on social media and complete your store data to improve your Zazzle search ranking. Thank you for watching, and see you in the next money-making video.
30
views
The EASIEST WAY To Make MONEY Online with AI - NO SKILLS Required!
Are you looking for an easy way to make money online? Look no further! With AI, you can start making money right away without any skills required!
In this video, I'm going to show you how to make money with chat gpt. This is an easy way to make money online that doesn't require any special skills or knowledge. Simply sign up for a chat room and start chatting with people about products and services. After a few minutes of chatting, you'll be able to make some money!
Unlock the potential of AI and start earning money online effortlessly. Watch our video and learn how you can make money online without any skills required. With this innovative solution, you'll discover the easiest way to generate income and reach financial freedom. Don't miss out, start today!
The best investment is not in crypto or stocks. But in zero-cost digital product that sell. Today I'll show you how AI can help us make money as easily as ABC, even for the laziest person on earth.
Links :
Register to Adobe Stock : https://stock.adobe.com
Image Upsacler Online : https://www.imgupscaler.com
Midjourney Prompt : "Your Text" + --ar 16:9 --quality 5 --v 4 --upbeta
Step 1: Open stock.adobe.com and click the Sell Menu and "Join Now" button to create a seller ac count. You can use your email, Google or Facebook account to register.
Step 2: Research profitable products. Go to stock.adobe.com/search, click the "View Panel" button and check the "Illustration" option, choose your desired orientation, and sort by "Downloads." Select the type of image you want and copy the title and save it in a notepad. Also, copy all related keywords and save them for later.
Step 3: Create AI art using Midjourney Version 4, which supports multiple aspect ratios. Use the parameters outlined in the video description. Improve the title with keywords you think will sell. Save the best result on your computer.
Step 4: Upscale your image using imgupscaler.com. Choose the 400% option, upload your photo, press start, and wait for the process to complete. Download the upscaled product to your computer.
Step 5: Improve your title with related keywords and ask ChatGPT to make it SEO-friendly.Ask ChatGPT to separate the product keywords with commas and create an SEO-friendly description for your title. Back to the Adobe Stock website, press the "Upload" button and change your file name to the SEO-friendly title to improve its metadata. Paste the title, description, and keywords. Choose "Illustration" for the file type and check the "Created using generative AI tools" option. Click the "Submit" button.
Allow 2-3 days for moderation. Thank you for watching, and see you in the next money-making video tutorial.
10
views
How To Make Money Online with ChatGPT, Midjourney and Redbubble 2023
Make money online with ChatGPT today! Get tips and advice on how to maximize profits and start earning with ChatGPT and MidJourney. Discover the best ways to make money online with ChatGPT, Chat GPT to make money, and how to make money with ChatGPT. Start generating income now with ChatGPT, Earn Money Online and Make Money Online.
Today, I'll show you how to make money online for free by combining ChatGPT, Midjourney, and Redbubble.
Part 1: Redbubble
Step 1. Visit the Redbubble website and click the "Start Selling" button to register as a seller (link provided in the video description).
Step 2. Fill out the registration form.
Step 3. Log in to your dashboard, then confirm your email to activate your account.
Step 4. Go to Account Settings, select Edit Profile, and enter your shop and profile information. Use ChatGPT to do this.If you don't have a ChatGPT account or don't know how to use it, watch my previous video on ChatGPT (link provided in the description).
Step 5. Go to the payment setting and connect your PayPal account to Redbubble.
Part 2: Product Research.
Step 1. Use the search bar on Redbubble to search for popular keywords. Select desired keywords from the suggestions and press the search button.
Step 2. From the search results, choose the first products.
Step 3. Copy the product title and tags, and save them in a notepad.
Part 3: Generate AI Artwork.
Step 1. Enhance the product title by adding popular keywords. Add Midjourney's parameters (you can copy them from this video description).
Step 2. Run the script in Midjourney and wait for the process to complete. If you don't have a Midjourney account, watch my previous video on getting started with Midjourney (link in the video description).
Step 3. Select the best image and save it to your computer.
Part 4: Upscale Image.
Step 1. To increase the visibility of your image in all Redbubble products, upscale it to a minimum size of 5000x5000 pixels. Use imgupscaler.com (link in the video description).
Step 2. Upload your image and select the 400% option. Click the "Start" button and wait for the process to complete.
Step 3. Download the upscaled image to your computer.
Part 5: Upload Artwork.
Step 1. Return to the Redbubble Dashboard and click "Add Designs." Upload the upscaled image you just downloaded. Wait for the process to complete.
Step 2. Use ChatGPT to create an SEO-friendly product title, tags, and description. Copy and paste the results to the product description. Repeat the same process for the product title and tags.
Step 3. Adjust the size and position of your design on each product to match the print area. Select the product color and orientation that match your design.
Step 4. Save and publish the product.
Remember, your product will not be publicly visible on Redbubble until you upload a minimum of 5 designs. Don't forget to stay current with trends and actively promote your work to increase success on Redbubble. Thank you for watching. See you in the next money-making tips.
15
views
Earn Money Online With ChatGPT, MidJourney and Print on Demand
Earn Money Online With ChatGPT, MidJourney and Print on Demand #makemoneyonline #chatGPT #MidJourney #PrintOnDemand #MoneyMakingTips
Are you looking to earn money online? In this video, learn how to do so with ChatGPT, MidJourney and Print on Demand! Discover all the benefits and tips you need to make a steady stream of cash with these easy strategies. Click now to get started!
My MidJourney Prompt : Most beautiful Anime Girl Japanese Aesthetic anime Otaku --quality 1 --ar 2:3 --upbeta
In this video, I'll show you how to make money online for free by combining AI tools with print on demand.
Part 1: Print on Demand
Step 1. Visit the TeePublic Designer registration page (link provided in video description).
Step 2. Fill out the registration form, then confirm your email to activate your account.
Step 3. Log in to your dashboard, go to My Account, and enter your PayPal or Payoneer information.
Step 4. Click Edit Settings to set your username and save the changes.
Part 2: Product Research.
Step 1. Use the search bar on TeePublic to search for popular keywords. Select desired keywords from the suggestions and press the search button.
Step 2. From the search results, select the Popular button at the top to view the top five products. Choose one you want and open it.
Step 3. Copy the product title, description, designer and customer tags, and save them in a notepad.
Part 3: Create Artwork.
Step 1. Enhance the product title by adding popular keywords. And add midjourney's parameters (you can copy them from this video description).
Step 2. Run the script in Midjourney and wait for the process to complete. If you don't have a Midjourney account, watch my previous video on getting started with Midjourney (found in the video description or video card).
Step 3. Select the best image or upscale all images and save them to your computer.
Part 4: Upscale Artwork.
Step 1. To increase the visibility of your image in all TeePublic products, upscale it to a minimum size of 5000x5000 pixels. Use imgupscaler.com or follow the link in the video description.
Step 2. Upload your image and select the 400% option. Click the Start button and wait for the process to complete.
Step 3. Download the upscaled image to your computer for use in your TeePublic product.
Part 5: Upload Art.
Step 1. Return to TeePublic and click the Upload Art button. Choose the option for a single product and upload the upscaled image you just downloaded. Wait for the process to complete.
Step 2. Use ChatGPT to create an SEO-friendly product title and description. If you don't have a ChatGPT account or don't know how to use it, watch my previous video on ChatGPT (link provided in the description). Copy the description to ChatGPT and ask it to make the description SEO-friendly. Copy and paste the results to the product description. Repeat the same process for the product title.
Part 6: Marketing.
Marketing is the most crucial aspect of earning money online. Promote your design on social media and ask ChatGPT to create SEO-friendly content for your social media posts. The best platform for promoting print-on-demand products is Pinterest, which will be covered in my next video. Don't forget to subscribe to this channel to support me. Thank you.
46
views
How To Use ChatGPT to MAKE MONEY ONLINE 🤑🤑🤑 for BEGINNERS
How To Use ChatGPT to MAKE MONEY ONLINE 🤑🤑🤑 for BEGINNERS
#chatgpt #ai #chatbot #beginners #money #online #business #guide #tutorial
Are you a beginner looking to make money online with ChatGPT? This step-by-step guide will help you unlock new possibilities with ChatGPT's powerful AI chatbot solutions. Learn how to use ChatGPT to grow your business and make money online quickly and easily.
In this video, I will show you how to register and use ChatGPT for the first time and discover non technical ways to make money onile using chat gpt.
ChatGPT is a conversational language model developed by OpenAI. It's based on the GPT-3 architecture and can generate human-like text responses to questions or prompts given to it. ChatGPT is used in various applications such as chatbots, customer support, content creation, and more.
Get started with ChatGPT by following these 3 simple steps:
1. Go to chat.openai.com and click the sign-up button.
2. Use your email, Google, or Microsoft account to sign up.
3. Enter your name and verify your phone number with SMS or WhatsApp.
Let’s Discover non-technical ways to make money online using ChatGPT, either for personal use or by selling your services on Fiverr
1. Social media management - Use ChatGPT to easily create social media content like Twitter threads and Instagram captions.
2. Content creation - Generate SEO-friendly articles in minutes.
3. Translation - Ask ChatGPT to translate articles or content to any language.
4. Email marketing - Ask ChatGPT to create an email campaign for you.
These are just a few basic ways to use ChatGPT to make money online. In the next video, I'll show you how to combine ChatGPT with other AI tools to maximize your earning potential. Don't forget to subscribe!
32
views
Create Amazing ANIME Artwork with a FREE AI ART GENERATOR (Midjourney Alternative) #aiart #ai
Create Amazing ANIME Artwork with a FREE AI ART GENERATOR (Midjourney Alternative) #aiart #ai #anime #midjourney #bluewillow #art #howto
In this video, I'm sharing my favorite FREE AI ART GENERATOR called "Midjourney Alternative". This tool makes it easy to create amazing ANIME art with a minimum of effort.
If you're a fan of anime and want to create some amazing artwork, then you need to check out this free AI ART GENERATOR. With Midjourney Alternative, you can create high-quality artwork in minutes, without any artistic experience required!
In this video, I will show you how to create amazing artwork with a free AI Art Generator with no limitations!
Step 1 : Join the Discord
Go to Bluewillow.ai and click join Beta. Everything you need happens within the Discord. Test your prompts, generate your images, meet others, and get support all in one place.
Before joining the Bluewillow Discord server, you must have a Discord login.
Step 2 : Go to a Rookie Channel
You can generate images with the Bluewillow Bot on any server that has invited the Bot. Look for instructions on your server on where to use the Bot.
Step 3: Learn Basic Command
Interact with the Bluewillow Bot on Discord using a Command. Commands are used to create images, change default settings, monitor user info, and perform other helpful tasks.
Here is a simple command structure : /imagine prompt + "your description"
Step 4 : Run your first command
Here is a basic example : /imagine prompt beautiful anime girl realistic
The Bluewillow Bot takes about a minute to generate four options.
Step 5: Reroll if needed
Click Re-roll button to reruns a job. In this case it would rerun the original prompt producing a new grid of images
Step 6: Make Variations
Click V Button to Creates a variation of the upscaled image and generates a new grid of four options. Choose the best variation for you.
Step 7 : Upscale Image
Click U Buttons or Upscale Buttons to upscale an image generating a larger version of the selected image and adding more details.
Step 8 : Save Your Image
Click on the image to open it to full size, and then right-click and choose Save image
Please subscribe this channel for more AI tools tutorial! Thank you!
14
views
How to Create FREE TEXT TO SPEECH | Audacity Tutorial
How to Create FREE TEXT TO SPEECH 🌟🌟🌟🌟🌟- Audacity Tutorial
#stepbystep #texttospeech #freetexttospeech #recordwebaudio #tts #ai #artificialintelligence #howto #tutorial #audacity #audacitytutorial
Learn how to record web audio with this Audacity tutorial! Get step-by-step instructions on how to set up Audacity, enter text, use the right settings and record web audio. Learn how to create professional quality text-to-speech audio using Audacity in minutes. Make sure to listen to your masterpiece at the end! Get ready to be the master of text-to-speech audio with this free and simple Audacity tutorial that shows you how to record web audio!
Step 1: Visit the audacityteam.org website and download the Audacity installer.
Step 2: Install Audacity.
Step 3: Click the "Audio Setup" button and select "Audio Settings."
Step 4: Set the "Host" to "Windows WASAPI," the "Recording Device" to "Loopback Input" for the speakers, and the "Channels" to "Stereo." Save your settings.
Step 5: Open the Google Translate website and paste your text.
Step 6: Go back to Audacity and press the "Record" button.
Step 7: Go back to Google Translate and play the audio.
Step 8: Click the "Stop" button to stop recording.
Step 9: Open the "File" menu, choose "Export," and select your desired audio format (in this case, MP3). Save your audio.
12
views
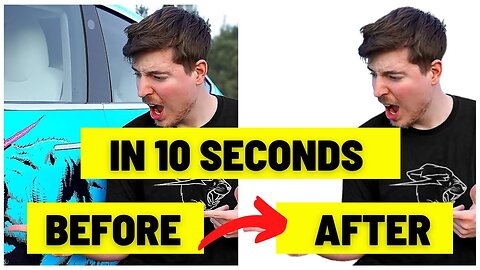
How to Remove Photo Background in 10 Seconds Using Online AI Tool for Free - Mr. Beast Photo
In this video, I will demonstrate how to remove a photo background using AI in 10 seconds or less.
Step 1 : Open Remove.bg website.
Step 2 : Upload Your Photo. In this video, I use Mr. Beast Photo as an example. Wait a few seconds and voila! Your photo background has been removed.
Step 3 : Download and save the result to your computer or phone.
2
views
The Complete Beginner's Guide : How to Create Image with AI and Midjourney's Free Generator
In this guide, we'll teach you how to create an image with AI using Midjourney's free generator. After learning this, you'll be able to create high-quality images with ease!
Whether you're a photographer new to AI or an experienced user, this guide will teach you everything you need to know to create beautiful images with AI. With Midjourney's free generator, you'll be able to create amazing images in no time at all!
How to create image with AI ( Step by Step Guide ).
Here is a basic example : /imagine prompt cat from mars --ar 2:3 --quality 1 --upbeta
Do you want to make breathtaking images with AI? Here's your complete guide to creating stunning visuals with Midjourney's free image generator. We'll introduce you to the basics of using AI to create images and provide you with 8 easy steps to get started. With this guide, you'll be a pro in no time!
Artificial intelligence has made it possible for anyone to create unique and compelling images with minimal effort. If you're interested in experimenting with AI-generated images, here's a step-by-step guide on how to generate your first AI-generated image.
Step 1 : Join the Discord
Go to Midjourney.com, select Join the Beta, or go directly to the Midjourney Discord.
Before joining the Midjourney Discord server, you must have a Discord login.
Step 2 : Find a Newbies Channel
You can generate images with the Midjourney Bot on any server that has invited the Bot. Look for instructions on your server on where to use the Bot.
Step 3: Learn Basic Command
Interact with the Midjourney Bot on Discord using a Command. Commands are used to create images, change default settings, monitor user info, and perform other helpful tasks.
Here is a simple command structure : /imagine prompt + "your description" + Aspect Ratio + Quality + Upscaler
Step 4 : Run your first command
Here is a basic example : /imagine prompt cat from mars --ar 2:3 --quality 1 --upbeta
The Midjourney Bot takes about a minute to generate four options.
Step 5: Reroll if needed
Click Re-roll button to reruns a job. In this case it would rerun the original prompt producing a new grid of images
Step 6: Make Variations
Click V1/V2/V3/4 Button to Creates a variation of the upscaled image and generates a new grid of four options. Choose the best variation for you.
Step 7 : Upscale Image
Click U Buttons or Upscale Buttons to upscale an image generating a larger version of the selected image and adding more details.
Step 8 : Save Your Image
Click on the image to open it to full size, and then right-click and choose Save image
Congratulations, you have just generated your first AI-generated image! In the next video, I will teach you how to improve your images
11
views

How to Create a Professional T Shirt Design with Canva : Six Easy Steps
How to Create a Professional T-Shirt Design with Canva: Step-by-Step Instructions
Learning how to create a professional t-shirt design can be a daunting task. But it doesn't have to be! With the right tools and guidance, you can create a stunning t-shirt design in no time. In this guide, we'll walk you through the steps of using Canva to design a unique t-shirt quickly and easily. From choosing the right font and colors to organizing your design elements, you'll learn how to create a great-looking t-shirt design in a limited time. So let's get started!
Step 1 : First, Sign up for a Canva account and select the "T-Shirt" menu.
Step 2: Choose a color design and layout for your design. You can also upload your own images or select from Canva's extensive library of free and paid graphics.
Step 3: Use Canva's editing tools to add text and customize your design. You can change the font, size, and color of your design as well as adjust the placement and rotation of your graphics.
Step 4: Change background to white to make it transparent.
Step 5: Preview your design and make any necessary adjustments.
Step 6: Once you are satisfied with your design, download it in PNG format, make it to maximum scale, and check Transparent Background option.
Now you have all the tools and knowledge you need to create your own professional t-shirt design in a short amount of time. So what are you waiting for? Get started on your own t-shirt business today! In the next video, I will show you how to sell your designs online and make money from them.
23
views