

How to Convert a GIF into an MP4 Using Chat GPT-4 Code Interpreter: A Complete Tutorial
Welcome back to our channel! In this video, we bring you an exciting tutorial where we showcase how to convert a GIF into an MP4 using the latest Chat GPT-4 AI language model by OpenAI, and all of it without any additional software!
⏰ Time Stamps:
00:00 - 00:21: Welcome and Introduction
00:21 - 00:35: GPT-4 Subscription requirements
00:36 - 00:54: How to enable Code Interpreter feature
00:54 - 01:11: Introducing the chosen GIF for the tutorial
01:11 - 01:30: Setting up the GPT-4 prompt
01:30 - 01:47: Tailoring the conversion parameters
01:47 - 02:04: Uploading the GIF
02:04 - 02:24: GPT-4 processing the conversion
02:24 - 02:38: Understanding the conversion process
02:38 - 02:41: Completion of the conversion
02:41 - 03:00: Reviewing the converted MP4
03:00 - 03:07: Final thoughts and outro
🤔 What's in the video?
In this tutorial, we will walk you through the steps to convert a GIF into an MP4 using the GPT-4 AI model. We show you how to use the Code Interpreter feature, which is a part of the new Beta features of GPT-4. We also explain how you can tailor the conversion process to your liking by adjusting parameters such as zoom factor, duration, etc.
💡 Key Takeaways:
Understanding the prerequisites for using GPT-4 for this purpose (GPT-4 subscription)
Enabling the Code Interpreter feature in GPT-4
How to use the GPT-4 prompt for your conversion task
Reviewing the MP4 output and appreciating the GPT-4 AI's capabilities
👍 Remember:
This method requires a GPT-4 subscription which comes at a cost. The Code Interpreter feature is a new addition and is currently being rolled out globally. Be patient if you don't see it right away!
We hope you find this tutorial helpful. If you did, please leave a like, share, and subscribe for more such informative content. Let us know your thoughts in the comments section below!
1
view
Create Videos With ChatGPT-4 + Visla = Free, Professional Videos Without Watermarks With ONE PROMPT!
Welcome to another exciting tutorial where we explore the capabilities of ChatGPT-4 and the Visla plugin to create engaging videos. In this video, we walk you through the process of creating a video from a single prompt, demonstrating the power and simplicity of AI in content creation.
We start off by showing you how to create a video of a rocket going into space using the Visla plugin. We discuss the features of the generated video, including AI voiceover and stock footage, and how you can monetize these faceless videos on YouTube with the right approach.
We then delve into the details of the video, showing you what you get out of the box and how to make changes to improve the final product. We guide you through the process of removing watermarks and other unwanted elements from the video.
Next, we start from scratch to show you how to create a new video using ChatGPT-4 and the Visla plugin. We walk you through the process of selecting the Visla plugin, entering your video prompt, and watching as the AI generates your video content, complete with title, description, tags, and a link to the video.
We then show you how to edit your video, including how to remove the intro and other unwanted scenes, and how to generate an AI voiceover. We also discuss the options for adding music and other elements to your video.
Finally, we demonstrate how to export your video, either with premium stock without watermarks or with free stock. We show you how to download your final video and discuss the potential for using it on platforms like YouTube or in your own video editor.
This tutorial is a comprehensive guide to creating free videos using ChatGPT-4 and the Visla plugin. Whether you're new to AI and video creation or looking to improve your skills, this video offers valuable insights and step-by-step instructions to help you create engaging content with ease.
Remember to like, share, and subscribe for more tutorials on AI and video creation. Thanks for watching!
7
views
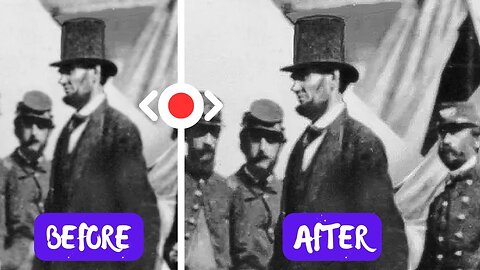
How To Fix (Sharpen) Old And Blurry Images With Photoshop - Detailed Tutorial
Welcome back to another Photoshop tutorial! In today's episode, we dive into a subject close to the hearts of many photographers and photo enthusiasts: how to sharpen any image. And to demonstrate the technique, we're not taking the easy route! We're delving into the annals of history, specifically using an image that's 161 years old. This historical gem captures Abraham Lincoln during his visit to the battlefield of Antietam. Unsure of the pronunciation? Don't worry, I've got you covered.
Timestamps:
00:00 - 00:19
Introduction to the video and presenting the 161-year-old image of Abraham Lincoln at Antietam.
00:19 - 00:38
A closer look at the original image reveals its age: blurring and lack of sharp edges. Yet, with a bit of Photoshop magic, see the transformation as the image is crisply defined.
00:38 - 00:58
Ready to get started? I kick off the tutorial by showing you how to duplicate the layer for our sharpening process. This is the first step to ensure you retain your original image untouched.
00:58 - 01:15
The main course! Introduction to Photoshop's Camera Raw Filter. I discuss why you might want to skip the traditional sharpen tools for this hidden gem, which provides precise sharpening capabilities.
01:15 - 01:48
Dive into the details: Adjusting the sharpening and radius levels. Live demo on the effects of these changes using Lincoln's face as our focal point.
01:48 - 02:22
Getting technical: Understanding radius and detail, and the crucial step of noise reduction. Too much noise reduction can alter your image's feel, so it's vital to find a balance.
02:22 - 02:55
Enhancing your image-editing skills: Using PC's 'Alt' or Mac's 'Option' key to visualize the changes you're making in a negative format. This method provides a unique perspective on the adjustments you're making.
02:55 - 03:17
Advanced technique alert! Why sometimes, multiple layers or passes can be more effective than one single, massive adjustment.
03:17 - 03:51
Final adjustments, comparing the sharpened image to the original, and voila! A beautifully sharpened relic from the past brought to life with modern technology.
This tutorial isn't just about sharpening an image. It's a trip down memory lane, bringing the past to the present with the power of Photoshop. Whether you're a seasoned Photoshop pro or a newbie eager to improve your skills, this tutorial offers something for everyone. Thanks for tuning in, and don't forget to leave your feedback in the comments below!
15
views
1
comment

What Schools Didn't Teach You: Rich Dad, Poor Dad Explained - Audio And Video Summary
Hey everyone! Welcome back to AI In A Minute, where we break down the most impactful books that can change your life. Today we’re diving deep into the personal finance classic, "Rich Dad, Poor Dad" by Robert Kiyosaki.
📚 About The Book
"Rich Dad, Poor Dad" is a landmark text that shook up the world of personal finance when it was first published in 1997. The author, Robert Kiyosaki, presents the financial philosophies of two dads: his biological father, a well-educated man with a stable job (Poor Dad), and his friend’s father, a successful entrepreneur (Rich Dad). Both had different approaches to money and investing, and these shaped Kiyosaki’s views on how to achieve financial freedom.
🔑 Key Takeaways
1️⃣ Assets vs. Liabilities
Rich Dad emphasizes the importance of acquiring assets—things that put money in your pocket, like real estate or businesses. Poor Dad focuses on accumulating liabilities, mistakenly thinking they are assets, like cars and houses.
2️⃣ The Rat Race
Poor Dad's philosophy keeps you stuck in the rat race—working hard to earn money, but then spending it all on bills and liabilities. Rich Dad teaches you to escape this cycle by investing wisely.
3️⃣ Financial Education
Poor Dad places value on traditional education, while Rich Dad stresses the importance of financial education, which isn't usually taught in schools.
4️⃣ Risk Taking
Rich Dad believes that taking calculated risks is essential for financial growth. Poor Dad avoids risks and plays it safe, which limits his potential for financial gains.
5️⃣ Income Streams
Rich Dad focuses on multiple streams of income, including passive income. Poor Dad relies on a single source: his job.
🧠 Who Should Watch This Video?
If you’re stuck in a 9-to-5 job and can't seem to escape living paycheck-to-paycheck
If you’re curious about how the wealthy think and invest differently
If you want to understand the basics of personal finance and investing for long-term wealth
📺 What's Inside This Video
[00:00] Introduction
[01:12] About the Author
[02:45] The Concept of Two Dads
[05:10] Assets vs Liabilities
[09:30] Escaping the Rat Race
[12:50] The Importance of Financial Education
[16:40] Risk Taking for Financial Growth
[20:25] Importance of Multiple Income Streams
[24:00] Conclusion
👇 Useful Links
Get "Rich Dad, Poor Dad" here: [Amazon Link]
Check out Robert Kiyosaki’s website: [Website Link]
For more on personal finance: [Playlist Link]
💡 Did You Enjoy The Video?
If you found value in this video, don’t forget to give it a thumbs up, share it with your friends, and subscribe for more content! Have questions or want to suggest a book for us to summarize next? Drop a comment below!
Remember, understanding the principles in "Rich Dad, Poor Dad" is just the beginning; applying them in real life is the key to achieving financial freedom. See you in the next video!
172
views
Marcus Aurelius' "Meditations" | The Ultimate Guide to Stoic Wisdom - Detailed Summary
Hey there, Philosophy Enthusiasts! Welcome back to AI In A Minute, the place where we dive deep into the world of philosophy, unlocking ancient wisdom that can utterly transform your life today. In this video, we’re dissecting Marcus Aurelius’ magnum opus: "Meditations." A Roman Emperor who was also a philosopher?
🔴 DON’T FORGET TO SUBSCRIBE! Turn on notifications so you never miss any of our philosophical explorations! 🛎️
📚 What is "Meditations"?
"Meditations" is not just a book; it’s a collection of personal thoughts, ethical aphorisms, and Stoic philosophies written by Marcus Aurelius, the Roman Emperor from 161 to 180 AD. Interestingly, Marcus wrote this as a personal journal, never intending it for public eyes. Yet, centuries later, it remains one of the most impactful pieces of Stoic philosophy, read and revered by people all over the world.
👑 Who was Marcus Aurelius?
Marcus Aurelius was not just any Roman Emperor; he was a Stoic philosopher who embodied the ideals of wisdom, temperance, and fortitude. His reign was marked by military campaigns and internal strife, yet he found time to reflect and write. Marcus is often cited as the model "Philosopher King," a leader who incorporates wisdom into governance, much in line with Plato's ideal ruler.
📝 Summary & Key Concepts
1️⃣ Acceptance of Nature’s Way
One of Marcus' most poignant pieces of wisdom is the acceptance of the natural course of life. He posits that we should be in harmony with nature and accept the events that come our way without too much resistance. By following the ebb and flow of life, we align ourselves with the universe, finding inner peace.
2️⃣ Virtue as the Highest Good
Marcus was obsessed with virtue. According to him, true good exists not in external possessions or circumstances but in virtue alone. Virtue enables one to be self-sufficient, satisfied, and at peace with oneself. A virtuous person remains unmoved by external events, maintaining an inner citadel of tranquility.
3️⃣ Impermanence and Mortality
Marcus constantly reminded himself of the impermanent nature of life. People, power, wealth—everything is transient. Accepting the impermanence of things helps us appreciate life more and also prepares us for the inevitable – death.
4️⃣ Stoic Mindfulness
Marcus Aurelius advocates for a keen awareness of the present moment. He argues that regret for the past and anxiety for the future are both unnecessary burdens. The present is all that truly exists, and it’s the only realm where we can act.
5️⃣ Universal Brotherhood
According to Marcus, all humans share rationality, making us parts of a larger whole. He champions the idea that we should act justly and with kindness towards one another, considering the common rationality that binds us together.
6️⃣ Inner Resilience
Marcus faced numerous hardships in his life, including wars, plagues, and betrayals. Yet, his philosophy focused on internal fortitude. No matter what life throws at you, your inner virtue and strength can help you navigate through it.
🧭 How to Apply Marcus Aurelius’ Wisdom?
1️⃣ Morning Reflections: Start your day with reflections. Take a moment each morning to think about the virtues you want to embody.
2️⃣ Journaling: Keep a diary where you note down your thoughts, challenges, and how you could handle situations better.
3️⃣ Act Mindfully: Practice being present in whatever you are doing. Whether it’s eating, walking, or talking, focus solely on the task at hand.
4️⃣ Universal Love: Treat everyone around you with kindness and fairness. Try to be less judgmental and more accepting of people’s flaws.
5️⃣ Embrace Challenges: View every hardship as an opportunity to grow and apply Stoic principles.
📖 Recommended Readings:
If you’re interested in diving deeper into the Stoic philosophy and Marcus Aurelius, here are some recommended readings:
"The Daily Stoic" by Ryan Holiday
"Letters from a Stoic" by Seneca
"Discourses and Selected Writings" by Epictetus
🙋♀️ Your Turn!
What are your thoughts on "Meditations"? Which concept resonates the most with you? Leave your thoughts in the comments below, and let’s get a discussion going!
240
views
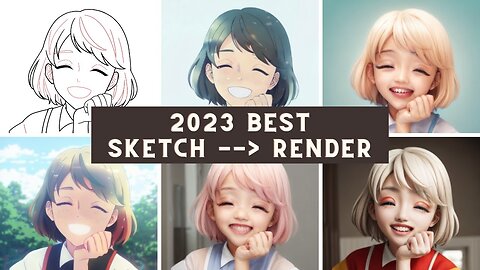
Best Sketch To AI Render Tool 2023 - Prome AI
Link to Prome AI: https://www.promeai.com/
Hey, art enthusiasts! Ever wondered how to elevate your basic sketches or line art to the next level? Look no further. Dive into today's tutorial where I take you step by step on how to transform your line art into an incredible piece of art with various styles using Prome AI. Whether you're a budding artist or a seasoned professional, this one's for you. Let's get artsy! 🖌️
⌛ Timestamps:
00:00 - Introduction to the video
00:19 - Presenting line art and the magic of Prome AI
00:38 - How PromII transforms your sketch
00:54 - Navigating PromeAI.com
01:10 - Uploading your line art/sketch
01:45 - Choosing your style on Prome AI
02:32 - Rendering options & description
02:51 - Awaiting the art magic
03:06 - Comparing the results
03:31 - Trying different rendering styles
04:18 - Viewing the final output
04:34 - Downloading your masterpiece
05:08 - Closing thoughts
🔗 Links & Resources:
Prome AI - The platform used in today's tutorial
🔔 If you found this tutorial helpful, consider giving it a thumbs up and subscribing for more art and tech tutorials! Drop your thoughts or any queries in the comments below.
1
view
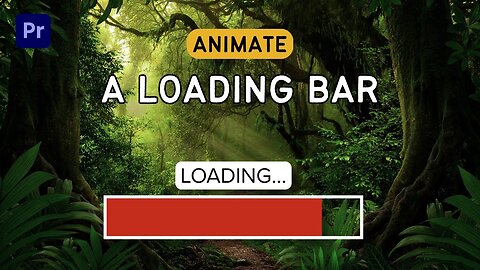
Create Amazing Loading Bar Animations in Premiere Pro: No After Effects Needed!
At the start (00:00:00:00 - 00:00:17:17), the presenter welcomes viewers back to their Premiere Pro tutorial series. He explains that he will demonstrate how to create a "cool little loading animation" in Premiere Pro, which traditionally would be made using After Effects.
From 00:00:17:19 to 00:00:34:02, he starts by erasing all existing layers and creating a new composition. He instructs viewers to import their footage into the project panel and drag it onto their timeline.
At 00:00:34:02, the instructor begins the process of creating the loading bar animation, starting with a rectangle. From 00:00:35:13 to 00:00:41:29, he opts for an extra-large rectangle for visibility and encourages viewers to choose a size that suits their needs.
In the segment 00:00:41:29 - 00:00:57:11, he continues to create the loading bar, setting the fill to none and the stroke to follow. He then moves into the essential graphics panel, and reminds viewers to ensure this panel is visible.
From 00:00:57:14 to 00:01:17:04, he emphasizes the importance of working within the essential graphics panel while creating the shape. He then describes how to create a simple rectangle with a 40 stroke, reminding viewers that they can customize the thickness.
Moving forward, from 00:01:17:06 to 00:01:39:17, the presenter creates another layer using the rectangle tool. This new shape is created inside the previous one, with a stroke and a fill. He also changes the settings to add a fill and turn off the stroke, leaving viewers with two rectangles.
In the next part (00:01:39:17 - 00:02:15:21), he explains how to adjust these rectangles: the bottom one is the stroke, and the top one is the fill. He then demonstrates how to use the selection tool to tweak the shape of the top (fill) layer, highlighting the adjustable handles that appear when the shape is double-clicked.
Between 00:02:15:21 and 00:02:37:27, the tutor works on fine-tuning the positioning of the fill within the stroke. He encourages viewers to eyeball the fit, although they can zoom in for precision.
From 00:02:37:27 to 00:02:56:17, he directs viewers to the effects panel, where they should apply a crop effect to the fill layer. He reiterates that if the effects panel is not visible, it can be found through the window.
Between 00:02:56:17 and 00:03:17:07, the instructor applies a crop effect to the fill layer and shows how to verify that it is indeed the fill layer. He guides viewers to locate and use the crop effect from the effects panel and apply it to the fill layer.
From 00:03:17:07 to 00:03:41:09, he showcases how the crop effect can be used to set the animation's direction. For this tutorial, he chooses to animate from right to left.
Between 00:03:41:09 and 00:04:15:05, the presenter shows how to animate the loading bar by moving the play head forward to the three-second mark and adjusting the crop values from 100% to 0%.
Finally, from 00:04:15:05 to 00:04:42:06, he plays the animation, which he finds a bit slow. He shows viewers how to speed up the animation by adjusting the keyframe on the timeline, then concludes the tutorial, expressing that it is indeed simple to create a loading bar animation in Premiere Pro. He signs off by asking for viewers' thoughts and thanking them for watching.
15
views
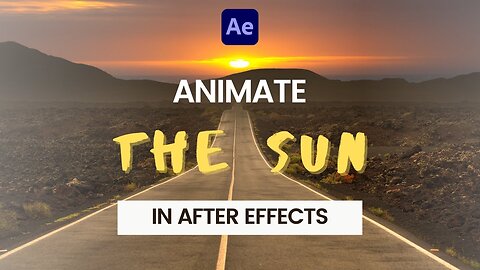
Brighten Up Your Videos: A Step-by-step Guide to Adding & Animating a Sun in After Effects
In this tutorial, we will dive into how you can add a radiant touch to your videos by introducing a sun and even animate it to your liking using Adobe After Effects. This quick guide is perfect for beginners and intermediates who want to make their videos stand out.
We start off by showing you how this simple effect can change the mood of your video dramatically, using a drone shot as an example. Then, we will guide you through the process of creating this effect from scratch. The first step is simply importing your footage into your project panel.
Next, we delve into the creation of an adjustment layer and locating the 'CC Light Rays' under Effects and Presets panel. We show you how to apply this effect onto the adjustment layer and give your footage a sunny makeover. Don't worry if you're not tech-savvy; we'll guide you through each step, ensuring you don't miss anything.
Our tutorial not only guides you on how to add a sun, but we'll also show you how to control its placement, adjust its radius and softness for a more natural or dramatic effect depending on what you need. But it doesn't stop there! We'll also teach you how to animate the sun, adding a dynamic flair to your videos.
Ever dreamed of a red or purple sun? Well, dream no more! In the final part of the tutorial, we will teach you how to change the color of the sun to suit your video's aesthetic.
Adding a sun or sun rays to your videos might seem like a small detail, but it can make a huge difference in setting the mood and overall impact. So, are you ready to let the sunshine into your videos? Watch our tutorial now!
Remember, if you found this video helpful, don't forget to like, share, and subscribe for more such useful After Effects tutorials!
6
views

Adobe After Effects Tutorial: Finding the Missing Camera And Renderer Views
00:00:00:00 - 00:00:18:14
The video begins with a cordial greeting from the speaker, welcoming viewers back to another Adobe After Effects tutorial. The aim of this particular tutorial is to guide viewers on how to locate a missing camera view or option, a task which may seem complex to beginners but is, in fact, quite straightforward. The speaker elaborates on their issue by providing an example: a digital image of their puppy dog, seemingly suspended in space. After adding a 'wiggle' effect to the image, the speaker explains they were unable to locate the camera view.
00:00:18:14 - 00:00:35:22
The speaker then dives into the solution. In order to regain visibility of the camera's distance, they instruct viewers to go to the left side of the software interface and click on the option to 'expand or collapse the layers, swatches, switches, paint, switch swatches'. Following this step, it's crucial to ensure at least one layer is set to 3D mode. The speaker highlights this on their own project, drawing attention to their 3D layer.
00:00:35:25 - 00:00:50:21
After setting a layer (or multiple layers) to 3D, additional options will appear on the right side of the interface, including the active camera and multiple camera views. The speaker emphasizes this point, explaining that the 3D setting is mandatory for these features to be available. If the 3D layer is deactivated, the camera view options will disappear.
00:00:50:23 - 00:00:58:02
The speaker reiterates the core lesson: activating the 3D mode on at least one layer will reveal the missing active camera and multiple camera views options. They succinctly conclude that this is all there is to the process before thanking the viewers for watching their tutorial.
1
view
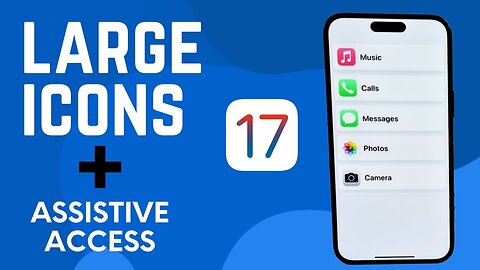
Step-by-Step - How To Make Icons Larger (Assistive Access) For iPhone and iOS 17
Welcome back to another comprehensive iOS 17 tutorial! In this video, we explore Assistive Access, a new feature introduced with iOS 17 that aims to declutter the user interface and enlarge your icons.
Assistive Access is a helpful feature for individuals experiencing visual impairment or any cognitive challenges. The step-by-step walkthrough provided in the video helps you set up the feature without a hitch.
Timestamps:
00:00 - Curtis' intro and brief overview of Assistive Access
00:22 - Importance of Assistive Access for different users
00:37 - Detailed step-by-step instructions to enable Assistive Access in Settings
00:55 - Introduction to the Assistive Access screen and starting the setup process
01:10 - Choosing the layout: Rows or Grids
01:27 - Selecting and customizing apps for Assistive Access
01:42 - Important note about Camera settings within Assistive Access
01:59 - Additional app selection and customization for Assistive Access
02:14 - Further customization for individual needs
02:31 - Adding more apps to Assistive Access
02:48 - Notifying about important Assistive Access functionalities
03:07 - Confirming password and wrapping up the setup process
03:23 - End of setup process, showing screenshots due to screen recording limitations
Remember, the choice of apps and layout depends on your personal preference and you can change it anytime. I hope this tutorial was helpful. Please drop your questions or comments below. Make sure to give a thumbs up if this video was useful and subscribe for more such iOS tutorials!
3
views
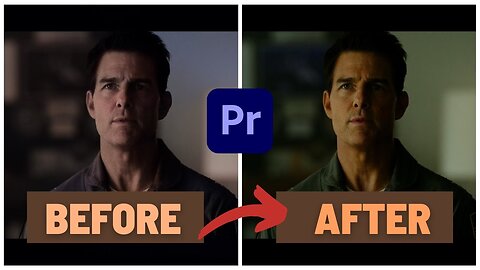
Instant Hollywood Look: Teal and Orange Color Grading - No LUTs Or Downloads Required
Welcome to a comprehensive tutorial on how to master the coveted teal and orange look without relying on LUTs. In this walkthrough, we debunk some misconceptions about orange skin tones, and introduce you to a professional color grading technique that's completely free. We're breaking down the classic summer blockbuster look, often described as teal and orange.
Using Adobe Premiere Pro, we show you how to achieve this popular color grading look by examining a downloaded IMAX version of Top Gun Maverick. The tutorial allows you to easily identify the color grading patterns used in this iconic film.
First, we delve into the theory behind this cinematic coloring. Using color.adobe.com, we showcase how you can use color grading to your advantage, determining precise hues from any image and understanding complementary colors.
Next, we transition to the practical application of this theory in Adobe Premiere Pro, guiding you through creating a new project, selecting footage, and navigating the color workspace. In our detailed demonstration, we explain how to tweak the shadows, mid-tones, and highlights to achieve the desired teal and orange aesthetic. You will also learn how to season the color grading to your taste and preference.
By the end of this video, you'll be able to apply color correction to all of your footage effortlessly, giving it a professional, Hollywood-like appearance. Whether you're a beginner or a professional, this guide is sure to take your color grading skills to the next level.
Thanks for watching, and remember to like, share, and subscribe for more professional editing tips and tutorials.
6
views
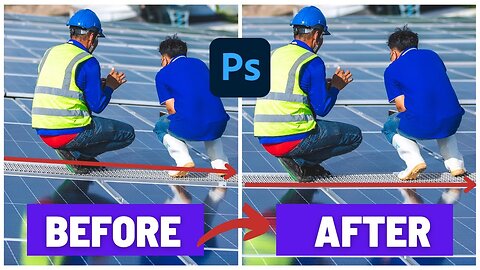
Photoshop Tutorial: How to Straighten Any Image using Perspective Warp and Geometry
In this comprehensive tutorial, we delve into the basics of image correction and manipulation using Adobe Photoshop. We will demonstrate how you can easily straighten out any image that may have been shot at a bad angle, using techniques such as perspective warp and geometry corrections. Here's a breakdown of what to expect:
Timestamps:
00:00 - 00:16: Introduction and overview of the image we'll be straightening
00:16 - 00:36: Explanation of the original, skewed image
00:36 - 01:01: Steps to load the image and navigate to the camera raw filter
01:01 - 01:03: Loading the image into the camera raw filter
01:03 - 01:13: Introduction to geometry corrections in the Camera Raw tool
01:13 - 01:18: Quick auto-correction using the 'A' button
01:18 - 01:25: Introduction to the Guided tool for more flexibility
01:25 - 01:31: The start of drawing guidelines for the Guided tool
01:31 - 01:34: Clicking on the Guided tool
01:34 - 01:37: How the Guided tool cross appears on the image
01:37 - 01:58: Using shift to zoom and draw the guidelines
01:58 - 02:18: Completion of the straightening process and how to deal with transparency on the edges
02:18 - 02:37: Scaling and finalizing the corrected image
02:37 - 02:55: Cross-verifying the image straightening using a brush tool
02:55 - 02:56: Wrapping up and thanking viewers for watching
Tags: #AdobePhotoshop #PhotoshopTutorial #ImageCorrection #PerspectiveWarp #GeometryCorrection
If you found this tutorial useful, don't forget to hit that like button, leave a comment about your favorite Photoshop tricks, and consider subscribing to our channel for more in-depth tutorials! Your support helps us keep making great content.
5
views
Rip Van Winkle - Full Audiobook - By Washington Irving - Imagery by Midjourney
📚 About "Rip Van Winkle":
Originally published in 1819 as part of "The Sketch Book of Geoffrey Crayon, Gent.", "Rip Van Winkle" is one of Washington Irving's most famous short stories. It tells the tale of Rip, a kind but lazy villager who ventures into the mountains, only to fall asleep for twenty years. Upon waking, he finds that the world around him has dramatically changed. Irving's tale masterfully weaves elements of myth, legend, and history, providing a critique on the transformation of American society post-Revolution.
🔍 Themes Explored:
The passage of time and its inevitable changes.
The tension between nature and civilization.
The contrasts of pre and post-Revolutionary America.
Myth and reality.
Individual identity and societal expectations.
Disclaimer:
This work is in the public domain, and this recording is provided for educational and entertainment purposes only. All rights to the original work belong to the author.
15
views
![Learn Photoshop's New Generative Expand (AI) | [7 Methods]](https://hugh.cdn.rumble.cloud/s/s8/1/E/n/x/8/Enx8l.oq1b.2-small-Learn-Photoshops-New-Genera.jpg)
Learn Photoshop's New Generative Expand (AI) | [7 Methods]
In this video tutorial, we dive into the new feature in the Photoshop beta, Generative Expand. This feature allows you to transform and extend your images in innovative and creative ways. You will learn multiple techniques to leverage this tool to your advantage, whether you are a beginner or a seasoned Photoshop user.
Timestamps:
00:00:00 - Welcome and introduction to the new Photoshop Beta feature, Generative Expand.
00:00:11 - Start of the practical tutorial, accessing Generative Expand via the crop tool.
00:00:31 - The basics of using Generative Expand to expand your images.
00:00:38 - Demonstrating image expansion, including the generation prompt options.
00:01:05 - Viewing the results of our first expansion using the phrase "my dogs in a restaurant."
00:01:24 - Exploring another option of proportional expansion using the Shift key.
00:02:01 - Explaining the advantages of the Alt or Option key for a perfect expansion.
00:02:13 - Testing Generative Expand with an empty generation prompt.
00:02:20 - Reviewing the result of an empty prompt expansion.
00:02:38 - Demonstrating the use of Generative Expand for multiple expansions.
00:03:09 - Introducing aspect ratio expansions with various presets.
00:03:24 - Applying a 16:9 aspect ratio expansion with the new feature.
00:04:00 - Reviewing the result of a 16:9 expansion without a specific prompt.
00:04:17 - Transitioning to the application of Generative Expand for creating patterned backgrounds.
00:04:24 - Executing a pattern generation from a chosen image.
00:04:54 - Reviewing the generated pattern from the initial image.
00:05:11 - Starting the final demonstration of Generative Expand with rotation and expansion of an image.
00:05:16 - Guiding you through image rotation and expanding it further.
00:05:48 - Applying a unique generation prompt for a humorous outcome.
00:05:52 - Checking out the results of the rotation plus expansion example.
00:06:05 - Wrapping up the tutorial with a summary of the various techniques of using Generative Expand.
Join us as we explore this exciting new feature that may reshape how you use Photoshop! Remember to like, comment, and subscribe for more content on the latest updates in digital tools and software.
16
views
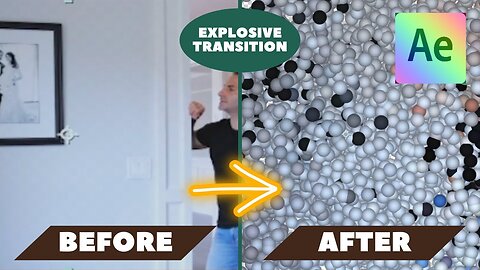
How to Create FREE Custom Exploding Transitions in Adobe After Effects | Step-by-Step Tutorial
In this video, we go through a step-by-step tutorial on creating your very own custom exploding transitions in Adobe After Effects, all without the need for purchasing plugins! If you're someone looking to personalize your videos with unique and engaging transitions, this tutorial is for you!
📽️ Timestamps:
00:00 - 00:18: Introduction to the tutorial and overview of what we'll be creating.
00:18 - 00:27: Brief explanation about 'ball action' that we will be using for creating our custom exploding transition.
00:27 - 00:33: Deleting the current composition to start from scratch.
00:33 - 00:41: Step 1 - Loading your video(s) into the project panel.
00:41 - 00:48: Step 2 - Dragging and dropping the first video onto a new composition.
00:48 - 00:56: Initial preview and splitting the layer for our video.
00:56 - 01:10: Deciding the duration of the initial footage and start of the transition.
01:10 - 01:28: Splitting the layer and creating two separate layers.
01:28 - 01:45: Planning the transition duration and setting up the transition.
01:45 - 02:02: Setting up the video to work on the transition.
02:02 - 02:16: Selecting the top layer (transition layer) and locating the effects and presets panel.
02:16 - 02:39: Applying the 'CC ball action' effect to the video.
02:39 - 02:48: Initial preview of the 'CC ball action' effect.
02:48 - 02:56: Moving to the effect controls panel.
02:56 - 03:15: Setting up the grid spacing and particles.
03:15 - 03:39: Animating the scatter, ball size, and grid spacing.
03:39 - 03:57: Setting up the end state of the transition.
03:57 - 04:14: Adjusting scatter, ball size, and grid space.
04:14 - 04:34: Recap of the steps so far and preview of the transition.
04:34 - 04:54: Explaining how to make the transition look like it belongs and animating the next piece of the video.
04:54 - 05:13: Adjusting the size and positioning of the next video.
05:13 - 05:31: Applying the transition effect on the next video.
05:31 - 05:50: Setting up the grid and animating the 'CC ball action' effect on the next video.
05:50 - 06:05: Configuring the start state of the next transition.
06:05 - 06:21: Setting up scatter, ball size, and grid space for the next video.
06:21 - 06:41: Restoring the video to its normal state.
06:41 - 06:59: Preview of the final transition - explosion and implosion.
06:59 - 07:13: Conclusion - How to create custom transitions in Adobe After Effects without any plugins or purchases.
Remember to hit that like button if you found this tutorial useful and don't forget to subscribe for more such content every week!
9
views
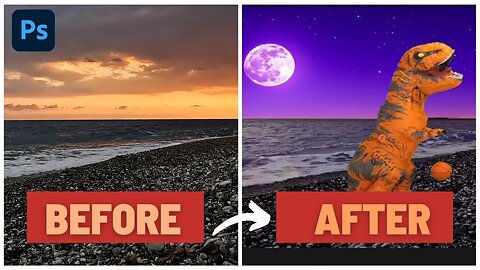
How To Combine Matte Painting And Photoshop Generative Fill To Create Amazing Videos!
Welcome to our newest Premiere Pro tutorial! This step-by-step guide will walk you through how to create stunning videos using techniques like generative fill, matte painting, green screening, and masking reflections.
We'll kick off by transforming a basic shot of a sunset and waves crashing into an extraordinary video of a dinosaur rampaging across a beach - all with the power of Premiere Pro.
Throughout this tutorial, you'll receive detailed instructions on each technique, starting from importing your footage into Premiere Pro, to stabilizing any shaky motions with the warp stabilizer effect. We then guide you in creating a seven-second video clip by fine-tuning your timeline and adjusting the duration.
This tutorial also places emphasis on the isolation of different elements, such as the sky and the water, and applying various effects to them. Discover how to generate a brand-new sky using generative fill in Photoshop Beta, fine-tune your selection, and tweak the color cast to match your scene.
To ensure the authenticity of your reflection, we'll teach you how to duplicate the top layer, transform it, flip it horizontally, and add a color blending mode. Then, you'll learn how to mask out the ocean area to create an opening, enabling your video to blend seamlessly within the reflection.
So, join us in this tutorial and discover the full power of Premiere Pro! Let's dive into the fascinating world of video editing together and let your creativity run wild.
Don't forget to like, comment, and subscribe for more editing tutorials. Happy editing!
2
views

How to Create Memes Using GPT-4 | No Photoshop Needed | AI Meme Generation Tutorial
Welcome back to another exciting tutorial! In this video, I'll show you how to leverage the power of AI to create hilarious memes using GPT-4 on ChatGPT Plus! No Photoshop, no complicated websites, just AI doing its thing!
Here's the video breakdown to help you navigate the tutorial:
00:00 - 00:20: Introduction to the video and demonstration of a meme created with GPT-4.
00:20 - 00:38: An overview of the meme: "Real artists spending years mastering their craft vs. AI artists generating masterpieces in .00 1 seconds".
00:38 - 00:58: Step-by-step guide on how to switch to GPT-4 in ChatGPT Plus and activate plugins.
00:58 - 01:12: Introduction to the two useful plugins for meme creation - Meme Generator and Meme Creator.
01:12 - 01:31: Demonstration of how to install the plugins from the plugin store and make sure they are loaded.
01:31 - 02:04: Brainstorming a funny meme concept: "Funny meme about using gas and brake pedal". Starting the meme generation process.
02:04 - 02:23: Showcasing the output from Meme Generator and creating multiple meme variants in real time.
02:23 - 02:43: Analyzing the generated memes. Unveiling the Drake Hotline Bling Meme, Distracted Boyfriend Meme, and the Two Buttons Meme.
02:43 - 03:00: Final overview of the memes created and highlighting the process.
03:00 - 03:11: Saving the generated memes and wrapping up the tutorial.
Thanks for watching! Don't forget to subscribe and hit the like button if you found this tutorial helpful. Stay tuned for more AI-related content and let me know in the comments below what other AI tools or applications you'd like to learn about!
7
views
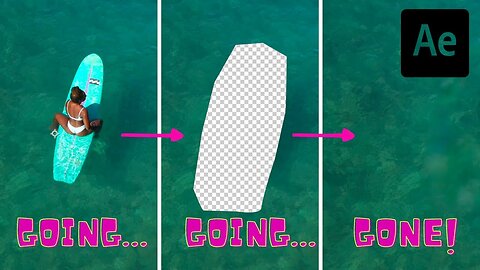
Remove Any Object Or Person From A Video With After Effects (AI) - Detailed Tutorial
Welcome back to our channel, where we guide you through various video editing tips and tricks. In this comprehensive tutorial, we use Adobe After Effects to demonstrate how you can seamlessly remove any object or person from your video.
[0:00] Introduction
Our video editing expert welcomes you back and briefly explains the tutorial's purpose - to teach you how to remove an object or person from a video using Adobe After Effects. We illustrate this using a short clip of a woman paddleboarding.
[0:17] Example
We present an example where the woman paddleboarding has been removed, replaced by a continuation of the surrounding sea. We discuss the use of content-aware fill, acknowledging that while not perfect, it offers solid results for video editing.
[0:41] Starting from Scratch
Our expert proceeds to delete everything, giving you a chance to learn the entire process from scratch.
[0:48] Importing Video
We begin by guiding you through the process of importing your chosen video into Adobe After Effects, creating a new composition.
[1:00] Trimming the Work Area
For a quicker demonstration, we trim the work area down to a manageable 2-second clip. This technique could be very useful for handling larger video files or more complex scenes.
[1:21] Content-Aware Fill
We introduce you to the Content-Aware Fill tool in After Effects, ensuring that it's enabled and visible for the upcoming steps.
[1:56] Creating a Mask
We show you how to create a mask around the object you wish to remove, in this case, the paddleboarding woman. We emphasize the importance of careful masking for the best results.
[2:13] Animating the Mask
By animating the mask path, we make sure that the selected object remains concealed throughout the footage. We guide you through this process step by step.
[3:10] Refining the Mask
For higher precision, we add and adjust additional points on our mask path, ensuring the woman stays within the mask throughout the video.
[3:51] Subtracting the Mask
We show you how to switch the mask from 'none' to 'subtract,' effectively removing the object from the video.
[4:09] Content-Aware Fill Options
We guide you through the options available in content-aware fill, discussing their functions and suggesting when to use each.
[4:38] Generating the Fill
Once the mask and fill settings are configured, we proceed with generating the fill, then pause to let the program process the fill.
[5:04] Results and Adjustments
We reveal the resulting video, now absent of the paddleboarding woman, and discuss the fill method used. We also talk about alpha expansion and how it can refine your results.
[5:19] Conclusion
Our expert highlights the success of the process, acknowledging the limitations but emphasizing the overall effectiveness of the content-aware fill tool. We encourage you to experiment with different settings and assure you that with patience, you can achieve great results.
[5:27] End
We wrap up the tutorial, reminding you that adjusting various settings can yield better results depending on the specifics of your footage.
Don't forget to like, comment, and subscribe for more helpful video editing tutorials. Thanks for watching!
10
views
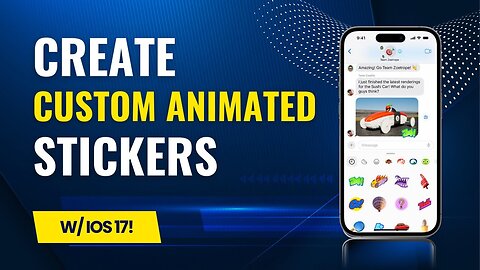
How to Create Custom (Animated) Stickers & Drag Into Conversations! With iPhone & iOS 17 - Tutorial
Welcome back to my channel, everyone! In today's video, I'll be walking you through a quick and easy iPhone tutorial on how to create your own stickers from personal photos using iOS 17. We're going to delve into how you can turn your favorite memories, whether it be your puppy Kingston or anything else, into awesome stickers to jazz up your text messages!
This video is perfect for those who love adding a personal touch to their messages. We'll be going over the step-by-step process, from selecting a photo to sending a custom sticker. Along the way, I'll introduce you to some of the new iOS 17 features, like the 'live' option for animated stickers and the effects you can apply to make your sticker shiny or original.
From the time stamp 00:01:25:11, we'll look at how you can add effects to make your sticker even more unique. I’ll also show you how to activate the live button for animated stickers and discuss which effects are compatible with this feature.
We'll wrap up by demonstrating how you can easily send these customized stickers to your contacts, adding a fun and personal touch to your conversations!
So, whether you're an iPhone newbie or an iOS veteran looking to learn a new trick, this tutorial is for you! You'll be sending out custom stickers in no time. Don’t forget to like, share, and subscribe if you find this video helpful, and leave a comment down below if you have any questions or if there's a specific tutorial you'd like to see next.
As always, thank you for watching and happy texting!
1
view
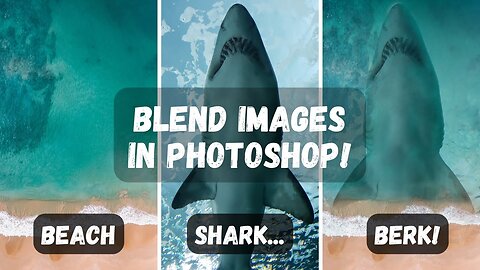
How to Blend And Combine Images in Adobe Photoshop: Complete Tutorial (2023)
Learn to create stunning, cinematic image blends using Adobe Photoshop in this detailed step-by-step tutorial! With this easy-to-follow guide, you'll be creating a beach scene with an enormous shark lurking beneath the surface, inspired by iconic movie posters. Whether you're a beginner or an experienced Photoshop user, there's something for everyone to learn.
🔖 Timestamps:
00:00 - Introduction
00:18 - What we're creating: Beach and Shark Blend
00:32 - Initial look at the blended image
00:46 - Restarting from scratch
01:04 - Adding the bottom layer (Beach Scene)
01:25 - Adding the top layer (Shark)
01:42 - Adjusting the Shark Image
01:57 - Layer Management
02:03 - Adding a Layer Mask
02:14 - Selecting the Gradient Tool
02:32 - Foreground/Background Colors and Gradient Selection
02:52 - Applying the Gradient
03:15 - Fine-tuning the Gradient
03:37 - Checking the Initial Blend
03:54 - Advanced Blending Techniques
04:16 - Brush Tool Settings
04:31 - Soft Round Brush and Opacity Settings
04:48 - Brushing Technique
05:06 - Bringing out the Shark's Details
05:24 - Continued Brushwork
05:42 - Final Touches on the Shark
05:58 - Blending in More of the Beach
06:14 - Finalizing the Bottom Blend
06:29 - Reviewing the Blend
06:46 - Enhancing the Blend Edges
07:13 - Conclusion
In this Photoshop tutorial, you will learn:
How to add and manage layers
How to use layer masks
How to use the gradient tool
How to blend images seamlessly
How to use the brush tool effectively for delicate refinements
Don't forget to like, comment, and subscribe if you found this tutorial helpful. Happy blending!
2
views
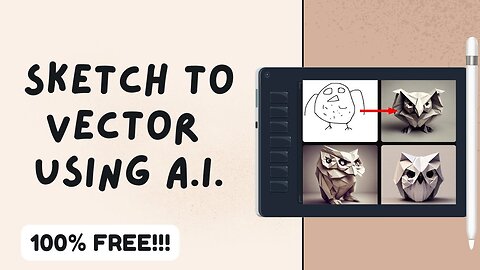
Transform Your Sketches Into Vector Graphics with AI! - For FREE - Stable Doodle - Detailed Tutorial
Link to Stable Doodle: https://clipdrop.co/stable-doodle
Link to Vectorizer AI: https://vectorizer.ai/
Welcome back to another tutorial! In this video, we delve into the world of AI and art, specifically how to use 'Stable Doodle' on ClipDrop to transform your simple drawings into stunning vector graphics, all for free!
⏱️TIMESTAMPS⏱️
0:00 - Introduction and brief overview
0:27 - Step-by-step guide on using ClipDrop / Stable Doodle
0:58 - Drawing a basic owl sketch
1:44 - Choosing art styles and generating the AI image
2:30 - Switching art styles and exploring results
2:49 - Downloading the AI-generated image
3:11 - Using Vectorizer AI to convert the image to a vector graphic
3:49 - Working with Adobe Illustrator and showcasing the vector graphic
4:29 - Conclusion and final thoughts
With the help of Stable Doodle, even those of us who struggle with traditional art mediums can create eye-catching and professional-looking pieces. From creating a fun owl sketch and turning it into different art styles using AI, to then converting it into a vector graphic, we cover all the necessary steps. I even demonstrate how to remove watermarks and how to work with Adobe Illustrator to manipulate your vector graphic.
Link to ClipDrop / Stable Doodle: https://clipdrop.co/stable-doodle
Link to Vectorizer: https://vectorizer.ai/
If you found this tutorial useful, remember to like, share, and subscribe for more tips and tutorials. Leave a comment down below to let us know what you'd like to see in future videos. Happy drawing!
13
views
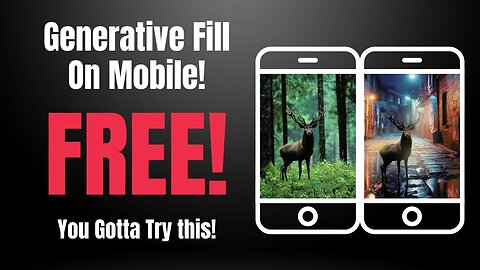
How To Use Photoshop Generative Fill For FREE On Your Mobile Device! iPhone, iPad, & Android!
Link: https://www.adobe.com/sensei/generati...
In this tutorial, I show you how to use the Adobe Firefly platform's Generative Fill tool for free on your iPhone or iPad. It's a nifty and exciting tool for image editing on the go, and the best part? It's completely free (at least at the time of making this video).
🔎00:00 - 00:16: Introduction to the video and a preview of what you can achieve with Generative Fill.
🔎00:16 - 00:34: A brief demonstration of how I used Generative Fill to add a pink hat to a stock image of a lady, all done on my iPhone.
🔎00:34 - 00:50: Step-by-step guide on how to access and sign in to Firefly Adobe. You can follow the link in the description below to get there.
🔎00:51 - 01:06: Assurance that the account used for this tutorial is free and the possibilities that lie ahead in the platform.
🔎01:06 - 01:25: An overview of the Generative Fill tool and how to access it, along with other options available on the platform.
🔎01:25 - 01:39: Demonstration on how to upload an image (a picture of my adorable bulldog, Kingston in this case) from your device to the platform.
🔎01:39 - 01:55: How to adjust your uploaded image for the best results.
🔎01:55 - 02:13: A tutorial on how to use the brush tool to select the parts of your image you want to alter.
🔎02:13 - 02:30: A fun example of how to use the tool to add a soother to Kingston's face.
🔎02:30 - 02:53: Revealing the result of our Generative Fill experiment and exploring various output options.
🔎02:53 - 03:09: How to download, copy, or publish your edited image straight from the platform.
🔎03:09 - 03:18: Final words and wrap-up of the tutorial.
👇Links to everything mentioned in the video are available in the description below. Please leave a like if you found this tutorial helpful and consider subscribing for more tech tutorials. Thank you for watching!
3
views
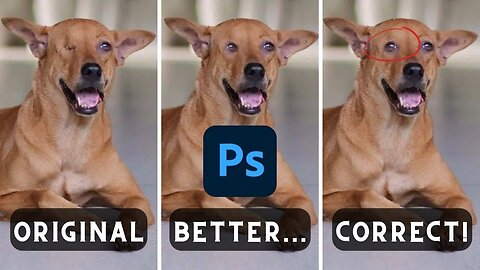
How To Duplicate (Clone) Any Bodypart - CLONE SOURCE - Photoshop
The video is a comprehensive Adobe Photoshop tutorial on using the Clone Stamp Tool. The video tutorial aims to provide step-by-step instructions on how to correctly clone body parts in a photo, and avoid common errors.
At the very beginning of the video (00:00:00:00 - 00:00:19:24), the presenter introduces the topic and explains the relevance of the clone source window in ensuring accuracy during the cloning process. He sets the stage for the tutorial by presenting the original image that he will be working on throughout the video – an image of a one-eyed dog, referred to as the 'Pupper dog'.
From 00:00:19:24 - 00:00:36:04, the presenter gives the audience a glimpse of his first attempt at cloning the dog's eye using the clone stamp tool. He then zooms in to highlight the disparity between the initial clone attempt and the correct version.
In the segment from 00:00:36:04 - 00:00:57:25, the presenter points out a common mistake where the inside of the eye, including the tear duct and the sclera, appear to be facing the same way in the cloned image. He indicates that a properly cloned image would show a distinct difference between the left and right eyes.
From 00:00:57:25 - 00:01:26:27, the presenter dives into the actual tutorial. He instructs the audience to load their image and select the clone stamp tool from the toolbar. He advises selecting a soft round brush from the top left options and adjusting its size as needed, emphasizing the importance of a soft round brush for a subtler and more realistic outcome.
He momentarily pauses the tutorial at 00:01:50:06 due to his dog's barking and resumes at 00:02:04:05. The presenter then explains the importance of the 'Clone Source' window, which he acknowledges is a tool often overlooked by many users.
From 00:02:04:05 - 00:02:40:24, the presenter demonstrates how to flip the clone source horizontally, which allows for the correct orientation of the cloned body part. He then proceeds with the cloning process, clicking on the eye of the dog to select the source and then placing the cloned eye on the other side of the dog's face.
In the segment from 00:02:40:24 - 00:03:24:01, the presenter shows how to use the elliptical marquee tool to adjust the size of the cloned eye, using the transform function. He explains that this step is optional and only necessary if the size of the cloned body part needs to be adjusted.
The tutorial wraps up from 00:03:24:01 - 00:03:31:24 with the presenter showcasing the final product of the cloning process. He concludes the video by reinforcing that the demonstrated method is how to correctly use the Clone Stamp Tool in Adobe Photoshop 2023 and thanks the viewers for watching.
97
views
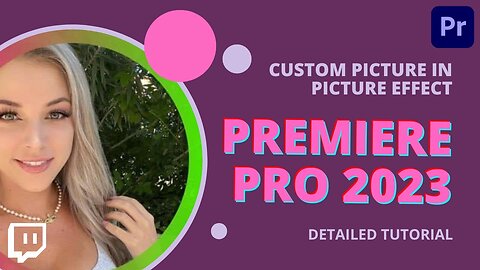
Premiere Pro 2023 - Custom Picture-In-Picture Effect (PiP) With Stroke - Tutorial
Welcome back, Premiere Pro enthusiasts! In this comprehensive tutorial, I'm going to walk you through creating custom Picture-in-Picture (PIP) effects, specifically showcasing how to create a circular PIP with an elegant stroke around it. Best part? I'll also teach you how to animate and freely move the PIP without altering the underlying footage.
⏱️ Timestamps:
0:00 - Introduction
0:15 - Demonstrating the PIP effect
0:36 - Starting from scratch
0:51 - Use cases and setting up the project
1:12 - Importing and preparing the footage
1:32 - Sizing and positioning your PIP
1:47 - Navigating to the effects panel
2:00 - Applying the crop effect
2:23 - Custom cropping with the ellipse tool
2:45 - Adjusting the ellipse dimensions
3:03 - Positioning the ellipse
3:15 - Tweaking the mask feather settings
3:44 - Inverting and cropping
3:56 - Fine-tuning the edges and the size
4:13 - Moving the PIP
4:27 - Implementing the paint bucket effect
5:09 - Adjusting paint bucket effect settings
5:36 - Adding the stroke to the PIP
5:54 - Final touches
6:08 - Final result and wrap up
6:26 - End
Whether you're a gamer who wants to include your reactions in gameplay videos or an educator aiming to make your tutorials more engaging, this video offers step-by-step guidance to achieve a custom PIP effect. You'll learn how to import and prepare footage, apply and adjust crop effects, add an artistic stroke, and finally move the PIP to your desired location.
This video is just a part of our comprehensive Premiere Pro tutorial series. To stay updated on future tutorials, make sure you hit the subscribe button and turn on notifications. If you have any questions, drop them in the comments below. And, if you found this tutorial helpful, do give us a thumbs up.
Happy editing!
20
views
Mastering Animations in Premiere Pro: A Step-by-Step Tutorial
Welcome to this comprehensive Premiere Pro tutorial where we will be diving into the realm of animations, and teaching you how to add considerable production value to your videos quickly and efficiently.
🕰️TIMESTAMPS🕰️
00:00 - Introduction
00:19 - Prepping for animations: Essential Graphics Panel
00:41 - Creating shapes within Premiere Pro
00:57 - Grouping shapes for a comprehensive animation
01:16 - Getting started with animations: Using the Rectangle Tool
01:35 - Customizing your shape: Fill, Stroke, Shadow, and More
02:09 - Animating your shape: Adjusting position, scale, rotation, opacity, and path
03:05 - How to animate the shape's position
03:44 - How to animate the shape's scale
04:02 - How to animate the shape's rotation
04:57 - Introduction to the Pen Tool
05:14 - Creating complex shapes using the Pen Tool
05:44 - Customizing your complex shape: Fill, Stroke, Shadow, and More
06:17 - Animating your shape's path using the Pen Tool
07:24 - Conclusion
This tutorial will take you through the basics of shape creation, right up to complex animation processes. Starting off with simple rectangle tools, we delve into the nitty-gritty of customizing your shape, and animating position, scale, rotation, and even path. Towards the end, we also explore the creative potential of the Pen tool and how it can be used to create more intricate shapes and dynamic animations.
Remember, this is all done right within Premiere Pro, no need to bring in any assets from After Effects or any other software. I can't wait to see how you apply these techniques to create your own animations and add a new dimension to your videos.
Don't forget to hit the 'Like' button if you found this tutorial helpful, and 'Subscribe' to our channel for more tutorials on Premiere Pro and other video editing software.
5
views