

Spicy Bacon Deviled Eggs Recipe: Tap & Hold the screen and click description for details
Spicy Bacon Deviled Eggs: (I doubled this recipe in the video)
- 12 eggs
- 1 C mayonnaise
- 2 T spicy mayo
- 1 T mustard
- 2 slices bacon, fried and chopped into bits
- Smoked paprika
Add 1 t baking soda to water with eggs, boil for 10 minutes, turn the heat off, wait 5 minutes, then transfer eggs into an ice bath for 10 minutes. Peel eggs, rinse, halve, and egg yolks to a mixing bowl with mayo, spicy mayo, and mustard. Use a hand mixer to beat mixture until smooth. Spoon into eggs, top with bacon bits, and sprinkle with smoked paprika.
Instant Deep Dish Pizza:
- 2 C water
- 2 t instant yeast
- 1 T sugar
- 1.5 C flour
- 1 t salt
Add ingredients to a large mixing bowl and stir until combined. This is a very hydrated, almost pourable dough. Allow dough to rise for 45 minutes. Preheat 2 well-seasoned, standard cast iron skillets at 425 until piping hot. Pour some oil in the bottom of each hot skillet so the surface is coated. Pour or spoon half the dough into each skillet. Add sauce, cheese, and toppings, then bake at 425 for 20 minutes until edges are golden brown. Allow pizza to cool in skillets for 10 minutes before serving.
43
views

Large Family What We Eat In A Day
Being at home all day every day homeschooling the kids means I need to put 3 square meals on the table every day. It sounds like a big task, and some days it feels like it. But most days it's just part of our rhythm and not too big of a deal since I'm always thinking at least one day ahead regarding food and prepping for one or two meals ahead. Today was just a typical day at home with a simple, high-protein breakfast and a big pot of soup for lunch that lasted a few meals. I had planned to make meatloaf, mashed potatoes, and cheesy broccoli for dinner but the baby was sick so I just used the soup we had for lunch for dinner as well and made my meatloaf dinner the next day.
Shop my kitchen essentials on Amazon: https://www.amazon.com/shop/hopewellheights
My Apron is from Etsy
Sourdough Pancake recipe: https://hopewellheightsblog.com/sourdough-pancakes/
Homemade Sourdough Discard Chicken Dumplings Recipe: https://hopewellheightsblog.com/homemade-sourdough-discard-chicken-dumplings-recipe/
Quick & Easy Sourdough Dumplings Recipe: https://hopewellheightsblog.com/sourdough-dumplings-quick-easy-discard-recipe/
John's Grandma's Meatloaf Recipe:
6 slices sandwich bread
1 cup milk
1 egg
1 T Worcestershire sauce
2 t salt
1/2 t pepper
1 t garlic powder
1 t onion powder
1 t Italian seasoning
2 lb ground beef
Soak the bread slices in 1 cup of milk in a mixing bowl for 10 minutes, then add the remaining ingredients and mix well. Transfer into a standard cast iron skillet.
Meatloaf Sauce
2/3 cup ketchup
2 T brown sugar
1 t Worcestershire
Mix all sauce ingredients and pour over the unbaked meatloaf. Bake at 375F for 50 minutes.
One Pot Mashed Potatoes:
This is very easy! Not really a precise recipe, just peel and dice. your potatoes, add to a dutch oven with 1T of butter per lb of potatoes, then cover 3/4 way with milk. Simmer on low until potatoes mash easily. Do not drain, just mash them in the pot and season with salt and pepper to taste. If you want to really jazz them up, add a few T of cream cheese, some garlic, and herbs!
49
views

Dual Purpose Family Milk Cows...
Cattle for homesteads & sourdough discard are the topics of the week. I’ve been so excited to see these new cattle and share a little bit about them with you all.
My Dress: https://www.neuflora.com/?ref=W4OeJ
Aprons are from Etsy
Sourdough Baking Supplies: https://www.amazon.com/shop/hopewellheights/list/2RVYO3WL4FIG9?tag=onamzhopewe07-20&ref_=aip_sf_list_spv_ofs_mixed_d
My Camera for Blogging: https://amzn.to/47Ps7bz
My vlogging camera: https://amzn.to/3GgX4JT
Pullman Loaf Pan: https://amzn.to/3N3hJF7
How to make a sourdough starter: https://hopewellheightsblog.com/sourdough-starter/
Sourdough Discard Pain De Mie:
120grams | 1/2 C milk
60 grams | 1/4 C water
225 grams | 3/4 C sourdough discard
2 eggs
60 grams | 1/4 C sugar
55 grams | 1/4 C butter
10 grams | 1 T salt
1 T instant yeast
500 grams | 3 1/3 C flour
the dough should be between 1100-1200 grams, no more than 1200 or the loaf will be dense.
Mix all ingredients except flour in a large mixing bowl, add flour slowly until the dough is sticky but workable. Knead until smooth but still sticky, this should not be a firm dough. If you've already added the amount of flour called for and it's too sticky to work, just cover it and let it rest for 30 minutes then try again rather than adding more flour. Once the dough is kneaded for 5+ minutes and smooth, place in a large bowl or baking bucket, cover, and bulk ferment (rise) for 1 hour or until doubled. Shape the dough by rolling it out in a rectangle like you would for cinnamon rolls, then log roll the dough and seal it. Place in Pullman pan, cover with the lid, and begin the final rise. When the dough is about 1/2 inch from the lid, preheat oven to 375F. Bake for 35 minutes with the lid ON. Remove from the oven and pull the lid back so the bread can begin cooling. The internal temp should be around 170-180F. Turn it out on a cooling rack after 30 minutes and allow to cool completely before slicing. This bread freezes really well. Otherwise, it lasts about a week on the counter.
With Cinnamon Raisin Swirl
1/2 C sugar
1-2 T cinnamon
1/2 C raisins
1 egg for egg wash
Use the Pain De Mie recipe above and follow all the steps until you get to the shaping. Once the dough is rolled out, brush with the egg wash. Then sprinkle evenly with the cinnamon sugar mixture. Top with raisins and begin log rolling. Keep the dough very tight as you roll to prevent air pockets and brush the top with egg wash every time you roll, this really does help prevent those big air pockets you tend to get with swirl breads. Seal the loaf and place seal side down in Pullman pan. Cover with the lid and proceed with the steps listed above for the standard loaf for rising and baking. This makes great French toast and French toast casserole!
Sourdough Japanese Milk Buns
Tangzhong (starter)
1/3 C milk
1/3 C water
1/3 C flour
gently heat and whisk on the stove until the Tangzhong begins to thicken, don't overheat or it will be gummy. Set aside to cool, you don't want to add hot Tangzhong to sourdough, it will kill the yeast so make sure it cools to at least 110F
Make the dough
1/4 C water
1/4 C milk
3/4 C or 225 grams starter
1 T instant yeast
2 eggs
1/2 C softened butter
1/4 C sugar
1 T salt
4-4.5 C flour
Mix all ingredients aside from flour, then add in Tangzhong and 3.5 cups flour, continue mixing and slowly adding flour until the dough is sticky but workable. This dough should be *very* sticky. If it's too sticky to work after adding all the flour, just cover it and rest for 30 minutes then try again - time is your friend because the flour absorbs and dough becomes more workable. Knead for 5+ minutes until you have a smooth but very sticky ball of dough. Bulk ferment for 1 hour or until doubled. Then shape into 24 buns that should be about 100g each. Allow buns to rise on a greased or lined baking sheet until doubled. Brush with an egg wash and bake at 350F for 20 minutes or until tops are golden brown. Cool and serve or freeze for later use.
111
views

Staying in Eggs Through the Winter! Tap & hold the screen and click description for details
What are your best tips for staying in fresh eggs all year round?
Sourdough Pancakes Recipe
1 C sourdough starter
1/4 cup sugar or honey, a mashed banana will work too
1 C milk
2 eggs
1 C flour
1 t baking powder
1/4 t sea salt
1 t baking soda
1 t vanilla extract
optional: cinnamon, nutmeg spice or vitality oil (1 drop only of each)
Add eggs & honey to a large mixing bowl and whisk together
add in sourdough starter, mix well
whisk in milk
add all dry ingredients + vanilla, vitality oils, whisk until a thick batter forms
Notes: If your batter is too thick or too thin, this could be due to the consistency of your starter (everyones is different!). If it's to thin, add more flour by the tablespoon until it thickens up. Too thick, add more milk by the tablespoon until it thins out.
42
views

Thanksgiving Leftovers from Scratch
Don't let your leftovers go to waste! Especially don't throw away that turkey carcass and any leftovers or drippings - you can turn all of that into beautiful, nutritious, turkey bone broth. Plus, there are so many delicious turkey leftover dishes - I'm sharing one of my favorites with you today
In this video, I'm canning 4 gallons worth of turkey bone broth from one 20 lb turkey! The cheapest I was able to find organic turkey bone broth online was $4.63/qt. If I were to buy 4 gallons of organic turkey bone broth it would cost $75! Now, if I were to buy *pastured* organic broth it would be $14/qt. So I actually canned $225 worth of broth. So really, it's worth your time and effort. And if you don't can, you can just freeze your broth in gallon Ziploc bags.
Shop my Kitchen & Canning Supplies: https://www.amazon.com/shop/hopewellheights
Christmas Gift Idea List for Mom: https://www.amazon.com/shop/hopewellheights/list/26PGHVU34Q0X0?ref_=aipsflist_aipsfhopewellheights
Christmas Gift Idea List for Toddlers: https://www.amazon.com/shop/hopewellheights/list/366ZHYXHHOOVG?ref_=aipsflist_aipsfhopewellheights
Christmas Gift Idea List for Girls: https://www.amazon.com/shop/hopewellheights/list/1W7C9VWZCVOSA?ref_=aipsflist_aipsfhopewellheights
Christmas Gift Idea List for Boys: https://www.amazon.com/shop/hopewellheights/list/N3T8WZYRFXHW?ref_=aipsflist_aipsfhopewellheights
Stocking Stuffer Ideas: https://www.amazon.com/shop/hopewellheights/list/2GNPXVYDQB2R0?ref_=aipsflist_aipsfhopewellheights
Large pressure canner: https://amzn.to/3SEKY4S
My dresses in this video: https://www.neuflora.com/?ref=W4OeJ
In-depth pressure canning tutorial: https://www.youtube.com/watch?v=WDBTmuwabwM
Turkey Bone Broth Recipe: not a precise recipe, just use everything you didn't eat from your turkey - bones, skin, drippings, organs, all of it. Add the entire carcass to a big stock pot along with any onions, lemons, apples, herbs, or anything you filled the cavity with. Add a few crushed garlic cloves to the stock pot, a tablespoon of salt, and a tablespoon of apple cider vinegar, and then fill the pot with water until the entire carcass is covered. Simmer on low for 12 hours then strain and store. You can freeze it in plastic bags or pressure can. And yes, this does need to be pressure canned, you can't water bath can bone broth. Process quarts for 25 minutes at 11PSI and half gallons for 36 minutes at 11PSI.
Turkey & Dumplings Recipe: (I doubled this recipe in the video)
1/2 C butter
1 C chopped carrots
1 C chopped celery
1 small onion, diced
4 cloves of garlic, minced
2 C cooked, chopped turkey
1/4 t sage
1/4 t rosemary
1/4 t thyme
1 t salt
1/2 t garlic powder
1/2 t onion powder
1/4 t pepper
2 T flour
1 Qt turkey bone broth
1 C heavy cream
1/2 C shredded cheddar
*** Halve the biscuit dumpling recipe for the recipe above***
Dumpling Recipe (same as my biscuit recipe): https://hopewellheightsblog.com/cast-iron-biscuits/
Instructions: Add butter and chopped celery, carrots, onion, and garlic to a dutch oven and simmer on low. Prepare the biscuit dumpling dough and chill in the fridge. Once. carrots are soft, add turkey, seasonings, broth, and cream. Simmer for 20 minutes, add cheese. Simmer for another 10 minutes, then use a spoon to drop the dumplings in. Cover with a lid, and let the dumplings cook on low for 20 minutes or until they are not doughy in the center. Just use a fork to test one. Allow to cool for half an hour before serving.
78
views

Human beings should never be referred to as “low value” by those who claim to be pro-life...
It’s incredibly damaging to the Christian (supposedly pro-life) witness to refer to human beings as “low value” for any reason, let alone a past that they have repented of - so let’s not. After all, we will be judged with the measure that we judge others….
This is especially cringe when it’s directly solely at women…
#patriarchy #grace
51
views

Sourdough Pain De Mie with Cinnamon Raisin Swirl Recipe #shorts #sourdough
Sourdough Pain De Mie with Cinnamon Raisin Swirl
2/3 C milk
1/3 C water
1 C starter
2 eggs
1/4 C sugar
1/4 C butter
1 T salt
4-4.5 C flour
1/2 C sugar
1-2 T cinnamon
1/2 C raisins
1 egg for egg wash
Mix all ingredients except flour in a large mixing bowl, add flour slowly until the dough is sticky but workable. Knead until smooth but still sticky, this should not be a firm dough. If you’ve already added the amount of flour called for and it’s too sticky to work, just cover it and let it rest for 30 minutes then try again rather than adding more flour. Once the dough is kneaded for 5+ minutes and smooth, place in a large bowl or baking bucket, cover, and bulk ferment (rise) for 8 hours or until doubled. Shape the dough by rolling it out in a rectangle like you would for cinnamon rolls. Once the dough is rolled out, brush with the egg wash. Then sprinkle evenly with the cinnamon sugar mixture. Top with raisins and begin log rolling. Keep the dough very tight as you roll to prevent air pockets and brush the top with egg wash every time you roll, this really does help prevent those big air pockets you tend to get with swirl breads. Seal the loaf and place seal side down in Pullman pan. Cover with the lid and begin the final rise. When the dough is about 1/2 inch from the lid, preheat oven to 375F. Bake for 35 minutes with the lid ON. Remove from the oven and pull the lid back so the bread can begin cooling. The internal temp should be around 170-180F. Turn it out on a cooling rack after 30 minutes and allow to cool completely before slicing. This bread freezes really well. Otherwise, it lasts about a week on the counter. This makes great French toast and French toast casserole!
51
views

BEST Sourdough Sandwich Bread Recipe! Tap & hold screen then click description for recipe #sourdough
Sourdough Pain De Mie (recipe makes one 13” loaf)
2/3 C milk
1/3 C water
1 C starter
2 eggs
1/4 C sugar
1/4 C butter
1 T salt
4-4.5 C flour
Mix all ingredients except flour in a large mixing bowl, add flour slowly until the dough is sticky but workable. Knead until smooth but still sticky, this should not be a firm dough. If you've already added the amount of flour called for and it's too sticky to work, just cover it and let it rest for 30 minutes then try again rather than adding more flour. Once the dough is kneaded for 5+ minutes and smooth, place in a large bowl or baking bucket, cover, and bulk ferment (rise) for 8 hours or until doubled. Shape the dough by rolling it out in a rectangle like you would for cinnamon rolls, then log roll the dough and seal it. Place in Pullman pan, cover with the lid and begin the final rise. When the dough is about 1/2 inch from the lid, preheat oven to 375F. Bake for 35 minutes with the lid ON. Remove from the oven and pull the lid back so the bread can begin cooling. The internal temp should be around 170-180F. Turn it out on a cooling rack after 30 minutes and allow to cool completely before slicing. This bread freezes really well. Otherwise, it lasts about a week on the counter.
Shop my sourdough supplies here: https://bit.ly/sourdoughessentials
54
views
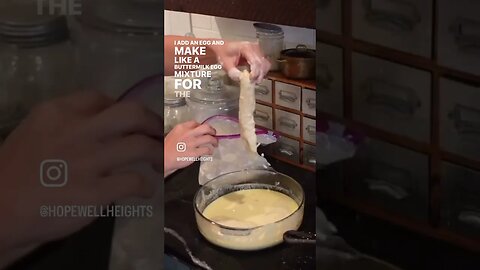
The Secret to the Best Fried Chicken
Looking to spice up your marriage? Here is a no-fail trick: learn to make really good fried chicken. In this video I’m frying halved breasts for chicken parm which was my husband’s request. But the method is the same no matter what you’re frying chicken for
soak chicken in buttermilk up to 1 whole day before breading and cooking.
Make the breading
3 cups flour
1 T salt (heaping)
1 T pepper
1 T onion powder
1 T garlic powder
1 T smoked paprika
Remove the chicken from the buttermilk & set in a separate dish while you make the wash
Buttermilk Wash
Reserved buttermilk from soaking chicken
1 egg or egg yolk
Whisk and use in the breading process. Coat in the breading mixture first, then coat in the buttermilk wash, and then in the breading mixture again. Yes, this is a double coating. And this is the BEST way to fry chicken!
Once chicken is breaded, it's ready to fry - lard, tallow, and coconut oil are best. Just make sure you have about 3/4” oil in whatever skillet you are using to fry the chicken. Fry with oil at 360F until chicken is golden brown on each side and cooked through.
61
views

Sourdough Artisan Bread Recipe
I’ve had a starter for 6 years and I’ve been making this artisan bread for 5 - I started making this bread before this big sourdough bang of 2020 and I haven’t changed my method. I learned by looking at and feeling the dough which has always served me well no matter what kind of flour I’m using or how hydrated my starter is. Here’s my recipe:
Shop my sourdough baking supplies here: https://www.amazon.com/shop/hopewellheights
Start your own sourdough starter:
https://hopewellheightsblog.com/sourdough-starter/
Yield is 1 loaf
1.5 cups water
1 cup active starter
1 T salt
3 cups flour
Add warm water and starter to a mixing bowl and mix, then add flour. Add 2 cups, mix, and then add more flour until you have a shaggy, dry dough. Do not knead, it’s ok if you can see bits of flour not totally mixed in in this first step. Just get it all to come together.
Cover and let rest at room temp or in a proofer for 30 min.
Add 1 T salt and work into the dough. Cover and rest for another 30 minutes.
Start your stretch and folds. After the 30-minute salt rest, stretch and fold the dough then rest for another 30 minutes. Repeat this stretch and fold followed by 30 minute rest 3 to 4 more times.
After the last stretch and fold, let the dough rest until it is almost doubled in size. Keep an eye on it so it doesn’t over-proof and start to fall flat.
Turn the proofed dough out onto the counter and shape it into a ball, turning to create tension. Let the shaped dough rest for 30 minutes.
Use a bench scraper to turn the dough into a basket, cover, then cold-proof overnight in the fridge.
When you’re ready to bake, preheat a DO or bread oven at 425. The DO needs to be very hot!
Turn the dough out onto parchment paper and score, then bake covered in the DO for 30 minutes. Uncover and bake for another 10-15 minutes, watching for the color you want on the crust.
Let the bread cool completely before you cut into it. This is important because the bread continues to bake even after it’s removed from the oven. Cutting into it too soon can cause it to be gummy.
87
views


Sourdough Discard Pumpkin Spice Cinnamon Rolls - Recipe on my Weekends in the Kitchen video!
This is a super easy & delicious twist on my classic biscuit recipe that can be found on my blog. If you want to see the whole process of making & baking these, it's on my Weekends in Kitchen on the Homestead video, here’s the recipe!
Biscuit Dough
2.5 cups flour
1 T sugar
1 T baking powder
1 t salt
1.5 cup butter
1 cup sourdough starter active or discard
1 egg
1/2 cup milk
Mix dry ingredients then cut in or grate the butter, add the starter, egg, and milk and gently incorporate - don’t knead! Roll the dough out into a big square
Pumpkin Spice Cinnamon Filling
1/3 cup butter
1/3 cup pumpkin purée
1/3 cup brown sugar
1 T cinnamon
1 t vanilla
Mix and spread evenly over the dough, cut and place in a 9x13, bake at 425 for 15-18
minutes.
Icing
1 T butter
2-3 cups powdered sugar
1 T milk
1 t vanilla
Whisk and pour over your faux pumpkin spice rolls when they’re hot
37
views

Perks of Having a Jersey Cow! 🧈 #homestead #jerseycow #rawmilk
This is definitely a perk to owning Jerseys! They’ve got a bit of a personality on them and are more prone to kick than other breeds, plus jersey bulls are downright deadly so many people AI or cross with something more docile to avoid having to run a Jersey bull on their property. But, the cream!!! It really does make it worth it.
You can do so much with cream. I always reserve some for my coffee and cooking. After that, butter is my number one cream product. Then whipped cream, sour cream, and cream cheese.
We just let one of the girls dry up as she is due in a couple months, I sure will miss all of this cream. But I’ve got a stockpile of butter in the fridge and I don’t mind black coffee for a while.
I know the stand mixer method is really popular for butter making, but in my experience it is rather messy and takes a long time. Whereas, the food processor keeps the mess contained and is relatively quick. Just pour your cream in to the full line and turn it on high. Within a few minutes you’ll have butter and buttermilk. 🤌🏼 🧈
Strain and save the buttermilk. Wash and press the butter until the water runs clear, then salt it if you like and serve, save in the fridge, or add to your freezer stash. Butter freezes really well!
#homestead #familymilkcow #jerseycow #rawbutter #rawmilk
35
views
Whey Caramel Sauce
The whey caramel recipe is in the description of my Natural Pregnancy video!
34
views


Heading into Fall on the Homestead
Let's make some food, talk about cast iron, do a fall front porch refresh, and chat about Halloween for Christians.
2 weeks ago I posted a video of cooking and food prep on the weekend. This video was filmed just a couple days later and is sort of a follow-up since I finished some of the food I prepped previously, recipes from the video below!
Shop my Kitchen, Home, Favorite Books, & more here: https://www.amazon.com/shop/hopewellheights
My favorite dresses: https://www.neuflora.com/?ref=W4OeJ
Sourdough Chocolate Chip Cookies: https://hopewellheightsblog.com/sourdough-chocolate-chip-cookies/#mv-creation-24-jtr
Sweet Potato Crumb Casserole
Sweet Potato Filling
4 cups baked sweet potato
1/2 cup butter
1/3 cup cream
2/3 cup brown sugar
Crumb Topping
1/2 cup butter
1 cup brown sugar
1/2 cup flour
1 tsp cinnamon
1 cup chopped pecans
Bake for an hour at 350
43
views

Weekend in the Kitchen on the Homestead
I love to rest and relax on the weekends, BUT we still have to eat. Spend the weekend with me in the kitchen feeding my family of 6.
Shop my kitchen on Amazon: https://www.amazon.com/shop/hopewellheights
This week's must-haves:
Instant Pot: https://amzn.to/44TKt9t
Copper Measuring Cups and Spoons: https://amzn.to/44VnVoE
Sourdough Pancake Recipe from the Blog: https://hopewellheightsblog.com/sourdough-pancakes/
Swedish Meatballs & Gravy from the Blog: https://hopewellheightsblog.com/one-pot-mashed-potatoes-with-meatballs-gravy/#mv-creation-8-jtr
Homemade Pasta from the Blog: https://hopewellheightsblog.com/preserving-farm-fresh-eggs-in-pasta-pasta-making-storage-tutorial/
Biscuits Recipe that I modified for Pumpkin Spice Biscuit Rolls: https://hopewellheightsblog.com/cast-iron-biscuits/
59
views


Homemaking & Some Big News...
We've got some exciting news to share as summer winds down and we head into my favorite season (basic, I know) but fall really is beautiful and delightful in every way here in the Midwest. Even on "slow days" on the homestead, the family still needs to eat. I worked around the house today but still had to tend to some bread that was proofing and make dinner. On the menu was a family fave that included some homestead contraband - good ole red dye 40-filled Doritos! Now is probably a good time to let you all know we aren't purists.
These are the knobs I found for super cheap for our old armoire in the entryway: https://www.handicraft.com/products/dritzscallknob?variant=40938524049577
Brod & Taylor Proofer: https://amzn.to/3PrTHoU
Miele Vacuum (best ever IMO): https://amzn.to/4621xv1
Shop my home & kitchen must-haves: https://www.amazon.com/shop/hopewellheights
50
views

Homestead Farm to Table
There's something so satisfying about making a big meal from scratch using mostly what you've grown or raised yourself, never gets old!
Shop my kitchen must-haves: https://www.amazon.com/shop/hopewellheights
Tomato sauce for lasagna: https://hopewellheightsblog.com/pressure-canning-tomato-sauce/
Whole milk ricotta
- Heat a gallon of whole milk to 190F, do NOT overheat.
- add 1/4 cup vinegar, citric acid, lemon juice, or ACV...stir for a minute
- Turn the heat off and wait 10-15 minutes for the curd to separate
- Strain through a cheesecloth & hang the ricotta to drip for 5-10 minutes
- Add some salt to the ricotta & serve or store in the fridge
Homemade pasta recipe: https://hopewellheightsblog.com/preserving-farm-fresh-eggs-in-pasta-pasta-making-storage-tutorial/
ricotta mixture for lasagna
-add 2 eggs to ricotta + a handful of freshly chopped parsley
Sourdough pie crust recipe: https://hopewellheightsblog.com/sourdough-pie-crust/
coconut cream pie recipe: https://hopewellheightsblog.com/old-fashioned-coconut-cream-pie/
52
views

Homestead Mornings
Typical late summer morning on the homestead. The pigs have all gone to market and the garden is winding down, so the main focus is on the cow and all of the milk. Lots of cheesemaking happening in the kitchen as I’m working on perfecting hard cheeses while still rotating in old tried and true soft cheeses like mozzarella.
Here’s my blog post on making a sourdough starter.
I don’t have my sourdough bread recipe on my blog yet but I use 1.5 C water, .5 cup starter, 1T salt, and flour until it's shaggy - sorry I don’t measure! I like working off of the feel of the dough that way my loaf turns out even when I use different flours. You want a shaggy dough at first, don’t worry it will get more workable throughout the ferment.
Shop the items in my home & kitchen on my Amazon storefront: https://www.amazon.com/shop/hopewellheights
The grass-fed beef gelatin I used for yogurt is from Perfect Supplements, My discount code is HOPEWELLHEIGHTS10 which can be stacked with their bundle discounts for ordering in multiples of 3 and 4. When I place a PS order, I stock up on everything - collagen, gelatin, beef liver, magnesium, coconut oil, mushroom powder, etc. so I can stack these discounts: https://www.perfectsupplements.com/Perfect-Bovine-Gelatin-p/ps-gelatin.htm?Click=622cf3e361f39&a_bid=5f354df4
This mozzarella recipe is from Mastering Basic Cheesemaking: https://amzn.to/3PgN2xD
My guide to sourdough starter: https://hopewellheightsblog.com/sourdough-starter/
Yogurt Starter Culture: https://www.homesteadersupply.com/index.php?main_page=product_info&cPath=234_170&products_id=2839
52
views

Homestead Cheese Making
This is the easiest hard cheese recipe I have seen to date! I’ve been so hesitant to dive into making hard cheeses because it seems like most recipes need to age 3-6 months. That seems like a long time to wait to see if I messed something up and adjust my process! I’m not sharing an exact tutorial since I am by no means an expert yet. I’m just showing you the basic process of cheesemaking so you can see its actually not as difficult as it may seem and simple hard cheeses can be made with an hour or so of hands on time and just a few days of aging in the fridge.
This is the Farmhouse Cheese recipe from the book Mastering Basic Cheesemaking. I can’t recommend this book enough! I wish I would have purchased it back when I was buying raw milk from a co-op before I had my own cow. I could have started learning and making back then and would have been more than ready for all of the milk and cream that comes with having your own cow.
Mastering Basic Cheesemaking: https://amzn.to/3spOuVC
Big Cheese Pot: https://amzn.to/3qJ6ud3
Amazon storefront: https://www.amazon.com/shop/hopewellheights
72
views

Vintage Thrift Haul Home Decor
The secret to finding vintage pieces on a budget lies in the difference between thrifting and antiquing. When I think of antiquing, I think of curated collections of legit antiques from various time periods - everything is beautiful, but also very pricey! Thrifting on the other hand is just picking through a bunch of junk priced for next to nothing hoping to find a treasure. This requires a lot of patience and an eye for true vintage pieces. I go the thrifting route because it's just so satisfying to me to fill my home with beautiful pieces on a budget. In fact, I am often very guilty of budget bragging..." see this, it was only $2 " lol
Not much to link in this vid since most was thrifted, but if you haven't jumped on the rub n' buff train yet, what are you waiting for?! This stuff is like magic. Turn gaudy, ugly, cheap-looking thrift finds into "vintage" dupes for just a few bucks and some elbow grease: https://amzn.to/3QJr8UX
I think the only other thing I need you to know about from this video is Ernie's little walker bike - a MUST for toddlers. This is his only toy, he rides it around all day and aside from this little bike he couldn't care less about toddler toys, he just wants to play outside, play with the big kids, or play with my stuff in the kitchen: https://www.avantlink.com/click.php?tt=cl&merchant_id=62d44d20-c742-49c3-b633-89e0d290ba05&website_id=4a13c867-e33e-4d4f-96a3-6efccf0d3d4b&url=http%3A%2F%2Fretrospec.com
If you see anything in my kitchen that looks somewhat new, I probably have it linked in my Amazon storefront: https://www.amazon.com/shop/hopewellheights
Ok, that's it for this week! See you next week for some cheesemaking, including some rookie mistakes I am learning from now that I'm venturing into hard cheeses.
82
views