


Bad Boy Clark
Hello and welcome back to my channel. I wanted to say thank you to my followers and thought I would share this video. This is Clark, he's such a good boy but sneaky. He is posted on my YouTube page as well. It is a customer of mine from last summer...his dog. I fell in love with him for he kept me company on my breaks. I'd play with him because he's just a year old...full of energy! Clark has a good soul! Thank you and I hope you have a good laugh as I did.
403
views
7
comments
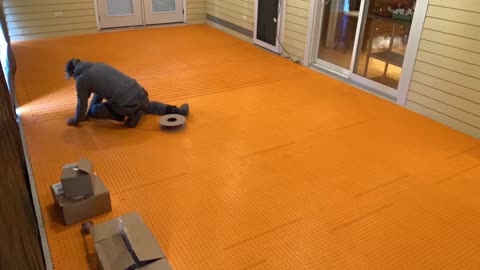
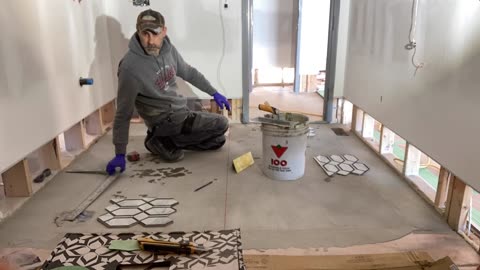
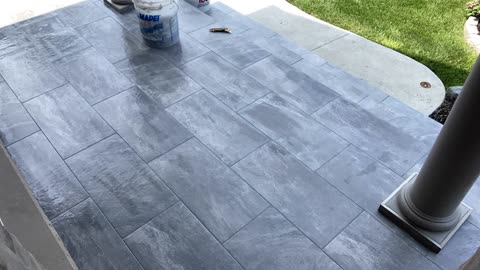
Heat Ditra Install With Warm Wire In Sun Room Phase One
Hello and welcome to my video of how to install Heat Ditra. In this video I measure and cut the heat ditra dry. The heat wire has to be installed with two separate cables operated on one thermostat. You need to use a module called a relay switch to operate the two cables as one. The electrician will take care of the rest at the end when the job is completed. I always install extra thermostat cables in case one fails. You should test your heat wire cables before install. Always remember to turn on your floor heat after 1 month of completion...cement needs time to cure or will fail.
91
views
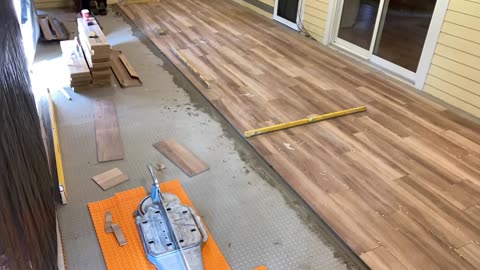
Heated Floor Sun Room Complete Phase Two
These porcelain tiles are 8 inch wide and 48 inch long. Had to level as I went along for the concrete had humps and bumps. The secret to installing is to add more cement in the middle of the tile then push down in the centre of the tile when installing.The longer the tile the more of a hump it has. If you have any questions please ask away.
104
views
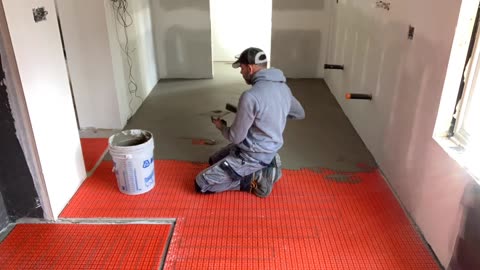
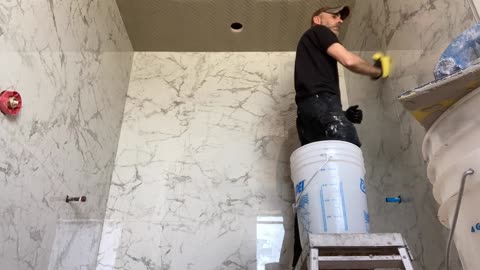
Master En suite Wet Room With Heated Floor And Curb Less Shower Base Phase One
Hello and welcome to my channel. On this project the floor and shower base is heated. This is called a wet room with a glass divider to breakup the tub and shower area from the bathroom cabinets and toilet area.
118
views
1
comment
Master En suite Wet Room With Heated Floor And Curb less Shower Phase Two
This job was so chaotic it was hard with all the distractions. There must have been around 10-15 vehicles on this job site. It's hard to get things done when there are that many people involved! It started out to be a great job but when you pile people on top of each other it becomes a salty atmosphere. Not the tradesman's fault it's just bad scheduling on the supervisors part. I was asked to help with this project but it will be my last one for this builder. I am just glad that it's over and happy that I am back to my builders whom I love.
277
views
1
comment
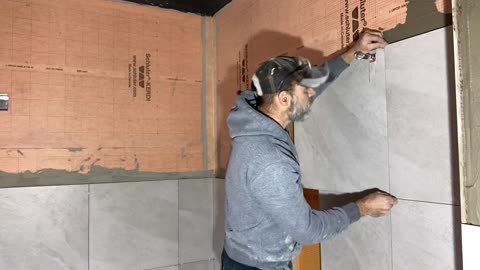
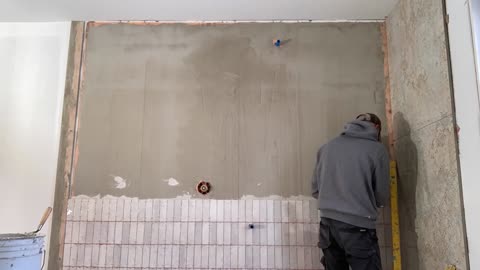
Cottage Main Bath Low Profile Shower
Hello again! In this tutorial the designer chose a 24 inch by 24 inch floor tile and the shower walls are a glaze subway. I used a 12 inch by 20 inch Schluter niche and white sills for the niche surrounding. I am happy you are here and hope you will ask a question. I will upload a video of how to get a better understanding.
214
views
4
comments
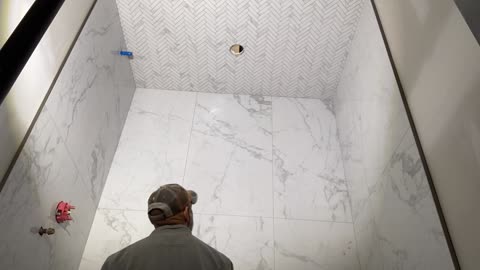
Farm House Loft Curb less Steam Shower
In this video the owner wondered if I could cut floor tiles in half. At first I said shit but then I said of course. I like new things and thought this would be a good project for my photo library. Subway tiles are going vertical up the walls and ceiling so it does take time. Patience is key! You don't just have it right off the bat, you develop it as you go along on different projects. I hope you enjoy my cheesy videos.
164
views
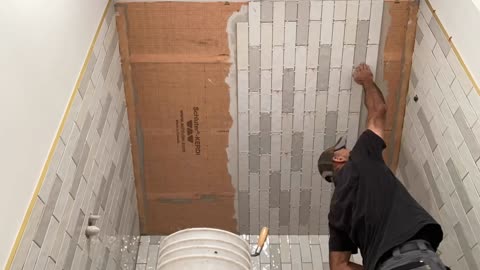
Farm House Loft Curb bless Steam Shower Part 2
I wanted to separate this bathroom video because it would be too long and annoying, who wants that. Wait for part 3. I am getting somewhat better but like my job's patience. As you can see I centred the back wall when I started the job then with one tile gauged it to better fit the wall. It's always best to start full tiles at the opening side walls of shower and work your way to the corner. To my surprise it worked out pretty well.
47
views
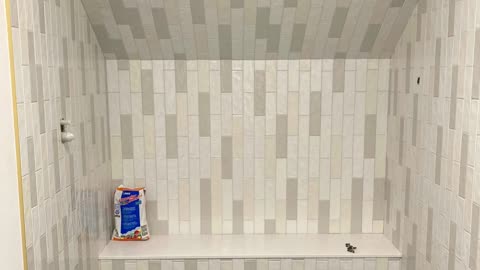
Farm House Loft Curb less Steam Shower Part 3
Finally almost there just grouting! I always use a white cement for the subway tiles. It's easier to clean up the tile joints first before grouting. The cement I use is a white Mapei Kerabond cement. Grey is harder to clean especially when using a light colour grout. In this case use a soft household brush dipped in water to better clean if you use grey cement. Please do not use wall mastic it's only used for back splash.
34
views
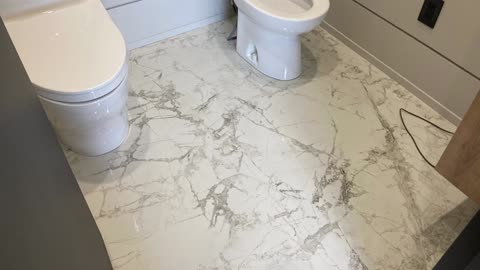
Lake House Main Bath
This bathroom was my last part of the lake house...I forgot to post it earlier. Checkout my "Lake House Complete" video if your interested.
164
views
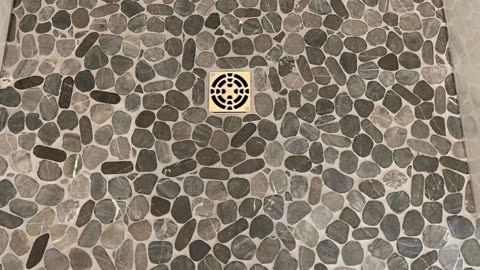
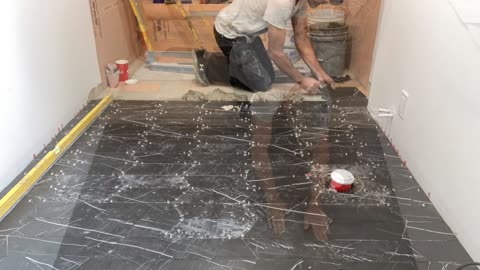
Second Floor En suite Bathroom
This en suite has heated floors with 12 inch by 24 inch porcelain glazed tiles throughout the floors and shower walls. Its always best to install 2 thermostat wire cables for safety if one should ever go in the future. The customer picked a pebble shower floor with a 12 inch by 24 inch niche.
59
views
6
comments
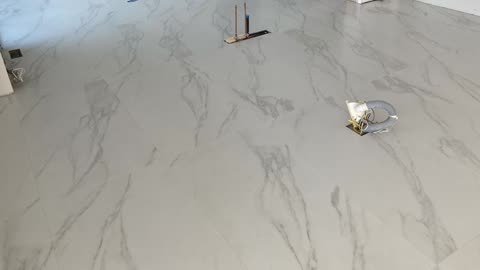
Lake House Kitchen And Living Area
This kitchen and living area has heated radiant floors throughout the house. The tiles are a large format satin tile 3 foot by 5 foot. Before tile installation the heat must be turned off and turned back on 30 days after completion. If the heated floor is kept on the tiles will fail for the heat will setup to quick.
35
views
Lake House En suite Bathroom
I love these 3 foot by 5 foot tiles! These tiles have some nice flex which is great to install. The grain of the big format tiles blend in beautifully. It's best to lay a few in another open area to match the grain first. Not all tiles can do this so don't get discouraged!
46
views
Lake House Loft Bathroom
In this video the tiles are 4 foot by 3 foot and are very heavy tile to work with for its much thicker. You have to admit it is a beautiful tile when installed.
31
views
Lake House Complete
It's always nice to see things come together.... tell me what you think?
23
views
Lake Cottage Main Bath
This lake cottage main bath has some good dips in the floor. The back end had a 2 inch slope so I levelled it out using sliced ditra membrane. I then mix cement to level it out for easier installation of tiles the next day.
27
views
Condo Front Porch
The tiles are a 12 inch by 12 inch porcelain. You should use a kerabond cement mixed only with a white glue called kerolastic. You should only mix half a bag of cement for it sets up within 45 to 1 hr. I must warn you kerolastic glue can get expensive but the job will last along time especially when you back butter your tile.
48
views
Lake Cottage En suite
On this project the customers and designer went with a large stamped format tiles. 3 foot by 2 foot for en suite floor, back wall and shower base. The accent wall is a 2 inch by 6 inch glazed tile and low profile shower.
32
views
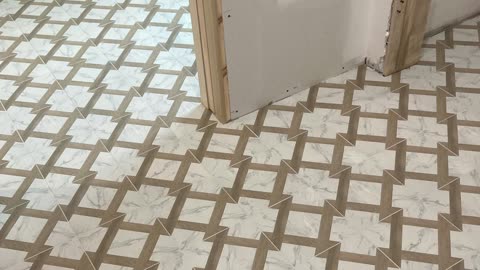
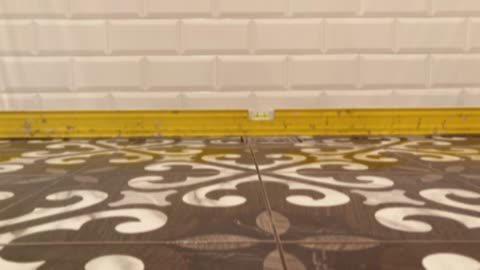
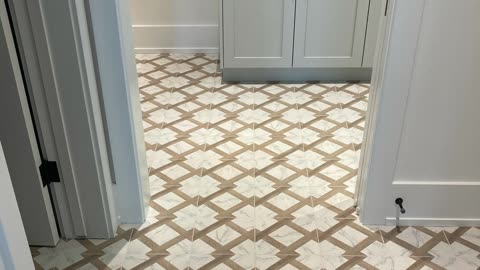
Mudroom, Powder Room And Laundry Room
Hello! These are an 8 inch by 8 inch pattern tile. If you turn the tile to its backside you will see an arrow. Follow the arrow in the same direction, in this case I went up. Most 95% of tiles have this marking, I will share with you soon. I hope you enjoy my cheesy videos ha ha!
33
views

Third Floor Condo Main Bath
On this job the main bath has a low profile shower with a niche and small corner bench for girls to shave their legs easier. The 24 inch by 24 inch tiles go around the main bath perimeter and shower. The kit kat mosaics were a bit tricky to install so I had to straighten out the above wall to match the 24 inch by 24 inch tiles. They fell off the sheet when dry cut and wet saw cut....lots of patience involved. Glass will be measured and installed at a later date when I complete my part. Hope you enjoy my cheesy videos ha ha!
60
views
1
comment
Third Floor Condo Main Bath Complete
Tell me your thoughts do you like the outcome of the job?
49
views
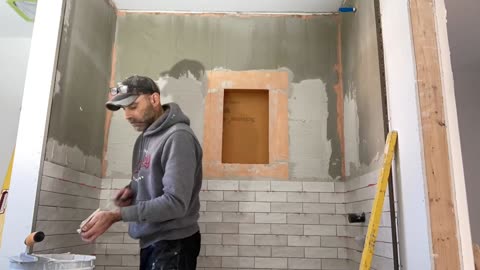
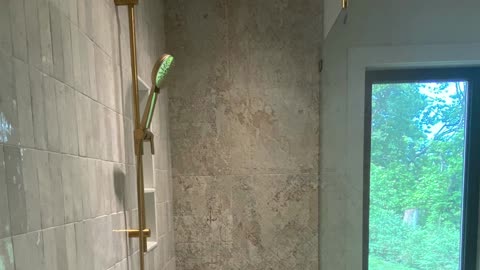
Third Floor Condo Ensuite Shower
For this third floor condo ensuite the designer went with a bench and 3 inch by 8 inch subway tile. The niche, bench, top and sides are dressed in sills, glass will be installed after completion. I always 45 the sills for a cleaner look and wet sand the edges with fine sand paper....I dip sand paper in water to help smooth edges. It always takes time to do subway tiles for it's a smaller format tile but enjoy the outcome when done. Always gauge tiles from top and the cuts at the bottom. I use my levels a lot for it's important to keep everything levelled while installation. Take your time you will appreciate your work when completed.
103
views