

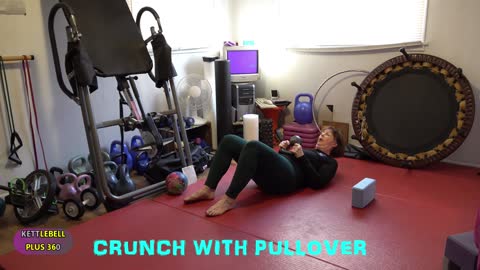
Crunch to a Kettlebell Pull Over in the Safety Zone
Crunch to a Pull-Over in the Safety Zone
Crunches help to activate your core muscles & is an effective compound-muscle ab exercise. The crunch is safer than a set-up when done correctly, they target your upper abdominal, lower abdominal, oblique, and lower back muscles.
The Pull Over exercise is one of the best because it puts the long head of the triceps into a fully lengthened extension state & during the lowering phase into flexion with the elbows bent flat on the mat.
How to Perform in the Safety Zone
Lie down on a mat on our back. Plant your feet on the floor, hip-width apart. Bend your knees and place your arms across your chest. Contract your abs and inhale.
Exhale and lift your upper body but, keep your back imprinted to mat, use a yoga block or pillow under your head if needed, keep your head and neck relaxed.
Inhale, lowing yourself one vertebra at a time under controlled tension returning to the starting position.
Next: Take either a kettlebell or a dumbbell in both hands from the top, let the shoulders go into 180 degrees of flexion, then drop the dumbbell straight down to fully lengthen the triceps.
The initiation into the concentric is done via elbow extension (which is the primary function of the triceps, of course) until completion.
Safety tips:
Use your core to raise your upper body. If the movement comes from your head or neck, you’ll increase the risk for injury.
Move in a slow, controlled manner. Rapid movements won’t engage the right muscles.
You can place your hands behind your head, but this can strain your neck. It’s best to try this hand placement after you’ve mastered the proper form.
When doing the Triceps Pull Over be sure to keep your core engaged & back imprinted to the mat. Breath out to the top of the move & breath in during the lowering phase.
If you have even a tinge of pain at any time stop & evaluate yourself.
This exercise can be done using the principle of movement under tension for a minute, go to another exercise & repeat a couple more times.
Give these exercises a try & let me know how they work for you. Mastery Coach Kettlebell Lady of Iron Leanne
34
views
Bridge to a Curl in the Safety Zone
Bridge to a Curl-Up
Are you ready for stronger, stabile abs, core, hamstrings & reduces injuries to your back? The bridge isolates & strengthens the glutes to activate fist increasing you over all body strength while reducing low back & hip injuries. The curl helps to stretch out tight back muses to eliminate back pain. This move can enhance core stability by targeting your glutes, abdominal muscles and the muscles of lower back and hips.
How to perform:
• Lie on your back with a mat underneath your body, tuck your chin to your chest.
• Use a pillow or yoga block underneath your neck support if it needs the support.
• Knees are bent & hip distance apart with your arms flat on the floor close to your body.
• Shoulders squeezed close together as you come to the top of the move.
• Soles of feet are grounded to the floor with more weight on your heels to help activate your glutes.
• Use the strength of your feet & glutes squeezing a ball to aide activation to lift yourself up toward the ceiling as high as comfortable.
• Keep your abs engaged, glues squeezed, hips & knees parallel shoulders flat on the floor.
• Breath out to the top of the move, hold to a count of 5, breath in as you lower yourself one vertebra at a time down flat on the mat.
Next: Curl yourself up into a ball to help loosen up your tight back muscles than come down to the starting position.
In the Safety Zone: If you feel even a tinge of pain during the bridge or curl up back the exercise down.
Duration: Use time under tension by doing for a minute 4 x in a row or alternate with other exercises.
For Variety: Extend one leg straight and perform the same lifting motion. Make sure you hold your weight in the heal of the bent knee. Bridge up keeping your hips parallel. Next do the Curl up as you would with the regular bridge. The duration is the same as mentioned above.
Mastery Coach Kettlebell Lady of Iron of Kettlebell Plus 360 is available for coaching, to answer your questions & concerns.
41
views
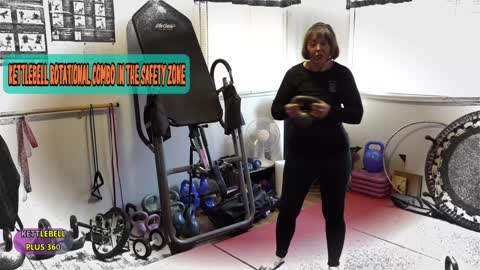
Kettlebell Total Body Rotational Workout in the Safety Zone
Rotational Total Body Workout builds posture, core strength and when its lost stopes you from performing daily activities leading to discomfort, pain & injuries. As our body ages over time, we can lose mobility,
especially rotation. Without rotation your body will become more susceptible to
joint & tendon injuries besides losing functional capacity. Being able to
turn & rotate from your hips is important when you need to turn sideways in
your car to see what is next to you & to make lane changes. Rotation also
occurs throughout the day when you need to turn to the side for an activity.
When we lose rotational capacity our muscle mass, strength, flexibility &
stability also declines. It’s important to have tall posture, your head between your
shoulders, squeeze your shoulder blades together to help correct rounding
shoulders and chicken neck. Your hips remain neutral as you rotate & move
from your hips with your shoulders & hands following along. Doing rotation work should be done daily. If you are unable
to move any further to the side take a deep breath staying in that position to
see if you can rotate a little further once the muscles release tension. I like to include mobility work with each workout moving my
body functionally as it was designed to move. I focus on rotation through my hips,
t-spine (mid back) & ankles which helps my ankles, knees, low back &
shoulders continue to function well. Even if you have a history of injury or joint wear &
tear, I challenge you to start working on rotational mobility daily. Mastery Coach, Kettlebell Lady of Iron is available for
coaching & appreciates your feedback. Until next time
148
views
Kettlebell Around the Word in the Safety Zone Animated
Around the World in the Safety Zone
Stand with your feet anchored straight ahead shoulder width apart.
Start with both hands on the kettlebell (object or no weight) in front of you
Release the bell with one hand and use the other to move it behind your back. At the same time, move the free hand behind your back and hand the kettlebell to it and move the kettlebell back in front of you horizontally or vertically and hand it off back to the other hand. To avoid going to fatigue start out with a minute on & 15 seconds off working up to 3 to 5 minutes with a 5 second break depending on your fitness level. Keep handing off the kettlebell from hand to hand around your body and then reverse the movement and go in the opposite direction for the same amount of time.
Exercise Tips in the Safety Zone
Maintain an upright position and go as fast as safely possible. Gain momentum with the kettlebell & allow the arms to extend fully with that momentum locking out your elbows to save straining them. Grip the kettlebell in the corner of the horn not in the middle. Extend your leg to help you pop up to fire muscles. Around the world teaches you eye had coordination & how to grip hand transitions with muscles as they fire around your body.
Squeeze your abdominals, engage you core, breathe deep into your diaphragm & resist allowing your torso and upper body to turn as your arm moves the kettlebell behind you. Engaging the core breathing deep into your diaphragm will stabilize the lower back so that you don’t twist yourself into an injury. Keep your shoulders locked in their sockets, no shoulder shrugs, not a biceps exercise & engage your lats. This will help keep your shoulders & arms turning with the move by keeping your core engaged. Use start stop moves to make this into a drill for greater strength, coordination & lighting quick movements.
Mastery Coach Kettlebell Lady of Iron is available for coaching & to answer your questions.
56
views

Kettlebell Around the World in the Safety Zone
Kettlebell Around the World in the Safety Zone It is important to understand the biomechanics of how you functionally move daily, to slow down long enough to evaluate if you are feeling even a tinge of discomfort or pain that could result in an injury. When in doubt check with an individual who is certified to evaluate how efficiently you are moving. As a Functional Movement Specialist, I can do a ten-minute evaluation to save downtown & expenses from injuries.
An important part of functional movement is being able to efficiently use acceleration deceleration force to a catch low to high an object to help bullet proof you body for those unexpected twists & turns when moving.
kettlebell around the world is an alternative exercise that primarily targets the forearms and to a lesser degree also targets the abs, core, biceps, glutes, hamstrings, lats, lower back, outer thighs, quads, traps, triceps and shoulders.
The only kettlebell around the world equipment that you need is a kettlebell is best, but you can use a dumbbell or even a hand towel to develop the movement pattern or your body weight.
Learning proper kettlebell around the world form is easy intermediate level of physical fitness and exercise experience. Start out with a lighter kettlebell than you would usually use because of the horizontal & vertical moves work muscles that normally don’t get don’t often get worked much. Watch the kettlebell around the world video, learn how to do the kettlebell around the world, and then be sure to check out the previous rotational workout videos. This exercise will also help develop motor control & stability in all plains of motion. The great thing about kettlebells is that a lot of the moves require you to embrace your core in a way that your abdominals don’t always get worked. The Around the World is a great abdominal exercise. To warm up you can pass the kettlebell from hand to hand around your body first.
Around the World in the Safety Zone
Stand with your feet anchored straight ahead shoulder width apart.
Start with both hands on the kettlebell (object or no weight) in front of you
Release the bell with one hand and use the other to move it behind your back. At the same time, move the free hand behind your back and hand the kettlebell to it and move the kettlebell back in front of you horizontally or vertically and hand it off back to the other hand. To avoid going to fatigue start out with a minute on & 15 seconds off working up to 3 to 5 minutes with a 5 second break depending on your fitness level. Keep handing off the kettlebell from hand to hand around your body and then reverse the movement and go in the opposite direction for the same amount of time.
Exercise Tips in the Safety Zone
Maintain an upright position and go as fast as safely possible. Gain momentum with the kettlebell & allow the arms to extend fully with that momentum locking out your elbows to save straining them. Grip the kettlebell in the corner of the horn not in the middle. Extend your leg to help you pop up to fire muscles. Around the world teaches you eye had coordination & how to grip hand transitions with muscles as they fire around your body.
Squeeze your abdominals, engage you core, breathe deep into your diaphragm & resist allowing your torso and upper body to turn as your arm moves the kettlebell behind you. Engaging the core breathing deep into your diaphragm will stabilize the lower back so that you don’t twist yourself into an injury. Keep your shoulders locked in their sockets, no shoulder shrugs, not a biceps exercise & engage your lats. This will help keep your shoulders & arms turning with the move by keeping your core engaged. Use start stop moves to make this into a drill for greater strength, coordination & lighting quick movements.
Mastery Coach Kettlebell Lady of Iron is available for coaching & to answer your questions.
224
views
Kettlebell Goblet Squat to a Press
Kettlebell Goblet Squat to a Two Arm Press in the Safety Zone
Full body workouts increase your metabolic rate to burn fat, build muscle, gain strength, flexibility & endurance. One of my favorite combinations is a Goblet Squat to a two-handed overhead press. If you have shoulder limitations only bring the kettlebell to about shoulder height or back it down to how high you can raise the kettlebell to the safety zone with zero pain.
Goblet Squat to an Overhead Press in the Safety Zone
The squat is a fundamental exercise to build lower body strength but, to avoid chronic lower back pain when doing traditional squats because of the load position. The Goblet Squat avoids this issue because the load is moved to the front of the body requiting in more core activation muscles. You can use a dumbbell instead of a kettlebell to target the quads & glues which are the primary muscles used for this variation of the Goblet Squat.
• Grp the kettlebell by the horns with both hands. The kettlebell should be positioned between your thighs, drive your heals in, take a deep breath to the top of the movement.
• Inhale and begin to lower yourself back to the squat, sitting back in your hips, keeping your core tight and torso upright. Allow your elbows to track between your knees.
• Drive up through your heels back to the starting position.
• Master Coach Kettlebell Lady of Iron is available for coaching.
Dumbbell Goblet Squat Variation in the Safety Zone
• Hold the weight in front of your chest with both hands.
• As you squat down your elbows need to track between your knees with the weight following
• Only go down in the squat position as low as you can maintain your form with knees out.
• Keep your torso upright, brace your abs to activate the core, breath out to the top of the move & breath in as you start to lower yourself.
Overhead Press in the Safety Zone
• Maintain a neutral spine and pelvic alignment, tense the glutes and lats, and use breathing behind the shield throughout the lift. Squeeze your free hand to add more tension.
• Sharp inhalation of air before the lift and a forceful exhalation as the kettlebell is being pressed, lower slowly, breathing in deep into your diaphragm (breathing behind the shield) pulling the weight down with your lats to the rack position.
• Avoid arching the lower back & allowing the rib cage to rise as you near the top of the press, ground your feet & set back.
• Actively pull the kettlebell back down by using the lats as you breathe in deep into your diaphragm.
• Rotate your elbows so that they point outward at the top but keep them tucked at the bottom of the movement.
• Do not use momentum or any additional leg drive to press the weight up.
• Make sure to squeeze your glutes and avoid leaning back while pressing the barbell over the head.
• Use a wider grip if you feel your shoulders are stressed.
• Keep your back from arching
• Instead of doing reps that may lead to failure “thinking” you need to complete before stopping I recommend you see how many “safely” you can do in one minute with good form. Do a minute & switch sides to give the side you just worked & repeat 3 to 4 times.
• Keep your heel ground to the with elbows to form a linkage with your entire body. This improves the energy from the ground up.
• Mastery Coaching virtually is available for assessments & how to for safe effective training.
317
views

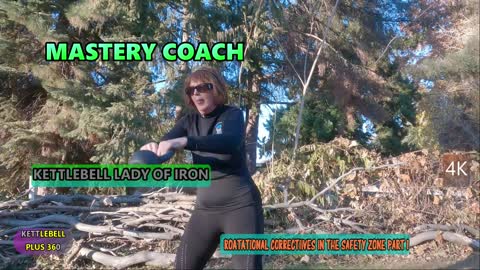
Rotation Correctives in the Safety Zone Part 3
Kettlebell Rotational Patterns
Kettlebells are powerful because the unique shape allows you to move in all planes of motion. Before you try this exercise it’s advisable to review my videos on Rotational Correctives in the Safety Zone. Once you have mastered the one arm swing, and rotation, you can take the kettlebell laterally with powerful rotation. The bell will stay in front here, add in a little bit of folding and sagittal plane but getting back into the frontal plane to add rotation. Rotational Patterns with the hinge are parallel from each other & help prepare the body to move effectively when needed to help avoid injury.
In the Safety Zone:
1. Engage your lats not your shoulders to control the weight.
2. Aa you come up from the bottom of the move breath out & at the top of the move breath in
3. Root your feet aligned like they are on a train track with your hips, knees & upper body in alignment.
4. Hinge at your hips not upper body flexion with your core muscles engage bracing your back.
5. If you feel even a tinge of pain that is a warming sign to stop to evaluate where the pain is from.
6. Always warm up before exercising & cool down afterwards. (I have videos that cover this.)
7. Mastery Coaching virtually is available for assessments & how to for safe effective training.
FNX products are made in USA with a 30 day no questions asked money back guarantee. For every item purchased a gallon of water is donated to a child in need of pure clean drinking water.
https://fnx.grsm.io/leannewylet78388332 To receive 15% off your order enter code: FNXSznG
41
views
Rotation Correctives in the Safety Zone
Rotational Corrective in the Safety Zone
Rotational Correctives builds posture, core strength and when its lost stopes you from performing daily activities leading to discomfort, pain & injuries.
As our body ages over time, we can lose mobility, especially rotation. Without rotation your body will become more susceptible to joint & tendon injuries besides losing functional capacity. Being able to turn & rotate from your hips is important when you need to turn sideways in your car to see what is next to you & to make lane changes. Rotation also occurs throughout the day when you need to turn to the side for an activity. When we lose rotational capacity our muscle mass, strength, flexibility & stability also declines.
It’s important to have tall posture, your head between your shoulders, squeeze your shoulder blades together to help correct rounding shoulders and chicken neck. Your hips remain neutral as you rotate & move from your hips with your shoulders & hands following along.
Doing rotation work should be done daily. If you are unable to move any further to the side take a deep breath staying in that position to see if you can rotate a little further once the muscles release tension.
I like to include mobility work with each workout moving my body functionally as it was designed to move. I focus on rotation through my hips, t-spine (mid back) & ankles which helps my ankles, knees, low back & shoulders continue to function well.
Even if you have a history of injury or joint wear & tear, I challenge you to start working on rotational mobility daily.
Mastery Coach, Kettlebell Lady of Iron is available for coaching & appreciates your feedback. Until next time . . .
33
views
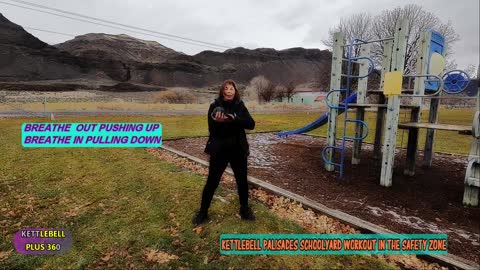
Kettlebell Playground Total Body Workout in the Safety Zone
Kettlebell Playground Total Body Workout in the Safety Zone
Kettlebell the handheld tool you can get a crazy workout anywhere any time. You can get in shape in five to fifteen minutes three to four days a week. To obtain results, you can break up a fifteen-minute workout into segments that works into your schedule. When I was healing from a seat belt injury, I was amazed how I got in the best shape of my life by using this principle getting stronger & rebuilt torn muscles from the injury. Doing a kettlebell workout in the snow gives you functional movement pattern training needed to stay safe during wintery days. Want to ski down a snowy hill with the wind blowing through your hair & skis attached to your feet, pack a lunch & take your cross-county skis into the back country or go for a walk or hike. You choose what motivates you to keep moving. The kettlebell swing metabolically demands recruitment of large muscle areas & reinforces key athletic movements: hip flexion & extension besides working the posterior chain. Be sure to plant your tripod foot, brace your abs & move under controlled tension.
Total Body Workout
Warm Up: Pass-Arounds, Figure 8 to a hold, Hallows, Over Head Triceps
10 kettlebell two handed swings & 10 kettlebell swing hand to hand transfers
5 Each side of your body:
One Arm Swing, Cleans, High-Pulls,
10 Goblet Squats
Cross Over Lunge, Skaters Lunge
Single Leg Deadlift Variation
Bottoms Up Press
Breath out to the top of the move & at the top of the move as come down breathe in (Exhale at top & Inhale at the bottom. Your anatomical breathing pattern should match the move.
Give it a try & leave me a comment of how it works for you!
Master Coach, Kettlebell Lady of Iron leanne wylet
31
views
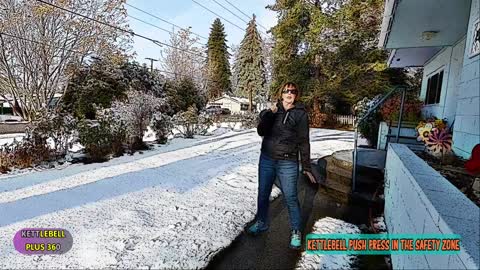
Kettlebell Push Press in the Safety Zone Animated
Kettlebell Push Press in the Safety Zone
How are your shoulders? The Push Press is a identical to the Military Press but, includes a leg drive. The single Kettlebell Push Press is a total body movement for a progression to more advanced overhead exercises. The Military Press places resistance in a straight line down the forearm, teaches proper alignment in the overhead position while simultaneously the arms, shoulders and back. It is also the foundational lift for vertical pushing & pressing movements. This overhead movement also develops more definition of your upper body because building strong, healthy shoulders in the safety zone. The kettlebell overhead press naturally aligns to the plane of the scapular, about 30 to 45 degrees anterior to the frontal plan. This means improved scapular health & less stress on the ball & socket in your shoulder. Holding the kettlebell in the rack position requires optional because of the gravitational pull of the mass against the body This is a bonus to building strong shoulders, posterior chain, back besides engaging the lats, abs & core will carry over to other exercise with movement under tension to increase strength, endurance & power.
How to perform Kettlebell Push Press in the Safety Zone:
1. Clean the kettlebell into the rack position.
2. Maintain a neutral spine and pelvic alignment, tense the glutes and lats, and use breathing behind the shield throughout the lift. Squeeze your free hand to add more tension.
3. Sharp inhalation of air before the lift and a forceful exhalation as the kettlebell is being pressed, lower slowly, breathing in deep into your diaphragm (breathing behind the shield) pulling the weight down with your lats to the rack position.
4. Avoid arching the lower back & allowing the rib cage to rise as you near the top of the press, ground your feet & set back.
5. Actively pull the kettlebells back down by using the lats as you breathe in deep into your diaphragm.
6. Rotate your elbows so that they point outward at the top but keep them tucked at the bottom of the movement.
7. Do not use momentum or any additional leg drive to press the weight up.
8. Make sure to squeeze your glutes and avoid leaning back while pressing the barbell over the head.
9. Use a wider grip if you feel your shoulders are stressed.
10. Keep your back from arching excessively by using a staggered stance.
11. Instead of doing reps that may lead to failure “thinking” you need to complete before stopping I recommend you see how many “safely” you can do in one minute with good form. Do a minute & switch sides to give the side you just worked & repeat 3 to 4 times.
12. Keep your heel ground to the with elbows to form a linkage with your entire body. This improves the energy from the ground up.
50
views
Kettlebell Military Press in the Safety Zone
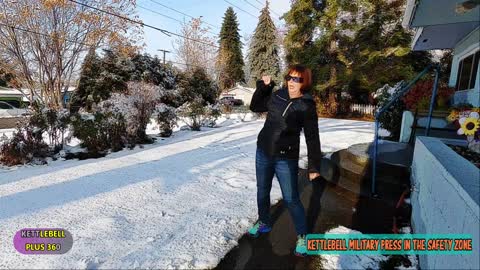
Kettlebell Military Press in the Safety Zone
How are your shoulders? The single Kettlebell Military Press is a total body movement for a progression to more advanced overhead exercises. The Military Press places resistance in a straight line down the forearm, teaches proper alignment in the overhead position while simultaneously the arms, shoulders and back. It is also the foundational lift for vertical pushing & pressing movements. This overhead movement also develops more definition of your upper body because building strong, healthy shoulders in the safety zone. The kettlebell overhead press naturally aligns to the plane of the scapular, about 30 to 45 degrees anterior to the frontal plan. This means improved scapular health & less stress on the ball & socket in your shoulder. Holding the kettlebell in the rack position requires optional because of the gravitational pull of the mass against the body This is a bonus to building strong shoulders, posterior chain, back besides engaging the lats, abs & core will carry over to other exercise with movement under tension to increase strength, endurance & power.
How to perform Military Overhead Press:
1. Clean the kettlebell into the rack position.
2. Maintain a neutral spine and pelvic alignment, tense the glutes and lats, and use breathing behind the shield throughout the lift. Squeeze your free hand to add more tension.
3. Sharp inhalation of air before the lift and a forceful exhalation as the kettlebell is being pressed, lower slowly, breathing in deep into your diaphragm (breathing behind the shield) pulling the weight down with your lats to the rack position.
4. Avoid arching the lower back & allowing the rib cage to rise as you near the top of the press, ground your feet & set back.
5. Actively pull the kettlebells back down by using the lats as you breathe in deep into your diaphragm.
6. Rotate your elbows so that they point outward at the top but keep them tucked at the bottom of the movement.
7. Do not use momentum or any additional leg drive to press the weight up.
8. Make sure to squeeze your glutes and avoid leaning back while pressing the barbell over the head.
9. Use a wider grip if you feel your shoulders are stressed.
10. Keep your back from arching excessively by using a staggered stance.
11. Instead of doing reps that may lead to failure “thinking” you need to complete before stopping I recommend you see how many “safely” you can do in one minute with good form. Do a minute & switch sides to give the side you just worked & repeat 3 to 4 times.
12. Keep your heel ground to the with elbows to form a linkage with your entire body. This improves the energy from the ground up.
173
views
Kettlebell Low Windmill in the Safety Zone
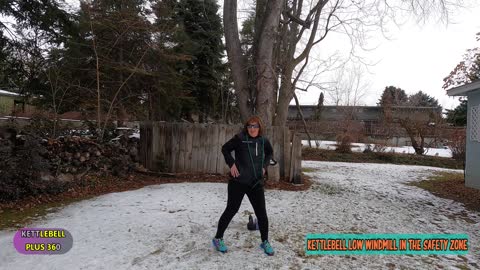
Kettlebell Low Windmill in the Safety Zone
Five Reasons to do the kettlebell Low Windmill
1. Back pain? The Windmill decreases back pain when the underlining cause is limited range of motion resulting in tight hamstrings, lack of glute activation & weak core muscles. When the range of motion is increased flexibility improves in your posterior chain muscles such as the glutes and hamstrings stress decreasing the load o the lower back causing the pain. The Windmill is a great way to stretch the hamstrings and work laterally the abs, lats & strengthen & brace your core to perform this movement & correct muscle imbalances..
2. Tight hamstrings? The Windmill increases primarily the range of motion & flexibility of the hamstring working each leg independently instead of together. This eliminates one leg compensating for the other. This also teaches your hamstrings & glutes to fire in a stretched position. To get up from the ground position you must fire your hamstrings & glutes besides laterally using your abs, lats & intraabdominal core pressure to control the movement pattern.
3. Glues activated? The Windmill works each glute independently teaching you how to contract the muscle from the bottom position to get back up hinging at your hips in a lateral position. Want to jump, run, get out of a chair? The glute muscles help you perform these activities & more. Plus, activated glutes takes the pressure off the lower back pain.
4. Want to increase core strength? The Dynamic Integrated Stabilization exercise protects your spine by bracing the core muscles done in a dynamic way. The Windmill requires your hips to move while your packed shoulders are stabilizing requiring the core to work even harder to maintain control of the movement pattern. This is a highly effective way to take a basic core strengthening exercise to strength of the core musculature.
5. How to decrease shoulder injury & healthier shoulder. A strong, packed stable shoulder reduces likelihood of injury to hold as a progression first using a resistance band as shown in the video to progress to a 5-pound weight to start with (or less with a dumbbell). Holding the weight overhead required the shoulder to position itself in different positions as your body moves through the movement pattern.
How to do Low Windmill:
Stand with the feet a little wider than shoulder-width apart at 45 degrees (bow-stance) & hold a kettlebell in one hand so that it is hanging down along the front of the right thigh (you can place the kettlebell on a Yoga Block if you lack flexibility) kick your hip back with a slight bend in your other knee.
Point the other arm straight overhead locked out, squeeze your shoulder blades, and sink back on your hip to lower the kettlebell in the other hand along the inside of the right leg right while looking up at the overhead arm. Keep your eyes on the hand being held overhead.
Place most of your weight on the back heel, kick your hip out with front knee with a slight bend.
The kettlebell exercise should first start out with no kettlebell, next use a resistance band to increase flexibility aligning your arm at the top position with the more in the lowest position in a straight line, then adding one kettlebell to the bottom hand and finally to the top
Give the Windmill a try to increase flexibility motor control, working the body laterally, transitions, and movement. Mastery Coach Ketllebell Lady of Iron is available for coaching. Let’s talk soon!
137
views
Kettlebell Snow Total Body Workout
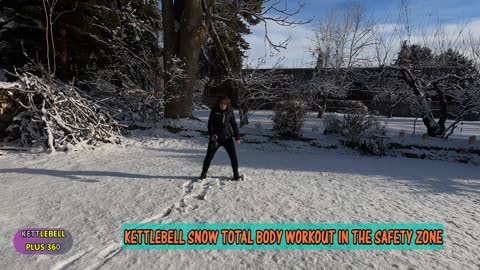
Kettlebell Snow Total Body Workout in the Safety Zone
Kettlebell the handheld tool you can get a crazy workout anywhere any time. You can get in shape in five to fifteen minutes three to four days a week. To obtain results, you can break up a fifteen-minute workout into segments that works into your schedule. When I was healing from a seat belt injury, I was amazed how I got in the best shape of my life by using this principle getting stronger & rebuilt torn muscles from the injury. Doing a kettlebell workout in the snow gives you functional movement pattern training needed to stay safe during wintery days. Want to ski down a snowy hill with the wind blowing through your hair & skis attached to your feet, pack a lunch & take your cross-county skis into the back country or go for a walk or hike. You choose what motivates you to keep moving. The kettlebell swing metabolically demands recruitment of large muscle areas & reinforces key athletic movements: hip flexion & extension besides working the posterior chain.
Sample Workout:
10 kettlebell two handed swings & 10 kettlebell swing hand to hand transfers
5 Each side of your body:
One Arm Swing, Cleans, High-Pulls, Snatch, Single Arm Squat
Give it a try & leave me a comment of how it works for you!
Master Coach, Kettlebell Lady of Iron Leanne
103
views
2
comments
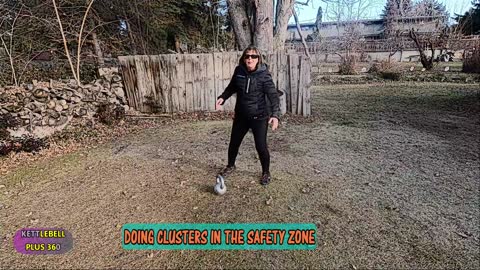
Kettlebell Cluster Strength Training in the Safety Zone
What do you want to achieve? Weight loss, conditioning, flexibility, cardo, strength or maintain a full active life to do what you enjoy doing? This video is about how to gain more strength, tone up & lose weight in one easy, fun way using the principle of Cluster Training. Cluster training was created to make strength gains quickly, ramping up your metabolism to burn calories the rest of the day.
Here you go:
Your body requires a variety of methods to make progressive gains with your fitness goals so instead of doing reps you do this instead.
1. Choose a kettlebell that is your normal weight of next weight up.
2. Do 1 or 2 or 3 reps at a time.
3. Set the weight down with a 10 second rest.
4. Pick the kettlebell back up and repeat 1 or two more time.
For example: Instead of doing 5 reps do 1 or 2 or 3 reps at a time, set the kettlebell down for ten seconds, pick it back up & repeat 1 or 2 or 3 more time for a total of 8 reps.
I recommend you keep a log to measure your progress of how you’ve progressed with your fitness goals. This helps keep you motivated when you have an off day or hit a temporary plateau.
Give it a try & let Mastery Coach Kettlebell Lady of Iron Leanne know how it goes. I’m also available for coaching.
Let’s talk soon!
95
views
Sandbag Training for Injury Prevention
Sandbag Training in the Safety Zone
Sandbag training adds a new stimulus to your muscles by doing Dynamic Variable Resistance Training (DVRT). This is functional movement training designed to replicate daily life activities engaging muscles in ways they aren’t used to working. Sandbag training is a fun way to burn calories, improve balance, coordination, cardio, core strength & teaching your body how to move 360 degrees (Please see picture below). If you don’t have a sandbag no worries. You can either order one & get sand from a local store to fill or use a box, pet food bag, bird seed bag or use your imagination. It’s important to be creative & teach your body to do functional training for your daily activities so it will know how to respond when your body is thrown out of balance staying in the safety zone.
This is what renown spine expert, Dr. Stuart McGill, says, “Functional training such as connecting the chains of the body and realizing that the body doesn’t function as bunch of randomly assembled parts.” Therefore, I focus on training movement patterns and not muscles. This was a key factor in how I recovered from a seat belt injury that had left me disabled. I am a certified Functional Movement Systems Instructor offering screening test to help correct muscle imbalances. You can contact Mastery Coach Kettlebell Lady of Iron Leanne on how you can get started. Let’s talk soon!
32
views
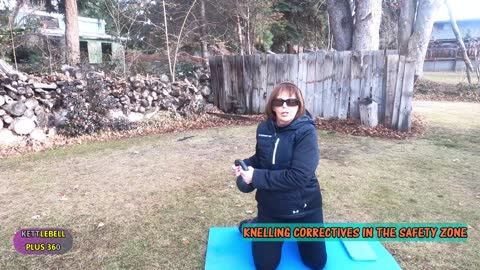
Kettlebell Swing & Overhead Press Remedials in the Safety Zone
Tall & Half Kneeling are corrective exercises that builds posture & improves the kettlebell swing & press. Why? The position is the pattern that sets up the movement for static and dynamic movement. This means you have integrity and efficiency of movement. When you are off your feet mistakes in movement are more apparent working quads, hamstrings, core, and stability. The hips, the spine and the upper thoracic spine are targeted. Vladimir Janda described this Lower Crossed Syndrome making this movement pattern challenging.
How to:
You’ll hold the weight in front of you and as you rotate to the left or right take a deep breath. If you are unable to move any further take a deep breath staying in that position to see if you can rotate a little further once the muscles release tension. When you take the weight behind you with tall posture squeeze your shoulder blades together to help correct rounding shoulders and chicken neck : if you’ve get ‘1’s’ on the shoulder mobility or the active straight leg raise in the Functional Movement Screen, that means you’re bringing a mobility problem to a motor control or stability workout.. Kettlebell Lady Leanne Wylet is a certified Functional Movement Systems administrator. She can be contacted on how to get yourself tested.
29
views

Kettlebell Bottoms-Press in the Safety Zone
Kettlebell Bottoms-Up is a great remedial drill before you press the kettlebell overhead. The Bottoms-Up position helps to build shoulder strength and mobility. The challenge of keeping the kettlebell upside down teaches you how to breathe deep into your abs, tighten the core under tension and find your groove for the press. It is usually used as a drill not an exercise. A couple other remedial drills are Tall Kneeling Press & Waiter Press covered in other videos
17
views