

Creating an Emu Nesting Spot
Getting emus to go "inside" is an almost impossible task. However if you ONLY feed inside (until of the age of about 18 months ~ 2 years of age (until mature), they will be very comfortable to go "inside". Now they put themselves up at night and prefer to stay in the barn during the colder weather. Getting them to NEST inside too, is very similar - I hollow out undeveloped eggs and fill them with sand and barn lime to create a spot I want my female to lay in - they check on the eggs daily and also cover them up - why?!! because I am sure to uncover and lay them (the fake eggs) out in the open space daily - this gets them to come in on a regular basis to cover them up - Sheila always lays wherever I have the fake eggs. I always take the freshly laid one (because of temperature drops that will freeze the eggs. After 3 weeks, I either put 3 at a time in an incubator and keep the freshest ones in a large bowl in the house - once the temperature is above freezing, I will lay the remaining good eggs in the nest, bringing the amount of eggs up enough to entice the male to go broody and start to incubate himself. Until then, I am sure to not to leave more than 4 or 5 eggs in the nest so he does not feel the need to sit on them (yet). I do not want to risk him getting up during a freeze and destroying and development that has started by them freezing.
9
views
3
comments

Lye Pretzel
650g Flour
350ml water
25g fresh yeast (3.5tsp dry yeast)
60g butter or margarine
12g salt
Dissolve yeast in water
add to the flour
add salt and butter
knead until soft
If dough is sticky - add more flour
Shape dough into pretzels (or any other shapes)
Make lye solution: (you can use baking soda solution, but it will never be the same)
for every liter of water - use 50g food grade lye
I used 500ml water and dissolved 2g lye
WEAR PROTECTIVE CLOTHES (GLOVES)
DO NOT USE ORGANIC MATERIALS NEAR THE LYE
(granite countertops should be covered, any wood, bamboo or other organics will degrade.
!!!!DO NOT USE NON STICK TEFLON!!!!!
Cover with parchment paper.
Submerge your shaped pretzels in the lye solution for 15-30 seconds each.
Place them in the freezer for 30 min to hold their shape while dipping in lye.
The longer the dip, the darker the bake.
Bake soon after dipping - this dough does not need to rise!
Sprinkle with coarse (Pretzel) Salt
Bake at 450F for 15 min
26
views
1
comment

German Christmas Stollen
Basic recipe:
Soak dried fruit & nuts overnight in rum
you can soak in orange juice and use flavored rum
or not soak at all.
I used a ratio of 4:1 fruit to nuts
400g dried fruit of your choice (Raisins, currants, cranberries, cherries, pine apple, orange peel, citrus peel, of your choice)
100 g nuts (almond, walnut, pecans etc)
500g flour
42g fresh yeast (16g dried yeast)
80g sugar
150ml warm milk
150g butter 1 egg
2 tsp salt
(Marzipan - OPTIONAL)
Dissolve the yeast in the warm milk with some of the sugar and flour and set aside for a few minutes.
mix flour, butter, sugar, egg and salt.
Add the yeast and milk mixture and knead until it all comes together.
Add the well drained fruit.
At this stage you can add extra flour so it is not too sticky.
Roll into a ball and let it sit 30 min.
This dough will NOT double in size.
Flatten dough out to about 3/4 to 1 inch thick in a rectangular shape.
If you add marzipan, add it as a roll a little off center on the dough.
Fold dough around and over the roll of Marzipan.
Press down edges to seal in the string of marzipan.
Let sit for 30 min.
Bake at 350F for 1 hr.
Poke holes in the hot loaves with a fork, and pour 1/2 stick of hot melted butter all over the loaf.
Roll the loaf in powdered sugar, then top off with another heap of powdered sugar.
You can wrap and freeze, eat, or save it for Christmas - it develops flavor in 4 weeks. This is why they are baked in November traditionally.
35
views
1
comment
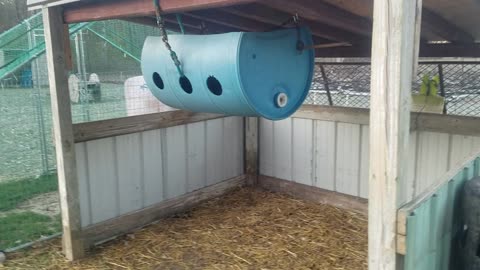
Goat & Chicken Proof Emu Feeder
I have built a few different emu feeders, mostly to keep the goats out.
Now I'd like to keep the chickens out too, so it was back to the drawing board to make something without having to purchase any materials.
You can make this one with a removable/lockable top access (to put food in and keep rain, goats and chickens out) - just place it high enough so the chickens cannot easily fly right into it (the access holes for the emus).
Placed on the outside of a fence with an access in the upper back area to load the feed and where emus can get to the holes in the front through a fence would also be ideal.
14
views

Banneton Baskets - are you getting the most out of yours?
Many people use banneton baskets to get the pattern of the basket on their breads. After many uses, you may get dough stuck in the grooves, which may or may not come out with the next loaf. . .
If you have this problem - especially with sticky dough - try avoiding flour as a dusting agent on your bannetons
62
views
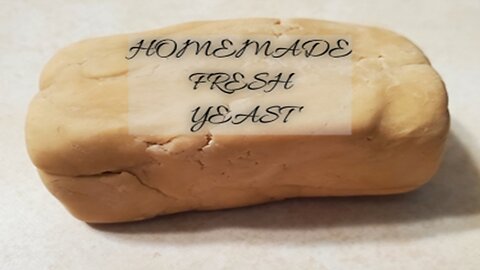
Homemade fresh yeast - from dry yeast - NEVER BUY YEAST AGAIN
When I was young, we only used fresh yeast to bake.
Fresh yeast is hard to find in the US.
Dry yeast has its pros: It keeps well, it is readily available and easy to use - also many recipes here call for dry yeast.
But I want to get to my roots again and NEVER BUY YEAST AGAIN
So here we are -making homemade fresh yeast from dry yeast.
Which in itself gets you 10x the yeast you started with - then we will extend the yeast and grow it whenever we need to.
it can be frozen as well - you can put it in ice cube containers in measured portions. it can easily be converted to be used in any recipes that call for the dry yeast:
for any regular light (white flour or sweet yeast doughs) use double the amount of fresh yeast to dry yeast (so 7g of dry yeast would be 14g of fresh yeast).
For heavier good, such as mixed (rye and whole wheat breads) use 3x the amount of fresh yeast as required in dry yeast.
For very heavy (whole grains/dark) breads you can do 4x the fresh to dry yeast proportions..
101
views
1
comment

DON'T BE FOOLED
You can grow many things from seed.
Many people buy "starters", but you are truly wasting your money on most of those.
Even potatoes can be grown from shriveled up sprouted old potatoes.
But did you know you can plant potatoes "TPS" - true potato seeds?
Also instead of buying expensive seeds for growing, it is cheaper to buy those same seeds as a food (if they are for consumption)- look in the spice isle for whole seeds, see the whole peas, beans etc.
Your flowers - do you buy the same flowers, year after year?
Why not grow them from seed yourself?
12
views

DON'T BE FOOLED
You can grow many things from seed.
Many people buy "starters", but you are truly wasting your money on most of those.
Even potatoes can be grown from shriveled up sprouted old potatoes.
But did you know you can plant potatoes "TPS" - true potato seeds?
Also instead of buying expensive seeds for growing, it is cheaper to buy those same seeds as a food (if they are for consumption)- look in the spice isle for whole seeds, see the whole peas, beans etc.
Your flowers - do you buy the same flowers, year after year?
Why not grow them from seed yourself?
8
views
1
comment

TOO EASY SOURDOUGH STARTER NO FEED OR DISCARD - EASILY STORED SET IT- AND FORGET IT TYPE SOURDOUGH
About ½ cup of flour (do not use bleached flour)
Good natural yoghurt (about 2 heaped tbsp.) - do not use pasteurized
About 1/3 cup water (more or less depending on consistency)
A few caraway seeds (about ½ tsp)
1 tbsp. Rye flour (optional)
The higher protein flour you use, the faster the fermentation will set in.
All measurements are approximate, as the bacteria is not demanding and will take over the starter.
The better the environment for the bacteria, the better the fermentation and your starter will be.
The starter should be a little thicker than a pancake batter.
Once combined, let it sit, with a breathable top on the countertop for about a week.
You can stir gently every day, but this is really not necessary
– just as a reminder that you have something on your countertop.
After a week, take the sourdough and start mixing in more flour
Any flour – just not bleached, this will kill off your sourdough.
Add enough flour to dry out your starter – when you think you’ve added enough – add a little more.
Once you are satisfied that your starter is dry, place it incased in flour in a jar,
or even inside your bag of flour for safe keeping.
To rehydrate the starter:
The day before you bake:
use about a golf sized parts(s) of your dehydrated starter.
Add enough water to get it to a soft dough consistency
Leave it covered on your countertop overnight
– Your sourdough should be alive and active by the time you are ready to bake.
I usually use around 1/5 of the grams in flour (for 500g of flour, I use 100g sourdough).
Depending on the strength of your sourdough and the flour you use in your recipes,
you can do more or less.
A lighter bread (white bread) can use less, a heavier bread (dark rye etc) will use more.
91
views
2
comments

Chillin' with my homies
After some morning chores, I like to grab a cup of coffee and hang out with my homies. It's not for everyone - some would consider this an assault - I however love being surrounded with unconditional love - (I know they only like me because I feed them). Sadly it's time to reconsider a close snuggle with both "baby" goats. They are becoming young men and like to douse themselves with their hormones - all up in their faces.(LOL)
3
views
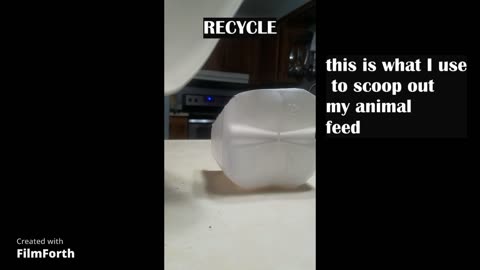
Milk Jug Scoop
We recycle as much as possible on our farm - this is just ONE of the great uses for an empty milk jug.
1
view

Some Handy DIY's for our homestead
There are a few items that have helped on our little farm. Some pretty obvious, others a little more unconventional - I missed quite a few items that we built/made, but they are in other videos (emu feeders, rain barrel/chicken waterer, chicken coops from old wooden boxes. A smoke house from an old wooden box. The shelves in the greenhouse from pallet wood and topped with old vinyl flooring. Vertical beehives from cut in half- 55 gallon drums. I guess there is just more opportunity to make another video.
2
views

Meet some of our animals - End of winter 2022
This is an old video of some of the animals on our farm in the early spring of 2022
3
views

Some of me
A little background - some pictures of our family - before we closed on our new adventure...our little farm in Decatur, IN.
2
views

Some of my artwork
I found a new passion during lockdown - Painting. Not that I am good at it, but it was so much fun - the colors, the trial and errors. Most painting were donated (some to the Boys & Girls Club in Ft Wayne, others to local charity networks for auction). I still love to paint but have not done so in a couple of years - "Farm life" took over - However I truly love the farming aspect of life - being self sufficient is the ultimate goal.
4
views

Dry Hatch - How it's done
Going to the dry hatch method got me 100% hatch rate.
I don't expect that every time, but it has proven itself to be the best method for me so far. I can't help thinking about a natural hatch. The hen does get up to feed, and will mainly use the ambient humidity. She cannot add water. And yes, even in nature not all eggs hatch - too wet, too dry, too hot, too cold. We however can create the perfect environment for a great hatch rate, so LET"S GET HATCHING
3
views

Easy Homemade Mozzarella
Leftover milk? -No problem
Milk on the verge of sell by date? - No Problem
Here is an easy recipe on how to make quick and easy
MOZZARELLA.
You will need:
1 gallon of milk (NOT ultra pasteurized)
1 1/2 tsp Citric Acid (1.5 tsp)
added to
1 cup water (unchlorinated)
1/4 tsp Liquid rennet (or 1/4 tablet rennet)
added to
1/4 cup water(unchlorinated)
Salt
Optional : DRIED (as fresh could spoil the cheese by adding moisture:
herbs & spices
Garlic powder
Dill
Directions:
Heat milk gently in large pot
Add the Citric Acid to the 1 cup water and pour into (still cold) milk
Bring temperature to between 90F and 95F
Add the Rennet to the 1/4 cup water and pour into milk
- stir gently or up/down motion of slotted spoon
Bring temperature to 105F
Take off heat
Let sit for 5 min
Cut the curds (optional)
Pour the pot of curds & whey through a colander atop of a large pot
to strain whey from curds.
Knead curds to get more whey out.
Place curds in microwave for 30 seconds at a time
Knead and pull curds until soft and shiny
(may need to place them into the microwave for 5-10seconds in between)
When shiny, add DRY ingrediencies, as fresh will add moisture, may start to spoil the cheese.
Leave out or refrigerate overnight
!! CHEESE !!
Bonus:
Make RICOTTA from the leftover whey:
In a large pot, add the whey and a splash of lemon juice
Bring the whey to a boil, remove from heat
Pour through a cheesecloth into a strainer atop of a large pot
Let it drain overnight.
Next day:
Remove ricotta from cloth.
Use as is or add your favorite flavors
Remove the Ricotta
after a while -
7
views

Formed ham - use meat scraps wisely
Have scraps of raw pork?
Make formed ham (aka "Spam")
Chop pork into different shapes and sized - you can also add ground pork to fill up gaps in the ham.
There are many different recipes out there - I used what I have available.
You do need a cure and salt - or a curing salt Like Morton's quick & Tender
I am not sure if you can use the Morton's Quick & Tender in lieu of the curing salt and Cure accelerator - so the last Recipe (#3) has not been tried (yet) - may need extra time to cure (5 days instead of 3 (?)
~~~~~~Recipe 1~~~~~~
For each Kg (1000g) of lean (great if marbled) Pork:
15g Salt (Non Iodized)
10 g brown sugar
3 g cure (curing salt - pink salt)
1/2g Sodium Erythorbate (Cure accelerator)- measure out 1g and use half.
~~~~~~Recipe 2~~~~~~
For each Kg (1000g) of lean (great if marbled) Pork:
15g Morton's Quick & Tender (Meat cure - contains 1% curing salt)
10 g brown sugar
1/2g Sodium Erythorbate(Cure accelerator) - measure out 1g and use half.
~~~~~~Recipe 3~~~~~~ NOT TRIED YET NOT SURE IF IT WORKS
For each Kg (1000g) of lean (great if marbled) Pork:
15g Morton's Quick & Tender (Meat cure - contains 1% curing salt)
10 g brown sugar
- MAY NEED ADDITIONAL DAYS TO CURE DUE TO LOWER CURING SALT AND NO ACCELERATOR
35
views
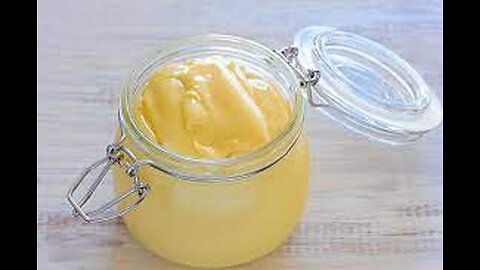
5 minute mayonnaise
1 whole egg
1 tsp white vinegar
1/2 tsp lemon juice
1/4 tsp salt
1/4 tsp Dijon mustard
1 cup oil (I used Olive)
You can add flavors as desired (Garlic, dill, cayenne pepper, etc)
Place ALL ingrediencies in a narrow, tall container
Let it set for 1 minute
Use immersion blender starting at the base of the container
move blender up, once the white solid forms underneath.
Done - enjoy - add more lemon juice, salt...etc as desired
4
views
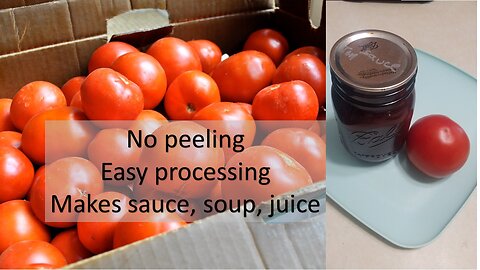
Easy Tomato processing
No peeling, minimal waste, quick and easy steps using a pressure cooker
I got about 20 lbs of tomatoes
Ended up with 6 pints of each:
Tomato paste/soup/juice
I LOVE the clear tomato juice - it has so much flavor I drink it cold and hot.
For each pint add 1/4 tsp citric acid (r bottled lemon juice works too)
and 1/2 tsp salt (optional)
5
views

Dandelion Salve
For each 1/2 cup of infused oil, you will need the following:
10 g bee wax
10 g of fat solids (Shea butter etc.)
5
views

Goldenrod Jelly
Use 8 cups of Blossom (tops) - the green is ok - I did not use the stems though
7 cups water (simmer these to make the golden rod tea.
Let the tea steep until cooled (or overnight)
Strain the tea through a fine sieve.
Use 5 cups of the tea (about 1200 ml)
- add 2 packs of sure jell (80 g pectin)
stir until dissolved - let boil for 1-2 minutes
-Then add 6 cups of sugar (1200g)
Bring to a rolling boil
you can add a tiny piece of butter (optional - to reduce the foaminess during boiling)
A splash of bottled lemon juice (optional - but gives a GREAT flavor)
This makes about 5 (and a bit) pints
Canning as you would for any other jams and jellies.
Golden Rod benefits: to reduce inflammation, relieve muscle spasms, fight infections, and lower blood pressure. It does seem to act like a diuretic, and is used in Europe to treat urinary tract inflammation and to prevent or treat kidney stones.
The syrup (don't add the pectin) is also useful for allergy relief.
I had this mixture NOT set once - however it was the consistency of runny honey - and tasted just like honey!!!!
We used it as syrup and to add to teas - it was delicious.
12
views

Easy Nesting Boxes
I saw a design of containers used as storage online....Well, I thought it would be a good idea to use as nesting boxes for the coops. I put out an ISO for empty kitty litter containers on our local Garage Sale sites. I offered to pay for them, but lo and behold I had such a great response from our local community whom all donated the containers to me for this project.
Music
3
views

Plantain Salve
Collect either broad leaf or narrow leaf plantain
Dry it (I used a dehydrator)
Crush/grind it
Cover it with a carrier oil ( I used olive oil)
then either let it sit for 4 weeks or heat it gently on a low simmer for 1-2 hrs
strain (using a cheese cloth)
for every 100g of infused oil use 15g of beeswax
melt the beeswax into the oil - use 3 drops of an essential oil
for every 100g
pour into container and let it set
21
views