
Nickelodeon Reveals BIG PLANS for SpongeBob's 25th Anniversary
Nickelodeon Reveals BIG PLANS for SpongeBob's 25th Anniversary
Description
special thank you
Vmart
YouTube
newspaper
party'
#explore #viral #newspaper #anniverasyparty #rumblevideo #vibeo #party
11
views

kund fo Phanda :-4 News series
The plot of Kung Fu Panda 4 (2024) involves Po's search for a new Dragon Warrior and his encounter with the villain, the Chameleon. The Chameleon is a shapeshifter who can take the form of Po's past enemies
79
views
1
comment

Sago (sabudana) 7 layer chatHealthy and tasty sabudana chaat recipe. It is made ingredients
Cookpad Cookpad
Get the App
Type ingredients...
Sabudana Chaat recipe main photo
Sabudana Chaat
16 comments given
Vedangi Kokate
1
“Tempting”
Anitha (Annie)
1
“bhut ache 😋”
Sonal Modi
1
“Woww”
Deepa
1
“Yummy😍❤”
SAHEJPREET SINGH
1
“What a presentation 👌👌👌👌👌”
Healthy and tasty sabudana chaat recipe. It
Save Recipe
Ingredients
15 minutes
2-3 servings
For sabudana layer:
1 cup sabudana soaked in water
1/2 cup peanut coarse powder
1/2 cup tomato chopped
2 tbsp ghee
2 green chillies, chopped
1/2 tsp cumin seed
1/2 tsp black pepper powder
1 tsp lemon juice
as required Sendha namak
For potato layer:
2 cup boiled potato diced
1 tbsp ghee
1/2 tsp cumin seeds
1 tsp chat masala
1/4 tsp turmeric powder
1 tsp lemon juice
2 green chillies, chopped
As required Sendha namak
For topping:
Few carrot Julienne
Few beetroot Julienne
Few cucumber julienne
as required Mango powder chutney
As required Coriander chutney
Cooking Instructions
Step 1
In a pan, heat ghee. Add cumin seed and green chili. After few seconds, add chopped tomatoes. Then add sendha namak in it.
Step 2
After few second add peanut powder, black pepper, lemon juice. Saute for few second. Add sabudana cook for 2-3 minutes. Transfer it to a bowl.
Step 3
In the same pan, heat ghee. Add cumin seed and green chili. Saute. Then add boiled potatoes. Cook for one minute.
Step 4
Take small glasses. At the bottom of the glass pour a layer of mango chutney. Then layer it with sabudana. Add turmeric powder, chat masala, and lemon juice sendha namak. Cook till golden in color. Switch the flame off.
Step 5
Now layer it with fried potatoes. Pour a layer of coriander chutney. Again layer it with sabudana.
Step 6
Now top it with carrot Julienne, beetroot Julienne and cucumber julienne.
#cooking #homemade #Healthyrecipt #lovercooking #testycooking
79
views


Rema, Selena Gomez - Calm Down (Official Music Video)
Rema, Selena Gomez - Calm Down (Official Music Video)
Source
v Mart
internet
#musiclover #love #
62
views

Red Velvet Cake Recipe 🎂🎂🎂🎂🎄🎄🎄
18 ingredients
Refrigerated
• 1 Egg yolk, large
2 Eggs, large
Baking & spices
• 2 1/4 cups All-purpose flour
1/2 tsp Baking powder
• 1 tsp Baking soda
0 1/4 tsp Cinnamon, ground
1/4 cup Cocoa powder, unsweetened natural
• 3 tsp Gel food coloring, red
2 cups Granulated sugar
4 cups Powdered sugar
• 1 tsp Sea salt, fine
⚫ 4 tsp Vanilla
Oils & vinegars
• 1 tsp Distilled white vinegar
• 1/2 cup Vegetable oil, fresh 0
Dairy
⚫ 3 stick Butter, unsalted
1 cup Buttermilk
16 oz Cream cheese
Liquids
• 1/2 cup Coffee or boiling water, plain hot
Instructions
Preheat oven to 180C/350F (all oven types). Butter 2 x 21cm / 8″ round cake pans (sides and base) and dust with cocoa powder.
Sift the Dry Ingredients and whisk to combine in a bowl.
Place butter and sugar in a bowl and beat with electric beater or in stand mixer until smooth and well combined (use paddle attachment if using stand mixer).
Add eggs, one at a time, beating in between to combine. At first it will look curdle – keep beating until it’s smooth.
Add vegetable oil, vinegar, vanilla, buttermilk and red food colouring. Beat until combined and smooth (Note 5).
Add Dry Ingredients. Beat until just combined – some small lumps is ok, that’s better than over mixing.
Divide batter between cake pans. Bake for 25 – 30 minutes on the same shelf, or until a toothpick inserted into the centre comes out clean. (Note 6)
Rest for 10 minutes in the pan then turn out onto a cooling rack and allow to cool.
FROSTING
Beat together cream cheese, butter and vanilla for 3 minutes (this makes it really smooth and changes from yellow to almost white). Add icing sugar and beat for 2 minutes or until frosting is light and fluffy to your taste. If your frosting seems too runny (depends on quality of cream cheese/ if the cream cheese was too soft), just add more icing sugar.
FROST CAKE
Cut the top off the cake using a serrated knife (to make the layers neat).
Spread one cake with 1 1/2 cups of frosting. Top with the other cake. Spread top and sides with remaining frosting.
Optional: Crumble offcuts and use to decorate the top rim and base of the cake
Fast Prep, Big Flavours
Main Menu
Display Search Bar
My RecipeTin
Small book
My cookbook "Dinner" now available!
Home Sweet
Red Velvet Cake
BY:Nagi
PUBLISHED:10 Jun '16UPDATED:21 Sep '21
1,598 Comments
RECIPE V VIDEO V DOZER V
A moist, classic Red Velvet Cake!! Made from scratch, and surprisingly easy when a few specific, simple steps are followed. This iconic cake has a soft “velvet” texture, just like what you get from the best top end fine bakeries, and is topped with soft, cream cheese frosting.
After Red Velvet Cupcakes? Here they are! UK readers: Please read note 7.
Made this for a birthday party, everyone was floored by how "velvety" and soft the sponge is. And the frosting is just perfect! Easy to follow steps, concisely written!
Red Velvet Cake recipe – tried and tested favourite!
This Red Velvet Cake has been taste tested and given a big thumbs up by many people because it’s a rather large cake and I’ve made it 5 times in the last two weeks.
“FIVE TIMES??!!”, I hear you exclaim (out loud or in your head). “You’re MAD!!”
If getting this cake exactly to my taste, as close as I can get it to the cakes you get from posh bakeries, and ensuring it works using both US and metric (i.e. rest of the world!!) measures means that I’m a mad baker, I’ll take that title. 😉
Besides, I’m really enjoying baking at the moment. There is something so satisfying about making something as pretty as Red Velvet Cake.
Made this for a birthday party, everyone was floored by how "velvety" and soft the sponge is. And the frosting is just perfect! Easy to follow steps, concisely written!
To tell you the honest truth, the reason I made it so many times in recent weeks is because my original recipe got a “so-so” response from the two toughest taste-testers I know: my mother and brother.
“The sponge is zara-zara”, my mother declared on first bite.
What the….?? Zara-zara? What on earth does that mean??
“Zara-zara” means “rough” in Japanese. The Japanese language has a handful of words which sound like what it means. “Zara-zara” being a perfect example. Usually it cracks me up. Not that day.
I gasped, indignant, and grabbed a spoon to shovel a bite into my mouth, ready to argue. And I realised – she was right. It was not as velvety as it could be. As it should be.
NOT HAPPY.
So I improved it. 🙂
Made this for a birthday party, everyone was floored by how "velvety" and soft the sponge is. And the frosting is just perfect! Easy to follow steps, concisely written!
What is Red Velvet Cake?
Red Velvet Cake is not just a chocolate cake with red food colouring added. This cake is softer than most, “velvet-like”, and the chocolate taste is actually quite mild. It’s more like a cross between a vanilla and chocolate cake with a very subtle tang from buttermilk. And it is generously smothered in a fluffy cream cheese frosting.
It’s wildly popular in America and there’s a cult following in Australia. Give it a few years, it will become a firm favourite soon!
The cake tastes buttery and moist, because it has butter in it for flavour, and oil for moisture. Yes, you need both, I promise you. It is not the same if you use only one of them.
Red Velvet Cake with Cream Cheese Frosting
Why should you use THIS Red Velvet Cake!
There are 3 more specific things about this recipe which might be a bit different to other Red Velvet recipes you have seen, but there’s a reason for it.
1. Cake flour – it’s a must! It’s key to achieving that soft silky sponge, just like what you get from posh bakeries. However, if you really can’t find it, please see the notes for a substitute;
2. Only 2 eggs – I’ve seen some recipes call for up to 5 eggs. I only use 2. It’s enough to hold the cake together just fine – any more than 2, and find the cake begins to start tasting “eggy”; and
3. Buttermilk – For almost every other baking recipe that I make using buttermilk, I say that you can substitute with lemon juice + milk which, when left for 5 minutes, curdles to have the same effect as using buttermilk. Not for this recipe – sorry! It is just not the same – part of the reason mine was “zara zara”. 😂
Oh, and one more rule. There is no substitute for Philadelphia Cream Cheese for the frosting. I’ve tried better value store-brand cream cheese before. It is never the same. Promise. ❤
I bake the layers in 2 separate tins, but if you don’t have two tins, you can make one big one and cut the cake in half. And to make the layers nice and neat, I cut the dome top off.
Made this for a birthday party, everyone was floored by how "velvety" and soft the sponge is. And the frosting is just perfect! Easy to follow steps, concisely written!
I like to crumble the off cuts and use it to decorate the cake. I think it looks pretty, don’t you? But that’s purely optional!
Made this for a birthday party, everyone was floored by how "velvety" and soft the sponge is. And the frosting is just perfect! Easy to follow steps, concisely written!
Made this for a birthday party, everyone was floored by how "velvety" and soft the sponge is. And the frosting is just perfect! Easy to follow steps, concisely written!
I promise you, there is nothing tricky about this cake. All you have to do is ensure you measure the ingredients properly, rather than just eye-balling it. 😉 As long as you do that, it’s actually easy to make, no more difficult than an ordinary sponge cake.
Putting aside fiddly fancy decorated cakes, Red Velvet Cake is surely one of the most striking and stunning cakes around. If you’ve never tried it before, you’re in for a real treat! – Nagi x
Red Velvet Cake
Watch How To Make It
How to make Red Velvet Cake – quick tutorial video! Red Velvet Cake for UK readers – please ensure you read Notes 7 and 9.
HUNGRY FOR MORE? Subscribe to my newsletter and follow along on Facebook, Pinterest and Instagram for all of the latest updates.
Made this for a birthday party, everyone was floored by how "velvety" and soft the sponge is. And the frosting is just perfect! Easy to follow steps, concisely written!
Red Velvet Cake
Author:Nagi | RecipeTin Eats Prep: 30minutes mins Cook: 25minutes mins Total: 55minutes mins Sweet Baking American, Western
4.94 from 291 votes
Servings10 -12 Tap or hover to scale
Print
Recipe VIDEO above. The classic, iconic Red Velvet Cake! The sponge is soft and velvety, true to it's name, with a buttery flavour, moist with a hint of chocolate, vanilla and tang from buttermilk.
MEASURES: Don't switch between weights/ml and cups in the recipe, read note 11. UK: Please read notes 7 and 9. After Red Velvet Cupcakes? Here's the recipe!
Ingredients
DRY INGREDIENTS
▢2 2/3 cups (400 g) plain cake flour (Note 1)
▢2 tbsp (10 g) cocoa powder , unsweetened
▢1 tsp (5 g) baking soda / bi-carb soda , NOT baking powder (Note 2)
▢Pinch of salt
WET INGREDIENTS
▢1/2 cup (115 g) unsalted butter , softened (1 US stick)
▢1 1/2 cups (330 g) caster / superfine white sugar (Note 3a)
▢2 eggs , at room temperature (around 2 oz / 60g each)
▢1 cup (250ml) vegetable oil
▢1 tsp white vinegar
▢2 tsp vanilla extract (or essence)
▢1 cup (250 ml) buttermilk , at room temperature (Note 4)
▢2 1/2 tbsp red food colouring liquid (UK: use Gel, Note 7)
FROSTING (NOTE 10)
▢14 oz (400 g) Philadelphia Cream Cheese, block , softened but not too soft (UK see Note 9)
▢1/2 cup (115 g) unsalted butter , softened (but not too soft)
▢1 1/2 tsp vanilla extract
▢4 cups (450 g) soft icing sugar / powdered sugar sifted (Note 3b)
Instructions
Preheat oven to 180C/350F (all oven types). Butter 2 x 21cm / 8″ round cake pans (sides and base) and dust with cocoa powder.
Sift the Dry Ingredients and whisk to combine in a bowl.
Place butter and sugar in a bowl and beat with electric beater or in stand mixer until smooth and well combined (use paddle attachment if using sta
#cookinlover #cakelover
120
views

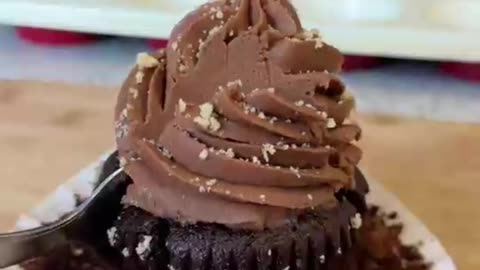
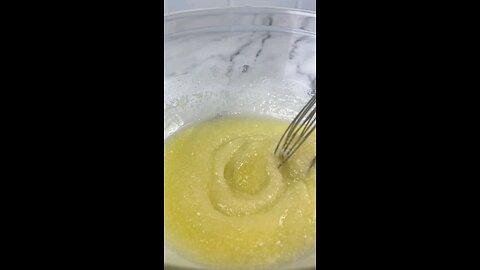
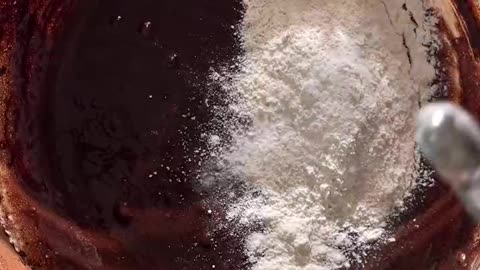
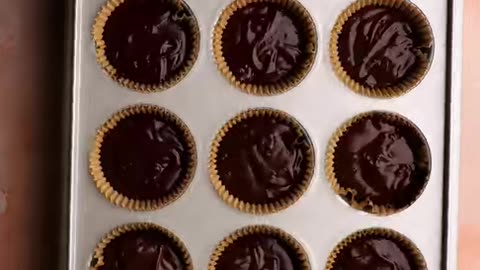
chocolate cupcakes with a shortbread base, filled with dulce de leche and topped with whipped milk
15 ingredients
Refrigerated
4 Eggs
Baking & spices
• 1 tsp Baking soda
125 g Brown sugar
50 g Cocoa powder
125 g Granulated sugar
500 g Milk chocolate
• 200 g Plain flour
Oils & vinegars
• 200 ml Vegetable oil
• 2 tsp White vinegar
Bread & baked goods
• 1 Plus some extra shortbread biscuits
⚫ 300 g Shortbread biscuits
Dairy
150 g Butter, unsalted
120 g Buttermilk
• 350 ml Double cream
Liquids
• 80 ml Water mixed with, hot
61
views
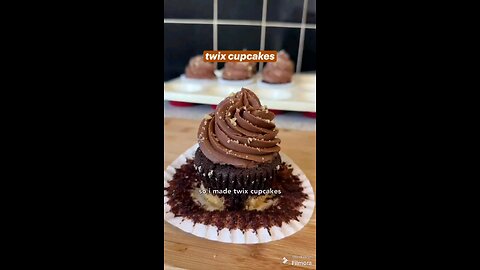
chocolate cupcakes with a shortbread base, filled with dulce de leche and topped with whipped milk
15 ingredients
Refrigerated
4 Eggs
Baking & spices
• 1 tsp Baking soda
125 g Brown sugar
50 g Cocoa powder
125 g Granulated sugar
500 g Milk chocolate
• 200 g Plain flour
Oils & vinegars
• 200 ml Vegetable oil
• 2 tsp White vinegar
Bread & baked goods
• 1 Plus some extra shortbread biscuits
⚫ 300 g Shortbread biscuits
Dairy
150 g Butter, unsalted
120 g Buttermilk
• 350 ml Double create
Liquids
• 80 ml Water mixed with, hota
source
cooking
#cookinglover #cakelover #cupcakelover #recipie
59
views

Oreo Boll recipe
INGREDIENTS: SUGAR, UNBLEACHED ENRICHED FLOUR (WHEAT FLOUR, NIACIN, REDUCED IRON, THIAMINE MONONITRATE {VITAMIN B1}, RIBOFLAVIN {VITAMIN B2}, FOLIC ACID), PALM AND/OR CANOLA OIL, COCOA (PROCESSED WITH ALKALI), HIGH FRUCTOSE CORN SYRUP, LEAVENING (BAKING SODA AND/OR CALCIUM PHOSPHATE), SALT, SOY LECITHIN, CHOCOLATE, ...
64
views
Chewy Brownies are just as chewy as the boxed brownies but packed with way
11 ingredients
Refrigerated
• 2 Eggs plus 1 egg yolk, large
Baking & spices
1/2 cup All-purpose flour
1/8 tsp Baking soda
3/4 cup Chocolate chips, semisweet
3/4 cup Cocoa powder, unsweetened
⚫ 1 tbsp Cornstarch
⚫ 1 1/4 cups Granulated sugar
1/4 tsp Salt
• 1 tsp Vanilla extract
Oils & vinegars
• 1/3 cup Vegetable oil
Dairy
5 tbsp Butter, unsalted
44
views

Pizza met kip
Pizza, wie is daar nu niet gek op? Deze kip pizza vult goed en is een heerlijke keuze voor een gezellige avond thuis! De smaakervaring wordt versterkt door extra kaas die aan de randen is toegevoegd, wat resulteert in die onweerstaanbare 'crusty chesse
25 ingredients
Ingredients
bloem: 400 g
• fijne griesmeel: 150 g
• zout: 8 g
kristalsuiker: 14 g
⚫ instant gist: 10 g
zonnebloemolie: 30 ml
⚫ water: 300 ml
• zonnebloemolie: 20 ml
• kipfilet: 500 g
0 zout: 3 g
• komijnpoeder: 3 g
paprikapoeder: 3 g
⚫ knoflookpoeder: 3 g
• uienpoeder: 3 g
⚫ gezeefde tomatensaus: 175 g
⚫ water: 50 ml
• Italiaanse kruiden: 2 g
• kaasblok
rode paprika: 150 g
courgette : 125 g
• rode ui: 70 g
⚫ gele ui: 120 g
⚫ groene olijven: 50 g
geraspte kaas
• smeerkaas
45
views

How Israel and Palestine Became Enemies | Flashback with Palki Sharma
How Israel and Palestine Became Enemies | Flashback with Palki Sharma
Source
V Mart
News special reporter
Maidia
Information technology
65
views
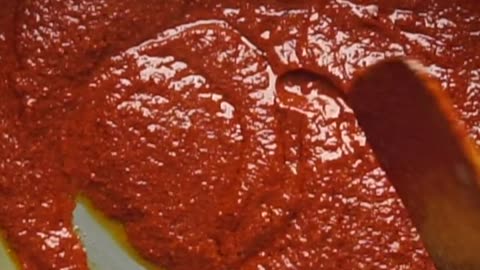
spicy butter garlic shrimp/prawns
I love using extra large or jumbo fresh shrimp (or prawns) for a juicy mouthful! It’s a huge bonus and one that will save you time if you can buy them ready to cook (peeled and deveined). I always keep their tails on for added flavour but you can remove them.
Sear your shrimp in oil first to get some incredible crisp edges.
INGREDIENTS
2 tablespoons olive oil
1 1/4 pounds (600 grams) large shrimp (prawns), shelled and deveined, tails on or off
Pinch of coarse salt and fresh ground black pepper, to taste
4 tablespoons butter
4-5 cloves garlic, minced (or 1 1/2 tablespoons minced garlic)
splash of dry white wine or broth (about 2 tablespoons)
1-2 whole red cayenne chili peppers
1/4 cup chopped parsley
INSTRUCTIONS
Heat olive oil in a large pan or skillet over medium heat. Add the shrimp, season with salt and pepper to taste and sear for 1-2 minutes on each side (until just beginning to turn pink).
Quickly deglaze the pan with a splash of wine or broth (if using), scraping up any browned bits from the bottom of the pan. Add the butter, garlic, red chilis and parsley. Toss shrimp through the butter sauce and cook for a further 30 seconds - 1 minute until the shrimp is cooked through (being careful not to overcook your shrimp
68
views

Mangalorean Chicken Ghee Roast Recipe
Course: Lunch
Diet: Non Vegeterian
Equipments Used: Hard Anodised Kadai (Wok)
Prep in 60 M
Cooks in 45 M
Total in 105 M
Makes: 4 Servings
Ingredients
1 Chicken breasts , cut into small pieces
3 tablespoon Curd (Dahi / Yogurt)
1/2 teaspoon Turmeric powder (Haldi)
1 tablespoon Lemon juice
1 sprig Curry leaves
1 teaspoon Jaggery
3 tablespoons Ghee
Salt , to taste
For the ghee roast masala
6 Dry Red Chillies
1 teaspoon Whole Black Peppercorns
2 Cloves (Laung)
1 teaspoon Methi Seeds (Fenugreek Seeds)
2 teaspoon Coriander (Dhania) Seeds
1 teaspoon Cumin seeds (Jeera)
4 cloves Garlic
1 tablespoon Tamarind Paste
Directions for Mangalorean Chicken Ghee Roast Recipe
To begin making the Mangalorean Chicken Ghee Roast Recipe, wash and clean the chicken thoroughly and drain all the water.
To Marinate the Chicken
In a mixing bowl, add curd, turmeric and lemon juice and mix well. Add the washed chicken pieces in the curd mixture and marinate for at least 1 hour.
For the ghee roast masala
Heat a flat skillet and add dry red chilies, fenugreek seeds, cumin seeds, coriander seeds, cloves and peppercorns. Roast them on low flame till the aroma of the spices wafts through the air. Turn off the flame and allow to cool.
Once the spices are cool, add them to a mixer jar along with the garlic and tamarind paste along with a tablespoon of water into a smooth paste. Keep it aside.
Heat a kadai with ghee, add curry leaves and allow it to crackle. Now, lower the flame and add chicken that is marinated with curd into the kadai and cook until the chicken has become firm.
Add the ghee roast masala into the kadai and mix everything together until it combines. Cook the chicken in the pan until the ghee separates out and reaches the surface.
Finally add in the jaggery, salt to taste and mix well. Once the jaggery has melted, mix well and check for seasoning. Switch off the heat and serve hot.
Serve the Mangalorean Chicken Ghee Roast Recipe along with neer dosa, steamed rice and Palak Tovve or Palak Dal Recipe by the side to complete your Sunday meals.
88
views
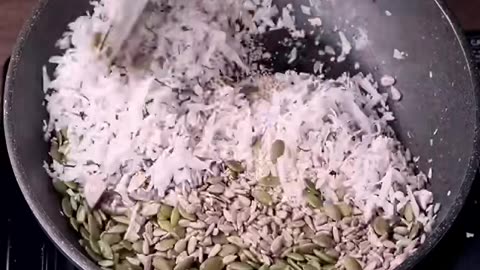
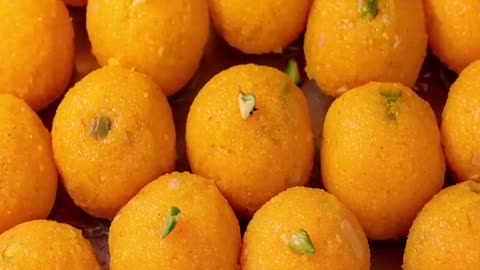
Dry Fruit Laddu Recipe no sugar free
No Sugar Healthy Dry Fruits Ladoo
Time:-30 min 12 servings
dry fruit laddu recipe | Healthy No Sugar dry fruits ladoo with step-by-step photo and video recipe. Ladoo or Barfi Recipes are very common types of sweets and desserts in Indian Cuisine. It is typically made with flour and sugar and shaped into a ball or like a fudge before it is served. However, there are certain sweets that do not require sugar and dry fruits ladoo is one such hugely popular healthy sweet recipe from Indian cuisine...
91
views
Blueberry, Almond and Lemon Cake
Ingredients
150g unsalted butter, at room temperature, plus extra for greasing
190g caster sugar
2 lemons: finely grate the zest to get 2 tsp, then juice to get 2 tbsp
1 tsp vanilla extract
3 large eggs, beaten
90g self-raising flour, sifted
⅛ tsp salt
110g ground almonds
200g blueberries
70g icing sugar
Method
1. Preheat the oven to 180°C fan. Grease and line a loaf tin 11 x 21cm, and set aside.
2. Place the butter, sugar, lemon zest, 1 tablespoon of lemon juice and vanilla in the bowl of a free-standing food mixer with the paddle attachment in place. Beat on a high speed for 3–4 minutes, until light, then lower the speed to medium. Add the eggs, in small additions, scraping down the sides of the bowl. The mix may split a little, but don’t worry: it’ll come back together. Add the flour, salt and almonds in three additions. Finally, fold in 150g of blueberries, by hand, and pour into the prepared loaf tin.
3. Bake for 15 minutes, then sprinkle the remaining 50g of blueberries over the top of the cake. Return to the oven for another 15 minutes, until the cake is golden-brown but still uncooked. Cover loosely with tin foil and continue to bake for 25–30 minutes, until risen and cooked. Test by inserting a knife into the middle: it’s ready if it comes out clean. Remove from the oven and set aside, in its tin, to cool for 10 minutes, then remove from the tin and place on a wire rack to cool completely.
4. Meanwhile, make the icing. Put the remaining tablespoon of lemon juice into a bowl with the icing sugar and whisk until smooth. Pour over the cake and gently spread out: the blueberries on the top of the cake will bleed into the icing a little, but don’t worry: this will add to the look.
90
views
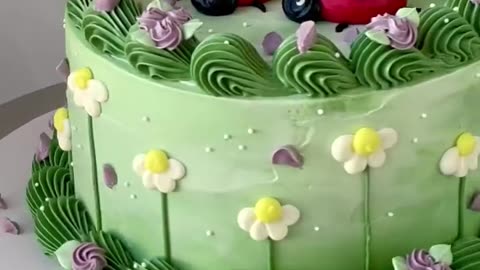
HIGH ALTITUDE CHERRY PISTACHIO LAYER CAKE
WHY YOU'LL LOVE THIS RECIPE
So Pretty and Colorful. I love the shades of pink and green in the buttercream, tinted naturally by cherry juice and creamy pistachio butter. And the maraschino cherries on top add the prettiest pop of color for a fun presentation.
HIGH ALTITUDE CHERRY PISTACHIO LAYER CAKE
July 20, 2022 by Heather Smoke Leave a Comment
Jump to Recipe Print Recipe
Cherry pistachio layer cake made with three layers of fluffy high altitude cherry cake, frosted with pistachio buttercream, and topped with swirls of cherry buttercream and sweet maraschino cherries. You’ll love the sweet and nutty flavor combination of cherries and pistachios in this pretty pink and green cake.
You might also love this Lambeth style chocolate cherry cake, orange pistachio cake, and pistachio brownie chunk ice cream.
Cherry pistachio layer cake topped with swirls of pink buttercream and maraschino cherries.
This site contains affiliate links. As an Amazon associate, I earn from qualifying purchases. This means that I may make a small commission if you purchase a product using those links. This in no way affects my opinion of those products and services. All opinions expressed on this site are my own.
WHY YOU’LL LOVE THIS RECIPE
So Pretty and Colorful. I love the shades of pink and green in the buttercream, tinted naturally by cherry juice and creamy pistachio butter. And the maraschino cherries on top add the prettiest pop of color for a fun presentation.
Tested for High Altitude. I develop and test all of my recipes of 5,280 feet, so other high altitm can be assured of consistent, reliable results in their own home baking. I adapted today’s high cherry cake from my popular strawberry cake, replacing the strawberry reduction with tart cherry juice.
HIGH ALTITUDE CHERRY PISTACHIO LAYER CAKE
July 20, 2022 by Heather Smoke Leave a Comment
Jump to Recipe Print Recipe
Cherry pistachio layer cake made with three layers of fluffy high altitude cherry cake, frosted with pistachio buttercream, and topped with swirls of cherry buttercream and sweet maraschino cherries. You’ll love the sweet and nutty flavor combination of cherries and pistachios in this pretty pink and green cake.
You might also love this Lambeth style chocolate cherry cake, orange pistachio cake, and pistachio brownie chunk ice cream.
Cherry pistachio layer cake topped with swirls of pink buttercream and maraschino cherries.
This site contains affiliate links. As an Amazon associate, I earn from qualifying purchases. This means that I may make a small commission if you purchase a product using those links. This in no way affects my opinion of those products and services. All opinions expressed on this site are my own.
WHY YOU’LL LOVE THIS RECIPE
So Pretty and Colorful. I love the shades of pink and green in the buttercream, tinted naturally by cherry juice and creamy pistachio butter. And the maraschino cherries on top add the prettiest pop of color for a fun presentation.
Tested for High Altitude. I develop and test all of my recipes at Denver’s altitude of 5,280 feet, so other high altitude bakers can be assured of consistent, reliable results in their own home baking. I adapted today’s high altitude cherry cake from my popular strawberry cake, replacing the strawberry reduction with tart cherry juice.
A slice of cherry pistachio layer cake.
See the recipe card at the end of the post for the full ingredients list and instructions.
INGREDIENTS
CHERRY JUICE REDUCTION
Tart Cherry Juice. You’ll be reducing the cherry juice by half, to evaporate some of the water and concentrate the cherry flavor. Then the cherry juice reduction will be used to flavor both the cake and the buttercream.
CHERRY CAKE
Whole Milk. Adds moisture and fat for a tender, flavorful cake crumb.
Lemon Juice. The acidity in the lemon juice enhances the flavor of the strawberries and also makes the cake more tender.
Reduced Tart Cherry Juice. Adds flavor, moisture and acidity.
Eggs + Egg Whites. Gives the cake strength and structure.
Vegetable Oil. Makes the cake moist, light and fluffy.
Vanilla Extract. Flavor.
Cake Flour. Flour gives a cake structure, and the lower protein content of cake flour makes a softer, fluffier cake than if you used all-purpose flour.
Sugar. Granulated sugar adds sweetness and moisture.
Baking Powder. Leavening agent to help the cake rise.
Salt. Enhances flavor and balances sweetness.
PISTACHIO
BUTTERCREAM
Butter. Makes a rich, buttery, fluffy buttercream. If the pistachio butter is salted, be sure to omit the extra salt.
Pistachio Butter. Creamy pistachio butter adds a rich flavor and creamy texture to the buttercream, as well as a natural green color.
Vanilla Extract. Flavor.
Powdered Sugar. Sweetens and thickens the buttercream.
Meringue Powder. Adds stability and improves the texture.
Salt. Balances the sweetness
CHERRY BUTTERCREAM.
Butter. Makes a rich, buttery, fluffy buttercream. I use unsalted butter, but if you use salted, just leave out the extra salt.
Reduced Tart Cherry Juice. Adds flavor and a natural pink color.
Vanilla Extract. Flavor.
Powdered Sugar. Sweetens and thickens the buttercream.
Meringue Powder. Adds stability and improves the texture.
Salt. Balances the sweetness.
Maraschino Cherries. Choose the jarred cherries “with stems” for a pretty presentation
CHERRY JUICE REDUCTION
Pour the tart cherry juice into a saucepan. Bring to a boil over medium heat, then simmer until reduced by half (from 1 1/2 cups down to 3/4 cup).
Cool the juice completely before using in the cake and buttercream
Preheat the oven to 350 F, and position a rack in the center of the oven. Spray the bottoms of three 8-inch round cake pans with non-stick baking spray. If making half the recipe for a smaller cake, use three 6-inch round cake pans.
In a large bowl, whisk together the milk, lemon juice, 1/2 cup reduced cherry juice, eggs, egg whites, vegetable oil, and vanilla extract until well combined. Whisk in the food coloring, if using. I added 2 small drops super red gel food coloring; without the food coloring, the cakes will be a paler pinkish tan color.
In a separate bowl, sift together the flour, sugar, baking powder and salt, then whisk until everything is evenly distributed. Add the dry ingredients to the wet ingredients, and whisk for about 10-15 seconds, just until combined.
Divide the batter between the pans, then bang the pans on the counter a few times to pop any large air bubbles.
Bake the cakes until the tops spring back when gently touched, or a cake tester or toothpick comes out clean, about 21-25 minutes for three 8-inch cakes, and about 18-20 minutes for three 6-inch cakes.
Set the pans on a cooling rack, cover loosely with a clean kitchen towel, and cool completely before frosting. Me
In the bowl of your stand mixer fitted with the paddle attachment, beat the softened butter for 1 minute until smooth. Beat in the pistachio butter and vanilla extract.
With the mixer on low, add the powdered sugar by spoonfuls, the meringue powder and the salt.
Increase speed to medium (#6 on a Kitchen Aid mixer) and beat for 4-5 minutes, scraping the bowl down several times, until very light and fluffy. Turn the speed down to “stir” and mix for 1 more minute to pop any large air bubbles.
Remove the cooled cakes from the pans, and stack, fill and frost the cake with the pistachio buttercream. See How to Stack, Fill, Crumb Coat and Frost a Layer Cake for more tips. Refrigerate the cake while you make the cherry buttercream.
Fit a piping bag with a coupler and tip #32, fill with cherry buttercream, and pipe the “shell” border around the base of the cake.
Fit a piping bag with tip 1M, fill with cherry buttercream, and pipe the swirls on top of the cakes
147
views
Motichoor Ladoo
Motichoor Laddu are delicious balls of gram flour, sugar, ghee, and cardamom. They are an essential part of the festival season - made specially for Diwali.
In India, Motichoor Ladoos are often prepared as prasad during Diwali or as an offering to the gods on important occasions such as weddings or births. In other parts of the world, they have developed a reputation for being one of India’s best-known desserts.
Prep Time
20minutes mins
Cook Time
20minutes mins
Total Time
40minutes mins
Course: DessertCuisine: IndianKeyword: Motichoor Laddu
Ingredients
500 g Besan (Gram Flour)
a large pinch Baking Powder
500 g Sugar
50 g Pistachios blanched
2 tbsp Cardamom Seeds
few Saffron Strands
1/2 cup Milk
as required for frying Ghee
Instructions
Heat 4 cups of water in a pan over medium flame.
Add the sugar and stir until fully dissolved.
When the syrup turns thick, switch off the flame and keep aside until required.
Mix the flour and baking powder in a large bowl.
Add milk, saffron strands and enough water to make a thick batter.
Beat well until mixed thoroughly.
The batter should not be too thick or too thin, it should be able to flow.
Keep aside for 15 to 30 minutes.
Heat ghee in a deep frying pan.
Using the fine sieve, rub the batter a little at a time through the sieve over the hot ghee.
Fry the boondi until they turn pale golden colour.
Drain well and put them into the sugar syrup.
When all the batter is used, switch off the flame.
Add the cardamom seeds and pistachios to the syrup.
Mix thoroughly.
If the mixture is too dry, sprinkle some hot milk.
Add 3 to 4 tblsp of ghee and mix again, ensuring the boondi does not break.
Shape the mixture into small round balls using greased hands.
Allow it to cool before storing them in airtight containers.
101
views
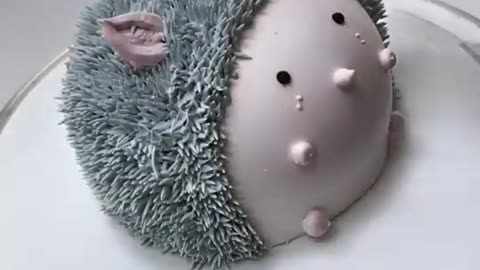
HALLOWEEN CHOCOLATE CUPCAKES
Prep:25 mins
Cook:20 mins
plus cooling and decorating
Easy
Makes 22
Bake our Halloween cupcakes for your little monsters. With black velvet sponge and scary faces made using simple icing techniques, they're spookily good
Nutrition: Per cupcake
Bake our Halloween cupcakes for your little monsters. With black velvet sponge and scary faces made using simple icing techniques, they're spookily good
Ingredients
200g butter, softened
300g golden caster sugar
200g dark chocolate, melted
2 eggs
250g self raising flour
¼ tsp baking powder mixed with 100ml boiling water
50g cocoa powder
200ml milk
1-2 tsp black food colouring (optional)
For the buttercream
300g unsalted butter, softened
500g icing sugar
1 tsp vanilla extract
black food colouring
For the decorations
pack of Smarties
black icing pen
1 pack mixed coloured fondant icing (you'll need pink, green, blue and white)
liquorice and strawberry laces and other sweets such as jelly fangs and liquorice allsorts
Method
STEP 1
Heat oven to 180C/160C fan/gas 4. Line two 12-hole cupcake tins with cases. Beat the butter and sugar until the mixture is creamy. Beat in the chocolate and the eggs until combined, then stir in the flour and baking powder, cocoa powder, milk and food colouring, if using. Spoon the mixture evenly between the cupcake cases, levelling the tops.
STEP 2
Bake for 20 mins or until the cakes are risen and springy to the touch. Cool for 5 mins in the tin, then lift out onto a wire rack to cool completely
STEP 3
To make the buttercream, beat the butter until soft, then stir in the icing sugar a little at a time. Beat in the vanilla and some black food colouring, then transfer to a piping bag fitted with a plain nozzle.
STEP 4
For the cat face, pipe the black buttercream in an even swirl onto the cupcake and smooth with a palette knife. Pipe two ears by making a blob for each and pulling the icing bag upwards to a point. Add two eyes on each with Smarties and use the black icing pen to paint a pupil onto each. Add a triangle nose made of pink fondant icing and create whiskers with sweets.
STEP 5
For the monster faces, cut circles of green and blue fondant to fit the tops of the cupcake and fix them in place with a little buttercream. Add eyes, noses and mouths made of sweets or use icing eyes (see tip, below). For skeletons, cut out shapes with white fondant and fix in place with the buttercream.....
115
views

El Taiger, Popoy & DJ Unic - Me Kemaste
El Taiger, Popoy & DJ Unic - Me Kemaste Alien dance VS Funny alien VS Dame tu cosita VS Funny alien dance VS Green alien dance VS ...
90
views

Ice Cream Song + More Children Songs & Cartoons | Learn with Baby Berry!
Colorful, yummy ice creams! Ice cream sog and more children songs and cartoons nursery rhymes and children songs!
88
views

Rip | Chadwick Boseman | rest in peace | black panther
Rip | Chadwick Boseman | rest in peace | black panther
82
views