
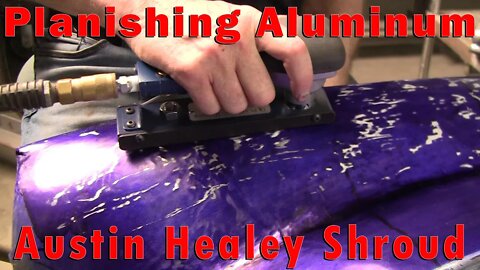
Planishing Aluminum: Austin Healey Shroud
https://www.proshaper.com
Our Amazon Storefront:
https://www.amazon.com/shop/proshaper
Planishing Aluminum: Austin Healey Shroud
We aren't back on the Healey but we're back on the Healey. In this video Wray has a hand planishing hammer that acts as a power slapper. He tried it out on steel and wasn't entirely sold but he knew it would move Aluminum. So taking Dykem and spraying it on the shroud and then using a hand file to spot the highs and lows. He then takes a dolly and the hand planisher and in 2 minutes you can see how well this tool actually worked. To do any of the fine details Wray will just use a slapper and dolly. He always says the last 10% of the job is 90% of the work.
Hand Planishing Hammer
https://www.coachsmithing.com/
Email: Wray@Proshaper.com
Website: https://www.proshaper.com
Facebook: https://www.facebook.com/ProShaper/
Instagram: https://www.instagram.com/proshaper/
Twitter: https://twitter.com/ProshaperM
Linkedin: https://www.linkedin.com/company/pros...
50
views
2
comments
Metal Finishing a 1933 Ford Fender
https://www.proshaper.com
Our Amazon Storefront:
https://www.amazon.com/shop/proshaper
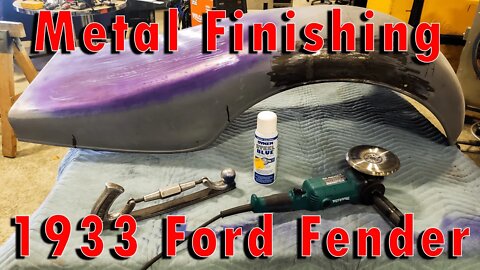
Metal Finishing a 1933 Ford Fender
In this video Wray shows us how he takes out the small dents on these 1933 Ford Fenders. First he had to sand off all the primer which helped show the low and high spots. He will also use Dykem if the dented area is large but will use a magic marker for smaller areas.
Then he will use a file to file down the dykem, revealing the areas that he has to chase with a slapper and dolly. After he will take the 5" shrinking disc and a spray bottle of soapy water then run it over the area of the fender to bring the high spots down.
There is still work that needs to be done on the front fender section but with some planishing and patience it will be good as new!
Email: Wray@Proshaper.com
Website: https://www.proshaper.com
Facebook: https://www.facebook.com/ProShaper/
Instagram: https://www.instagram.com/proshaper/
Twitter: https://twitter.com/ProshaperM
Linkedin: https://www.linkedin.com/company/pros...
33
views
1933 Ford Fender Repair
https://www.proshaper.com
Our Amazon Storefront:
https://www.amazon.com/shop/proshaper
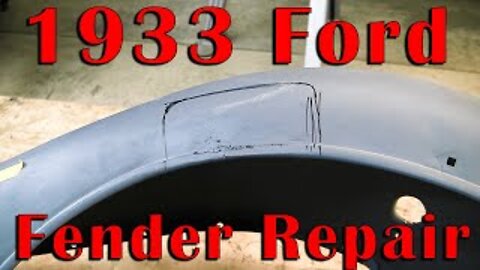
1933 Ford Fender Repair
I hope this intrigues all of our viewers. We wanted to finish the Alfa fender but we have something more important to do and we have a limited time to finish it. So here we have 2 1933 Ford Fenders which were repaired at some point but as you can see, the repair needs to be repaired.
There is a patch that was put on the inside of the fender overlapping the original skin. On the front side of the fender we can see a lot of holes and micro dents. To fix this Wray starts out with a gauge showing the opening of the fender and comparing it to the fender that needs the most work. The gauge doesn’t fit the second fender as it seems the front has pushed the fender in.
Now that we measured everything it’s time to make a flexible shape pattern and gauges. Wray explains how he does it, which is a nice change for me as I just get to film him doing it. Once the flexible shape pattern has been made, Wray compares it to the fender that needs work and it is confirmed that they don’t match.
To see what’s going on with the bead, Wray uses his shrinker / stretcher and a 1” strip of sheet metal and stretches it to match the bead. Again, when we compare it to the other fender we see that the bead dips down.
Tomorrow we will cut out the rotted section of the fender and replace it with a patch panel to make both fenders match.
Email: Wray@Proshaper.com
Website: https://www.proshaper.com
Facebook: https://www.facebook.com/ProShaper/
Instagram: https://www.instagram.com/proshaper/
Twitter: https://twitter.com/ProshaperM
Linkedin: https://www.linkedin.com/company/pros...
47
views

33 Ford Fender (Part 3) The Patch Panel
https://www.proshaper.com
Our Amazon Storefront:
https://www.amazon.com/shop/proshaper
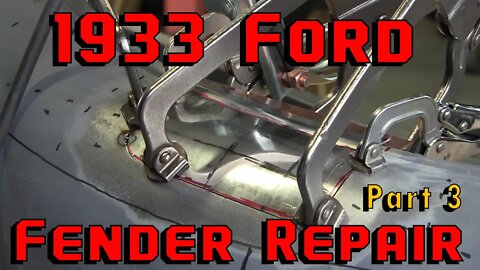
33 Ford Fender (Part 3) The Patch Panel
This video has it all! Now that the Ford fender wire has been repaired, it's time to create the patch panel. Now when we weld the patch panel in, we want to make sure that the fender matches the other fender. To do this Wray fabricates a bar that fits perfectly inside the good fender and then bolt it into the fender we are fixing. This ensures that when we weld, it won't shrink back into itself.
The thickness of the steel is 19 gauge. Wray cuts out a piece about a half inch larger all around the flexible shape pattern to give him a little cheat room. Wray created another Gauge going across the fender to make sure it flows correctly from front to back and left to right.
Using all the information we have Wray slowly massages the patch panel with his hands to give it a slight radius. To make sure the crown is correct, Wray uses our ProShaper Mallet and a leather beater bag to add area to the center of the panel.
Wray cleans up the panel while adding a little more area using our English wheels, both large and small. Now that the panel matches the gauges, Wray uses the tipping wheel to add the bead down at the bottom.
Once this is all complete Wray slowly grinds away the excess material allowing for a tight fit. He finishes it up by tacking that patch panel to the fender and that's it for this video.
The video on Friday will so how we metal finish the weld, fix any dents and by the end it should look perfect!
Email: Wray@Proshaper.com
Website: https://www.proshaper.com
Facebook: https://www.facebook.com/ProShaper/
Instagram: https://www.instagram.com/proshaper/
Twitter: https://twitter.com/ProshaperM
Linkedin: https://www.linkedin.com/company/pros...
59
views
33 Ford Fender repair (Part 2): Forensic Files
https://www.proshaper.com
Our Amazon Storefront:
https://www.amazon.com/shop/proshaper
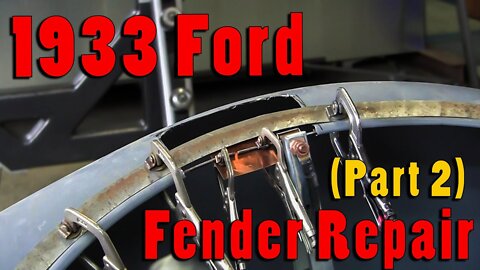
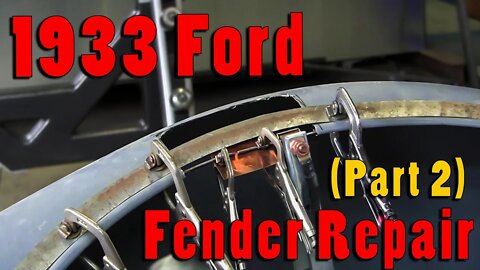
33 Ford Fender repair (Part 2): Forensic Files
In this video we cut out the rotted piece of the 33 ford fender. Wray slows carves away the metal that's wrapped around the wired edge being careful not to cut the actual wire. Once it all cut away we see where the wire split which caused the fender to be pushed in the front about 5/8".
Wray cleans up the wire removing the rust and then using our Vulcan tig welder he welds the wire back together ensuring the fender is the correct length. He then cold forges the welded wire using a body dolly and hammer.
Once it's all welded Wray confirms the the bead flows exactly like the other fender using the Flexible shape pattern. By this point it is 11pm and we were beat so the next episode will be creating and welding the patch panel in.
Email: Wray@Proshaper.com
Website: https://www.proshaper.com
Facebook: https://www.facebook.com/ProShaper/
Instagram: https://www.instagram.com/proshaper/
Twitter: https://twitter.com/ProshaperM
Linkedin: https://www.linkedin.com/company/pros...
82
views
33 Ford Fender (Part 3) The Patch Panel
https://www.proshaper.com
Our Amazon Storefront:
https://www.amazon.com/shop/proshaper
33 Ford Fender (Part 3) The Patch Panel
This video has it all! Now that the Ford fender wire has been repaired, it's time to create the patch panel. Now when we weld the patch panel in, we want to make sure that the fender matches the other fender. To do this Wray fabricates a bar that fits perfectly inside the good fender and then bolt it into the fender we are fixing. This ensures that when we weld, it won't shrink back into itself.
The thickness of the steel is 19 gauge. Wray cuts out a piece about a half inch larger all around the flexible shape pattern to give him a little cheat room. Wray created another Gauge going across the fender to make sure it flows correctly from front to back and left to right.
Using all the information we have Wray slowly massages the patch panel with his hands to give it a slight radius. To make sure the crown is correct, Wray uses our ProShaper Mallet and a leather beater bag to add area to the center of the panel.
Wray cleans up the panel while adding a little more area using our English wheels, both large and small. Now that the panel matches the gauges, Wray uses the tipping wheel to add the bead down at the bottom.
Once this is all complete Wray slowly grinds away the excess material allowing for a tight fit. He finishes it up by tacking that patch panel to the fender and that's it for this video.
The video on Friday will so how we metal finish the weld, fix any dents and by the end it should look perfect!
Email: Wray@Proshaper.com
Website: https://www.proshaper.com
Facebook: https://www.facebook.com/ProShaper/
Instagram: https://www.instagram.com/proshaper/
Twitter: https://twitter.com/ProshaperM
Linkedin: https://www.linkedin.com/company/pros...
40
views
33 Ford Fender repair (Part 2): Forensic Files
https://www.proshaper.com
Our Amazon Storefront:
https://www.amazon.com/shop/proshaper
33 Ford Fender repair (Part 2): Forensic Files
In this video we cut out the rotted piece of the 33 ford fender. Wray slows carves away the metal that's wrapped around the wired edge being careful not to cut the actual wire. Once it all cut away we see where the wire split which caused the fender to be pushed in the front about 5/8".
Wray cleans up the wire removing the rust and then using our Vulcan tig welder he welds the wire back together ensuring the fender is the correct length. He then cold forges the welded wire using a body dolly and hammer.
Once it's all welded Wray confirms the the bead flows exactly like the other fender using the Flexible shape pattern. By this point it is 11pm and we were beat so the next episode will be creating and welding the patch panel in.
Email: Wray@Proshaper.com
Website: https://www.proshaper.com
Facebook: https://www.facebook.com/ProShaper/
Instagram: https://www.instagram.com/proshaper/
Twitter: https://twitter.com/ProshaperM
Linkedin: https://www.linkedin.com/company/pros...
90
views

33 Ford Fender Repair
https://www.proshaper.com
Our Amazon Storefront:
https://www.amazon.com/shop/proshaper
1933 Ford Fender Repair
I hope this intrigues all of our viewers. We wanted to finish the Alfa fender but we have something more important to do and we have a limited time to finish it. So here we have 2 1933 Ford Fenders which were repaired at some point but as you can see, the repair needs to be repaired.
There is a patch that was put on the inside of the fender overlapping the original skin. On the front side of the fender we can see a lot of holes and micro dents. To fix this Wray starts out with a gauge showing the opening of the fender and comparing it to the fender that needs the most work. The gauge doesn’t fit the second fender as it seems the front has pushed the fender in.
Now that we measured everything it’s time to make a flexible shape pattern and gauges. Wray explains how he does it, which is a nice change for me as I just get to film him doing it. Once the flexible shape pattern has been made, Wray compares it to the fender that needs work and it is confirmed that they don’t match.
To see what’s going on with the bead, Wray uses his shrinker / stretcher and a 1” strip of sheet metal and stretches it to match the bead. Again, when we compare it to the other fender we see that the bead dips down.
Tomorrow we will cut out the rotted section of the fender and replace it with a patch panel to make both fenders match.
Email: Wray@Proshaper.com
Website: https://www.proshaper.com
Facebook: https://www.facebook.com/ProShaper/
Instagram: https://www.instagram.com/proshaper/
Twitter: https://twitter.com/ProshaperM
Linkedin: https://www.linkedin.com/company/pros...
44
views

English Wheeling made simple (Part 3)
https://www.proshaper.com
Our Amazon Storefront:
https://www.amazon.com/shop/proshaper
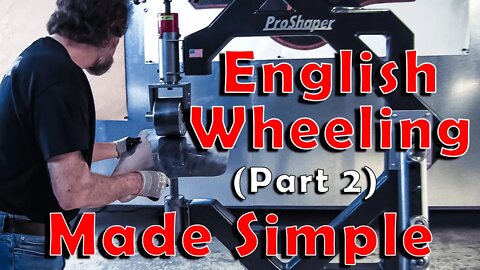
English Wheeling made simple (Part 3)
Were back on the 67' Alfa Duetto Fender. Wray introduced the fender on the first part of the series, where he made a small patch panel for the lower section. Then when describing the top part of the fender with a large radius, he shows that using a low crown lower anvil on the English Wheel can achieve the correct result instead of starting with a high crown.
In the last episode Wray started to work on the top part of the fender but couldn't complete it because we ran out of time. So in this episode Wray shows how to fix the wiggle on the edge of the panel, how to fill out the area value and confirming with the flexible shape pattern.
At the end of this video Wray uses his magic touch and puts the panel into arrangement using nothing but his belly and hands as a fulcrum and lever.
Email: Wray@Proshaper.com
Website: https://www.proshaper.com
Facebook: https://www.facebook.com/ProShaper/
Instagram: https://www.instagram.com/proshaper/
Twitter: https://twitter.com/ProshaperM
Linkedin: https://www.linkedin.com/company/pros...
16
views

Fred does some laps at the shop
https://www.proshaper.com
Our Amazon Storefront:
https://www.amazon.com/shop/proshaper
Back in 2005 Dick Bear took my metalshaping/coachbuilding class. Dick had the desire to scratch-build a car. He brought along to the the class a model of a McLaren M8B. At the class we scaled up one of the front fenders and proceeded to make it. Two years later Dick had built a street legal complete car in North Carolina where he was living. After he finished that car he had so much fun in the process he decided to build a Lola inspired Indy racer. This one is street legal as well. The McLaren Dick built he drove across country several times putting 50000 miles on it. The Lola he drove about 7000 miles. My friend Fred is now the steward of the Lola and he delights in bringing it to local car shows. He loves to let little kids sit in it and see the smiles that are created. Fred stopped by the shop on his way home with the Lola and did a few laps around my circular driveway. He is thinking of bringing it to the local track in Palmer, and taking some high speed laps. Dick built two impressive and beautiful race cars that make memories instantly in everyone that sees them.
Email: Wray@Proshaper.com
Website: https://www.proshaper.com
Facebook: https://www.facebook.com/ProShaper/
Instagram: https://www.instagram.com/proshaper/
Twitter: https://twitter.com/ProshaperM
Linkedin: https://www.linkedin.com/company/pros...
27
views
English Wheeling made Simple (Part 2)
https://www.proshaper.com
Our Amazon Storefront:
https://www.amazon.com/shop/proshaper
English Wheeling made Simple (Part 2)
Part one discussed making a patch panel for this Alfa Romeo fender. We built up the area of the sheet metal only using the low crown anvil on our English Wheel. In this video, Wray using the #2 low crown anvil shows that you can make the top part of the fender without needing to start with a high radius lower anvil.
We could use a metal shaping mallet to bump up the area, but where is the fun in that. It's only because we started filming so late that we had to wrap up, there will be a second part next week showing the full area and arrangement values.
If you want we can add the detail work to it.
Email: Wray@Proshaper.com
Website: https://www.proshaper.com
Facebook: https://www.facebook.com/ProShaper/
Instagram: https://www.instagram.com/proshaper/
Twitter: https://twitter.com/ProshaperM
Linkedin: https://www.linkedin.com/company/pros...
13
views
Thursday Metal Shaping Tip
https://www.proshaper.com
Our Amazon Storefront:
https://www.amazon.com/shop/proshaper
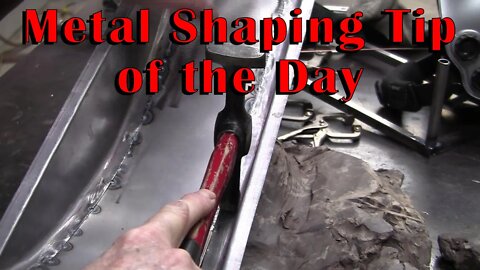
So I'm finishing a Flexible shape pattern on an Alfa Fender for tonight's video when I hear Wray across the shop say "I'm a genius". So Naturally I grab the camera and go over to see what Wray has done now.
It's actually a pretty good tip!
Email: Wray@Proshaper.com
Website: https://www.proshaper.com
Facebook: https://www.facebook.com/ProShaper/
Instagram: https://www.instagram.com/proshaper/
Twitter: https://twitter.com/ProshaperM
Linkedin: https://www.linkedin.com/company/pros...
25
views
English Wheeling Made Simple
https://www.proshaper.com
Our Amazon Storefront:
https://www.amazon.com/shop/proshaper
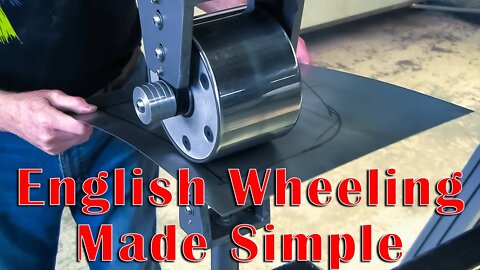
English Wheeling Made Simple
Since the last video we've done, we've gained a plethora of new subscribers so we went back to the basics and created another English Wheel video using our "Youtube English Wheel".
In this video Wray discusses the good and the bad between different English Wheel frames and what you should expect. Wray then goes over the differences between an Upper adjuster and lower adjuster and why he prefers one to the other. He explains the different radiused lower anvils and when you should use them and finally he brings on a real world example using an Alfa Romeo fender.
There are certain parts on a car that rust, especially where we live. He shows a portion of a fender where if it were rusted and we were making a patch panel for it, how to go about it.
We hope you enjoyed this video, let us know in the comments if there is anything else you want to see in the part 2 version of the English Wheel.
Email: Wray@Proshaper.com
Website: https://www.proshaper.com
Facebook: https://www.facebook.com/ProShaper/
Instagram: https://www.instagram.com/proshaper/
Twitter: https://twitter.com/ProshaperM
Linkedin: https://www.linkedin.com/company/pros...
24
views
How to weld Aluminum Tig Vs. Gas
https://www.proshaper.com
Our Amazon Storefront:
https://www.amazon.com/shop/proshaper
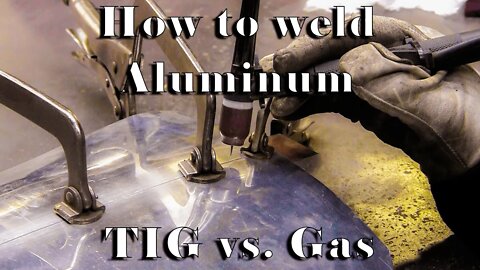
How to weld Aluminum Sheet Tig Vs. Gas
We have a lot going on in the shop these last few months but I think we're finally back to doing 2 videos a week. This video is to compare and contrast the differences between tig welding and gas welding Aluminum sheet. Wray grabbed a scrap piece, cut it down the middle and welded one half of the panel using the TIG welder and the second half using a gas welder. We then proceed to the stress test to see if the welds hold up. Mind you the welds are perfectly fine when you fit the panel to the car. We're just showing through the use of a mallet how much stress the welds can take before they break.
We hope you enjoy this video and if there is anything else you might want to see please let us know!
Email: Wray@Proshaper.com
Website: https://www.proshaper.com
Facebook: https://www.facebook.com/ProShaper/
Instagram: https://www.instagram.com/proshaper/
Twitter: https://twitter.com/ProshaperM
Linkedin: https://www.linkedin.com/company/pros...
131
views
More Rust Removal Secrets
https://www.proshaper.com
Our Amazon Storefront:
https://www.amazon.com/shop/proshaper
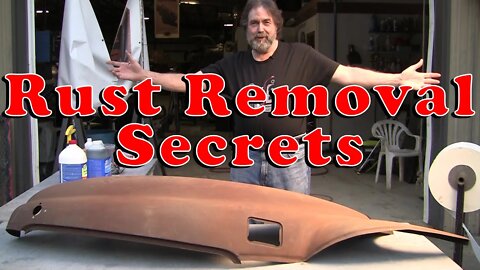
More Rust Removal Secrets
We're back. Wray has been providing little snippets of the things going on in the shop. Now that we have some time, we are making videos again. I had pulled out a fender that had some serious rust and Wray in his infinite wisdom decided to make a comparison video using Muriatic Acid, Naval Jelly and Phosphoric acid and see which works the fastest.
Email: Wray@Proshaper.com
Website: https://www.proshaper.com
Facebook: https://www.facebook.com/ProShaper/
Instagram: https://www.instagram.com/proshaper/
Twitter: https://twitter.com/ProshaperM
Linkedin: https://www.linkedin.com/company/pros...
20
views
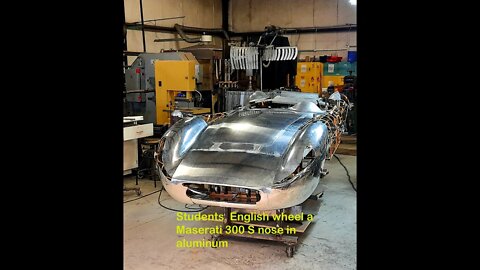
Students English wheel a Maserati 300S nose
Roland, Keith, Jason, and Jim all worked together at the ProShaper coachbuilding class and they built a 300S Maserati nose in .063" aluminum. Keith stayed 9 days, Roland was one of my apprenticeship contest winners, he stayed 10 days. Jim and Jason only attended the two day class.
14
views

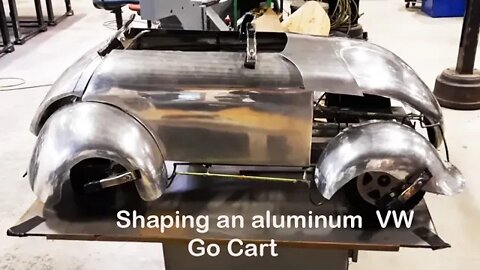
Awesome VW Go-Cart shaped by Apprenticeship Contest winner Jason
Jason was a total novice to shaping and now he has mad skills learned at ProShaper.
20
views

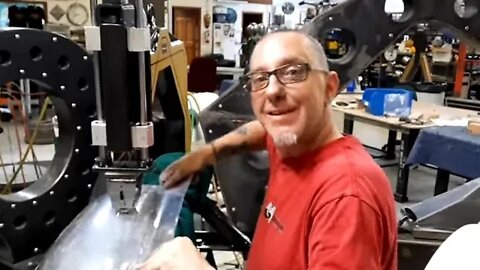
1966 Ferrari 275 GTB rear quarter panel secrets
In this video I show all of the details that are present in this replacement rear quarter panel. I believe it was handmade in the 1970s by an English coachbuilding shop to a very high standard.
7
views

Body hammers: How to make them COOL
https://www.proshaper.com
Our Amazon Storefront:
https://www.amazon.com/shop/proshaper
Eric had some time so he polished, tuned, and modified his favorite body hammers, here are the results.
Email: Wray@Proshaper.com
Website: https://www.proshaper.com
Facebook: https://www.facebook.com/ProShaper/
Instagram: https://www.instagram.com/proshaper/
Twitter: https://twitter.com/ProshaperM
Linkedin: https://www.linkedin.com/company/pros...
14
views
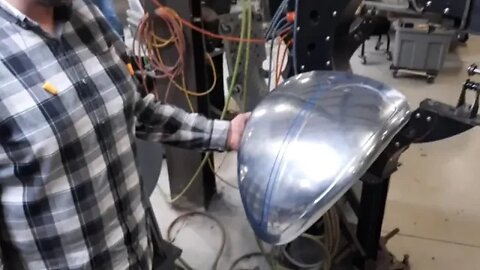
Tipping wheel magic
https://www.proshaper.com
Our Amazon Storefront:
https://www.amazon.com/shop/proshaper
My student Jason tipping the joggle on the aluminum VW gocart hood
Email: Wray@Proshaper.com
Website: https://www.proshaper.com
Facebook: https://www.facebook.com/ProShaper/
Instagram: https://www.instagram.com/proshaper/
Twitter: https://twitter.com/ProshaperM
Linkedin: https://www.linkedin.com/company/pros...
16
views

Silicon Bronze Shaping and Secrets
https://www.proshaper.com
Our Amazon Storefront:
https://www.amazon.com/shop/proshaper
Silicon Bronze Shaping and Secrets
Last episode you'll remember Wray was working on a piece of silicon bronze. Today we show you what we've been making. It's a large sing valnce with a smaller sink bowl inside. Wray discusses the different techniques of annealing the silicon bronze to help work the metal. He then uses the shop power hammer to add area, then over to the english wheel to smooth it all out.
We talk about a few youtube channels you should check out as well.
Armor Templates
https://www.youtube.com/c/DavidGuyton
Tom Lipton
https://www.youtube.com/user/oxtoolco
Repousse
https://www.youtube.com/c/douglaspryor
Email: Wray@Proshaper.com
Website: https://www.proshaper.com
Facebook: https://www.facebook.com/ProShaper/
Instagram: https://www.instagram.com/proshaper/
Twitter: https://twitter.com/ProshaperM
Linkedin: https://www.linkedin.com/company/pros...
12
views
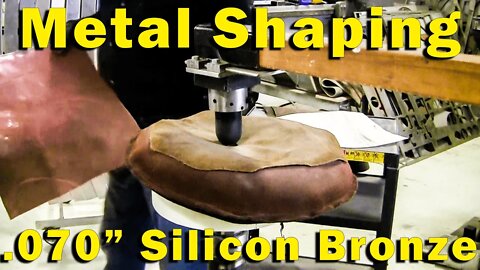
Metal Shaping Silicon Bronze .070" Thick
https://www.proshaper.com
Our Amazon Storefront:
https://www.amazon.com/shop/proshaper
Metal Shaping Silicon Bronze .070" Thick
Wray is working on an architectural job using silicon bronze .070 thick, it’s super stiff and you can’t just wheel it out so he is using the Maglio (Helve Hammer) and that powers it out then using the power hammer to smooth the panel and then onto the English wheel for the finish smoothing. Eventually it will go back to the power hammer where we will put a hammered finish with a special die. This process shows how Wray uses the flexible shape pattern to determine where and how much to hit in order to expand the panel to where it needs to be, to accept the 2 compound curves it needs.
Email: Wray@Proshaper.com
Website: https://www.proshaper.com
Facebook: https://www.facebook.com/ProShaper/
Instagram: https://www.instagram.com/proshaper/
Twitter: https://twitter.com/ProshaperM
Linkedin: https://www.linkedin.com/company/pros...
12
views
Students Metal Shaping Projects: Stearman, Talbot Lago and more
Students Metal Shaping Projects: Stearman, Talbot Lago and more
This past weekend we had our 4-day metal shaping class. We have a few students who decided on our 130 hour program and have been making some amazing progress on their projects. Simon and Ed are from England, Simon has been working on a motorcycle gas tank. He made a beautiful wire form and using Wrays flexible shape pattern as a guide shaped beautiful panels for his tank. Ed has been working on the "arm pit section" of his Stearman plane that apparently you just can't find parts for. Ed and simon have become super stars in the shop. Next we go over to Ed on his Austin Healey and see the tremendous progress he and the students have made. We then go over to our 10-day apprentice winner Jason who has been coming back at least 3 times a week to finish what he started. I think we ruined Jason because he just never wants to leave. Finally we hop on over to Gilles and look at his beautiful Talbot Lago and his plans for the future of it.
https://www.proshaper.com
Our Amazon Storefront:
https://www.amazon.com/shop/proshaper
Email: Wray@Proshaper.com
Website: https://www.proshaper.com
Facebook: https://www.facebook.com/ProShaper/
Instagram: https://www.instagram.com/proshaper/
Twitter: https://twitter.com/ProshaperM
Linkedin: https://www.linkedin.com/company/pros...
20
views