
Steps to make a panel: 52 Cadillac Convertible (Part 4)
https://www.proshaper.com
Our Amazon Storefront:
https://www.amazon.com/shop/proshaper
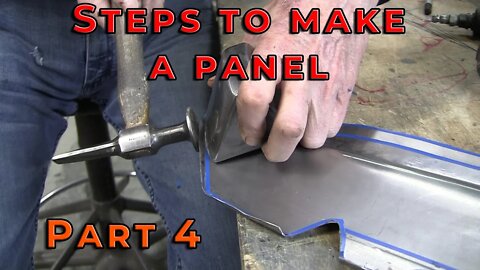
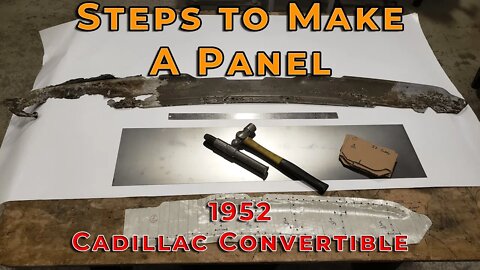
Steps to make a panel: 1952 Cadillac Convertible (Part 4)
We hope you all had a Happy Thanksgiving! We are back, and this panel is finally coming together. Wray adds a little area to the panel and refines the edge of the radius using the caulking tool and hammer. Now he cleans the panel up and marks the edges where they are going to be tipped using the tipping wheel. Wray adds the joggle to the front of the panel which stiffens it up and then uses the tipping wheel to tip the flange all around the panel. He then takes the plinth plate to his hammer and dolly station and slowly hits the flange over till it's in the correct spot. He was extremely tired and when that happens he kind of goes into super focus mode and doesn't really talk. I asked him some questions when I thought they were relevant but we hope you enjoy this video as most of it has been sped up.
Email: Wray@Proshaper.com
Website: https://www.proshaper.com
Facebook: https://www.facebook.com/ProShaper/
Instagram: https://www.instagram.com/proshaper/
Twitter: https://twitter.com/ProshaperM
Linkedin: https://www.linkedin.com/company/pros...
5
views
Ferrari 275 GTB Rear Quarter Rust Removal
https://www.proshaper.com
Our Amazon Storefront:
https://www.amazon.com/shop/proshaper
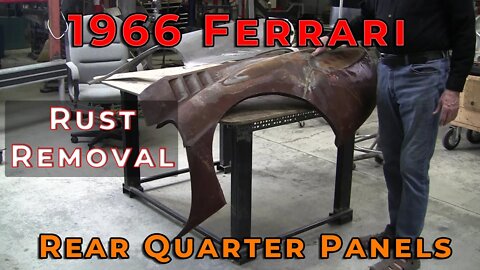
Ferrari 275 GTB Rear Quarter Rust Removal
Happy Thanksgiving to you all!
We just wanted to show one of the gems we got when buying out an old shop. 2 1966 Ferrari 275 GTB rear quarter panels with some pretty serious rust. The panel that is clean had been brushed with Muriatic acid just to see how well it would work. We're always trying new ways to de rust panels. Our upcoming video will go over other methods including options given to us by you the viewer. You can see these panels were all made by hand. You can see some of the hammer marks on the flanges and also see where the separate panels were welded together. We hope you enjoy. Tomorrow we will have part 4 of the Cadillac plinth panel and it is looking amazing!
Email: Wray@Proshaper.com
Website: https://www.proshaper.com
Facebook: https://www.facebook.com/ProShaper/
Instagram: https://www.instagram.com/proshaper/
Twitter: https://twitter.com/ProshaperM
Linkedin: https://www.linkedin.com/company/pros...
3
views
Steps to make a panel: 52 Cadillac Convertible (Part 3)
https://www.proshaper.com
Our Amazon Storefront:
https://www.amazon.com/shop/proshaper
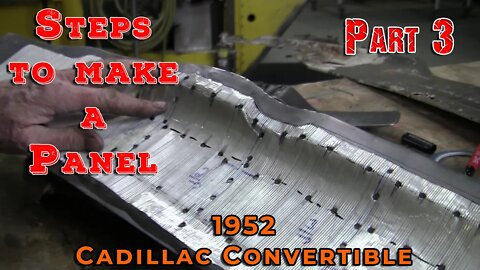
Steps to make a panel: 1952 Cadillac Convertible (Part 3)
We're back at the convertible and we have a plinth panel that needs to much work to restore so Wray is building it from scratch. Now we start to see the sheet metal panel take shape. To refine more of the shape Wray uses an assortment of our caulking tools and a ballpeen hammer to adjust the edges where the panel should be tipped. To flatten out any radius that was been created at the bottom of the panel Wray uses the slapper with the hammer to hit into the radius. It's a lot of hit, check, hit, check but at the end of the video we see it all pay off as it starts to look like a plinth plate.
Email: Wray@Proshaper.com
Website: https://www.proshaper.com
Facebook: https://www.facebook.com/ProShaper/
Instagram: https://www.instagram.com/proshaper/
Twitter: https://twitter.com/ProshaperM
Linkedin: https://www.linkedin.com/company/pros...
5
views
Steps to make a panel: 1952 Cadillac Convertible (Part 2)
https://www.proshaper.com
Our Amazon Storefront:
https://www.amazon.com/shop/proshaper
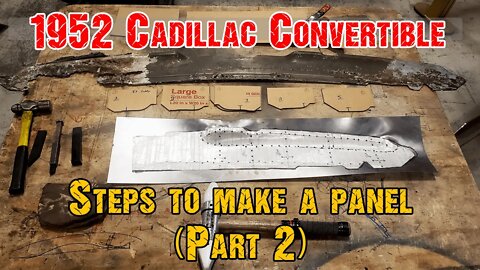
Steps to make a panel: 1952 Cadillac Convertible (Part 2)
We're back at the convertible and we have a plinth panel that needs to much work to restore so Wray is building it from scratch. As you saw in part 1 of this mini series Wray just added area to two parts of the panel using a body hammer and caulking tool. In this episode, using the flexible shape pattern and gauges we determine the next step which is to add area to the plinth plate where the radius meets the flange. We mark out the area and bring it over to the English wheel. Using our high crown wheel, in just a few minutes the radius area has mostly been filled and now we need to arrange the panel. Using a wooded dolly as a fulcrum Wray adds the radius which is confirmed by the gauges we made. Now it's time to add more area to the panel where the radius starts and ends. We do this using some clay, a caulking tool and hammer making sure we hit the correct spots. You'll notice there were a lot of steps to get to this point and we want to show you everything and not skip any parts, which is why this series will be a 4 parter. We hope you enjoy our series!
Email: Wray@Proshaper.com
Website: https://www.proshaper.com
Facebook: https://www.facebook.com/ProShaper/
Instagram: https://www.instagram.com/proshaper/
Twitter: https://twitter.com/ProshaperM
Linkedin: https://www.linkedin.com/company/pros...
6
views
Metal Shaping Class: What you can expect
https://www.proshaper.com
Our Amazon Storefront:
https://www.amazon.com/shop/proshaper
Metal Shaping Class: What you can expect
Here is a video that will show what you will learn in the class. It explains a little about who Wray is, what his goal for the classes are, and the amazing projects you can work on yourself. We hope to see you soon!
Email: Wray@Proshaper.com
Website: https://www.proshaper.com
Facebook: https://www.facebook.com/ProShaper/
Instagram: https://www.instagram.com/proshaper/
Twitter: https://twitter.com/ProshaperM
Linkedin: https://www.linkedin.com/company/pros...
2
views
Steps to make a panel: 1952 Cadillac Convertible
https://www.proshaper.com
Our Amazon Storefront:
https://www.amazon.com/shop/proshaper
Steps to make a panel: 1952 Cadillac Convertible
We're back at the convertible and we have a plinth panel that needs to much work to restore so Wray is building it from scratch. Mark starts off with making a flexible shape pattern of the good half. He then makes gauges out of cardboard to ensure we have the right flow. He makes sure to add all the information he can to both the F.S.P. and the gauges. He then adds the clear tape to seal the F.S.P. Wray then uses the information provided and cuts out two sheet metal blanks for the right and left half of the plinth panel. Reading the flexible shape pattern he notices two spots that will need to add more area. Using the caulking tool, some clay and a ball peen hammer he brings out the area of those two spots. I wish we had more in this video, but Wray went over in detail his thought process on how to go about fabricating the panel. This most likely will be a 3 part video series and we hope you enjoy!
Music: Heading West by Audionautix is licensed under a Creative Commons Attribution 4.0 license. https://creativecommons.org/licenses/by/4.0/
Email: Wray@Proshaper.com
Website: https://www.proshaper.com
Facebook: https://www.facebook.com/ProShaper/
Instagram: https://www.instagram.com/proshaper/
Twitter: https://twitter.com/ProshaperM
Linkedin: https://www.linkedin.com/company/pros...
2
views
How to metal finish a butt weld: Scout 800 Fender
https://www.proshaper.com
Our Amazon Storefront:
https://www.amazon.com/shop/proshaper
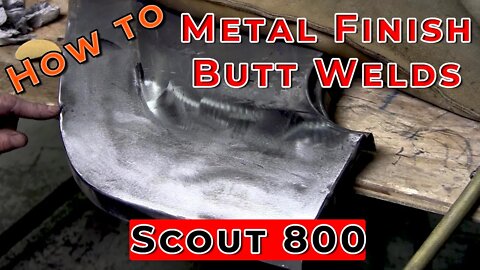
How to metal finish a butt weld: Scout 800 Fender
Now that the Scout 800 Fender patch has been welded in, It's time to finish the metal using several techniques. Applying a marker to the patch panel Wray then uses the shrinking disc to see the high and low spots. Wray then dresses the weld using a slapper and dolly along with his body hammer for the flange. Wray then likes to use a sanding block as well as an orbital sander to really see any minor imperfections. Remember Wray wants this panel to look like it just came off the factory floor. Once all the high and low spots have been addressed with the shrinking disc along with the hammer and dolly, Wray give the panel a thorough check and applies a black spray paint to show how it looks.
Email: Wray@Proshaper.com
Website: https://www.proshaper.com
Facebook: https://www.facebook.com/ProShaper/
Instagram: https://www.instagram.com/proshaper/
Twitter: https://twitter.com/ProshaperM
Linkedin: https://www.linkedin.com/company/pros...
19
views
TIG Butt Welding: Scout 800 Fender
https://www.proshaper.com
Our Amazon Storefront:
https://www.amazon.com/shop/proshaper
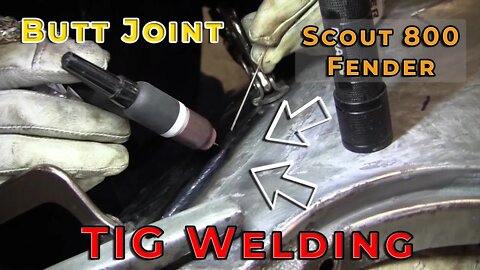
TIG Butt Welding: Scout 800 Fender
We finally made it back to the Scout Fender. In the last video, Wray spoke about two students who wanted to make some patch panels so they used the Scout fender we were working on. At the end of the 4 day class, the patch panels had been tac welded into place. This video starts off with Wray, cleaning the butt join with a wire wheel and then grinding the tac welds down. Using a soft body dolly and body hammer Wray made sure that there was no peak where the two panels met. After it's been sufficiently worked, Wray uses the Everlast tig welder we have, but instead of the foot pedal, he used the on off button which acted as a pulse. For some reason, our microphones would cut out the second he touched the button. We initially wanted to have the panel all finished but we ran out of time due to our sound issues. The next video Wray will grind the weld, planish the panel and then use the shrinking disc to make sure we have a smooth transition.
Email: Wray@Proshaper.com
Website: https://www.proshaper.com
Facebook: https://www.facebook.com/ProShaper/
Instagram: https://www.instagram.com/proshaper/
Twitter: https://twitter.com/ProshaperM
Linkedin: https://www.linkedin.com/company/pros...
22
views
What's happening at ProShaper
https://www.proshaper.com
Our Amazon Storefront:
https://www.amazon.com/shop/proshaper
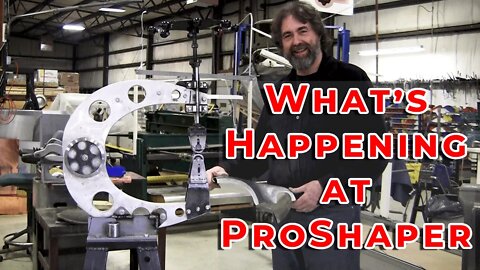
What's happening at ProShaper
Since we've been gone for a little while, we thought you would enjoy seeing what's been happening in the shop for the past few months. Wray shows what our students have done with the Alfa Romeo that Ed brought in. Then we show you the progress being made on both the fender of the Cadillac and also the chassis. We walk through more progress a student has made on the scout fender and also show you a neat little trick towards the end. We hope you enjoy it!
Email: Wray@Proshaper.com
Website: https://www.proshaper.com
Facebook: https://www.facebook.com/ProShaper/
Instagram: https://www.instagram.com/proshaper/
Twitter: https://twitter.com/ProshaperM
Linkedin: https://www.linkedin.com/company/proshaper
1
view
Chassis Rust Removal with Rust 911
https://www.proshaper.com
Rust 911:
https://www.rust911.com/
Our Amazon Storefront:
https://www.amazon.com/shop/proshaper
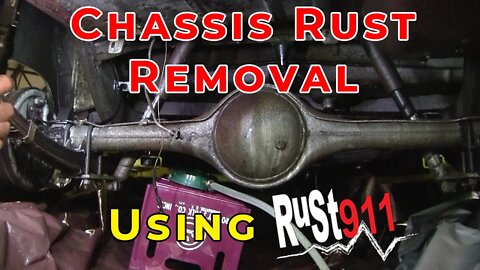
Chassis Rust Removal with Rust 911
We're back folks! Wray spoke a while back about his idea for removing rust on a chassis of his 52 Cadillac. Him and Esteban built a tapered platform out of MDF and 2x4's, put a tarp on top of it and a bucket at the base containing Rust 911 solution and 10 gallons of water. We enclose the chassis with the tarp bungee cords and a sump pump in the bucket with a hose and a sprinkler head underneath the car to spray the Rust 911 solution on everything it can reach. This is the progress that has been made in 4 days.
Email: Wray@Proshaper.com
Website: https://www.proshaper.com
Facebook: https://www.facebook.com/ProShaper/
Instagram: https://www.instagram.com/proshaper/
Twitter: https://twitter.com/ProshaperM
Linkedin: https://www.linkedin.com/company/proshaper
16
views
Collector Car Metal Work: Scout 800
https://www.proshaper.com
Our Amazon Storefront:
https://www.amazon.com/shop/proshaper
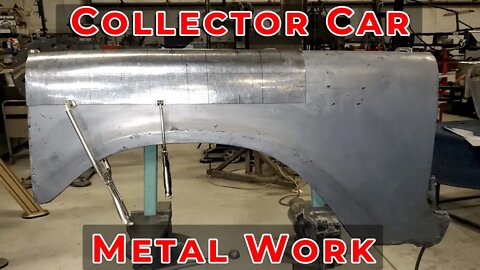
Collector Car Metal Work: Scout 800
We're back on the Scout 800! In this installment, in order to make sure the panel fits correctly we added to the flexible shape pattern the lower half of the fender. Mark also made another gauge showing the flow of the front of the fender. While Mark was doing that Wray made a stand for the fender so we can properly locate the flange and it also doubles as a welding station.
Using a Delrin block and a body hammer Wray roughed out a few of the dents on the original fender. Now that we have all the information Wray mounts the fender to the stand, adds the new flange and tac welds it in place using our Everlast Tig welder.
Email: Wray@Proshaper.com
Website: https://www.proshaper.com
Facebook: https://www.facebook.com/ProShaper/
Instagram: https://www.instagram.com/proshaper/
Twitter: https://twitter.com/ProshaperM
Linkedin: https://www.linkedin.com/company/proshaper
11
views

How to get clean metal
https://www.proshaper.com
Our Amazon Storefront:
https://www.amazon.com/shop/proshaper
How to get clean metal
The last video we had removed all the paint but there was still rust on the hood and front fenders. Today Mark removed the naval jelly from the hood and fenders with a putty knife, used concrete and metal prep from Klean Strip to scrub the remnants from the naval jelly. This also helps remove and surface rust we weren't able to scrape off. Now we also had a guest at the shop who brought in a grill that had a lot of rust and some serious pitting that naval jelly just won't remove. For something like that you would probably want to dip but the better option would be just to remake the whole thing.
Hopefully the next video we start tackling the rust from underneath the Cadillac.
Email: Wray@Proshaper.com
Website: https://www.proshaper.com
Facebook: https://www.facebook.com/ProShaper/
Instagram: https://www.instagram.com/proshaper/
Twitter: https://twitter.com/ProshaperM
Linkedin: https://www.linkedin.com/company/proshaper
3
views

1952 Cadillac Convertible Paint and rust removal results
https://www.proshaper.com
Our Amazon Storefront:
https://www.amazon.com/shop/proshaper
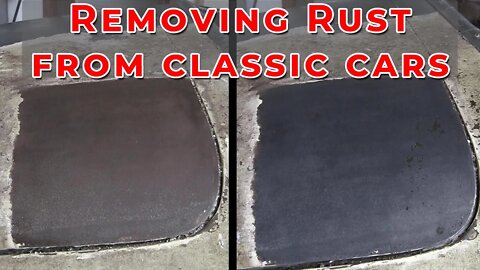
1952 Cadillac Convertible Paint and rust removal results
After working on removing the paint and rust from most of the 1952 Cadillac Convertible we took the car outside to see and dents and rot spots. We then decided while we're looking over the car it might be beneficial for the viewers to see what we look for next. As you can see for the age of the car it is in fantastic shape. There are a few rot spots we will most likely make patch panels for. Unfortunately we didn't have enough time to finish removing all the rust, we still have the front hood and a little surface rust on the fender. Next we will try to tackle all the rust from underneath the car. Stay tuned cause that one will be pretty wild!
Email: Wray@Proshaper.com
Website: https://www.proshaper.com
Facebook: https://www.facebook.com/ProShaper/
Instagram: https://www.instagram.com/proshaper/
Twitter: https://twitter.com/ProshaperM
Linkedin: https://www.linkedin.com/company/proshaper
16
views
Rust Removal Classic Car Restoration
https://www.proshaper.com
Our Amazon Storefront:
https://www.amazon.com/shop/proshaper
Rust Removal Classic Car Restoration
This video goes over and shows the rust removal process on classic cars during the restoration process. Wray is anti sand blasting because it will warp the metal, and sand gets everywhere and you'll be sucking it out for weeks.
Since we have a lot of rust on our Scout 800 and the 1952 Cadillac Convertible we decided to show how quick and effective removing rust with simple solutions found at home depot.
We start by removing the paint with Klean Strip Premium Stripper paint remover. Once the surface is clean and we spot rust we dose the rust with naval jelly, dabbing it on with a brush. It's best to let it sit for a few hours until you see the jelly turn black. Take a putty knife and start scraping the rust off. It should remove most if not all the rust with the first application. If there is any rust left just apply another dose. Once the naval jelly is off we use concrete & metal prep from home depot with a coarse steel wool. When the surface is free of rust and paint, we typically use soapy water to remove the film left behind from the naval jelly. Now the surface is all set for you to start your restoration project.
Email: Wray@Proshaper.com
Website: https://www.proshaper.com
Facebook: https://www.facebook.com/ProShaper/
Instagram: https://www.instagram.com/proshaper/
Twitter: https://twitter.com/ProshaperM
Linkedin: https://www.linkedin.com/company/proshaper
83
views
1952 Cadillac Convertible
https://www.proshaper.com
Our Amazon Storefront:
https://www.amazon.com/shop/proshaper
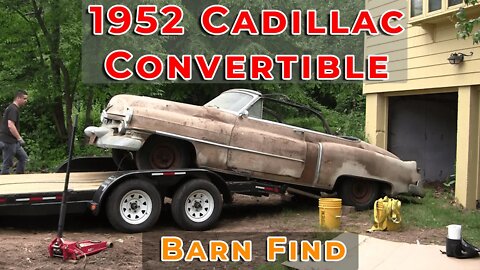
1952 Cadillac Convertible
This past weekend, Wray and Esteban went to pick up a 1952 Cadillac Convertible from Wrays friend. The car has been sitting in the garage since 1965. Looking at the car the rust isn't too bad, mostly surface rust that we'll remove with naval jelly The wheels wouldn't move so with the help of a torch, hammer and pulley Wray managed to free everything up and put new tires on so the car would roll. He loaded it up onto the trailer to bring it home to ProShaper.
Email: Wray@Proshaper.com
Website: https://www.proshaper.com
Facebook: https://www.facebook.com/ProShaper/
Instagram: https://www.instagram.com/proshaper/
Twitter: https://twitter.com/ProshaperM
Linkedin: https://www.linkedin.com/company/proshaper
6
views
Scout Restoration Series: Fitting a patch panel
https://www.proshaper.com
Our Amazon Storefront:
https://www.amazon.com/shop/proshaper
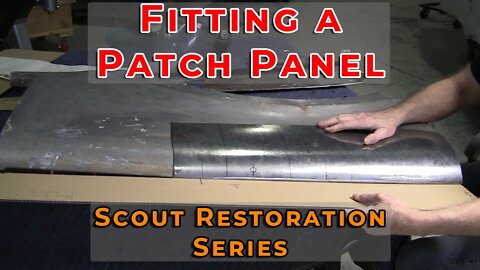
Scout Restoration Series: Fitting a patch panel
In this episode of the Scout Restoration series Wray finished tipping the edges and refining the areas of the fender patch panel. Wray shows the methods used to ensure the edge is not rounded and what tools he used. Now he has marked the area of the scout fender that will be replaced. He cuts the area out and fits the patch panel where it needs to be. To make sure after we weld it that everything flows correctly we made another gauge from the other 66 scout in the shop. In the next episode Wray will be taking out the dents from the fender, cut the front flange off and replace that and hopefully weld it all together! Thank you for watching!
Email: Wray@Proshaper.com
Website: https://www.proshaper.com
Facebook: https://www.facebook.com/ProShaper/
Instagram: https://www.instagram.com/proshaper/
Twitter: https://twitter.com/ProshaperM
Linkedin: https://www.linkedin.com/company/proshaper
2
views

Scout Restoration Series: Tipping edges on patch panel
https://www.proshaper.com
Our Amazon Storefront:
https://www.amazon.com/shop/proshaper
Scout Restoration Series: Tipping edges on patch panel
In this episode of the Scout Restoration series Wray off camera tuned the panel to fit all the gauges. Wray also had me make a Flexible shape pattern of the flange at the top of the fender and combine it with the original F.S.P.We did this because there is a taper on the scout fender and we want to ensure everything fits correctly. Measure measure measure as Wray always says. Once Wray has marked out where the flange will be tipped, he takes the fender patch panel to the tipping wheel. Using he arm as the lever and the wheel as the fulcrum, Wray slowly brings the edge to 90 degrees. You now see that the panel has lost it's arrangement by checking it against the gauges. He then takes the panel over to the Shrinker / Stretcher, shrinking the flange to fit the gauge.
This is when we had audio issues and spent 30 minutes trying to fix the problem so unfortunately we ran out of time and were unable to fully tip the other flange. We hope to add that part in the next video.
At the end of the video we've added how much time each job has taken so far.
Email: Wray@Proshaper.com
Website: https://www.proshaper.com
Facebook: https://www.facebook.com/ProShaper/
Instagram: https://www.instagram.com/proshaper/
Twitter: https://twitter.com/ProshaperM
Linkedin: https://www.linkedin.com/company/proshaper
5
views
Scout Restoration Series: Making a patch panel
https://www.proshaper.com
Our Amazon Storefront:
https://www.amazon.com/shop/proshaper
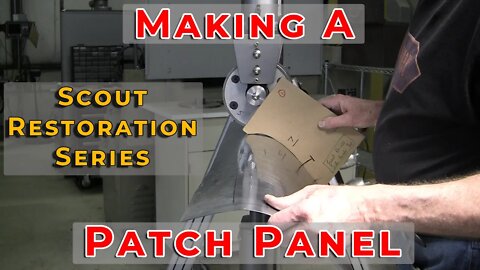
Scout Restoration Series: Making a patch panel
Now that the flexible shape patter and gauges have been made off the Scout 800 fender, Wray removes it from the fender. He dusts off the F.S.P. with plaster of paris to ensure the two sides don't stick together. He then cuts out a blank piece of sheet metal larger than what is needed to use as a lever when wheeling it. Now onto the Youtube English Wheel to add area to the panel. This can be confirmed by how the F.S.P. fits to the panel. Once the area is added, it's time to confirm the arrangement by using the gauges we made. It's a little bit of back and forth to make sure it all fits, but you'll see by the end of this video the shape is nearly there.
At the end of the video we've added how much time each job has taken so far.
Email: Wray@Proshaper.com
Website: https://www.proshaper.com
Facebook: https://www.facebook.com/ProShaper/
Instagram: https://www.instagram.com/proshaper/
Twitter: https://twitter.com/ProshaperM
Linkedin: https://www.linkedin.com/company/proshaper
18
views
Scout Restoration Series: Measuring the surface
https://www.proshaper.com
Our Amazon Storefront:
https://www.amazon.com/shop/proshaper
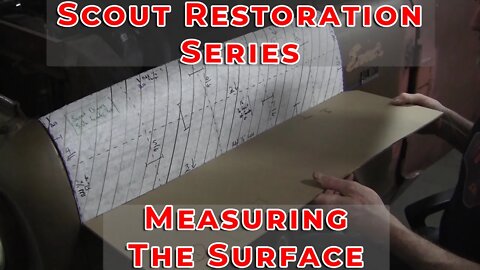
Scout Restoration Series: Measuring the surface
In this installment of the Scout Restoration series Wray had Mark create a partial flexible shape pattern from another scout with an intact fender. Wray explains the process and why he uses a flexible shape pattern instead of a wood or wireform buck. Then he shows the hood from the scout and how it had a lot of surface rust on it. For the rust removal we use Naval jelly, spreading it on the hood with a 1" brush. Depending on how bad the rust is, we usually leave it on for 3 - 24 hours. Once you see the naval jelly turn black, the rust is ready to be scraped off with a putty knife. Most of the time 1 coating of the naval jelly works and other times we need to apply it 2-3 more times. In the next video Wray will take off the Flexible Shape Pattern from the other scout, cut out a blank piece of sheet metal and create the patch panel.
Email: Wray@Proshaper.com
Website: https://www.proshaper.com
Facebook: https://www.facebook.com/ProShaper/
Instagram: https://www.instagram.com/proshaper/
Twitter: https://twitter.com/ProshaperM
Linkedin: https://www.linkedin.com/company/pros...
15
views
Metalshaping / Coachbuilding: Studebaker Racer Build
https://www.proshaper.com
Our Amazon Storefront:
https://www.amazon.com/shop/proshaper
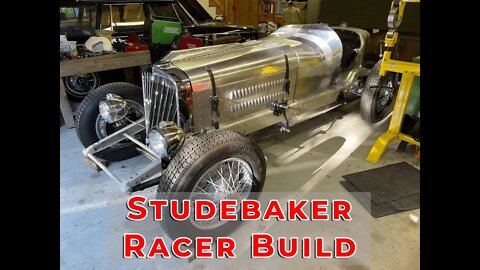
Metalshaping / Coachbuilding: Studebaker Racer Build
Gary Ash has always wanted a 1931/32 Studebaker Indy Car but there were only 6 made and the last one sold for $1 million. So for the last 10 years Gary has been accumulating as much information as possible. He had his chassis built in Indiana and took 2 different metal shaping classes but still hasn't gone anywhere with his car. He finally came to the Proshaper 4 day metal shaping class and spoke to Wray about his project. He signed up for many more classes bringing his project every time and getting closer and closer to completing it. This past weekend Gary started up his prized possession and took it for a ride. This quick video highlights his build.
Email: Wray@Proshaper.com
Website: https://www.proshaper.com
Facebook: https://www.facebook.com/ProShaper/
Instagram: https://www.instagram.com/proshaper/
Twitter: https://twitter.com/ProshaperM
Linkedin: https://www.linkedin.com/company/pros...
12
views
Scout Restoration Series: Removing the Hood and Fender
https://www.proshaper.com
Our Amazon Storefront:
https://www.amazon.com/shop/proshaper
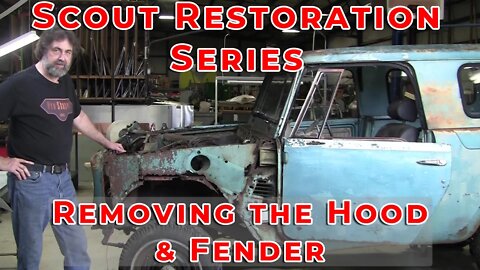
Scout Restoration Series: Removing the Hood and Fender
In this video Wray brought in the 1966 International Scout 800 so we can remove the fender and hood. In this series we are trying to show what problems you will encounter when restoring any automobile. Since the scouts we have were from New England you will encounter a lot of rust. Some panels may need to be remade while others will need a patch panel put in. Taking the fender off we encountered stubborn bolts. With the use of a cut off wheel and a torch we were able to free the fender. The hood was much easier to remove as there were only 6 bolts and they weren't rusted in place. In the next part of the International Scout Restoration we will be tackling the surface rust on the hood and also cutting out the portion of the International Scout Fender to be replaced.
Email: Wray@Proshaper.com
Website: https://www.proshaper.com
Facebook: https://www.facebook.com/ProShaper/
Instagram: https://www.instagram.com/proshaper/
Twitter: https://twitter.com/ProshaperM
Linkedin: https://www.linkedin.com/company/proshaper
32
views
Metal Shaping: International Scout
https://www.proshaper.com
Our Amazon Storefront:
https://www.amazon.com/shop/proshaper
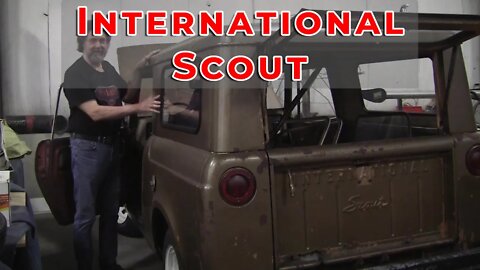
International Scout
Our channel focuses more on coachbuilding than restoration, well we've decided to pivot! Wray has a small collection of International Scouts at the shop. His idea is to show the restoration process from start to finish. At times we will compare restoration using a patch panel vs a complete rebuild of a panel from a piece of sheet metal. Our goal is to bring more awareness to the metal shaping craft, to try and keep it alive.
Email: Wray@Proshaper.com
Website: https://www.proshaper.com
Facebook: https://www.facebook.com/ProShaper/
Instagram: https://www.instagram.com/proshaper/
Twitter: https://twitter.com/ProshaperM
Linkedin: https://www.linkedin.com/company/proshaper
23
views
How to make a Reverse Curve
https://www.proshaper.com
Our Amazon Storefront:
https://www.amazon.com/shop/proshaper
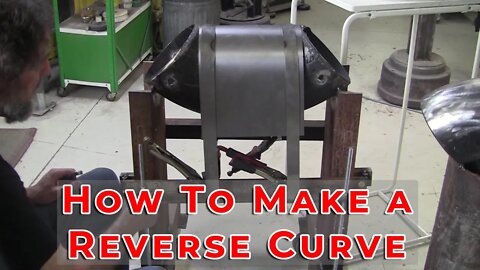
How to make a Reverse Curve
Everyone wants to have the best tools and for the majority of metal shapers that's just not feasible. Wray's goal is to teach people to shape metal without the need for expensive tooling. In this video Wray shows how, with the use of a large diameter pipe elbow and a metal shaping mallet you can create a reverse curve in sheet metal.
Email: Wray@Proshaper.com
Website: https://www.proshaper.com
Facebook: https://www.facebook.com/ProShaper/
Instagram: https://www.instagram.com/proshaper/
Twitter: https://twitter.com/ProshaperM
Linkedin: https://www.linkedin.com/company/proshaper
8
views
Metal Shaping Beads and Panels
https://www.proshaper.com
Our Amazon Storefront:
https://www.amazon.com/shop/proshaper
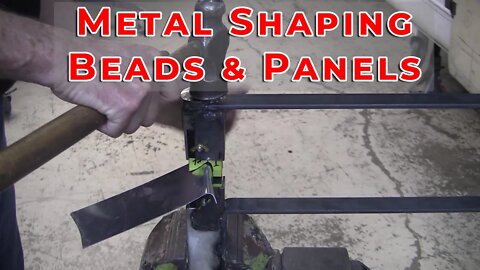
Metal Shaping Beads and Panels
During our last Metal Shaping Class our students were working on Ed's Alfa Romeo and were trying to add the beads to some of the panels. Not everyone can afford a Pexto, so using scrap around the shop Wray fabricated a tool that can create the correct bead in the sheet metal panels.
https://www.proshaper.com
Our Amazon Storefront:
https://www.amazon.com/shop/proshaper
Metal Shaping Beads and Panels
Email: Wray@Proshaper.com
Website: https://www.proshaper.com
Facebook: https://www.facebook.com/ProShaper/
Instagram: https://www.instagram.com/proshaper/
Twitter: https://twitter.com/ProshaperM
Linkedin: https://www.linkedin.com/company/pros...
7
views
1
comment

Alfa Romeo: Students learning how to make compound curves
https://www.proshaper.com
Our Amazon Storefront:
https://www.amazon.com/shop/proshaper
Alfa Romeo Students learning how to make compound curves
After the 4-day metal shaping class where the students helped Ed in building the panels for is Alfa Designed car. We had 6 students total, some had a little bit of metal shaping knowledge while others had none. The panels that were created from our students turned out great! With the help from Ed making all the gages and flexible shape patterns a few days prior to the class, the students were able to jump right in.
Email: Wray@Proshaper.com
Website: https://www.proshaper.com
Facebook: https://www.facebook.com/ProShaper/
Instagram: https://www.instagram.com/proshaper/
Twitter: https://twitter.com/ProshaperM
Linkedin: https://www.linkedin.com/company/pros...
11
views