

YouTube Shadow-banning 4 this Video - Working in the Garden
YouTube is shadow-banning our channel and it started after we posted this video. We were growing the channel at breakneck speed until July 4th when we released this video. The next day our impression rate was reduced to a 10th of what it was. And all of our videos now top out in the first two days before flat lining on impressions.
176
views
2
comments
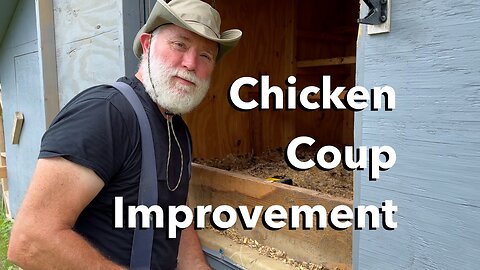
Easy Nest Box Build
The Spring Chickens are large enough to blind with the rest of the flock, and the coups need some improvements. We need to put more nesting boxes in the coups. Currently we have just two official laying boxes and a collection of milk crates that seems to work well enough, but he chickens who have been laying eggs have slowed down their production. We suspect that the few broody hens we have are monopolizing the nest and preventing others from laying. We will continue working on the broody hens, but we also want to add more nesting boxes to allow others access.
We also want boxes that tend to face the hens away from us if they are on the nest. If we lay in some simple boxes just inside the door the chickens will then be faced into the coop. This allows us to reach under from behind and scoop out any eggs they are sitting on, without the chance of being pecked at. So with some scrap wood we have in the barn, and some simple hardware we are going to build a set of removable boxes to cover the doors for the coups.
32
views

Reduce Food Cost by Digging Potatoes
The potatoes went into the ground before the channel began, and they should be ready to dig. Our potato growing to date has been in buckets or small grow bags. This year was the first time we could make enough room to plant a good size bed.
As I started planting, I made one decision that may dramatically impact our yield. I decided to shove in as many rows as possible, so they are only about 8 inches apart. The plan had been to get back into the bed and mound them up before covering them with a straw mulch. Then we got busy with the rest of the garden, the remodeling project, and tree cutting. When we returned to the potatoes, the plants were large and thick, and there was no way to get into the bed to tend the rows. The plant cover was so thick we did not worry about sunburned potatoes.
We had no plan for the expected yield and made last-minute decisions about varieties to plant. The first few rows we planted have grown as long as possible, and the time is right for digging. Our yield is pretty light on these two rows, which may result from the heavy activity of the Colorado Potato Beetles. These potatoes are like gold because their store cost keeps increasing.
______________________________
Bama Country - Country by Kevin MacLeod is licensed under a Creative Commons Attribution 4.0 license. https://creativecommons.org/licenses/by/4.0/
Source: http://incompetech.com/music/royalty-free/index.html?isrc=USUAN1100359
Artist: http://incompetech.com/
131
views
2
comments

How to Can Sweet & Spicy Zucchini Relish
Canning your own condiments is easy. When your zucchini is in full swing, make Sweet & Spicy Zucchini Relish. This simple recipe allows you to store pounds of deliciously preserved squash for the winter. Use this relish to dress up a basic pork chop, baked potato, chicken breast, or even a hot dog. We eat this stuff on everything. Nothing complicated about the prep, cooking, or canning. Anyone with basic kitchen knowledge should be able to prepare this in just a couple of hours.
__________________________________
Sweet & Spicy Zucchini Relish
10 c grated zucchini
4 chopped onion
2 bell peppers
6 jalapeño peppers, chopped
5 T salt
Mix vegetables and salt set 6 hours. Drain and rinse and Putin a large pot.
Add 2 1/2 c apple cider vinegar
3 c. Sugar
2 t. Celery seed
1 t. Black pepper
1 t, red pepper flakes
1 T cornstarch.
Bring to a boil on med/high heat, until it starts to thicken (about 35 min).
Put in sterilized jars leaving 1” headspace, making sure to remove any air bubbles. Water bath at a rolling boil 20 min. Let rest in canner 5 min before removing
80
views
7
comments

Big Reveal of Finished Laundry Room
Our laundry room remodel is almost finished. We are completely renovating a 2001 Fleetwood mobile home, and the laundry room is the smallest part of the project. So far we have demolished the original room down to the studs, rewired the switches and outlets, added new recessed lighting, insulated interior walls, drywalled, painted, and tiled the floor. All that is left is shiplap, trim, and shelving to finish this up. On this project, we use nail guns, miter saws, jigsaws, impact drivers, drills, levels, and six years of remodeling experience complete this transformation.
17
views
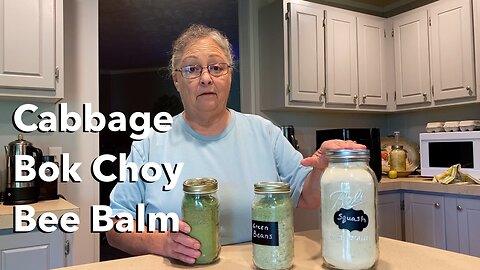
Harvest Never Wasted - 3 Preservation Techniques
We have 4 more large cabbages, several heads of bok choy, and a large harvest of bee balm that will go bad fast. Our garden is only now starting to produce the massive quantity of food we will need for the next year. Preserving that food for long-term storage is essential to a homesteading lifestyle. In past videos, we have used fermentation and pickling to preserve cabbage and cucumbers. All of our fermentation jars are full of sauerkraut that is still fermenting, but we have other options to preserve cabbage. Freezing is a simple method that can lead to freeze-drying at a later date. Freeze-dried foods are easy to powder for long-term shelf-stable food. Drying is an ancient form of preservation made new school with the technology of the freeze drier. Sometimes, such as with the bee balm, the ancient method of simply hanging items to dry works best.
______________________
Guts and Bourbon by Kevin MacLeod is licensed under a Creative Commons Attribution 4.0 license. https://creativecommons.org/licenses/by/4.0/
Source: http://incompetech.com/music/royalty-free/index.html?isrc=USUAN1400032
Artist: http://incompetech.com/
69
views
2
comments

What to do about a weed filled garden
Gardens in summer get weedy. Weed fabric helps control the weeds, but labor is the only way to control the rest of the weeds. Today we have a short window of opportunity without rain. The new mower is charged up. Time to mow down the garden.
27
views
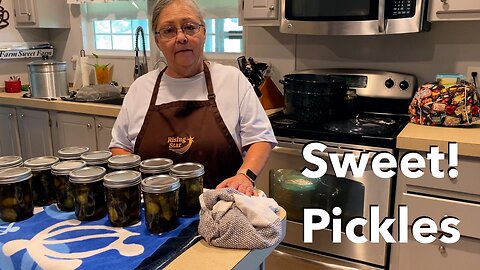
Simple Sweet Pickle Canning
Marti is making sweet pickles. Your garden, or in our case your neighbor, will flood you with produce through the summer. All of this food needs to be eaten or stored. We try to prepare for at least the next year, but we do have food in the pantry still from Nevada. One lesson we learned about canning is to provide as much variety as we can in the pantry. We have more dill pickles in the pantry than we should, but what do you do with all these cucumbers. Sweet pickles provide a nice change of pace on a sandwich.
Good sandwiches need great bread. Nothing in today's grocery store should be called bread. Making your own bread is simple. Marti, likes to use the recipe she found on @SimpleLivingAlaska. This sourdough provides the perfect platform for a ham sandwich with sweet pickles.
__________________________
Sandwich Pickles
Yield 3 pt jars
2 lbs. cucumbers, cut in 1/4” slices
1/2 c kosher salt
3 qts water, divided
1 qt plus 1c. Vinegar5%
1 c brown sugar
1 c granulated sugar
1/2 t. celery seed
1/2 t. Mustard seed
1/2 t. Turmeric
Cut into slices and put in large bowl. Combine salt and 2 qt. Water, stirring until salt dissolves. Pour over cucumber slices. Let stand 2-3 hours or overnight in the refrigerator. Make sure cucumbers are under the water, cover with a plate. Drain cucumbers and rinse under cold running water , then drain
Combine 3 c. Water and 3 c. Vinegar in a large saucepan and bring to a boil. Reduce heat and simmer, then add cucumber slices and simmer 5 min. Drain, discarding the liquid.combine 2 cups vinegar and 1 cup water, brown sugar, granulated sugar, and spices in a large saucepan, simmer 10 minutes. Add cucumber slices and bring mixture to a boil
Ladle hot pickles including liquid, into jars leaving q/2” headspace. Make sure air bubbles are out. Clean rim with vinegar and put on lots and rings, finger tightened. Put in water bath canner (temp of water and pickles should be about the same), making sure jars are covered at least an inch. Canner needs to come to a rolling boil, and boil for 10 min. Then turn off heat and let jars sit 5 min then carefully remove jars with canning tongs, setting on a towel, to start cooling. Jars should start to pop as they cool. If all jars do not seal, clean the rim of jar again, and lid and reprocess again.
80
views
5
comments

Product Review - Greenworks 19in 60V Lawn Mower
We needed a new mower. We chose this smaller mower after looking at all of the larger, more powerful, and heavier mowers, including some that cut the grass for you. The size is essential for cutting between garden beds, and it fits easily around and under plants. We cut most of the lawns with a zero-turn mower, so this is for the smaller areas.
We have hills, so it has to be lightweight. Tall grass and thick weeds require power to cut them down. This Greenworks mower seems to have the right size and power and the price point was within budget. Let's get it out of the box and see how it performs.
83
views

Cottage Garden Tour
Marti spends many hours each week in her art garden, tending the plants and pulling weeds. Learning about each plant, how it grows, and how it can be used is a passion for her. From sweet smells to savory foods and medicinal applications, these plants are more than just beautiful. Marti has been waiting for some of her favorite flowers to show their colors so she could share their beauty with you. She tours her art garden from one end to the other before finishing with a relaxing montage.
22
views

What to do with all that Zucchini
Marti makes an amazing Zucchini Bread. If you have never tried this amazing desert you should whip up a batch. Simple ingredients, simple process, simply delicious. This is a year round favorite on The Return Homestead.
While we use Zucchini for many other dishes, powders (freeze dried), canned goods, the bread is my favorite. Healthy, nutritious, filling, and, yes, sweet. Every year we cut back on the number of Zucchini plants we put in the ground and we are always flooded with squash by mid summer. We don't waste any of it.
____________________________
Zucchini Bread
3 eggs
1 c sugar
1 c oil
2 t vanilla
3 c flour
1 t baking soda
1 t baking powder
1 t salt
1 t cinnamon
3 c grated zucchini
1/2 c nuts
1. Beat eggs and sugar. Add oil and vanilla and mix well.
2.combine all dry ingredients and add to wet mix. Add zucchini and nuts stirring until well mixed.
3. Spoon into 2 greased loaf pans.
4. Bake 350 degrees for 1 hour or until done when checking with toothpick.
33
views
1
comment

6 Things to Consider About Tile
Doing an excellent job of setting tiles needs careful planning. The choices you can confront at a tile store, like Floor and Decore, easily overwhelm homesteaders on a budget. Our past tile projects taught us to consider all the options before spreading the mud on the floor. Tonight is no different. We started talking tile while ripping out the upper cabinets in the laundry room. Tonight we focus our attention on the tile to make the final decisions. Our most significant decisions involved laying out the tile to fit the space. Throughout our conversation, 6 primary characteristics of tile weighed heavily on our choices. Tomorrow we set tile, but tonight let's talk tile.
Homesteading is about more than growing tomatoes and squash. Being a Jack-of-all-trades is a must. The original homesteaders had no contractors living in their communities and no fallback position. They risked everything for a chance to live free and independent. Like you, we depend heavily on the world's systems, but we are changing that one day at a time. We aim to be more self-sufficient at the end of the day than when we woke up. Today that means setting our own tile.
21
views

Best Carrot Cake Ever!
Marti froze most of last year's carrot harvest to make Carrot Cake. Today she is mixing carrots, flour, sugar, eggs, and love, to make my favorite Amish Carrot Cake. Simple ingredients, simple process, simple cake with an amazing flavor profile and a smooth texture that melts in your mouth. Hungry yet?
_______________________________
Marti’s Amish Carrot Cake
1 1/2 c sugar
1 c oil
3 eggs
2 c flour
2 t cinnamon
1 t baking soda
1 t baking powder
1/2 t salt
3 c shredded carrots
Frosting
1 8oz. Cream cheese, softened
2-3 T butter, softened
1 t vanilla extract
4 c powdered sugar
Preheat oven to 350 degrees.
Grease the bottom and sides of 13x9 cake pan and lightly flour
In a large bowl, beat sugar, oil & eggs until blended.
Add flour, cinnamon, soda, baking powder, vanilla, and salt. Blend until smooth.
Stir in carrots and pour into prepared pans.
Bake 40-45 min until done and let cool.
Mix frosting ingredients until smooth, and frost the cake when cooled. Store in refrigerator.
35
views

Take Down Trees that Threaten Your Home
Chainsaws are dangerous and useful. I enjoy making sawdust and today there is lots to make. We want to take down all the trees threatening the guest house. We would hate to finish the remodel and loose the house to a falling tree. The land the trees cover will be useful for orchards, and gardens.
Assessing the risks of using a chainsaw is no simple task. Do your homework. Understand how the saw works and you can use it safely. Today I am going to share some of my thoughts and techniques for sharpening the chain, creating a safe cutting zone, protecting the user, and guiding a tree's fall.
20
views

Easiest Way to Paint the Laundry Room
Texture is on the wall and we need to seal it with a good layer of paint. Nothing fancy here, just doing the work to spread the paint. We decided to use a roller for the walls instead of an airless paint sprayer. The sprayer would have finished the room in minutes, but taken an hour or so to setup and clean up. We will apply two coats of paint to the walls, and the texture on the ceiling needs a little deeper nap on the roller. Anyone can do this to transform any space.
_________________
Lazy Day by Audionautix is licensed under a Creative Commons Attribution 4.0 license. https://creativecommons.org/licenses/by/4.0/
Artist: http://audionautix.com/
Tennessee Hayride by Audionautix is licensed under a Creative Commons Attribution 4.0 license. https://creativecommons.org/licenses/by/4.0/
Artist: http://audionautix.com/
Open Road by Audionautix is licensed under a Creative Commons Attribution 4.0 license. https://creativecommons.org/licenses/by/4.0/
Artist: http://audionautix.com/
8
views
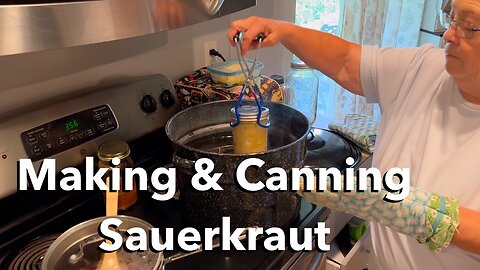
The Simple Way to Make Sauerkraut - Guide for Everyone
We love Sauerkraut. Delicious and healthy for your insides. Our neighbor, who has a wholesale produce business, traded us some LARGE cabbages for eggs. We enjoy Kielbasa, cabbage, and potatoes, but these heads are too large for just the two of us. Simple solution - make Sauerkraut. Marti gives a step-by-step guide to preparing the cabbage, setting up fermentation, and how to can it for shelf-stable storage.
To make extra brine combine 1 quart of water with 1 1/2 tablespoons of salt in a saucepan, stirring until salt dissolved. Bring the brine to a boil. Remove from heat.
_______________
Lazy Day by Audionautix is licensed under a Creative Commons Attribution 4.0 license. https://creativecommons.org/licenses/by/4.0/
Artist: http://audionautix.com/
_________________
18
views

Simple Organic Control of Potato Beetles
We were wrong about the Japanese Beetles. The bugs in our potato patch are Colorado Potato Beetles, a nasty destroyer of nightshades. We are working daily to destroy the beetles before they consume our potatoes. If they eat all the potatoes, they will move on to the tomatoes and peppers. Not Good! This is all out battle, but we will not use any pesticides to win.
13
views

Low Cost Drywall Texture Technique
We are at about the halfway point of finishing the laundry room. The walls are installed, taped, mudded, and will soon be ready for texture. First, we quickly traveled to Lowe's to source material for our shiplap wall. Then we sand the level 2 mud to a smooth finish before demonstrating this amazing drywall texture technique. We have used this method in several other spaces, including Marti's Art Studio. Anyone can get a professional texture finish with no special tools or training.
________________________________________
Lazy Day by Audionautix is licensed under a Creative Commons Attribution 4.0 license. https://creativecommons.org/licenses/by/4.0/
Artist: http://audionautix.com/
Hoedown by Audionautix is licensed under a Creative Commons Attribution 4.0 license. https://creativecommons.org/licenses/by/4.0/
Artist: http://audionautix.com/
15
views

Homestead Approach to Finishing Drywall
Time for Level 2 on the drywall mud. Within the construction industry, drywall finishing is broken into 4 levels. This provides contractors a way to discuss the work and the costs associated with each level, to provide clear expectations for their customers. We borrow their language for our drywall projects but we do not hold ourselves to the same expectations as we would a contractor when it comes to finishing the walls. We can do this any way we want to, and so we do. We plan to level out our level 1 mudding effort with another layer of mud. After sanding we will apply the texture and move on to painting. For today's video, we demonstrate the way we sand our level 1 mud and how we apply the level 2 mud.
15
views
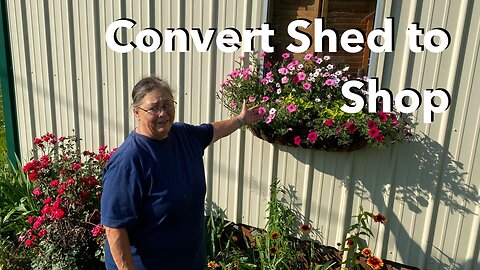
How we turned a shed into and art studio.
We got an amazing barn when we bought The Return Homestead. A 400-square-foot lean-to shed had been added on the southwest side of the barn. The structure had been framed and then covered with a metal roof and siding, making a dry space sufficient for outdoor storage. We used spray foam to seal the holes created by the ribs in the metal. Then we used Reflectix to seek the rafter bays, added insulation to the ceiling, built a dividing wall, and installed a new door. We pulled electrical circuits for lighting and power outlets. After that, we hung drywall, taped, mudded, textured, and painted the newly formed art studio.
25
views

Homestead Update
It has been a busy week, and a lot has improved at The Return Homestead. Take a walk with us as we see what is up with the goats, chickens, garden, and Sunshine.
9
views

DIY Drywall Mud - Screws, Seams, & Corners
We hung the drywall, and now we need to get the mudding started. This is level 1 mudding out of 4 levels. Make sure the screws are fully set. Get the mud hydrated. Take your time, and don't try to do perfectly on the first step.
_________________________
Open Road by Audionautix is licensed under a Creative Commons Attribution 4.0 license. https://creativecommons.org/licenses/by/4.0/
Artist: http://audionautix.com/
_________________________
21
views

DIY Light Install - Super Easy
We are moving forward with the remodel work on the Laundry Room. Our 2001 Fleetwood remodel started in the Laundry Room, and we now need to install new lighting. We want to transform this small space from a dark, depressing closet into a bright workstation. Replacing the dated typical room lighting with multiple slim-line LED ceiling lights is a great solution. The brightness of each light can be adjusted, and they are easy to install. Remodels are more complicated than original installs, but we work around the problems to get the job done.
17
views

5 Step Process to Solve Homesteading Problems
Repairs at The Return Homestead are expected. The more systems we put in place, the more repairs we encounter. Not every repair is on a system we installed, and often the system needing repair is unfamiliar. A little online research helps fill the gaps, and familiarity with essential hand tools, saws, drills, drivers, tape measures, and levels is often enough to do the work. We have a simple 5-step method for problem-solving that helps connect the research to the skills. Today we share our 5-step approach.
9
views
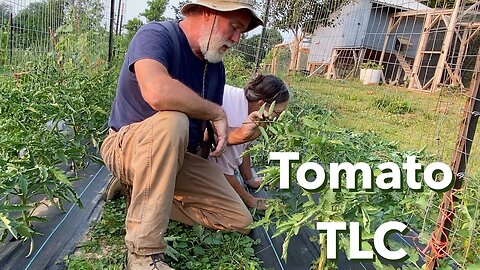
Tomato Talk, Tips for Healthy Harvest
After we trellised the tomatoes, we got busy with other projects, and the plants shot up. Almost every plant has reached the bottom of the trellis and we have plenty of room to prune. Time again to take off lower branches, tie up to the trellis, and talk about why.
12
views