How To Install A Garbage Disposal | Installing an Insinkerator 1/3 HP Garbage Disposal
InSinkerator 1/3 hp Garbage Disposal: https://amzn.to/47C2eeL
Multi Screwdriver: https://amzn.to/3vzY1Lb
Oatey Plumber's Putty: https://amzn.to/3vBlD2a
Electrical Tape: https://amzn.to/3U36QY3
If you don’t know how to install a garbage disposal, it would feel practically impossible. The truth is you don’t need any special tools to install one. In fact, this article will show you that anybody who knows a few DIY basics can install it in about an hour. Read this article to get a hassle-free guide on how to install a garbage disposal.
There are many garbage disposals to choose from. If you haven’t decided on one for your home yet, then I am going to recommend the Insinkerator Badger 1 model. It is ⅓ horsepower, which is plenty of power for your home’s kitchen. Click the link below to take a look at it.
Installing a garbage disposal is easier than you might think. This article is going to show you how to install one if you have electrical power under your sink. There are two forms this power can come in. The first is for there to be a power outlet that is available under the cabinet. The second is for it to have a hardline connection directly to the garbage disposal.
Required Tools:
Oatey Plumber’s Putty
Hacksaw
Flat Screwdriver
Wire Strippers
How To Install a Garbage Disposal in a Double Sink
The steps outlined here include how to install a garbage disposal with and without a dishwasher. If you have a dishwasher connected to your existing garbage disposal, you will follow the steps outlined below for that. If there is no dishwasher connected, skip those steps.
Turn Off The Power
The first step for any job that you are working on anything that has electricity running to it is to turn off the power at the breaker box. This can be easy if you have a well labeled panel. But if it isn’t labeled very well it might be a guessing game.
Test if the power is off before you make any assumptions. The easiest way to do this is to flip on the switch for the garbage disposal. It is safe to begin if it doesn’t come on. Remember to flip it off though, because you don’t want the new garbage disposal to turn on when you turn the power back on.
This is also the right time to remove any products that are in the way. Find a place to put as many of them as possible. You want to have as much working space as you can. For the installation.
Disconnect The Old Garbage Disposal
There will be two screws attached to the discharge pipe. Back those out all the way and set them aside. If there is a dishwasher attached to the disposal this is a good time to remove the hose that attaches it. To do this turn the screw on the pipe clamp counterclockwise until the clamp is loose. Then pull the connection off the garbage disposal.
There are also three screws facing upward just beneath the sink. Loosen each of these about half way. If you use a screwdriver for two of them, the third should be able to loosen by hand. You want to back them out enough to lift the bottom of the bracket up towards the sink.
Once these screws are loose and the drain pipe is disconnected from the garbage disposal, hold the bracket steady with one hand and twist the garbage disposal to the left with the other. This should pop it loose.
After it is movable, take a flat screwdriver to pop off the metal ring that is holding the pieces of this bracket together. To do this first slide all the parts upwards towards the sink. This will allow the ring to be visible. While holding them up with one hand, use a flat screwdriver in your other hand to slide the ring downward.
Is the garbage disposal plugged into a wall outlet, or is it hardlined in? If it’s plugged in you can simply pull the plug out and the garbage disposal will be free to move. You will need to attach a power cord to the new garbage disposal, and may need to reuse the old cord. Both methods are the same from this point on.
If it is hard lined in, you will need to remove the wires before you can lift the disposal away.
To do this simply turn the disposal upside down, or lay it on it’s side with the bottom facing you (whichever one is easier for you). There is a small metal plate with one screw in it near the location the wires go into the bottom. Remove this screw.
There should be two wire nuts, and one grounding wire screw. Remove the wire nuts, and loosen the screw. Once all three wires are free you should be able to pull them out. You may want to clip them close to the location they were twisted if this is easier.
Disclaimer: Only clip them if you have plenty of length on your wire left. Also only do this if you have a wire stripper handy and are comfortable with stripping the wires later. It can be a larger problem if there isn’t enough length to hook up the new disposal.
You also want to remove the connector the wires are going through. There are a couple of screws that can be removed. Once the wires are pulled out you can turn this connector counterclockwise to remove it.
-
 4:19
4:19
Gotchaplumber
1 month agoHow To Install a Garbage Disposal?
3 -
 12:57
12:57
JarHeadFL
2 years agoHow to replace a garbage disposal
32 -
 3:51
3:51
Gotchaplumber
1 month agoHow to install garbage disposal rough in for kitchen sink?
7 -
 4:44
4:44
Gotchaplumber
1 month agoHow To Wire a Garbage Disposal?
2 -
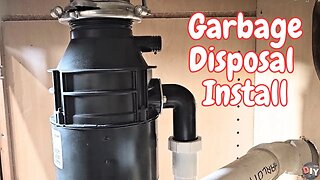 8:16
8:16
Home Repair Hub
1 year ago $0.01 earnedNever Call a Plumber Again: How to Install Your Own Garbage Disposal! Replace Quick Lock
891 -
 0:42
0:42
NT TECH
1 year agoReview: InSinkErator Garbage Disposal with Cord, Badger 1, 13 HP Continuous Feed & WM Harvey 0...
2 -
 2:34
2:34
ALLCHECKOUT
2 years agoWhat's the Best Way to Clean a Garbage Disposal In Short Time Quick And Easy (Insinkerator)?
20 -
 3:51
3:51
ApplianceReviews
11 months agoBANGSON Portable Washing Machine, 17.6 lbs Washer(11Lbs) and Spinner(6.6Lbs), Mini Compact Twin...
61