

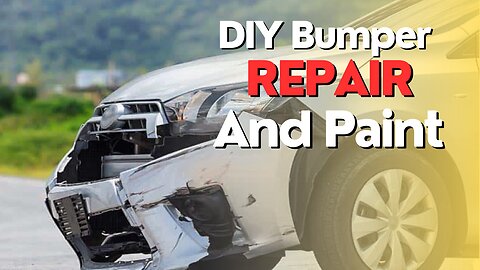
DIY Bumper Repair And Paint A Plastic Bumper Cover | How To Paint A Bumper Cover Solution🎨🖌
If you are interested to learn more about diy bumper repair and paint a plastic bumper cover, you can click: https://rodsshop.org/auto-body-paint/
This video is about diy bumper repair and paint, If you are looking for some other kind of repair info on plastic bumpers, try the following subjects:
-how to paint a bumper cover
-how to repair plastic car bumpers
-bumper repair with plastic welder
One thing I noticed when I was searching for details on diy bumper repair and paint a plastic bumper cover was the lack of relevant details.
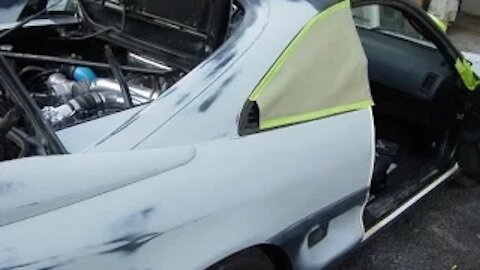
This video, “DIY bumper repair and paint”, covers the damage, how the broken dent was pulled out and I show how to weld the break back together. I used a plastic welder kit that is listed below in tools and materials.
This bumper was repaired on the car, usually it is easier to fix off the car. However, some cars are nightmares to take the plastic bumper covers off. This DIY bumper repair and paint was relatively easy and didn’t take but about a days’ time of repair. That was allowing for the fillers and primers to dry.
--------------
Be sure to check out my YouTube Channel for many more how to fixes: https://youtube.com/c/RodsshopOrg
MATERIALS:
For all your paints, paint codes and supplies - https://rodsshop.org/get/automotive-touchup-paint-codes/
6” DA Self-Adhesive Sandpaper Discs Assortment - https://amzn.to/48MwQev
5 Pack Scotch-Brite Scuffy Pads - https://amzn.to/4aRuUTL
25 Sandpaper Sheets Assorted Grits (80,120,220) - https://amzn.to/3U0iYJH
400 Grit Wet Dry Sanding Sheets - https://amzn.to/48HYJUU
Bondo Bumper Repair Filler Kit - https://amzn.to/3RRr2d0
2k Gray Urethane Primer - https://amzn.to/3TU9Kyz
2K Glamour High Gloss Aerosol Clear - https://amzn.to/3HbIjZc
Extra Strength Painter's Tape - https://amzn.to/47pjLH7
General Purpose Masking Paper - https://amzn.to/4aQ7yxW
Grease/Wax Remover - https://amzn.to/3HiVpE0
Tack Cloth - https://amzn.to/3RW39Ro
Microfiber Cleaning Cloths - https://amzn.to/48sqYYe
If you found this video valuable, give it a like.
If you know someone who needs to see it, share it.
Leave a comment below with your thoughts.
Learn more about RodsShop and or Contact Me: https://rodsshop.org/
Subscribe to my RodsShop Newsletter to keep up with the latest: https://rodsshop.org/join-newsletter/
Join My Q&A Forum: https://rodsshop.org/automotive-forum/
Check out my related videos:
Clear Coat Repair for Under $100: https://youtu.be/3tlD72qW7zA
141
views
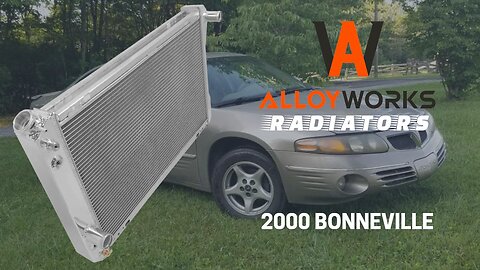
Installing a Radiator 2000 Bonneville - Alloyworks
Shop all Alloyworks Radiators
Get a special discount price by using Coupon Code - RODRADS
Installing a Radiator 2000 Bonneville - Alloyworks Radiators
https://rodsshop.org/get/alloyworks-radiators/
This video shows how to install an Alloyworks Radiator in a 2000 Pontiac Bonneville.
#Alloyworks
Here is a list of some of the tools and other helpful things that can make changing out a radiator in a 2000 Bonneville easier:
https://rodsshop.org/get/alloyworks-overflow-tanks/
Online eManual - Covers Mechanics to Wiring
https://rodsshop.org/get/emanualonline/
Craftsman Tools Extension Bar (1-1/2" Long 1/4" Drive)
https://amzn.to/3OdxXvk
1/4" Drive Air Ratchet
https://amzn.to/44C5fv2
3/8" Drive Air Ratchet
https://amzn.to/3rJCYEg
3/8-Inch Drive Air Impact Gun
https://amzn.to/3Q8uy3i
Precision Hook and Pick Set
https://amzn.to/44ZNiGC
Transmission Oil Cooler Line Disconnect Tool
https://amzn.to/3Y5hYnk
Check Out My Channel:
https://goo.gl/9WOYat
Learn more about RodsShop and or Contact Me:
https://rodsshop.org/
Subscribe to my RodsShop Newsletter to keep up with the latest:
https://rodsshop.org/join-newsletter/
Join my Q&A Forum:
https://rodsshop.org/automotive-forum/
Check out my related videos:
How To Replace A Electric Window Regulator - https://youtu.be/fw7f_urPxhg
Know when to replace your car battery - https://youtu.be/yCO7O_h3CKc
How to know if an engine is bad - https://youtu.be/OeHVs__9ONs
Follow me and Like me on Facebook:
https://www.facebook.com/rodsshopsolutions
Follow me on Twitter:
https://twitter.com/rodsshop_org
Follow me on Instagram:
https://www.instagram.com/rodsshop/
84
views
1
comment

Winterizing Your Car: ⛄Top Tips for a Safe and Snowy Season⛄⛄
Get your car ready for winter with these essential tips: check tire pressure, inspect the battery, and prepare an emergency kit. Watch now! #CarCare #WinterPreparation
40
views

How To Jump Start A Car - Fully Explained
Jumper Cables, Heavy Duty with Carrying Bag 16ft 4-Gauge
https://amzn.to/38H6VrC
Jumper Cables, Heavy Duty with Carrying Bag 16ft 2-Gauge
https://amzn.to/3tesPMp
Battery Jump Options: https://amzn.to/38Vqltb
Battery Terminal Cleaning Brush and 10pcs Anti Corrosion Washers Fiber Protector
https://amzn.to/3DHrJ0B
Battery Cleaner with Acid Indicator and Terminal Protector Package
https://amzn.to/3BCdN5W
12V Car Battery Tester, Alternator Tester Analyzer
https://amzn.to/3DKCIWZ
There are many videos on how to jump start a car, however I am explaining it a little in reverse. All the manuals and videos tell you to hook up your jumper cables to the vehicle that will be providing the charge first. Then hook the cables up to the vehicle that needs the boost. It says to hook your ground cable to anything grounded but the battery terminal. All I can say is they can stick this stupid inaccurate information.
The best way is to hook your cables to the dead battery first. Hook the jumper cables straight onto the battery terminals. If the battery is dead or weak and you do not have the cables hooked to anything on the other end, then there can be no sparks or danger.
I have used this method on how to jump start a car for over 40 years and it has always worked and never had any issues.
For materials and tools, follow this link:
https://rodsshop.org/automotive-battery-and-charging/
Learn how to properly place your vehicle in the correct position to get the shortest distance between the batteries for the fastest charging. Learn what the best jumper cable is to use for jumping off a car.
Feel free to share this video:
https://youtu.be/4xF2dP5ktaU
Check Out My Channel:
https://goo.gl/9WOYat
Learn more about RodsShop and or Contact Me:
https://rodsshop.org/
Subscribe to my RodsShop Newsletter to keep up with the latest:
https://rodsshop.org/join-newsletter/
Join My Q&A Forum:
https://rodsshop.org/automotive-forum/
Check out our related videos:
Know when to replace your car battery - https://youtu.be/yCO7O_h3CKc
How To Replace A Electric Window Regulator - https://youtu.be/fw7f_urPxhg
Follow me and Like me on Facebook:
https://www.facebook.com/rodsshopsolutions
Follow me on Twitter:
https://twitter.com/rodsshop_org
Follow me on Instagram:
https://www.instagram.com/rodsshop/
301
views
1
comment
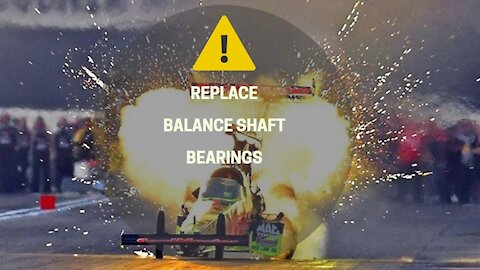
GM Buick 3800 Balance Shaft Bearings - 1995 thru 2005 Replacement
https://rodsshop.org/get/auto-mechanic-pro/
Wanting to replace the front roller bearing on a GM Buick 3800 Balance Shaft, from 1995 to 2005? This video explains how you can replace just the bearing instead of trying to buy a whole new shaft.
Need the correct engine torque specifications for rebuilding your 3800?
https://rodsshop.org/buick-3800-engine-torque-specifications/
All parts and tool links are listed here below -
Balance Shaft Bearing - Rear Bushing: https://amzn.to/38tfuGu
Balance Shaft Front Roller Bearing: https://amzn.to/3jCuLvb
GM Engine Balance Shaft Gear: https://www.gmpartsdirect.com/oem-parts/gm-driven-gear-24503524
GM BALANCE SHAFT (Include Front Bearing): https://www.wholesalegmpartsonline.com/products/BALANCE-SHAFT/2997868/24506557.html
Bearing Separator Set: https://amzn.to/3jyqrwW
Small Bearing Separator: https://amzn.to/3kI04no
https://rodsshop.org/how-to-paint-a-car/
Torque on the Balance Shaft Sprocket To Balance Shaft is:
16ftlbs plus Additional 70 Degrees; Torque Angle Gauge Required
Torque Angle Gauge: https://amzn.to/3js17sd
The only videos you can find out there are how to delete the balance shaft. This is commonly done so that double roller timing components can be added. However, once you do that, the engine looses its balancing.
In this case, this is a factory rebuild, so the customer wants to keep the balance shaft. I figured there are others that feel the same way, so I made this video on how to replace GM Buick 3800 Balance Shaft Bearings.
Feel free to share this video:
https://youtu.be/TbHhGuVsL5M
Check Out My Channel:
https://goo.gl/9WOYat
Learn more about RodsShop and or Contact Me:
https://rodsshop.org/
Subscribe to my RodsShop Newsletter to keep up with the latest:
https://rodsshop.org/join-newsletter/
Join My Q&A Forum:
https://rodsshop.org/automotive-forum/
Check out our related videos:
Testing Super Clean Products - https://youtu.be/8yzgbjfYqeY
How to know if an engine is bad - https://youtu.be/OeHVs__9ONs
Follow me and Like me on Facebook:
https://www.facebook.com/rodsshopsolutions
Follow me on Twitter:
https://twitter.com/rodsshop_org
Follow me on Instagram:
https://www.instagram.com/rodsshop/
130
views
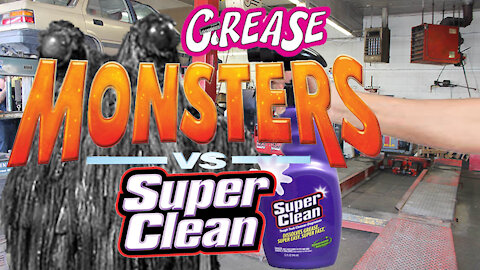
Testing Super Clean Products
Testing Super Clean Products
Get the best degreaser and related products from Super Clean, links below for each product.
See how Super Clean products work great in an automotive shop but is very useful in many other areas as well. I have been using Super Clean degreaser since the mid 80's. It works great for detailing engine compartments. Super Clean works great cleaning engine or transmission parts. Many cleaning solvents leave oily residues that can hurt automatic transmissions or even engines. So it is best to remove all like residues, Super Clean strips the metals back down to being like new.
Super Clean Floor Absorbent is far better than most oil dry's, its fine made absorbent actually removes most of the oil film that others leave. The Super Clean aerosol works great on a final floor cleaning. It works great on ovens and stove drip trays and more.
Super Clean Multi-Surface All Purpose Cleaner Degreaser, Full Concentrate, Scent Free, 32 Ounce
https://amzn.to/3xSmp6t
Super Clean 1gal Super Clean Degreaser
https://amzn.to/37VYs3n
Super Clean Multi Surface All Purpose Gunk Remover Aerosol Degreaser, 17oz
https://amzn.to/3k4Zik3
Super Clean Foaming Multi-Surface All Purpose Cleaner Degreaser Spray, Full Concentrate, 32 ounce
https://amzn.to/3mhrWBc
Superclean 3 lbs Absorbent Floor Dry Cleaner
https://amzn.to/3AQe1WS
Feel free to share this video:
https://youtu.be/8yzgbjfYqeY
Check Out My Channel:
https://goo.gl/9WOYat
Learn more about RodsShop and or Contact Me:
https://rodsshop.org/
Subscribe to my RodsShop Newsletter to keep up with the latest:
https://rodsshop.org/join-newsletter/
Join my Q&A Forum:
https://rodsshop.org/automotive-forum/
Follow me and Like me on Facebook:
https://www.facebook.com/rodsshopsolutions
Follow me on Twitter:
https://twitter.com/rodsshop_org
Follow me on Instagram:
https://www.instagram.com/rodsshop/
119
views
1
comment

Donate your car to charity
https://rodsshop.org/donating-your-car/
On occasions my shop like others gets a car that just isn't worth putting the money into due to it being too far gone. Often a customer will ask what to do with the car. Selling it or hauling it off really is kind of a hassle, so I usually suggest donating it to a charity. RodsShop has a page with a list of charities that you can donate a vehicle to. so if you have any type of vehicle setting around collecting dust or costing you to store it, you might consider donating it.
Read more about it and view list:
https://rodsshop.org/donating-your-car/
Visit RodsShop: https://rodsshop.org/
Join our Q&A Forum:
https://rodsshop.org/automotive-forum/
Follow me and Like me on Facebook:
https://www.facebook.com/rodsshopsolutions
Follow me on Twitter:
https://twitter.com/rodsshop_org
Follow me on Instagram:
https://www.instagram.com/rodsshop/
92
views
Paint Your Car Yourself
Paint Your Car Yourself
https://rodsshop.org/auto-body-paint/
Follow this link and get your free Auto Body Repair Guide and Tips book. Learn the pro secrets..
This Paint Your Car Yourself video is not a step by step process but to show that anyone can paint a car like a professional from their home. I will explain further steps below on what, how and why I did to get the eye popping finish you see in this video.
Paint Your Car Yourself video is to show how anyone can paint a car at home. This Miata was brought to me by a friend to see if I could revive it and save it. It had been painted by a company called Macco, not sure if they are national or not but it is one of those places that offers low priced paint jobs. Never go to these type places unless you want your car ruined!
Anyone can build a homemade paint booth, all you need is a roll of 20x100 roll of plastic, some 2x4’s, tape, a fan and central heat and air filter. If you do not have a garage, you can buy a 10x20 portable garage from Harbor Freight Tool Company and those make great paint booths. Either from constructing one in your garage or a portable garage, just make sure you have a filtered air inlet and an exhaust fan pulling the paint out.
For materials used and guides, follow these links:
https://rodsshop.org/auto-body-paint/
https://rodsshop.org/auto-body-tools-and-supplies/
Feel free to share this video:
https://youtu.be/efL6E9koDjA
Check Out My YouTube Channel:
https://goo.gl/9WOYat
Learn more about RodsShop:
https://rodsshop.org/
Join our Q&A Forum:
https://rodsshop.org/automotive-forum/
Check out our related videos:
Learn Auto Body and Paint - https://youtu.be/UhxqSYV9G9Y
Collision Repair By RodsShop - https://youtu.be/qtw8rvXEnLo
2000 Mazda Miata Repaint Project - https://youtu.be/RBRnz7FXQlY
689
views
2
comments

How To Wet Sand A Car
How to wet sand in auto body
https://rodsshop.org/how-to-paint-a-car/
Quite often Do-It-Yourself mechanics and car enthusiast want to attempt auto body repair and paint a car but are usually hesitant because the fear of messing up or just the lack of information available. Currently you can get a course that will have you spray painting like an experienced auto body tech in two hours or less. https://rodsshop.org/how-to-paint-a-car/
Act now and not only will you get a very informative FREE guide and tips book on Auto Body and Paint, but you will also get a FREE guide on MIG Welding and how to use it doing Auto Body Repairs.
As always, please LIKE and SUBSCRIBE!!!!
If you found this video valuable, give it a like.
If you know someone who needs to see it, share it.
Leave a comment below with your thoughts.
Add it to a playlist if you want to watch it later.
Now You Can Learn Professional Spray Painting & Body Work Repair In 2 Hours With Step-By-Step Complete Video Training. Auto Body and Paint looks like art, but it’s really a skill that anyone can learn.
Finally, a comprehensive, step-by-step course that leads you by the hand and reveals all the secrets of professional quality spray painting and bodywork.
Act right now and you will get my Auto Body Repair Guide and Tips eBook for FREE. This is not one of those useless info manuals. I wanted to make sure that this eBook can walk you through all that you need to know on how to setup a spray gun, how to clean it, how to spray it. Plus I cover some tricks of the trade on masking, how to do dents repairs both traditional and paintless dent repair tricks.
As an added bonus, you will also get an excellent guide and tips eBook on MIG Welding. This is very good information to have if you have the need to weld doing auto body repairs.
https://rodsshop.org/how-to-paint-a-car/
Feel free to share this video:
https://youtu.be/9lS9jK-v1v8
Check Out My Channel:
https://goo.gl/9WOYat
Learn more about RodsShop and subscribe to my newsletter and get your Free Auto Repair Guide: https://rodsshop.org/
Join our group forum Q&A:
https://rodsshop.org/automotive-forum/
Check out our related videos:
How To Mix Body Filler: https://youtu.be/BTkv1sRNi14
How To Fix Peeling Clear Coat Truth Revealed: https://youtu.be/c7g07zHK6EY
1970 Duster Quarter Panel Patch Panel Install: https://youtu.be/i1eJOGNNcRU
Follow me and Like me on Facebook:
https://www.facebook.com/rodsshopsolutions
Follow me on Twitter:
https://twitter.com/rodsshop_org
Follow me on Instagram:
https://www.instagram.com/rodsshop/
767
views

How to make a collision repair on a budget
https://rodsshop.org/auto-body-paint/
See how to make a collision repair on a budget. Often body shops will want to buy body parts at high prices plus repaint your entire car when that isn't always necessary. See how I took this 2001 Nissan Sentra and stretched the dollar by getting used parts and painting only what needed to be painted and still get a job better looking than most professional shops provide.
Get Your FREE Auto Body Repair Guide and Tips
https://rodsshop.org/free-auto-body-repair-guide-and-tips/
Auto Body Tools and Supplies
https://rodsshop.org/auto-body-tools-and-supplies/
Auto Body Collision Parts
https://rodsshop.org/get/partsgeek/
Auto Body and Paint Course
https://rodsshop.org/auto-body-paint/
You'll discover how to make a collision repair on a budget is still doing body work as you would on any type of job. It isn't magic in a can or just using spray can products. If you are looking for something magical or a quick-fix, this isn't the video for you. However, you can use aerosol products if you do not have a compressor. View Aerosol Products Here:
https://rodsshop.org/get/automotive-touchup/
This video should help you understand how to save on materials and whether to buy used or new parts. Spending too much time fixing a used part isn't really saving money. Maybe it saves the dollar amount, however if you have to use your time and materials on getting a body panel ready to paint, that cuts into your savings.
This video goes over methods to save money on auto body repairs. Please contact me if you are not finding your automotive paints inexpensively enough.
If you would like to know how to tackle a paint job like this either as a one time project or if you are considering making auto-body a serious hobby or even considering auto-body a profession. You can now learn this trade and all the secrets of getting an eye popping finish from your own home and not even at a fraction of what a school would run you. I am promoting two different courses. One is great for a simple project and can put you on your way of painting like a pro, the other is a very in-depth course and can teach this skill as a new trade. Check these out:
https://rodsshop.org/auto-body-paint/
https://rodsshop.org/how-to-paint-a-car/
For materials used and guides, follow these links:
https://rodsshop.org/auto-body-tools-and-supplies/
You can cut the cost on collision repairs by using used brackets, used parts and only priming damaged areas and painting only what needs to be painted. It will be hard to cut the cost on frame bending if you vehicle requires it but doing everything else on your own can cut your bill by thousands.
How to make a collision repair on a budget relies on what kind of job you expect in the end. If you want a show job, expect to pay for that kind of quality. In this video, I turned a car that really needed a complete paint job and that cost, down to painting a third of it and keeping the cost down to something affordable.
Feel free to share this video:
https://youtu.be/awtz22erROE
Check Out My YouTube Channel:
https://goo.gl/9WOYat
Learn more about RodsShop and or Contact Me:
https://rodsshop.org/
Subscribe to my RodsShop Newsletter to keep up with the latest:
https://rodsshop.org/join-newsletter/
Join our Q&A Forum:
https://rodsshop.org/automotive-forum/
Check out our related videos:
Learn Auto Body and Paint - https://youtu.be/UhxqSYV9G9Y
How To Fix Peeling Clear Coat Truth Revealed - https://youtu.be/c7g07zHK6EY
2000 Mazda Miata Repaint Project - https://youtu.be/RBRnz7FXQlY
Follow me and Like me on Facebook:
https://www.facebook.com/rodsshopsolutions
Follow me on Twitter:
https://twitter.com/rodsshop_org
Follow me on Instagram:
https://www.instagram.com/rodsshop/
981
views
3
comments
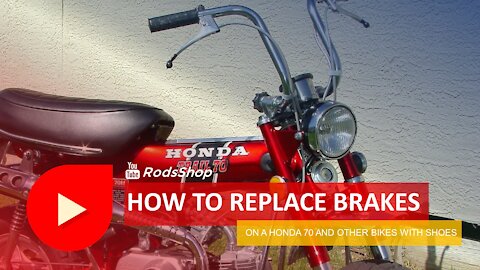
How To Replace Brakes On A Honda 70
https://rodsshop.org/get/cms-honda/
Many people are afraid to work on mini-bikes, small bikes and motorcycles in general. I actually find them easier to work on than cars. This video covers how to replace brakes on a Honda 70, but this can apply to all Honda small mini-bikes to even the larger bikes. My Honda 450 has the exact same brake design for the rear. This also covers more than just Honda's. All the other Japanese motorcycle manufacturers such as Yamaha, Kawasaki, Suzuki use the same type designs.
https://rodsshop.org/get/cms-motorcycle-parts/
Please leave me a comment or contact me through my website if you have questions or need help.
https://rodsshop.org/contact/
Doing brakes on a motorcycle needs accurate and precise attention due to how crucial it is for you to be able to stop. Never use the wrong kind of tools to work on any motorcycle, big or small. I personally feel motorcycles are easier to work on than car and trucks are but even still, motorcycle repair rates are higher and require an education before techs are tuned loose on them.
There is a reason why they demand that motorcycle mechanics have training. This is to weed out the greasy Eddie shade tree rednecks that want to use carpentry tools, nails and wood screws for auto type repairs. Motorcycles are fined tuned machines and everything on them has to be in good working order before trusting your life to them to ride.
For any tools that may have been used in this video, you can find on my site:
https://rodsshop.org/automotive-resources/
Feel free to share this video:
https://youtu.be/d6JAGWF3uqI
Check Out My YouTube Channel:
https://goo.gl/9WOYat
Learn more about RodsShop and or Contact Me:
https://rodsshop.org/
Subscribe to my RodsShop Newsletter to keep up with the latest:
https://rodsshop.org/join-newsletter/
Join our Q&A Forum:
https://rodsshop.org/automotive-forum/
Follow me and Like me on Facebook:
https://www.facebook.com/rodsshopsolutions
Follow me on Twitter:
https://twitter.com/rodsshop_org
Follow me on Instagram:
https://www.instagram.com/rodsshop/
130
views
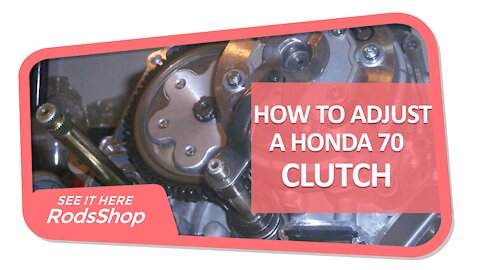
Honda Mini Trail Automatic Clutch Adjustment
https://rodsshop.org/get/cms-honda/
This is a quick video on the procedure for Honda Mini Trail clutch adjustments. Many of the older Honda small bikes were automatic clutches, meaning that you gear shifter is what engaged the clutch instead of a hand lever on the handlebars. This will cover Honda QA50, Z50, CRF50, XR50,C70, CT70, CL70, CRF70, XR70, ATC70, CT90, CL90, CT110
https://rodsshop.org/get/cms-honda/
The Honda CT70 in this video was revived from sitting, stored away for over 12 years. It needs a complete overhaul and the clutch disc are near their end of life. However, the procedure that is shown in this video is exactly how you adjust these type clutches on the Honda Mini Trails.
I think some of the other manufacturers such as Yamaha and Kawasaki also use a similar type clutch. If you have run across this with other brand bikes, please leave a comment and I will add this to the description to help other folks out with this as well.
You will see that there are two methods I use to adjust the automatic clutch. One is with it running and the other is with it off. Either method works fine for getting you to a base start. I recommend after making this initial adjustment, to ride it and ensure it is shifting the way you want it. You can tweak your adjustment by turning the screw very little in between test rides. If you feel the clutch is not engaging fully and makes shifts hard, you can turn the screw between 1/32 to 1/16 counter clockwise. If you feel the clutch is slipping, turn it the same but clockwise.
Check out my other related video:
How To Replace Brakes On A Honda 70:
https://youtu.be/d6JAGWF3uqI
For tools and guides that might help, visit:
https://rodsshop.org/automotive-resources/
Feel free to share this video:
https://youtu.be/mq6JEw7WULU
Check Out My YouTube Channel:
https://goo.gl/9WOYat
Learn more about RodsShop and or Contact Me:
https://rodsshop.org/
Subscribe to my RodsShop Newsletter to keep up with the latest:
https://rodsshop.org/join-newsletter/
Join our Q&A Forum:
https://rodsshop.org/automotive-forum/
Follow me and Like me on Facebook:
https://www.facebook.com/rodsshopsolutions
Follow me on Twitter:
https://twitter.com/rodsshop_org
Follow me on Instagram:
https://www.instagram.com/rodsshop/
136
views
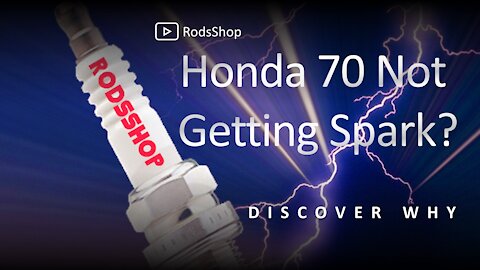
Honda 70 not getting spark
https://rodsshop.org/get/cms-honda/
Is you Honda 70 not getting spark to the engine? Watch the diagnostic procedures on how to track down the cause of your small Honda Mini Trail not getting fire to the engine.
https://rodsshop.org/get/cms-honda/
In most cases, the points and or condenser are the culprit to why these small engines lose spark to the spark plug. However, other components such as the spark plug, spark plug wire, spark plug ignition coil to the magneto coil itself can go bad without notice.
In this video, you will see how I diagnose each electrical ignition part to see if it is good or bad. You will also see how to adjust the points and how to install a condenser. I also use and mention various tools that I used to help fix this Honda CT70. Please see below for a list of tools.
Magneto Flywheel Puller: https://amzn.to/3rOUzVW
Multi-Tester: https://amzn.to/3rhklSB
Ignition Feeler Gauge: https://amzn.to/2YCGMoO
Soldering Iron: https://amzn.to/3rd73X7
Inline Spark Tester: https://amzn.to/3ajQpPQ
Electronic Silver Solder: https://amzn.to/3jMV1kK
For any additional tools you may need:
https://rodsshop.org/automotive-tools-and-supplies/
Feel free to share this video:
https://youtu.be/oRQr-GGoZQ4
Check Out My YouTube Channel:
https://goo.gl/9WOYat
Learn more about RodsShop and or Contact Me:
https://rodsshop.org/
Subscribe to my RodsShop Newsletter to keep up with the latest:
https://rodsshop.org/join-newsletter/
Join My Q&A Forum:
https://rodsshop.org/automotive-forum/
Check out my related videos:
Honda Mini Trail Automatic Clutch Adjustment - https://youtu.be/mq6JEw7WULU
How To Replace Brakes On A Honda 70 - https://youtu.be/d6JAGWF3uqI
Follow me and Like me on Facebook:
https://www.facebook.com/rodsshopsolutions
Follow me on Twitter:
https://twitter.com/rodsshop_org
Follow me on Instagram:
https://www.instagram.com/rodsshop/
125
views
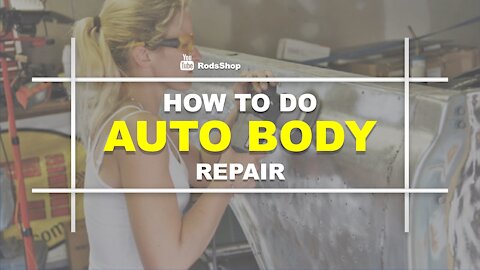
How To Do Auto Body Repair
https://rodsshop.org/auto-body-paint/
If you are an automotive Do-It-Yourselfer, you have probably wanted to learn auto body repair. There are too many wannabe's that handout the wrong information on how to do auto body repair correctly. This video shows some steps on how to make dent repairs using tools and fillers. The sanding process and spraying primer on a 2002 Volkswagen Beetle.
Get my Auto Body Repair Guide and Tips book free:
https://rodsshop.org/auto-body-paint/
In this video, I am working on a customer's 2002 VW Bug. The car needed the passenger door replaced, the rocker panel repaired and the rear bumper had peeling clear coat. I go over all three of these type repairs.
You will also see an example of using one of the paintless dent repair tools. If you can pull dents out without having to sand down the paint, the better.
This video goes over some steps in auto body repair but if you are wanting to learn Auto Body and Paint from A to Z and paint like a pro and better than most professional shops, you need to go check out this course.
https://rodsshop.org/auto-body-paint/
If you would like to know how to tackle a body job like this either as a one time project or if you are considering making auto-body a serious hobby or even considering auto-body a profession. You can now learn this trade and all the secrets of getting an eye popping finish from your own home and not even at a fraction of what a school would run you. I am promoting two different courses. One is great for a simple project and can put you on your way of painting like a pro, the other is a very in-depth course and can teach this skill as a new trade. Check these out:
https://rodsshop.org/auto-body-paint/
https://rodsshop.org/how-to-paint-a-car/
For materials used and guides, follow these links:
https://rodsshop.org/auto-body-tools-and-supplies/
https://rodsshop.org/welding-tools-and-supplies/
I show priming the door panel, I didn't show how many coats. When I do this much body work to a panel, I usually apply three heavy coats. Then block it down by wet sanding it with 220 grit paper. I always use urethane primer and block sanded twice.
This video doesn't go over the painting process, as this is a body work video. I will be doing a video soon on painting, so stay tuned.
Feel free to share this video:
https://youtu.be/wrYqT3My8F0
Check Out my YouTube Channel:
https://goo.gl/9WOYat
Learn more about RodsShop and or Contact Me:
https://rodsshop.org/
Subscribe to my RodsShop Newsletter to keep up with the latest:
https://rodsshop.org/join-newsletter/
Join our Q&A Forum:
https://rodsshop.org/automotive-forum/
Check out my related videos:
How To Wetsand - https://youtu.be/9lS9jK-v1v8
How To Fix Peeling Clear Coat Truth Revealed - https://youtu.be/c7g07zHK6EY
How To Mix Body Filler - https://youtu.be/BTkv1sRNi14
Follow me and Like me on Facebook:
https://www.facebook.com/rodsshopsolutions
Follow me on Twitter:
https://twitter.com/rodsshop_org
Follow me on Instagram:
https://www.instagram.com/rodsshop/
1.2K
views
1
comment
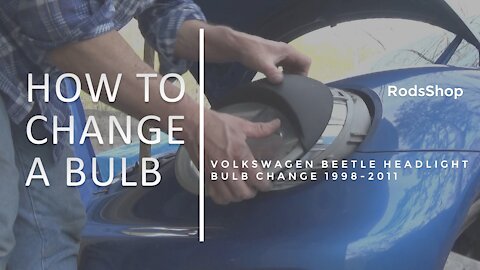
How To Change A VW Beetle Headlight Bulb
https://rodsshop.org/how-to-paint-a-car/
If you have a Volkswagen Beetle between 1998 and 2011, toy may find that changing the headlight bulbs isn't as easy as you think it would be. In fact it may look like a complete mystery to some. But not to worry, the method is a little ridiculous but easier than you may think.
https://rodsshop.org/how-to-paint-a-car/
In this video, you will see how you remove the entire headlamp assembly by sliding it out forward. Thus giving you access to the rear of the assembly where you will find the door to change the actual bulbs.
Between the years of 1998 and 2002, there is a thicker black lever you flip upward to release the headlamp assembly. 2003 and up they made the lever a little smaller, made it white and even has direction printed next to it. The earlier years was a little less obvious and the assemblies didn't slide in and out as easy, as you can see in this video.
If you would like to know more about body work or even how to paint. Either as a one time project or if you are considering making auto-body a serious hobby or even considering auto-body a profession. You can now learn this trade and all the secrets of getting an eye popping finish from your own home and not even at a fraction of what a school would run you. I am promoting two different courses. One is great for a simple project and can put you on your way of painting like a pro, the other is a very in-depth course and can teach this skill as a new trade. Check these out, plus get your free copy of my eBook which is Auto Body Repair Guide and Tips:
https://rodsshop.org/auto-body-paint/
https://rodsshop.org/how-to-paint-a-car/
Are you in the need for auto body tools?
https://rodsshop.org/auto-body-tools-and-supplies/
Feel free to share this video:
https://youtu.be/1jv6V4Aumwg
Check Out My YouTube Channel:
https://goo.gl/9WOYat
Learn more about RodsShop and or Contact Me:
https://rodsshop.org/
Subscribe to my RodsShop Newsletter to keep up with the latest:
https://rodsshop.org/join-newsletter/
Join my Q&A Forum:
https://rodsshop.org/automotive-forum/
Check out my related videos:
How To Do Auto Body Repair - https://youtu.be/wrYqT3My8F0
How To Fix Peeling Clear Coat Truth Revealed - https://youtu.be/c7g07zHK6EY
How to wet sand in auto body - https://youtu.be/9lS9jK-v1v8
Follow me and Like me on Facebook:
https://www.facebook.com/rodsshopsolutions
Follow me on Twitter:
https://twitter.com/rodsshop_org
Follow me on Instagram:
https://www.instagram.com/rodsshop/
241
views
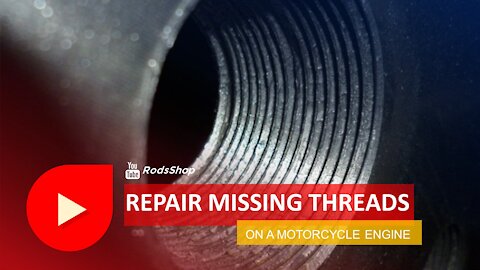
How Do You Repair Missing Threads On A Motorcycle Engine
https://rodsshop.org/get/cms-motorcycle-parts/
Motorcycles always seem to take abuse, and usually it is the engine crankcase that takes the brunt. In this video, I am working on a Honda CT70 that the bottom thread for the side cover has been busted off. It was caused by the drive chain jumping off and bunching up behind the side cover. This broke the side cover and broke the ear with the threads off. Watch how I repaired missing threads.
https://rodsshop.org/get/cms-motorcycle-parts/
It is common on motorcycles for the threads to be stripped out. In that situation, repairing the threads with a "Helicoil Thread repair kit is common. But if the aluminum has been busted away, a thread repair kit will not help.
You will see in this video, how I used an aluminum threaded rivet and put it in the place of the missing threads. I used a MIG Welder to spot the rivet in place, but I explain that you can use an epoxy like J.B. Weld instead. If the hole that you need to fix isn't required to hold a lot of stress, epoxies will work just fine.
Here is a list of tools and material I used to make this repair in this video:
Carbide Rasp Set-5pcs - https://amzn.to/2OhpCeO
Die Grinder - https://amzn.to/3sV0fOG
Aluminum Brazing Rods - https://amzn.to/3cifzyp
Propane Torch Kit - https://amzn.to/2PH4UFD
Oxygen MAPP Torch Kit - https://amzn.to/3v3OA1T
Eastwood MIG 135 Welder - https://amzn.to/3boVwPn
Aluminum Welding Wire - https://amzn.to/3qxijge
Aluminum Alloy Rivet Assortment - https://amzn.to/3ruiYjW
J-B Weld 8265S Reinforced Epoxy - https://amzn.to/2O5OBC5
For more tools for this type of work - https://rodsshop.org/automotive-resources/
Check Out My YouTube Channel:
https://goo.gl/9WOYat
Learn more about RodsShop and or Contact Me:
https://rodsshop.org/
Subscribe to my RodsShop Newsletter to keep up with the latest:
https://rodsshop.org/join-newsletter/
Join my Q&A Forum:
https://rodsshop.org/automotive-forum/
Check out my related videos:
Honda 70 Not Getting Spark - https://youtu.be/oRQr-GGoZQ4
Honda Mini Trail Automatic Clutch Adjustment - https://youtu.be/mq6JEw7WULU
How To Replace Brakes On A Honda 70 - https://youtu.be/d6JAGWF3uqI
186
views

Suzuki DRZ400S Not Getting Enough Gas
https://rodsshop.org/get/cms-motorcycle-parts/
Suzuki DRZ400S Not Getting Enough Gas
This bike is known for running lean and having to have the carburetor adjusted to run richer. But before you start working on the carburetor, look at the fuel supply first. These bikes are also known to have fuel petcock valve issues which cause the Suzuki DRZ400S not getting enough gas.
Replacement Fuel Petcock Valve: https://amzn.to/3hEy846
Hand held vacuum pump tester: https://amzn.to/3whX1GD
If your motorcycle is running lean, and that is any model bike. Look at the fuel supply first before tearing into the carburetor. I have seen many people start turning screws and trying to make all sorts of adjustments to the carburetor when in fact, it was not getting the right volume of gas to it.
You want to check your fuel flow first. If it seems restricted, check your fuel filter screen that is built in most petcocks. If that is clean, look to see if the bike has a vacuum operated shut off valve built in the petcock. This type of valve is most common. First ensure it is getting vacuum to the valve. If so, using a vacuum pump or just use a hose and suck on it with your mouth, and see if the gas flows out of the fuel line properly.
So if your Suzuki DRZ400S Not Getting Enough Gas, follow the above steps first before messing with the carburetor. It is fact, motorcycle engines take more abuse and are under more stress than a car engine is. This will fatigue the rings faster. As the rings weekend, the compression lowers, thus causing you over time to have to make adjustments to the carburetor. However, ensure that you are getting adequate fuel flow first.
Needing parts for your bike, check out CMS:
https://rodsshop.org/get/cms-motorcycle-parts/
Check Out My YouTube Channel:
https://goo.gl/9WOYat
Learn more about RodsShop and or Contact Me:
https://rodsshop.org/
Subscribe to my RodsShop Newsletter to keep up with the latest:
https://rodsshop.org/join-newsletter/
Join my Q&A Forum:
https://rodsshop.org/automotive-forum/
Check out my related videos:
Honda 70 Not Getting Spark - https://youtu.be/oRQr-GGoZQ4
How To Replace Brakes On a Honda 70 - https://youtu.be/d6JAGWF3uqI
How Do You Repair Missing Threads On A Motorcycle Engine - https://youtu.be/Zxkm6t0hs5A
66
views
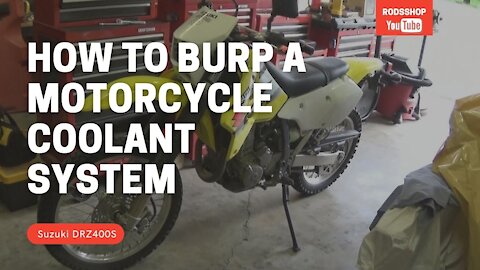
How To Burp Motorcycle Coolant System
How To Burp A Motorcycle Coolant System
https://rodsshop.org/get/cms-motorcycle-parts/
If you have cracked open the cooling system on a motorcycle, you might find that getting the air out can be tough. In this video, you will get an idea how to burp a motorcycle coolant system. I am using a Suzuki DRZ400S as an example of how to get the air out of the cooling system.
https://rodsshop.org/get/cms-motorcycle-parts/
Some cooling systems on motorcycles have a closed coolant reservoir bottle. Meaning there is no cap to remove to add coolant. In this video, I talk about how I used a large syringe to push extra coolant in the overflow reservoir. I did this to help monitor if the system needed anymore added or not. If you need a syringe, you can purchase one here:
https://amzn.to/3p9gTcB
Most motorcycles have smaller lines and smaller cooling chambers withing the engine, thus making it easy for any air to cause the bike to overheat.
If you have replaced a cooling system part or just want to flush out the old coolant fluid and add new, you will need to know how to burp the air out. The method I used is much like on a car. With the radiator cap off, I ran the bike until it got hot. Once hot, I let it run for 3 to 4 minutes burping out air and coolant out of the radiator cap inlet. I then would let the bike cool for about 30 minutes, then top off the coolant level. I would then repeat the same process of letting it run and burp air out with the cap removed.
I then let it cool off again for another 30 minutes, top the fluid level off but this time put the radiator cap on, start it and let it get hot. I then found the bleeder screw on the other radiator, the one without a cap. I opened it up and let it burp out air and coolant for about a minute. Now the system has been bled of air. Let it cool for an hour and then remove radiator cap and top off coolant level. More than likely the coolant reservoir bottle will be low to empty. Using a syringe, I pushed coolant into the bottle until it was about a quarter way full. This is a good way to monitor if the system is still low on coolant. If low, when it cools after being hot, the radiator will suck up any left in the bottle. If it is about the correct level in the radiator, the overflow bottle will always stay about the same level.
Check Out My YouTube Channel:
https://goo.gl/9WOYat
Learn more about RodsShop and or Contact Me:
https://rodsshop.org/
Subscribe to my RodsShop Newsletter to keep up with the latest:
https://rodsshop.org/join-newsletter/
Join my Q&A Forum:
https://rodsshop.org/automotive-forum/
Check out my related videos:
Suzuki DRZ400S Not Getting Enough Gas - https://youtu.be/19IizOdxe-4
Honda 70 Not Getting Spark - https://youtu.be/oRQr-GGoZQ4
How Do You Repair Missing Threads On A Motorcycle Engine - https://youtu.be/Zxkm6t0hs5A
Follow me and Like me on Facebook:
https://www.facebook.com/rodsshopsolutions
Follow me on Twitter:
https://twitter.com/rodsshop_org
Follow me on Instagram:
https://www.instagram.com/rodsshop/
157
views

How to Replace Brake Pads and Rotors
https://rodsshop.org/get/auto-mechanic-pro/
How to Replace Brake Pads and Rotors
Look further down for list of materials and tools used in this video...
Learn the basics on how to replace brake pads and rotors on your vehicle. There are many types of braking systems, this of course depends on your make model and type of vehicle you own. However, there is still a basic method and process to changing out your brakes pads and rotors. If you would like help and step by step instruction on how to work on cars, plus learn the skill like a professional, follow this link below:
https://rodsshop.org/get/auto-mechanic-pro/
In this video, I am replacing the brake pads and rotors on a 2000 Nissan Altima. This is just an example car, to show you generally how brakes are assembled and come apart. You will also learn a few techniques used by pros and things you should look for to do a good efficient brake job.
Learning how to replace brake pads and rotors yourself, can save you a lot of money. Most of the time, the parts for a brake job will run you under $250.00. In the case of this older car, the parts in total were $130. That was the purchase of two rotors, ceramic brake pads and the brake hardware kit. Most shops charge way too much for brake jobs, especially places like Firestone. I just learned that they are charging around $800 to do a brake job. That is a rip-off and a crime in my opinion.
Some trucks and mostly the older cars like in around and up to the 80's, use tapered bearings in the front rotors. I do not cover this in this video but you can watch a demonstration on how that process is done in this video here:
https://youtu.be/mbcuPs7b_EA
For a wide range of tools that are used, view here:
https://rodsshop.org/automotive-tools-and-supplies/
Here is a list of some tools I use and mention in this video:
Impact Screwdriver Set: https://amzn.to/3pUbNl9
Caliper Piston Compressor Tool: https://amzn.to/3gyXHkW
Complete Caliper Piston Set: https://amzn.to/3cLtfTz
Brake Caliper Hangers: https://amzn.to/3pVI0s8
Disc Brake Caliper Lube: https://amzn.to/3xt9Bnf
Anti-Seize Lubricant: https://amzn.to/3wFcp0g
Disc Brake Quiet Spray: https://amzn.to/2UaqDIn
Check Out My YouTube Channel:
https://goo.gl/9WOYat
Learn more about RodsShop and or Contact Me:
https://rodsshop.org/
Subscribe to my RodsShop Newsletter to keep up with the latest:
https://rodsshop.org/join-newsletter/
Join my Q&A Forum:
https://rodsshop.org/automotive-forum/
Check out my related videos:
How To Replace Wheel Bearing Hub and Rotor 92 99 Suburban - https://youtu.be/QnHGx1dtO0A
How To Pack A Wheel Bearing - https://youtu.be/P_tSJq9zc-M
How to Replace Front Brake Pads and Rotors on a 2004 Mazda 6 - https://youtu.be/0GjWsq49QJE
Follow me and Like me on Facebook:
https://www.facebook.com/rodsshopsolutions
Follow me on Twitter:
https://twitter.com/rodsshop_org
Follow me on Instagram:
https://www.instagram.com/rodsshop/
126
views

How To Install An Alloyworks Radiator
Shop all Alloyworks Radiators
Get a special discount price by using Coupon Code - RODRADS
https://rodsshop.org/get/alloyworks-radiators/
Alloyworks Radiator 3 Row Radiator Shroud Fan Thermostat For 1973-1987 Chevy C/K C10 C20 C30 Truck 85 - 20-1/4" high x 33-1/4" wide
Get a special discount price by using Coupon Code - RODRADS
https://shrsl.com/329i6
For Smaller Size Alloyworks Radiator 3 Row Radiator Shroud Fan Thermostat Fits 1973-1987 Chevy C/K C10 C20 C30 Truck 85 -18-15/16" high x 33-1/4" wide
Get a special discount price by using Coupon Code - RODRADS
https://shrsl.com/329io
Aluminum Black Water Temp Temperature Gauge Joint Pipe Adaptor 26mm through 40mm
https://amzn.to/3hELxax
190'F ELECTRIC COOLING FAN THERMOSTAT TEMP SENSOR 1/8" 1/4" 3/8" 1/2" Inch NPT
https://amzn.to/2TIyBbF
12-Slot Relay Box 6 Relays 6 ATC/ATO Standard Fuses Power Junction Block
https://amzn.to/2TG46Dn
Radiator Mounting Cushions Support Pads Fits for GM
https://amzn.to/2TIyMUn
Red Prothane Radiator Mounting Cushions Support Pads Fits for GM
https://amzn.to/2VgT8Vl
Chrome Radiator Support Bracket
https://amzn.to/3xoibDV
16 Gauge 6 Color Combo 50 Feet Wire
https://amzn.to/3AyMPwy
12 Gauge 50ft Red 50ft Black Wire
https://amzn.to/3ACi1Lt
Wiring Diagram For Electric Fan Relay:
https://rodsshop.org/download-basic-coolant-fan-relay-wiring/
This video shows how to install an Alloyworks Radiator, includes removal of the old radiator, and includes how to wire an electric cooling fan. Look further down for the download link for a wiring diagram for wiring up an electric cooling fan. This Alloyworks radiator is going in a 1977 Chevy C10 Pickup Truck. The one that was in it was a smaller sized radiator. Chevy put three different sizes between 73 to 80. Two of the radiators are the same height at 18-15/16". The one that is called for in this year is more of a heavy duty radiator standing 20-1/4".
You will learn how to remove a radiator from a 1973 to 1980 Chevy Pickup Truck properly. Pay attention, because there are few helpful tips along the way. Watch me install this Alloyworks Aluminum Radiator with mounted electric cooling fans. You will also see how to wire up the cooling fans properly.
Click the link below to download wiring diagram:
https://rodsshop.org/download-basic-coolant-fan-relay-wiring/
Feel free to share this video:
https://youtu.be/W5Ucc63uvn4
Check Out My Channel:
https://goo.gl/9WOYat
Learn more about RodsShop and or Contact Me:
https://rodsshop.org/
Subscribe to my RodsShop Newsletter to keep up with the latest:
https://rodsshop.org/join-newsletter/
Join my Q&A Forum:
https://rodsshop.org/automotive-forum/
Check out my related videos:
How To Replace A Electric Window Regulator - https://youtu.be/fw7f_urPxhg
Know when to replace your car battery - https://youtu.be/yCO7O_h3CKc
How to know if an engine is bad - https://youtu.be/OeHVs__9ONs
Follow me and Like me on Facebook:
https://www.facebook.com/rodsshopsolutions
Follow me on Twitter:
https://twitter.com/rodsshop_org
Follow me on Instagram:
https://www.instagram.com/rodsshop/
189
views

Auto Body Collision - How to line up body panels
https://rodsshop.org/how-to-paint-a-car/
One step that often doesn’t get the right amount of attention when doing collision repair, is getting the body panels to line up properly. You can apply a glossy slick paint job but it can be ruined instantly with misaligned gaps. Learn how to line up body panels when doing a collision repair.
https://rodsshop.org/how-to-paint-a-car/
This 2001 Nissan Sentra was wrecked in the front, the driver rear-ended someone. The driver’s side frame rail was bent inward and downward. The frame shop bent the rail back into position and welded the radiator support in. It would have been netter if they had not welded it in but the adjustments that needed to be made were not too severe.
There are some really good frame shops out there, unfortunately they are few and far between. Most are adequate and can do the job close enough for the body-man to make adjustments. Then there are some that are not with they money you pay them. The frame shop that did the bend on this Sentra did an OK job but they were still off about ¾ of an inch of having the frame rail to the correct height.
This video goes over some steps I took to line up the body panels after its collision. The car was old and the customer didn’t want to spend a lot of money repairing it, so I did the best I could getting the body panels to line up with out charging the customer a high amount.
If you would like to know how to tackle a paint and body job like this, either as a one time project or if you are considering making auto-body a serious hobby or even considering auto-body a profession. You can now learn this trade and all the secrets of getting an eye popping finish from your own home and not even at a fraction of what a school would run you. I am promoting two different courses. One is great for a simple project and can put you on your way of painting like a pro, the other is a very in-depth course and can teach this skill as a new trade. Check these out:
https://rodsshop.org/auto-body-paint/
https://rodsshop.org/how-to-paint-a-car/
For materials used and guides, follow these links:
https://rodsshop.org/auto-body-tools-and-supplies/
Any time you are doing a collision repair like this one, always place your body panels on and put just enough bolts to hold them in place. You are looking to ensure that everything will line up properly. The best kind of auto body collision repairs are when the tech takes the time to make sure all gaps line up like factory. Properly aligned and even body lines are what makes a vehicle look good. This video should give you some tips on how you can line up your body lines the correct way.
You can see in the end that the all the gaps lined up really well and the paint and blend job looked pretty sharp. He was able to sell the car and still make a profit even after the repairs.
459
views
1
comment
Learn Auto Body and Paint
https://rodsshop.org/auto-body-paint/
Learn Auto Body And Paint from Home. DIY auto body and paint training. Learn complete paint jobs, rust repair, custom work and more!
Start Learning Auto Body and Paint Plus Get Your FREE 150 page eBook That Reveals How To Paint Your Car, Body Work Techniques, Detailing & More:
https://rodsshop.org/auto-body-paint/
496
views

Know when to replace your car battery
https://rodsshop.org/online-auto-repair-manuals/
It sucks when you need your car most and the battery is dead. Were there warning signs? Most of the time, there are signs your battery is losing its strength. Learn to know when to replace your car battery before it is too late.
https://rodsshop.org/automotive-battery-and-charging/
The biggest telltale of a dying battery is usually noticed when the weather turns colder. Listen to the speed at which your engine is cranking, if it seems to be slower than normal, this may be a sign. However, even a good battery loses a bit of its cold cranking amps in cold temperatures, but this is still something you should have checked.
If you are not at all mechanically inclined but you want to know when to replace your car battery, go to any local parts store and have them check it for you. Most auto parts stores will check you battery strength along with your charging system for free.
In this video, I use my own battery and charging system checker, so if you are a car person and love tools, here is the link to where I bought my tester:
https://amzn.to/3tb8abL
If you would like to view more tools I used in this video, and to look at some more advanced testers, go to my page here:
https://rodsshop.org/automotive-battery-and-charging/
59
views
3
comments

1999-2010 VW Beetle Exterior Door Handle Removal
https://rodsshop.org/how-to-paint-a-car/
This is really quick video on how to remove the exterior door handle on a 2002 Volkswagen Beetle. I will show you where the set screw you need to back out is, pulling the handle end out, how to release the lever cable to the handle and then slide handle out. I have provided some recap slides at the end of the video for better visual help.
View screen shots and more on RodsShop How To page, click on the 1999-2010 VW Beetle Exterior Door Handle Removal Tab: https://rodsshop.org/how-to-make-automotive-repairs/
https://rodsshop.org/how-to-paint-a-car/
88
views
How to change the PCV valve 2004 Mazda 6
https://rodsshop.org/get/auto-mechanic-pro/
Quick video on how to remove and replace the PCV valve on a 2004 Mazda 6. The job itself isn't that hard, you will need to take two hoses loose, shown in the video. The hose going to the PCV valve can be pulled off and then you will need to remove a bracket on the firewall also shown in the video. The total job shouldn't take you more than 15 minutes if that.
Purchase the PCV Valve Here: https://amzn.to/3wa5Wei
https://rodsshop.org/get/auto-mechanic-pro/
49
views