

Enjoyed this channel? Join my Locals community for exclusive content at
techfreedom317.locals.com!
How to Do Web Apps for MS and Google in Debian Based Distros
CNIX OS: https://cnix.org
Jeffrey Petersen's site: https://jeff.pro
Flatpak instructions here:
https://flathub.com/setup/debian
Once flatpak is installed, reboot the machine
Log back in
open the terminal and type the following:
flatpak install flatseal chrome edge
It will ask for confirmation on each package, as well as which version you want
just hit enter on the flatseal one
pick 2 for chrome and 1 for edge
confirm each one
wait for the downloads
once finished, should take 5-15 minutes, depending on hardware and internet speed
click the application menu (or hit the meta/windows key on your keyboard)
type flatseal
click it to open
open the chrome permissions
scroll down to File System - Other Files
click the little add button
click in the new field
copy this in: ~/.local/share/applications:create
then click to add another directory
copy this in: ~/.local/share/icons:create
exit flatseal
open Edge
unclick send data option
sign in if you have an MS login
visit the service you wish to have as a web app
click the elipses button (...)
click Apps
Click Create New App (name as desired)
Go to your Application Menu
search for the name of your new web app
right click on it
add to desktop, Favorites, or Panel/Task Manager (as desired)
For Google stuff
Open Chrome
Sign in
navigate to chrome://apps
Right click on your desired app, click open in new window, then Create Shortcut
Go to your Application Menu
search for the name of your new web app
right click on it
add to desktop, Favorites, or Panel/Task Manager (as desired)
music:
"Alex Productions - Hard As Steel" is under a Creative Commons (CC BY 3.0) license.
https://www.youtube.com/watch?v=DGJgmIwlnKw
32
views
WTF Notes - How to Flatpak on Manjaro
Ever wondered how to get access to your work emails on your Manjaro install? Here's how:
turn on your computer
log in
open pamac (Add/Remove Software... should be in your task manager)
click settings (sandwich menu) ->Preferences (enter password)
change update checking frequency, leave auto downloads off, max out parallel downloads, change mirror to your country for faster speeds
click third party tab along the top
enable AUR and check for updates
scroll down and enable flathub and check for updates
Close preferences window and Pamac
Open Pamac (Add/Remove Software)
click the magnifying glass
search for flatseal and click install
search for chrome and click install
search for microsoft and install Microsoft edge
Click Apply at the bottom of the screen and enter your password
click the green M button (where the traditional start menu would be in windows)
click Utilities then Flatseal
Once in Flatseal, click on Google Chrome
scroll down to Filesystem
Click to add directory (folder with a + in it)
copy this: /home/m/.local/share/icons:create
click add directory icon again
copy this: /home/m/.local/share/applications:create
close Flatseal
Open Chrome
Don't let it be the default or send extra data to Mountain View
Sign in with your main account (allow sync or not, up to you)
navigate to chrome://apps
right click on whichever google app(s) you want to add to your computer
check the open in new window box
click create shortcut
repeat for whichever other Worskpace apps you need
right click on the new window in your task manager and pin it there
Click the "M" button on the left end of the taskbar
Click All Applications
scroll to "G" and right click on your new web apps individually, adding them to the desktop and to the favorites menu
Microsoft Apps
Open Edge
Click through the set up process, undo the telemetry option
Open a new tab
Navigate to your desired MS services and login
Click the settings button, the horizontal version of the one in Chrome
Select Apps -> Create App
Name your web app
Click Ok
It should open in a new window, just repeat the process you did with the Workspace app(s) earlier to pin it to the task manager, your Favorites in the app menu (green "M" where the start menu is in windows) and add it to the desktop if desired.
"Alex Productions - Hard As Steel" is under a Creative Commons (CC BY 3.0) license.
https://www.youtube.com/watch?v=DGJgmIwlnKw
38
views
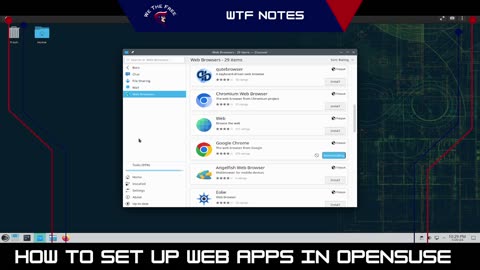
We the Free Notes 1: How to set up Web Apps on OpenSUSE
Ever wondered how to get access to your work emails on your Freed PC or We the Free machine? Here's how:
turn on your computer
log in
open discover (should be in your task manager)
click settings
click add flathub in upper right corner of window
enter password
click Internet -> Web Browsers
Scroll down to Google Chrome, then click install, enter your password
Scroll down a few more to Microsoft Edge (If you need Microsoft stuff, such as outlook and other MS 365 stuff for work)
click the error off when Edge fails to install the first time
click updates (there should be an orange 1 there)
update the package in question
go back to Internet -> Web Browsers, scroll down and click install on Edge again
Open the Settings App
click Applications
Click Flatpak Permissions Manager
Click Chrome
scroll down
tap the + by where it says "Add Permissions"
type in /home/user_name/.local/share/applications in the field*
click the drop down and select "Create"
repeat with the following path: /home/user_name/.local/share/icons
*when you see user_name in Linux related directions, insert your user name there
"Alex Productions - Hard As Steel" is under a Creative Commons (CC BY 3.0) license.
https://www.youtube.com/watch?v=DGJgmIwlnKw
30
views
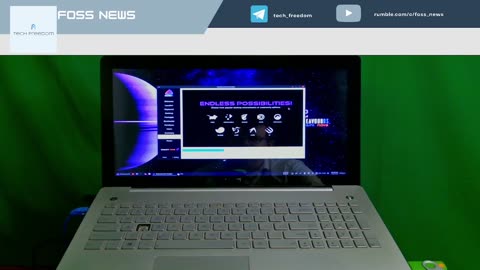
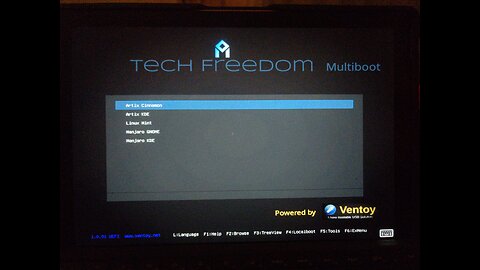
Bare Metal Mint Debian Edition Install
Quick install with my custom ventoy drive.
1. Do a Freedom Consultation
2. Choose to work with Tech Freedom
3. Receive flash drive
4. Plug in flash drive
5. Reboot system
6. Boot into the Ventoy flash drive
7. Select your Chosen Distro and Desktop Environment
8. Boot in
9. Check out your desktop
10. Run the installer
97
views
Bare Metal Endeavour OS Install
Endeavour OS is a Arch based distro, descended from Antergos Linux. It is immediately downstream from Vanilla Arch. Endeavour OS is terminal-focused in terms of package management, so no GUI package managers involved. It is also lightweight and tends to be very responsive in my experience.
Same principle as with the LMDE install video I made recently.
1. Download EndeavourOS
2. Prep flash drive
3. Burn Endeavour onto a drive
4. Reboot system
5. Boot into the flash drive
6. Select your Chosen Distro and Desktop Environment
7. Boot in
8. Check out your desktop
9. Run the installer
35
views
How to Install Linux (Bare Metal)
Take a look at this quick install video using my new customized Ventoy based USB flash drives. Pardon the different video & audio quality and style, as I took this video on my cellphone. If you have any questions, hit me in the comments. Thanks for watching.
Steps:
plug in your flash drive
Restart your computer (if windows 10 or 11, then hold shift as you restart to call up the advanced boot options, then boot from USB)
Let it boot into the custom ventoy environment
Select the distro and desktop you want to try
Hit enter for default boot mode on the next screen
Let it boot into the live environment
Explore the desktop
If you like it, open the installer, if you don't, try another option (reboot the computer and hit ESC, f1, f2, or f10, depending on the manufacturer), then pick the asolid USB option, this should open up ventoy again)
Pick a new candidate
Repeat above steps until you find a combination you like
Once you do, open the installer in the live environment, and let it erase the drive and replace windows with your chosen flavor of Linux.
Follow the steps as presented in the installer, and by the end of it, your system will be running Linux.
Congratulations, you just set your computer free from spying and the performance penalty that brings.
https://techfreedom.pro/2021/12/01/tech-freedom-3-how-to-101/
83
views
Tech Freedom Announcements
It's been a good last couple of weeks... we have some big things in the works, but I wanted to let you guys know what was up the last couple of weeks when I wasn't posting as usual.
I've been making some changes to the website, particularly the store and landing pages, simplifying descriptions and the like to hopfully help things to be more understandable. I still need to do the Ruth test...
Other than that, I have posted the last 2 months of content from Rumble as blogs, and prepared all of the devotional content for Spirituality & Tech through the end of September.
On a personal level, my wife and I celebrated our 10th wedding anniversary, and we are looking at some major changes happening in our lives (hopefully) by the end of this calendar year. More on that when more is available to share.
34
views
A Little Story
John Q Public and his family.
John is an average American guy, married, two kids, runs his own small business. His business did well until he started researching "truther" topics: history, vaccines, and the like. He just wants to be left alone. He believes that the constitution means something, that Kids should be protected, Trump won in 2020, and no one should ever be forced to inject anything into their body.
For these reasons, he was shadowbanned, and his family suffered... they were shadowbanned and surveiled. They nearly lost their home. John's business tanked.
How can John regain digital sovereignty? Degoogling his life: migrating from Windows or MacOS to Linux, iOS or stock Android over to a device with GrapheneOS or DivestOS, regaining your data from their clouds, and eventually shutting down those accounts and replacing them with privacy-respecting options.
https://techfreedom.pro
36
views

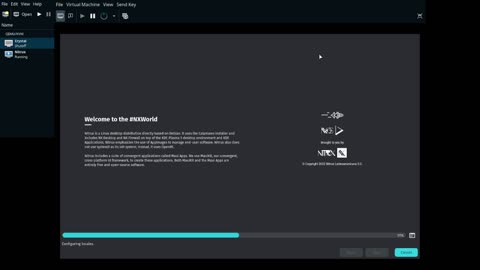
A pair of basic reviews: NitruxOS and Crystal Linux
Review of NitruxOS and Crystal Linux
https://nxos.org/english/nx/
Nitrux has allot going for it. I want to like it, I really do. But I don't, at least not in its current form. I see loads of potential, but it just isn't "there" yet, it feels sluggish when it should fly... the store is confusing, though I like the idea of appimages.
https://getcryst.al/
A beta with loads of potential. I may look again when onyx is actually in place. I like the Jade installer. Amethyst looks interesting as a pacman wrapper. The main issue that I have is that their main raison d etre is based on the shifting sand that is GNOME. I don't know, you guys.
22
views

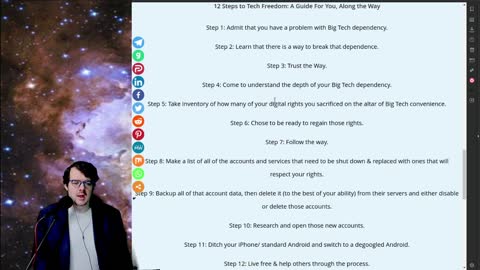
How do I get tech freedom? What are the steps?
What does it take to break free from Big Tech as much as possible? Lots of thinking, time, and decisive action.
134
views

10 things about Tech Freedom
I set her up with Manjaro KDE on her new Asus Zenbook, and bought & degoogled a OnePlus 7 Pro for her before I launched late last year. She is essentially non-technical, and glazes over whenever I talk about tech stuff. She shot and edited this on her own.
6.62K
views
2
comments

How to Degoogle a OnePlus 6 with LineageOS
Short and sweet. The main differences between this and the process for the Pixel 3xl I did last week more or less come down to different files, no need for downgrading stock to accommodate Lineage, and one other thing: the command to unlock the bootloader.
548
views
How to Install LineageOS on a Pixel 3xl
How to Install LineageOS or Lineage for microG on a Pixel 3XL (Crosshatch)
1. Pick your variety of LineageOS, download the February 2022 one, along with the factory image they offer for the 3XL.
2. Prepare your computer to do the job
1. Linux
1. Install android tools packages, this will give you ADB and Fastboot, as well as Android-UDEV, so that your computer can connect with your phone in order to send it commands through the terminal.
1. This process is command line based, and there is no other way to go about it.
2. Open your terminal emulator (Konsole/Xterm/Terminal)
3. Distro specific commands
1. Debian/ Ubuntu
1. sudo apt-get install android-tools-adb
2. Fedora/ SUSE
1. sudo yum install android-tools
3. Arch
1. sudo pacman -Syu android-tools
3. Set up Debugging on your phone
1. Open the settings app in GrapheneOS
2. Scroll to “About Phone”, tap to open
3. Scroll to the bottom of that menu, and tap the Baseband Version 7 times.
4. Navigate back to the main settings menu, and open Developer Options
5. Scroll to USB Debugging, and enable
4. Connect your phone to the computer and grant Debugging permissions to your computer.
5. Enable OEM Unlock in developer options
6. Type adb devices in your terminal window, which will call up the adb server and cause it to start up and show the serial number of your device.
7. Type adb reboot bootloader in the terminal
8. Once your phone reboots, type fastboot devices in the terminal to make sure that it is connected properly
9. Type fastboot flashing unlock in the terminal
10. You may need to do a few things on the device to confirm it, then it will reboot
11. Once it reboots, you will need to re-enable USB Debugging in the settings app.
12. Type adb reboot bootloader in the terminal after this is complete
13. Confirm that the computer sees the phone after the phone reboots by typing fastboot devices in the terminal
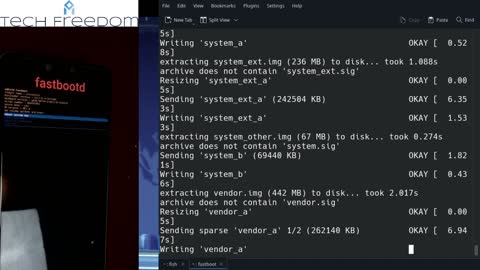
14. Once that is done, unzip the factory image you got from Lineage
1. Unzip the file you just downloaded, right in your downloads folder is fine
2. run the following commands in your terminal once that completes
1. fastboot flash bootloader /home/username/Downloads/crosshatch-sp2a.220305.012/bootloader-crosshatch-b1c1-0.4-7617406
2. fastboot reboot-bootloader
3. fastboot flash radio /home/username/Downloads/crosshatch-sp2a.220305.012//radio-crosshatch-g845-00194-210812-B-7635520.img
4. fastboot reboot-bootloader
5. fastboot update /home/username/Downloads/crosshatch-sp2a.220305.012/image-crosshatch-sp2a.220305.012.zip
6. fastboot reboot
15. fastboot flash boot /home/username/Downloads/20220302-microG-crosshatch-recovery.img
16. Once it reboots to recovery, tap Factory Reset, then Format Data
17. After that process completes, Sideload the Lineage .Zip file, then Apply from ADB
18. On the computer, type adb sideload /home/username/Downloads/lineage-18.1-20220302-microG-crosshatch.zip, and hit Enter.
1. This process may not look like it has been completed fully, in fact, it will likely only register as reaching 47% before it says that it is done.
19. Back on the phone:
1. After you see this, you can Reboot to System and you will have a degoogled phone, after it boots up. If you selected the Lineage for microG option, it will come with f-droid pre-installed, along with microG to spoof your connection to things like Firebase for push notifications, and will also allow you to set up alternate sources for maps and navigation, unifiedNLP and the like.
1. I suggest that you do these things at first boot.
2. Also, use f-droid to install the Aurora Store
1. To set up the Aurora Store, all you need to do is select Anonymous (non legacy), and it will spoof a google account for you every time you open the app to do anything.
3. While in the Aurora Store, I suggest installing the Brave Browser
1. once installed, open Brave, and visit telegram.org, and download telegram directly from them, it should be 60-70 MB, then grant permission to install from untrusted sources, and install it.
20. You have a freshly installed, degoogled environment on your Pixel 3XL. Congratulations.
444
views
How to Degoogle your Pixel 3 xl with GrapheneOS
How to install Graphene OS on a Pixel 3XL (Crosshatch)
1: Webusb Installer
1. Follow the instructions on the website, here: https://grapheneos.org/install/web
1. Make sure your phone is FACTORY UNLOCKED
1. Boot your phone, if a scary looking message appears, then it is bootloader unlocked already, if not, then do the following steps
1. Open the settings app (pull down from the top of the screen until you see a little gear icon , then tap it.
2. Scroll to the bottom, tap on About Phone
3. Scroll to the bottom of that menu, and tap on the Baseband number 7 times, this will unlock the Developer Options back in the main Settings menu
4. Navigate back to that menu, Tap on Developer Options
5. Scroll down to OEM Unlock, tap here to enable. If it is grayed-out, you are out of luck with that device, get a new one and start over.
6. If it is tap-able, tap it.
2. Proceed to installing whatever packages are needed for your operating system so that it can connect with your phone in the way that is necessary for the process to complete.
3. Reboot your device into Fastboot
1. reboot, and then hold the volume down key as it powers back on
2. Once there, scroll, using the volume buttons and the power button to make selections, down to Unlock Bootloader and press the power button twice to select and say Ok
3. While still in the bootloader, connect your phone to the computer
4. Download the Factory Images and signature files from the GrapheneOS site, and the signature checking utility to assure that it is Genuine.
5. Once it passes, continue to the next step on the list by clicking Flash Release, it should find your phone and begin the process for you.
6. After it finishes, you will need to reboot and go back into the bootloader, then lock it again by clicking Lock Bootloader on the website. Once that is done, reboot and start your newly GrapheneOS powered Pixel 3XL.
2: CLI
1. Basically the same as any other Custom ROM, I will demonstrate that methodology when I install Lineage for microG tomorrow.
3.14K
views
Gotta get your phone serviced? Here's how to keep your warranty on the Pixel 3XL.
How to flash back to stock on the Pixel 3XL (Crosshatch)
1. Go back to the graphene webusb installer site, scroll to the bottom, issue the unlock command and go back into fastboot and confirm it, then click Remove non-Stock Key.
2. download latest stock Android Image from https://www.xda-developers.com/how-to-download-android-12/#feb2022
3. This will require CLI, not the web tool.
4. Visit this site for an explanation of how to get your phone working on stock again https://www.droidwin.com/restore-pixel-3-3a-xl-stock-firmware-fastboot-unbrick/
1. Unzip the file you just downloaded, right in your downloads folder is fine
2. run the following commands in your terminal once that completes
1. fastboot flash bootloader <drag and drop bootloader image file in terminal>
2. fastboot reboot-bootloader
3. fastboot flash radio <drag and drop radio image file>
4. fastboot reboot-bootloader
5. fastboot update <drag and drop the zip file in that folder>
6. fastboot reboot
After this, you should reboot into stock android and you can flash whatever other ROM you want, after you turn your developer options on and enable USB debugging.
159
views

GrapheneOS Webinstaller demo - Pixel 3 XL
How to install Graphene OS on a Pixel 3XL (Crosshatch)
1: Webusb Installer
1. Follow the instructions on the website, here: https://grapheneos.org/install/web
1. Make sure your phone is FACTORY UNLOCKED
1. Boot your phone, if a scary looking message appears, then it is bootloader unlocked already, if not, then do the following steps
1. Open the settings app (pull down from the top of the screen until you see a little gear icon , then tap it.
2. Scroll to the bottom, tap on About Phone
3. Scroll to the bottom of that menu, and tap on the Baseband number 7 times, this will unlock the Developer Options back in the main Settings menu
4. Navigate back to that menu, Tap on Developer Options
5. Scroll down to OEM Unlock, tap here to enable. If it is grayed-out, you are out of luck with that device, get a new one and start over.
6. If it is tap-able, tap it.
2. Proceed to installing whatever packages are needed for your operating system so that it can connect with your phone in the way that is necessary for the process to complete.
3. Reboot your device into Fastboot
1. reboot, and then hold the volume down key as it powers back on
2. Once there, scroll, using the volume buttons and the power button to make selections, down to Unlock Bootloader and press the power button twice to select and say Ok
3. While still in the bootloader, connect your phone to the computer
4. Download the Factory Images and signature files from the graphene site, and the signature checking utility to assure that it is Genuine.
5. Once it passes, continue to the next step on the list by clicking Flash Release, it should find your phone and begin the process for you.
6. After it finshes, you will need to reboot and go back into the bootloader, then lock it again by clicking Lock Bootloader on the website. Once that is done, reboot and start your newly GrapheneOS powered Pixel 3XL.
2: CLI
1. Basically the same as any other Custom ROM, I will demonstrate that methodology when I install Lineage for microG tomorrow.
415
views

Tech Freedom Intro: What is this?
A few things I forgot to mention:
Weekly Devotions
FOSS news 3x/week, now with memesplanations
Occasional tutorials
Https://t.me/tech_freedom
Https://techfreedom.pro
Https://gab.com/groups/58195
Https://truthsocial.com/@tech_freedom
5.75K
views
How to use Techfreedom.pro
Walkthrough of my site, intro to social media
Gab group: Https://gab.com/groups/58195
Telegram channel: https://t.me/tech_freedom
Telegram chat: https://t.me/tech_freedom_chat
636
views

Some Tech Jargon Defined - Tech Freedom
A reading of my Linux 101 article found here:
https://techfreedom.pro/2022/03/29/linux-101/
930
views
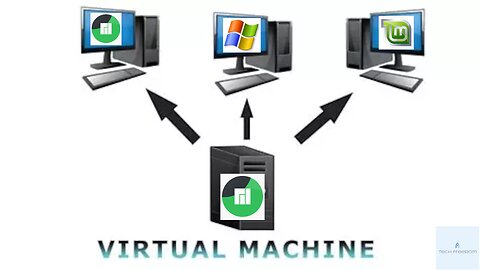
How do I set up a virtual machine to test a new distro?
Running a Manjaro KDE VM in Gnome Boxes on my Manjaro KDE Laptop...
Installing and switching from KDE to LXQT.
https://www.howtogeek.com/193129/how-to-install-and-use-another-desktop-environment-on-linux/
Forgive the stutters, my machine was rather taxed as I was streaming and recording the install process.
1.35K
views

How do I customize KDE?
Hey All,
Someone on Gab voted for this, so I thought I'd give them a little love and show you what KDE theming can do in brief.
My setup is as follows:
Arititm-Dark Global theme
taskbar to top of screen, ala` MacOS, set to 50 pixels
aritim-dark GTK theme
Breeze icons
single row task manager next to app menu button
Aritim wallpaper #3
51
views

Tutorial on Rescuing Your Data From Google
From an example account i made this afternoon, where I sent a few emails back and forth with a few of my other accounts, and uploaded a handful of things into the drive, just to have something for them to gather and zip up for me.
I also showed establishing accounts on Protonmail and Zoho.
https://go.zoho.com/H9P
202
views