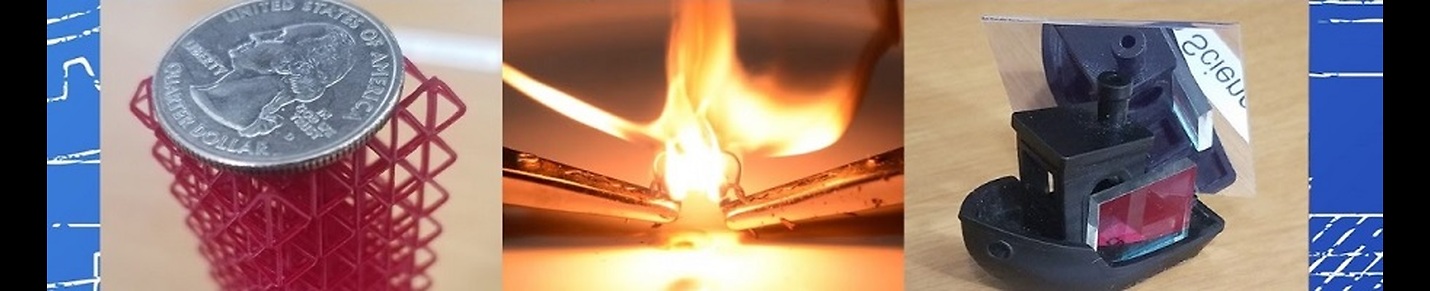


Ultimate Mini Pulse Motor Throttling!!! ~ Transistor Motor Controller
Throttled between 150mA and 650mA with a 2VDC input. I had a great time building a playing with this project. Watch the complete construction and operation here: https://youtu.be/eSzVXSYhLmc
#garagscience #engineering #maker
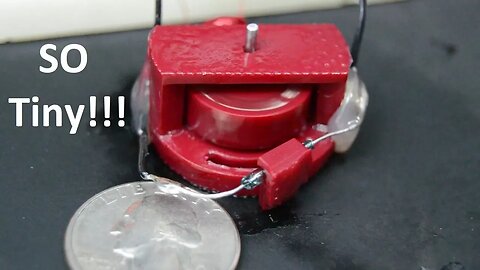
Smallest mini pulse motor on Youtube. I have yet to see one this small anywhere else on Youtube, what a great project!!!
Download Here: https://www.thingiverse.com/thing:2736817
This was a fun little science experiment to engineer a very small and compact pulse motor. I spent a fair amount of time looking around Youtube and as far as I can tell this is the smallest one out there. If I'm mistaken just let me know in the comments!
Pulse motors work mostly the like way their name sounds. Magnets attached to a rotor are repelled from a stationary coil (motoring coil) which is pulsed to allow new magnets to move into position. The pulsing action is generated from some type of sensor on the opposite side of the rotor that reacts when the magnets pass by it. Typically this sensing is done through induction with another coil, a reed relay or a hall effect sensor. I attempted the first two approaches in this video but due to the motors small size I only had success with the reed relay.
On future builds I will probably use a hall effect sensor as they are a little better suited for these types of applications. (I just didn't have any on hand when I started this build ;) )
Let me know what you think in the comments and if you have any questions be sure to ask. And don't forget to SUBSCRIBE!!!! The goal is to double the size of this channel in 2018!!!!
Facebook: https://www.facebook.com/GarageScience/
Instagram: @garage_science
13
views
Ultimate Mini Pulse Motor!!! ~ With Transistor Motor Controller!!!
Smallest mini pulse motor on Youtube. I have yet to see one this small anywhere else on Youtube, what a great project!!!
#garagscience #diyprofessional #grayscalegenerator #engineer #engineering #make #maker #hobby #freeenergy #diy #doityourself #project #fusion360 #science #garage #mini #smallest #pulsemotor #dcmotor #electronics #electricity #controller #diytechprojects #techprojects
Download Here: https://www.thingiverse.com/thing:2736817
This was a fun little science experiment to engineer a very small and compact pulse motor. I spent a fair amount of time looking around Youtube and as far as I can tell this is the smallest one out there. If I'm mistaken just let me know in the comments!
Pulse motors work mostly the like way their name sounds. Magnets attached to a rotor are repelled from a stationary coil (motoring coil) which is pulsed to allow new magnets to move into position. The pulsing action is generated from some type of sensor on the opposite side of the rotor that reacts when the magnets pass by it. Typically this sensing is done through induction with another coil, a reed relay or a hall effect sensor. I attempted the first two approaches in this video but due to the motors small size I only had success with the reed relay.
On future builds I will probably use a hall effect sensor as they are a little better suited for these types of applications. (I just didn't have any on hand when I started this build ;) )
Let me know what you think in the comments and if you have any questions be sure to ask. And don't forget to SUBSCRIBE!!!! The goal is to double the size of this channel in 2018!!!!
I got some inspiration from the video titled "Pulse Motor from Old Parts" by Ludic Science (https://youtu.be/gPJrlFsRXGk) and wanted to see what a little bit of 3D printing could do to make an electric motor that was brushless just to experiment. I hope you enjoyed my video, leave me a comment and let me know!!!
Facebook: https://www.facebook.com/GarageScience/
Instagram: @garage_science
36
views
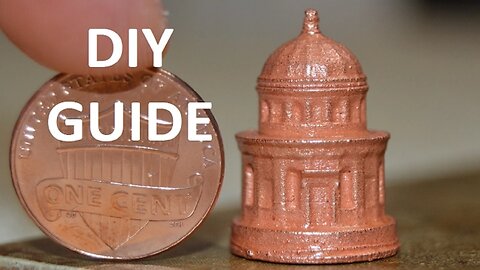
Best and Safest Copper Plating in a Mason Jar Tutorial ~ DIY Professional #5
No other tutorial provides this much information and explanation on how to achieve high quality copper plating from household ingredients!!!
Bill of Materials:
Conductive Paint for copper plating non-metal objects:
https://amzn.to/2MIKU3H
Copper Sulphate:
https://amzn.to/2L9EdmF
Citric Acid:
https://amzn.to/2QqwQgK
PolyEthylene Glycol:
https://amzn.to/2UBOBrC
Air Pump:
https://amzn.to/2Uz7Q57
DC Power Supply (power supply I have):
https://amzn.to/2PuYBz7
DC Power Supply (all you actually need for this purpose):
https://amzn.to/2Py5r6W
Copper Wire:
https://amzn.to/2UE20iO
#garagscience #diyprofessional #garageplating #homeplating #engineer #engineering #make #maker #hobby #project #chemistry #electrochemistry #electroplating #copperplating #copper #homemade #safe #diy #doityourself #best
This is a great alternative to strong acid copper plating with harsh chemicals like sulphuric acid and hydrochloric acid. This electrolyte is almost safe enough to drink due to every ingredient being safe to consume with the exception of the copper sulphate.
This setup will provide good plating results for thick plating instead of the very thin plating most other guides on youtube offer. Electroplating doesn't have to be hard, I intentionally provide exact instructions so that anyone can replicate this. Be sure to share this around the interwebs so that others can benefit from it as well.
If you want to see how to make a copper plating electrolyte with a strong acid you can watch my other tutorial here:
https://youtu.be/yvW5mWbUbU4
This copper plating recipe is derived from the think and tinker site recipe available here:
https://www.thinktink.com/stack/volumes/voliii/consumbl/cplatmix.htm
Here is a great resource to use when troubleshooting a copper plating bath that isn't plating well:
http://www3.uic.com/wcms/images2.nsf/c06db59d70a043cc85256809004d8cbe/183dbe584ba8157b852570140067e6a2/$FILE/09-Electrolytic_Copper_Plating_Additives_and_Contaminants.pdf
I got into copper plating with the intent to plate 3D printed parts and since then I have learned a mountain's worth of information. I've tried to simplify it as much as possible and condense the chemistry into relatively short videos so that anyone unfamiliar with the science can get successful results.
Remember to like this video and subscribe if you haven't done so already. Your support is what makes all these videos possible!!!
I also post additional content to my facebook page and instagram account:
https://www.facebook.com/GarageScience/
@garage_science
78
views
1
comment
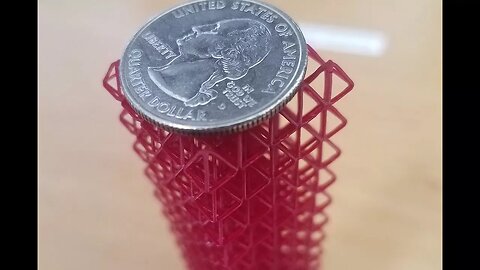
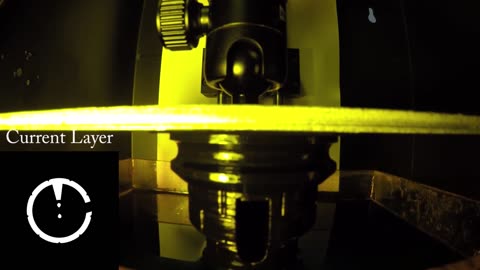
Tall 3D Printed Diamond Matrix Timelapse ~ SLA 3D Printer in action
ANOTHER TIMELAPSE!!!! This print was awesome and surprisingly strong! It's been too long since I posted a time lapse and I couldn't be more pleased with this print. Currently my printer is set to it's largest XY build area meaning lowest XY resolution. The next thing I want to do is scale this print by 50% and print it again on the highest resolution!!! Leave questions in the comments and I'd be more than happy to answer them.
Some specs on the print:
XY Resolution: 84um
Z resolution: 50um
Exposure time: 15sec
Print time: ~ 30hrs
over 3000 layers!
Autodesk Magenta Resin
If you are new to 3D printing this printer utilizes a high definition projector (Acer H6510BD) to cure photosensitive resin layer by layer and thus create a 3 dimensional object. This method as a whole is called stereolithography and this particular method is known as DLP (or Digital Light Processing), other methods use lasers and mirrors or LEDs with an LCD screen.
In my opinion DLP printers offer the most versatility when it comes to resin printing and have the capability of being much faster than laser based printers. Which type of SLA printer do you prefer? Let me know in the comments!
Be sure to check out my FB page and instagram for more content!
https://www.facebook.com/GarageScience/
@garage_science
12
views
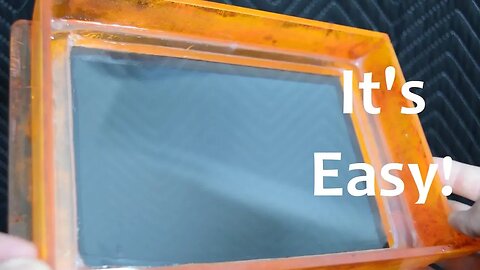
Replace PDMS on SLA/DLP 3D Printer Resin Vat ~ Step by Step Guide ~ DIY Professional #4
It can be a little daunting to try and recoat a vat with PDMS without completely ruining a resin tank (aka Vat). This video will show you the do's and dont's of refurbishing a well used vat.
#garagscience #engineering #maker
Polydimethylsiloxane more commonly known as PDMS is the most widely used material to coat vats in SLA/DLP 3D Printers due to it's non-stick properties and optical clarity(remember that SLA stands for stereolithography). Unfortunately over time this coating clouds and makes it difficult or impossible to continue printing. When this occurs you must either buy a new vat or replace the PDMS coating on the vat. Since recoating PDMS is significantly cheaper many people attempt to refurbish their vats.
This video will show you exactly what to do as well as things you should avoid doing. Most importantly is that silicone sealant inhibits the curing reaction in the PDMS and so it should never be used on the inside of any vat that uses PDMS as a non-stick coating.
You'll also see in this video that I use FEP film as an additional non-stick surface because it also has extremely good non-stick qualities and has been proven to last much longer than PDMS before needing to be replaced. Since FEP naturally sticks to PDMS it makes it very easy to apply FEP film to further increase the life span of any vat.
Link to Sylgard 184 PDMS used in this video:
https://www.amazon.com/gp/product/B004IJENBG/ref=as_li_tl?ie=UTF8&camp=1789&creative=9325&creativeASIN=B004IJENBG&linkCode=as2&tag=garagescience-20&linkId=684af698bf0a9a00d3f536fa68a75aff
Link to FEP film used in this video:
https://flexvat.com/products/fep-film
Link to PDMS datasheet:
http://www.dowcorning.com/DataFiles/090276fe80190b08.pdf
Link to FEP film datasheet:
https://www.chemours.com/Teflon_Industrial/en_US/assets/downloads/h55008_FEP_Film_Properties_Bulletin.pdf
Let me know what you think of this video, whether you liked or disliked it please let me know so I can produce better content!
Remember to LIKE and SUBSCRIBE if you enjoyed watching!!!
Also checkout my FB page and Instagram account for additional content that doesn't always make it into video form!
https://www.facebook.com/GarageScience/
@garage_science
16
views

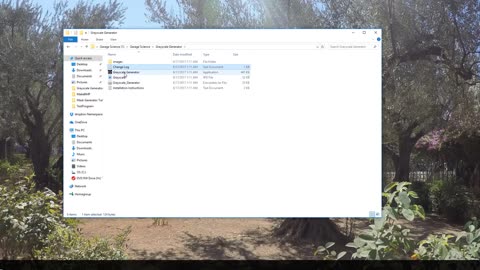
Create a DLP 3D Printer Grayscale Mask Guide
Start to finish guide on measuring and correcting the light output of a DLP 3D Printer. The link to download the mask generator software is located here: https://www.patreon.com/GarageScience
#garagscience #diyprofessional #grayscalegenerator #engineering #maker #homebrew #java #diy #3dprinting #dlp #sla
If you would like to use the phororesistor data point matrix I used you can access it here: https://drive.google.com/open?id=0B6ko0iKoNkCJQ0NkMmdtWGgzeUU
Anyone that's used a DLP 3D Printer is well aware of the variation in light intensity across the projection area. This property can be very frustrating and my even be extreme enough to limit printing capabilities. This mask generator software takes data about your projectors output and creates a grayscale mask that reduces the high intensity portion of the projection and brings them down to the same level as the low intensity areas.
This is a very straight forward guide and doesn't require any special equipment. All that is needed is an ohmmeter and a photo-resistor. Because the mask generator software creates a grayscale mask based on the difference between data points you don't actually have to get actual magnitude of light intensity. All you need is something that provides an output that is proportional to light intensity which is what the photo-resistor provides.
Please note that I have a UV pass filter installed in my projector which is what creates the deep blue projection. If you are using an unmodified projector I don't know if you will get different results because the photo-resistor will measure all light. It may be difficult to measure UV output if it's output has a different gradient across the projection area than the visible light.
If you have questions leave me a comment and I will try and help as much as possible.
Please remember to like this video and subscribe!!!!
Check out my Facebook page: https://www.facebook.com/GarageScience/
10
views
DLP Projector UV Pass Filter Installation Guide
This is a follow up video to my guide on removing the hot mirror (IR and UV Blocking mirror) from my DLP Projector to reduce cure times in my DLP 3D Printer.
If you do remove your hot mirror, installing a UV pass filer is a must. The Halogen lamp in your DLP Projector emits enormous amounts of light in an array of wavelengths from UV to Infrared. Since most resins cure between 385 and 405nm there are only a few wavelengths that actually need to be emitted from the projector. The UV pass filter protects your optics and DMD chip from unnecessary light exposure and heat.
#garagscience #engineering #maker
You can watch the first part on how to remove the hot mirror here:
https://youtu.be/0ep6uho9GXI
DLP Printers are a subset of SLA (Stereolithographic) 3D Printers, except instead of a laser they use High Definition Projectors to cure each layer of resin. If you want to learn more about DLP 3D Printers you can watch my overview video here: https://youtu.be/hQ21gbeYFYQ
The resin used in this video is Autodesk Magenta. Before modifying my projector at all I needed cure times of about 30sec and that was with gamma settings at their brightest and not being in Eco Mode. Since making the modification I've been able to turn my gamma settings almost all the way down and put the projector in ECO mode, and I still have gotten cure times reduced to 16sec.
If you have questions or suggestions be sure to leave them in the comments and like this video if you enjoyed watching.
Be sure to check out my FB page as well: https://www.facebook.com/GarageScience/
10
views

DLP Projector UV Filter Removal Guide
Increase the UV output from your DLP projector by nearly 3 times with this simple 5 minute modification. Most people may not realize that there DLP projectors have multiple components that filter UV light. In this guide I'll show you how to remove the strongest filter (the one directly on the halogen lamp).
#garagscience #engineering #maker
This is applicable for anyone with a DLP style 3D Printer or anyone wishing to do PCB fabrication with adhesive UV sensitive masks. It literally only takes a few minutes and significantly increases the UV output from your projector.
DLP Printers use UV light from a halogen bulb with a DLP projector to cure resin layer by layer until a 3D part is produced. DLP Printers tend to print fast than FDM or Laser based SLA printers because they can cure an entire layer at a time. However DLP Projectors are not designed for UV output and the standard UV output from an unmodified projector is much lower than the actual UV output from the halogen bulb. Therefore to optimize the performance of your DLP Printer a few modifications to its DLP Projector are necessary.
Be sure to check out my FB page: https://www.facebook.com/GarageScience/
You can follow me on Instagram @garage_science
22
views
Mask Generator Overview and Installation Guide
Download link located at: https://www.patreon.com/GarageScience
It's been a long project but it is finally finished. To the best of my knowledge this is the only program that exists that can output a tailored grayscale mask for a DLP 3D printer. I'm very excited to see people start using this software and hopefully you get a lot out of it.
This is Java based application that takes data you input and uses it to interpolate the grayness required for individual pixels of an image and then builds that image. The varying levels of grayness level out the light distribution along the X-axis and Y-axis of your DLP 3D Printer.
This is Ver 1 of what will likely be multiple versions. If you have issues with installation or operation let me know in the comments so that I can address it.
Happy Printing! Don't forget to like the video and subscribe!
#garagscience #diyprofessional #grayscalegenerator #java #homebrew
FB: https://www.facebook.com/GarageScience/
7
views
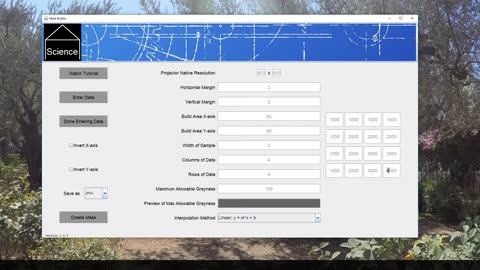
Mask Generator Tutorial and Walkthrough
Download link located at: https://www.patreon.com/GarageScience
This video will walk you through the required information that is needed for this application to create a custom grayscale image pixel by pixel. This software is free to download and use, if you find it helpful be sure to leave me a comment and like the video.
This is Java based application that takes data you input and uses it to interpolate the grayness required for individual pixels of an image and then builds that image. The varying levels of grayness level out the light distribution along the X-axis and Y-axis of your DLP 3D Printer.
This is Ver 1 of what will likely be multiple versions. If you have issues with installation or operation let me know in the comments so that I can address it.
Happy Printing! Don't forget to like the video and subscribe!
#garagscience #diyprofessional #grayscalegenerator
FB: https://www.facebook.com/GarageScience/
93
views

Creation Workshop G-Code Tutorial and Glitch Exploit
Want more out of Creation Workshop? Say no more! Turns out there is a very helpful glitch in the software that you can leverage along with if-then statements to make some very customized G-Code.
If you aren't familiar with G-Code this should help get you off on the right foot with some of the more complicated things you can do with creation workshop G-Code.
Exploiting the Glitch isn't necessary but will help your code run a little smoother. Let me know in the comments if you're interested in the exposure calibration part and I'll put it on thingiverse.
I hope you get a lot out of this tutorial and if you have any questions I will do my best to answer them just leave them in the comments below.
Creation Workshop is free to download and use software that many people use for there resin based 3D printers. There is a paid version available that doesn't offer much of an improvement over the free version, because of this most people use the free version. This video deals with editing G-Code for the free version of creation workshop.
The printer I use is the DLP printer developed by 3Dfacture called the the Draken.
Checkout my Facebook page here: https://www.facebook.com/GarageScience/
Follow me on Instagram: @garage_science
And of course make sure you Subscribe!!!!!
7
views
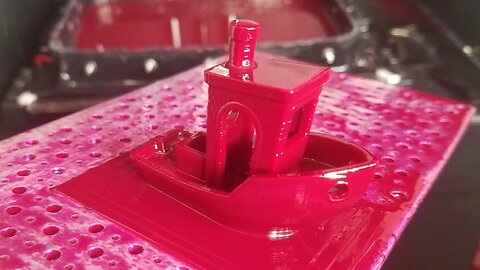
Improve Build Plate Adhesion on Your 3D Printer
We've all been there, failed print after failed print. I want to show you some simple improvements to nearly eliminate print failures from parts separating from the build platform.
#garagescience #maker #doityourself
I managed to modify the build platform on my DLP 3Dprinter to include a large array of closely spaced holes to not only allow resin to pass through the plate and thereby lowing the separation forces but to also allow resin to cure into the holes slightly and increase the adhesion of the part to the build platform.
There is definitely a lot of patience that goes into making a modification like this you can modify your printer and it'll look almost like a CNC mill did it.
I also created a handy tool to easily separate parts without needing a scraper, I'll go over how to create this tool in the video.
The third aspect of this improvement is an overview on creating custom rafts to print parts onto. Since many resins tend to warp and curl on long thin edges (especially on overcured areas) such as the rafts used to attach parts to a printer build plate, having a graduated raft helps to significantly reduce the chances of part separation due to warping on the edges of the raft.
If you made it this far through the video description then you probably had the patience to stick all the way through the video. I applaud your loyalty to my humble Youtube channel. If you haven't already, remember to subscribe and share this video with other 3D Printer lovers. Be sure to like this video as well and leave me a comment about anything I can improve on future videos.
Check me out on FB here: https://www.facebook.com/GarageScience/
I am also on instagram @garage_science
16
views
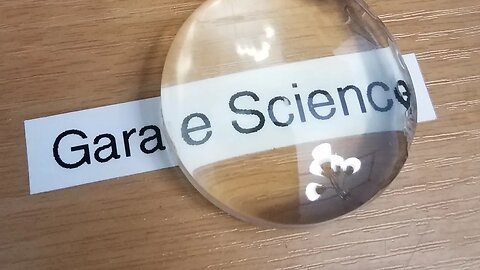
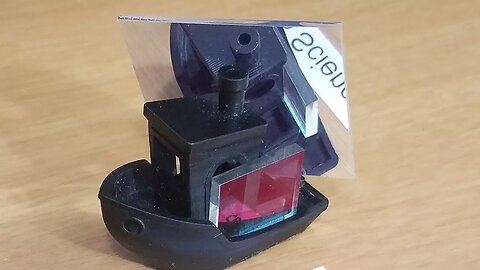
Print Transparent Parts ~ Autodesk Clear Resin Review ~ 3D Printing Material for SLA 3D Printers
Enjoy a very in depth review of the Autodesk PR48 Clear Resin that was designed for the Autodesk Ember 3D Printer. This resin is however compatible with SLA/DLP printers that cure resin in the 402nm wavelength range.
#garagscience #engineering #autodesk
This resin can be purchased for $119.95 from Autodesk or one of it's distributors. I chose to purchase mine through the jeweler website riogrande.com because they have slightly lower shipping costs than Autodesk. Below is a link to this resin on their site:
https://www.riogrande.com/Product/Ember-Clear-Photosensitive-Resin/701277
#garagescience #maker #autodesk
Autodesk was nice enough to release the recipe for their clear resin, that recipe can be obtained here: http://learn.ember.autodesk.com/blog/open-source-resin
I loved using this resin and I will definitely be purchasing more in the future. If you have any questions about this resin please leave them in the comments section below. I tried to offer as much information as I could about this resin so you know what to expect if you decide to purchase some.
If you are new to SLA (Stereo-lithographic) or DLP (Digital Light Processing) 3D printing please watch my video explaining how these types of printers work: https://youtu.be/hQ21gbeYFYQ
I love to get feedback about my cinematography and I want to make my videos more appealing and more interesting to watch in the future. Please let me know in the comments what I can improve on of there is something about this video you want to see in future videos then let me know as well.
As always be sure to check out my Facebook page Garage Science here: https://www.facebook.com/GarageScience
You can also find my on Instagram @Garage_Science
25
views
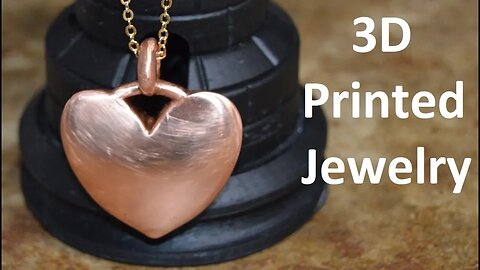
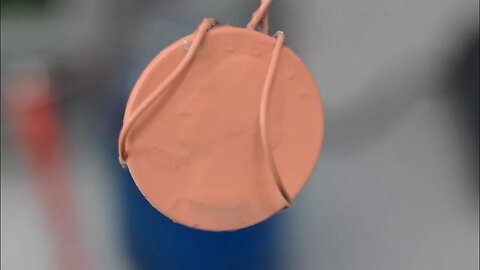
3D Printed and Copper Plated Jewelry ~ DIY Copper Necklace Pendant
Enjoy the evolution of this amazing project from concept to finished product. The wife loves it and I loved making it! She received this for Valentines day and I received a boat load of brownie points! I'm happy to answer any questions just let me know in the comments.
Get the Conductive paint I used in this video here:
https://amzn.to/2MIKU3H
3D printing opens up limitless options in so many areas, the particular printer I use is a DLP/SLA 3D Printer. Meaning it uses a high definition projector to cure liquid resin layer by layer until a final part is created. The 3D printer I own is a 3Dfacture Draken which I received after backing their kickstarter campaign. The resin I used in this video was Autodesk Ember Clear resin. Click the link below if you would like to see more about how exactly this printer works: https://youtu.be/hQ21gbeYFYQ
Multiple guides exist (including my own) on how to setup a copper plating bath. You'll notice the pendant in this video came out of my plating bath with nodules all over the surface. This was due to having a relatively high pH. As a part copper plates hydrogen gas is generated, this slowly raises the pH. Since I had been doing quite a bit of plating before this video I should have done a test plate prior to plating this pendant. The results though weren't terrible and as you can see in the video I was able to still make this into a beautiful piece of fine jewelry.
To see how my plating bath works click this link: https://youtu.be/7QXi4PM39ho
To see how I make my plating solution click this link: https://youtu.be/yvW5mWbUbU4
To see how I copper plate plastic 3D printed parts click this link: https://youtu.be/nmeLfZw7pD0
Be sure to check our my facebook page: https://www.facebook.com/GarageScience/
The electroplating process I used in this video is more complicated than say the one used in the video titled "Electroplating - Easy DIY Nickel, Copper, Zinc Plating" (https://youtu.be/G-PtnwtOR24) but it's not so complicated the average person can't get it to work. Comment if you have any questions please!!!
You can also find me on instagram under the name "garage_science"
28
views
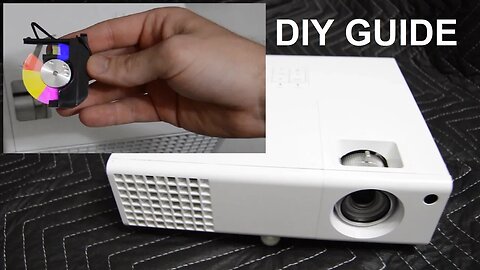
DLP Projector Color Wheel Removal/Replacement Guide ~ Acer H6510BD ~ Improve 3D Printing Speeds
Improve your printing speeds without bricking your projector. Follow this step by step guide to make it happen flawlessly. In this video I break open my DLP projector to remove the color wheel. Replacement bulb here: https://amzn.to/31MfP1K
For some or even most this is probably a daunting task. I'll do my best to make it straight forward and simple so anyone can do it on any projector.
Since DLP 3D Printers are only concerned with black and white projections, the color wheel is an unnecessary part that creates a light filter and reduces the overall lumens output of your DLP projector. Removing this part increases the light intensity and thereby decreasing your resin curing times. Most printers reduce their resin cure times by 10% by removing the color wheel.
A DLP Projector uses two key components to refine the light created from the halogen lamp to make the final projected image. The first is the DMD (Digital Micromirror Device) which directs the light towards or away from the output lens and the second is the color wheel which generates the color for the outputted image.
A color wheel is broken into multiple sections. The non-clear quadrants function as light filters to create different colors. By removing the color wheel we'll get back the light intensity lost by passing the light through the colored quadrants.
If you're new and don't know how a DLP/SLA 3D printer works then check out my video where I give a thorough walkthrough of my Draken DLP 3D Printer: https://www.youtube.com/watch?v=hQ21gbeYFYQ
If you found this video helpful please like it and leave me a comment.
If you haven't looked at my channel please follow this link and check it out: https://www.youtube.com/channel/UC8gwNDVWC7TEIEbY_aXNDmg
Subscribe and help me make more videos like this!!!
Background Music Attribute:
Deliberate Thought by Kevin MacLeod is licensed under a Creative Commons Attribution license (https://creativecommons.org/licenses/by/4.0/)
Source: http://incompetech.com/music/royalty-free/?keywords=deliberate+thought
Artist: http://incompetech.com/
20
views
Best Copper Plating Solution ~ DIY Professional #3
Here is a step by step guide of what I consider the easiest and best copper plating solution without purchasing expensive plating kits. If you’re new to copper plating then watching this video is a must!!!
#garagescience #diyprofessional #garageplating #diy #doityourself #chemistry #copperplating #electroplating #science #garage #scientist
This copper plating recipe is derived from the think and tinker site recipe available here:
https://www.thinktink.com/stack/volumes/voliii/consumbl/cplatmix.htm
Bill of Materials:
Conductive Paint for plating non-metal objects:
https://amzn.to/2MIKU3H
Copper Sulphate:
https://amzn.to/2L9EdmF
Sulphuric Acid:
https://amzn.to/2UCABOh
PolyEthylene Glycol:
https://amzn.to/2UBOBrC
Air Pump:
https://amzn.to/2UAhSmF
DC Power Supply (power supply I have):
https://amzn.to/2PuYBz7
DC Power Supply (all you actually need for this purpose):
https://amzn.to/2Py5r6W
Copper Wire:
https://amzn.to/2UE20iO
The photo gallery of all my electroplating projects is located here:
https://drive.google.com/drive/folders/0B6ko0iKoNkCJSEJtaHJRR193ajg?usp=sharing
You can see how my electroplating bath works by going here:
https://youtu.be/7QXi4PM39ho
I first got into electroplating just as a fun science experiment. As I tried to plate things better and better that grew into what I have now which is very close to professional level copper plating results. I’ve never purchased a kit and I have made everything I use from scratch.
I have used citric acid before as a replacement for sulphuric acid (battery acid) and you can get good plating results with a milder acid like this. Sharp corners are not handled very well in a bath like this however and you will tend to get tree like growths around sharp corners with a citric acid plating solution.
Always use caution when working with sulphuric acid. It isn’t such a harsh chemical that it will immediately melt the skin from your hand if unprotected but it must be washed off with lots of water or you will get a chemical burn. And getting it in your eyes is EXTREMELY hazardous so never handle without eye protection. This plating solution can be very effective and very safe if treated properly. I highly suggest a sealed screw on lid container like the 5gal bucket I use in the video to make sure that no electrolyte can pose a hazard to the surrounding area or yourself.
There is a sea of information about copper plating, most of it relating to industrial copper plating. The science in the published information is still good even for small operations. Make sure you still do plenty of research so you know how your apparatus operates and avoid giving yourself a migraine over trying to figure out why your copper plating bath doesn’t work.
The video titled "Making copper electroforming / electroplating bath" by Jason Welsh (https://youtu.be/5k6x3OzYwDk) provides another approach that is similar to mine.
The video titled "Best DIY Copper Plating Methods" by Christopher Wagner (https://youtu.be/oHSaUu2U06Q) shows voltage effects on short duration plating.
The video titled "Copper Electroplating - The Sci Guys: Science at Home" by The Sci Guys (https://youtu.be/T3qhqTVssoo) demonstrates the basic electrochemical principles behind copper plating.
The video titled "How to electroplate copper onto objects such as metal & plastic" by InForAPenny2010 (https://youtu.be/yTrcpucEplo) shows a similar method that I use to copper plate plastic. You can see in the thumbnail for this video a copper plated 3D Print.
As always I am glad to answer any questions. Check me out on facebook and like my page because I do post smaller projects there and on my Instagram account when I don’t make videos of them.
https://www.facebook.com/GarageScience
216
views

Creation Workshop Mask Builder Preview
Sneak peak at a java program I am writing to create tailored grayscale images that will level out the light distribution of the projector in your DLP 3D Printer. Subscribe so you don't miss the release of this awesome tool. There's going to be quite a few good projects coming out of the first quarter of 2017!!!
For those that may not be aware. A DLP 3D Printer uses a high definition DLP (Digital Light Processing) Projector to cure resin into hard plastic layer by layer to create a 3 dimensional part. The inherent nature of using DLP Projectors is that the UV light intensity is not even across the build area and can result in overcuring in some areas and undercuring in others.
Creation Workshop software allows for images to be used as masks for the projected images almost like a filter. With the right grayscale image you can level out the light intensity distribution to get perfectly even curing. That is the goal of this software
8
views

Guns Fun ~ Shooting Tannerite, Shooting Ice and Shooting Oobleck
An explosive twist on splitting firewood plus some additional fun shooting water jugs and Oobleck (A non-newtonian fluid). Share with your friends if you enjoyed watching and subscribe to my channel so you don't miss any great content.
#garagescience #tannerite #shooting #guns #oobleck #explosion #neardeathexperience #backyard #safety
When each round hits the red cup there's an oobleck explosion. And shooting tannerite in a stump with a winchester was awesome. There are plenty of videos about shooting into oobleck but not many also include some really great shots shooting tannerites. Tannerite is an exploding target compound that reacts rapidly causing it to explode when shot with a high power rifle. I used a winchester lever action rifle to blow up this tannerite, it's a model 94 chambered in 30-30. I also used my sig sauer p220 45 acp to shoot oobleck (a non newtonian fluid). But by far my favorite part was the tannerite explosion.
Also check me out on Facebook for additional content that didn't make it into my videos: https://www.facebook.com/GarageScience
Make sure that if you are shooting tannerite that you are a safe distance away especially if you are embedding the tannerite into another object. A contained or directed blast can very quickly become very dangerous. You'll notice in the video that beside blowing the stump to pieces, the stump that everything was sitting on was also cracked in half. This was way more explosive force than we were expecting. But we were super excited to catch it on video for you to enjoy!
Also, recently watched this video titled "70 LBS Of Tannerite VS BEAVER DAM!!!" by Mark Freeman #408 (https://youtu.be/eP6_sExYh_Q) and got a really big kick out of it. Have fun and be safe!!!
Garage Science is a channel devoted to experiments and projects for tinkerers and hobbyists.
130
views
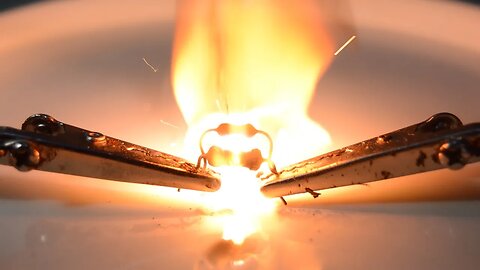
How to Start Electrical Fires ~ Burning/Blowing Up Resistors With Science!!!
Make fire and blow up resistors while also putting sound electronic theory into practice. Is there a more fun way to learn? I doubt it!
Like me on Facebook and share this video with friends.
#garagescience #science #fire
https://www.facebook.com/GarageScience
Burning resistors is fun and I had a lot of fun making this video. I did make my whole garage smell like an electrical fire in the process though. The big point to drive home with these experiments, especially the ones involving low voltages such as the ones using only 10Volts, is that if you over power a resistor it will burnout and possibly catch on fire. In a controlled environment it's not a big deal but if this were in a wood casing, or around flammable liquids this could get really bad really fast. So make sure you spend a few minutes, do some math, and make sure you aren't about to burn your house down with your DIY/Science/Physics project! Also the smoke from resistors burning can cause some eye irritation and make sure if you're going to do this you wear eye protection in the resistors explode.
I tried to cover the basics of ohm's law and the power equation. I also tried to cover the primary differences between resistors in parallel and resistors in series. If you have any questions regarding these items please ask in the comments and I'll be more than happy to answer.
I hope you enjoyed this video and if you haven't already, please support this channel by subscribing! And watch some of the other videos on my channel. I try and push out the highest quality videos as I can but I'm always open to some constructive criticism, so leave me a comment if you see something I could be doing better.
Also make sure you don't do what's described in the video titled "A Fire Department Warned People To Never Make This Dangerous Mistake With An Extension Cord" by nollygrio (https://youtu.be/W9U9ZXQWdXw)
The video titled "Resistor burning slowly" by afrotechmods (https://youtu.be/MUfMPjMAwx8) inspired me to make this video.
12
views
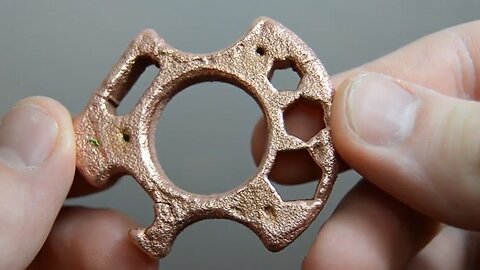
Electroplating 3D Prints ~ Copper Knuckle - Reinforced 3D Print
This reinforcement method greatly increases the strength of 3D Printed parts. So much that you could easily beat someone to death with this one finger knuckle with out worrying about damaging it. I say "beat someone to death" in jest but that doesn't mean it isn't true ;)
Get Conductive Paint to electroplate non-metal objects here:
https://amzn.to/2MIKU3H
By reinforcing printed parts it opens up a much larger world of possible projects since your strength limitations will be greatly diminished. I might have to print myself an AR-15 Lower Reciever next ;)
I had a lot of fun making this video, it was definitely the first time I have ever punched the living crap out of a watermelon. I hope you enjoyed it too, make sure if you did that you let me know in the comments.
If you want to see how my electroplating bath works that I used to copper plate this item then check out this video: https://www.youtube.com/watch?v=7QXi4PM39ho
Check out my FB page here: https://www.facebook.com/GarageScience
And definitely check out Gravelle Knives for more awesome gear like these knuckles. http://gravelleknives.com/index.html
Gravelle Knives FB: https://www.facebook.com/Gavelleknives
61
views
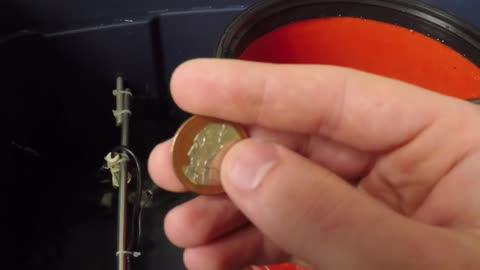
Homemade Copper Plating Bath - Easy, Affordable and Reliable - DIY Professional #2
Other videos show how to copper plate but use a mason jar or something similar. This is a highly reliable and effective copper plating bath that has the ability to produce professional results and run continuously for weeks. I built this for approximately $150 which does not include the price of the variable DC power supply, but as you can see in this video you don't need a lot of voltage and could easily use a voltage regulator or voltage divider to step down the voltage from even a cell phone charger to get an affordable power supply.
Here are some pictures of other items I have plated, sorry I forgot to include them in the video:
https://drive.google.com/folderview?id=0B6ko0iKoNkCJSEJtaHJRR193ajg&usp=sharing
This electroplating bath has a modular design that allows you to do any kind of electroplating with both air agitation and temperature control as long as the electrolyte tank fits into the heating bath. From what I have researched there is no home plating kit that provides these features for any where near the price I built this for. This encompasses the idea behind the DIY Professional.
This is the 4th interation of my electroplating bath design and I have been successfully copper plating and nickel plating a large variety of items for the past year without any issues related to the design of the electroplating bath.
All components for this bath were purchased at Home Depot or Amazon. Below is a list of major items I used while designing this bath:
Conductive Paint for plating non-metal objects
https://amzn.to/2MIKU3H
Stainless Steel Rod:
https://amzn.to/2L9gvXE
Titanium Wire:
https://amzn.to/2EgiO9T
pH meter:
https://amzn.to/2GXKQrC
Air Pump:
https://amzn.to/2QIEwb2
Submersible Water Pump:
https://amzn.to/2Lb0sbR
Automatic Thermostat:
https://amzn.to/2PwcqgP
Stainless Steel Mesh for mesh bags:
http://www.mcmaster.com/#stainless-steel-mesh/=11a6hm7
5 Gallon bucket and lid:
http://www.homedepot.com/p/The-Home-Depot-5-gal-Homer-Bucket-05GLHD2/100087613
http://www.homedepot.com/p/Leaktite-5-gal-Screw-Top-Lid-5GAMMA6/203205720
Outer Tank:
http://www.homedepot.com/p/Rubbermaid-18-Gal-Roughneck-Tote-FG2214TPMICBL/100644802
^^^I'm pretty sure my Rubbermaid bin is 18 Gallons but it may be the next size bigger than that. Just make sure your bin is big enough for you to fit a 5 gallon bucket inside and still get the lid on.
Below is the recipe for the electrolyte I am using to Copper Plate:
https://drive.google.com/file/d/0B6ko0iKoNkCJamd6VUhTSm1paFk/view?usp=sharing
For nickel plating I use something called a Watts Bath.
The part I am plating in this video was 3D printed on my Draken DLP printer by 3DFacture. Click on the annotation at the end of the video to see how I printed this part.
#garagescience #diyprofessional #copperplating #electroplating #chemistry #homemade #diy
Be sure to like me on Facebook here:
https://www.facebook.com/GarageScience/
44
views
Giant Rook 3D Printing Timelapse | Resin DLP/SLA | 3D Facture Draken 3D Printer
Because why not right ;)
This is the model I printed after making a Creation Workshop Walkthrough guide. Check out some of the other timelapse videos on my channel.
Eventually I would like to have printed an entire set of over sized chess pieces. In a world where things are always being made smaller I think it's time to super size more than just people's waste line. ;)
This was printed on the Draken 3D SLA/DLP printer by 3D Facture. I used Fun to Do Deep Black Standard Blend Resin. The print was done at 0.05mm layer height. Layer exposure time was 12s. Bottom layer exposure was 24s and 15 bottom layers were used to attach the print to the build plate. Print time was about 15hrs.
You'll notice that this print was done without supports whereas the creation workshop walkthrough generates supports for the model. I forgot to plug in my computer's power cable after starting the print initially and after my computer died the print failed. In order to reduce the print time I cut out the supports and took my chances. All I had to do was poke a hole in the bottom of the support raft to drain the resin from the void.
This printer uses a high definition projector to harden liquid resin. If you want to see how this process takes place check out my 3D Printing Guide here: https://www.youtube.com/watch?v=hQ21gbeYFYQ&list=PLqQbaCz5UjevzYjDzg-HW8xFldbymnd0C&index=1
Check out my FB page: https://www.facebook.com/GarageScience/
Use "newcustomer10_G" coupon code to get 10% off of a new Draken 3D Printer!!!!
3DFacture Store is located here: http://3dfacture.com/store/
Timelapse shot with Go Pro Hero 4 using time lapse mode. Video edited using Adobe Premier Elements.
26
views

Complete Creation Workshop Walkthrough Guide
Enjoy this in depth walk-through of the open source software creation workshop. It is long I know, but I hope you find it helpful. If something is unclear bring it up in the comments and I'll do my best to clear it up.
I made this tutorial based around using the software to control an SLA/DLP Resin Printer. I use the Draken printer by 3D Facture. A DLP printer uses UV light to cure photosensitive resin. Because an
entire layer can be cured at once these printers tend to be very fast if you use large layer sizes. That being said, using smaller layer sizes will increase the number of layers and consequently increasing build time.
To learn about setting up a model and creating more advanced supports check out my video on model preparation here: https://www.youtube.com/watch?v=-KVGNdGDGI8&list=PLqQbaCz5UjevzYjDzg-HW8xFldbymnd0C&index=2
(the 3D Facture site started undergoing updates between recording this video and uploading it, so if my links don't work let me know and I'll update them)
Links:
Draken User Manual: http://3dfacture.com/wiki/user-manual/
Creation Workshop:https: https://cdn.instructables.com/ORIG/FPL/SUEH/INT484TM/FPLSUEHINT484TM.zip
Creation Workshop Host: https://github.com/area515/Creation-Workshop-Host
Creation Workshop User Manual: http://www.buildyourownsla.com/forum/download/file.php?id=446&sid=51dad001c5261e5aba2854f41f78ac73
Use "newcustomer10_G" coupon code to get 10% off of a new Draken 3D Printer!!!!
3DFacture Store is located here: http://3dfacture.com/store/
Check out my FB page: https://www.facebook.com/GarageScience/
14
views
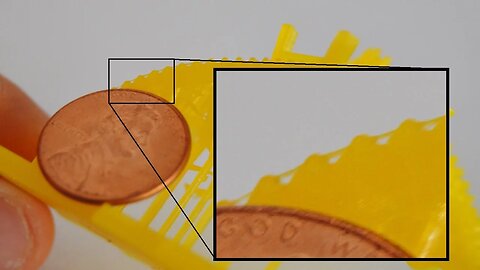
Ultra High Resolution 3D Print
This massive STL file has hair thin details that actually printed. A startup jewelry company in Vietnam asked to have a sample part made and the STL I received was over 800MBs!!!!! Some of the detail in this part is thin as a strand of hair and I was very pleased to see these features actually get printed.
I printed this part with Maker Juice G+ Yellow resin. It was printed at 0.01mm layer height and 0.037mm XY axis resolution. Exposure time was 5s and base exposure time was 10s, 115 base layers were used. ~3800 layers per print were needed and took ~12hrs to print.
I address this in the video but there was a significant amount of background exposure that somewhat effected the quality of the part. Background exposure occurs when the black color from the projector isn't actually black and over time it cures a layer of resin that attaches to the print. The unsightly blobs that result can ruin a print. Thankfully they didn't overly effect the finish on this print.
This is the first time I've had to deal with background exposure and has only happened since starting to use Maker Juice. I have gone through a liter of Fun to Do resin and never dealt with background exposure issues.
This project definitely got me turned off of Maker Juice and in the future I would rather pay a little more for resin and get something that is easier to work with.
I hope you enjoyed the timelapse and checkout my channel. Please subscribe and support this channel if you like my content.
Checkout my FB page here: https://www.facebook.com/GarageScience/
And check out the website for the Vietnam jewelry startup here: http://www.tuanjewels.com/
Time Lapse was shot with a Go Pro Hero4 and edited with Adobe Premiere Elements.
6
views

Easy Romantic Gift | Twisted Heart Vase Timelapse | 3Dfacture Draken 3D Printer
Like my FB page here: https://www.facebook.com/GarageScience
This is an quick and cheap romantic gift for spouses, girlfriends, wives and special someones. Great to do for Valentine's Day!!!!
This item was printed with a Draken SLA/DLP printer from 3Dfacture. I printed it using Maker Juice G+ Yellow resin. It turned out pretty well, this is actually the first print I have ever done with this type of resin and was pleased with the result. The odor is slightly stronger than the Fun to Do Standard Blend Deep Black resin that I normally use.
Check out my channel for more resin printer timelapse videos. Youtube is a little scarce when it comes to timelapses of these types of printers.
Thingiverse #: 42570
8
views