

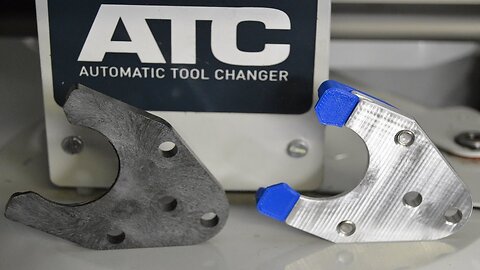
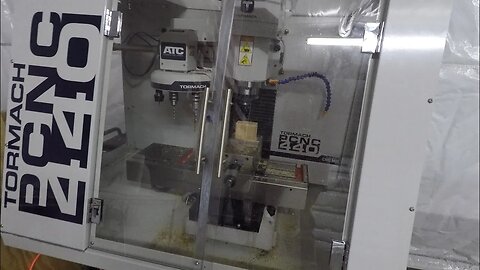
Improved Tormach ATC Tool Holder for PCNC 440, 770M and 1100M Automatc Tool Changers
Custom machined tool holding forks for the Tormach PCNC 440 ATC. These replace the plastic forks that come with the Automatic Tool Changer. There's something special about using a machine to make new parts for that machine.
The background for this project is that the stand plastic tool holding forks tend to bend and deflect either from having heaving tools like the JT2 drill chuck with a large drill bit or they deflect slowly but permanently over time if you leave heavier tools in the ATC. The ramifications of this effect is that occasionally your spindle may bind up with the tool as it comes down to grab it. This causes the spindle to strip/break the nylon screws or break the tool holding fork. The tool holding forks are suppose to break like this when there is a misfeed, however there's no way to predict when it's going to happen and I've personally experienced it more times than I'd like.
To fix this I'll be machining an aluminum tool holder out of 6061 Aluminum and I'll be using a 3D printed detent to lock the parts into place.
Let me know what you think in the comments, this video actually got to cover a lot of ground. I'll cover some of the solidworks settings, feeds and speeds, ATC alignment, fixturing, 3D printed fixtures, cutting strategies ect.
Buy on Etsy here:
https://www.etsy.com/listing/1452972955/improved-tormach-atc-tool-holder-forks?ref=listings_manager_grid
Be sure to follow me on Instagram and Facebook as well.
46
views
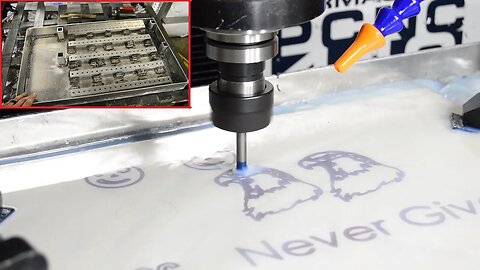
DIY Tile Engraving Fixture for CNC Mill ~ Tormach PCNC 440
I got the idea for engraving tiles with my CNC mill while walking past ceramic drill bits in Home Depot. Suddenly the thought of a tile in front of the toilet with the phrase "Never Give Up" emblazoned on it popped into my head. The resolve in one's darkest hours such a tile could provide motivated me to try and engrave that phrase. It was a success. But milling ceramics on a CNC mill can be pretty bad for the ways and other linear components on the mill. Long term it'd be equivalent to throwing beach sand into the mill every time I turned the flood coolant on. There had to be a better way.
Enter the tile engraving fixture. The fixture functions as a separate tank to maintain the cutting fluid used while milling tiles separate from the coolant used to mill metals and other materials. This approach would allow long term engraving without risk to the other critical components on the CNC mill.
Because Tormach machines utilize an auxiliary 120V plug to power the flood coolant pump its very simple to swap that to a submersible pump in the engraving fixture.
Submersible Pump:
https://amzn.to/3OZ3jVl
Mill Probe Build
https://youtu.be/TXOfKo_iUDQ
This project was the first time I've ever tried welding aluminum. It is very obvious this is the case. Any advice is very appreciated. Though I think I'll be looking to swap my Lincoln Electric 180HD MIG welder with the Magnum 100SG spool gun for a TIG welding in the relatively near future.
Be sure to follow me on FB and Instagram as well:
https://www.facebook.com/GarageScience
@GarageScience
#garagescience
#DIYProfessional
#tormach
#cnc
#diycnc
#engraving
#tiles
#pcnc
77
views
Followup for DIY Tile Engraving Fixture for CNC Mill ~ Tormach PCNC 440
After about a week goofing around with the tile engraving fixture I can say that it works very very well. The containment of ceramic dust is great and keeps the rest of the machine clean. This will ensure no long term problems with wear since the ceramic dust won't go into all the cracks and crevices of my Tormach PCNC 440.
Let me know what you think in the comments. If you have any ideas or want to inquire about a service you can reach out to me via email (the.scientist.in.the.garage@gmail.com) or you can check out me Etsy store here:
https://www.etsy.com/listing/1271407883/true-custom-ceramic-engravingtile?ref=listings_manager_grid
#garagescience
#diyprofessional
#tormach
#PCNC440
#cnc
#diycnc
#engraving
#tiles
16
views
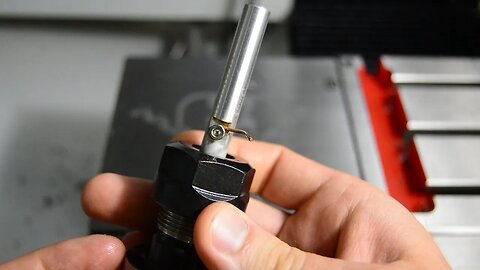
DIY CNC Mill Probe ~ Tormach PCNC 440 Mill
Since I'm cheap and not milling high tolerance components.... yet. I decided to make a simple probe out of some precision ground 3/8 inch aluminum round stock.
The basic premise for how this probe works is to measure for an electrical connection between the probe and the vice/stock. This approach should be fairly accurate since the electrical connection will be a very low resistance as soon as the probe makes contact.
The hurdle I had to overcome, since the resistance through the body of the machine and up through the table is actually pretty low, was to electrically isolate the top of the probe from the tool holder. This ensures the only resistance measured is between the probe and the vice.
The continuity function on most multimeters usually has an audio beep function when a very low resistance is measured (ie. electrical continuity exists). I utilized this function to give a quick audible indication for when the CNC probe makes contact.
The aluminum for this project can be purchased here:
https://amzn.to/3sOoTmu
A similar beeping probe can be bought here:
https://amzn.to/3MPfUJC
Also check out my FB page and Instagram. And be sure to leave all your love and hate in the comments ;).
#garagescience
#diyprofessional
#tormach
#cnc
#diycnc
#probe
#pcnc
#machinist
28
views
Tormach PCNC440 ~ Premium Package with ATC Setup Lessons Learned
Lots and lots of lessons learned with this video. I focus a little more on the lessons learned then on the step by step setup. There are a lot of great Tormach guide videos on the step by step setup and I'd encourage anyone whose doing this to watch those as well. I cover in this video various points in the setup for me and some of the tips, tricks and mistakes I made along the way. Enjoy and let me know what you think in the comments.
#garagescience
#diyprofessional
#tormach
#cnc
#diycnc
#pcnc
#machinist
12
views
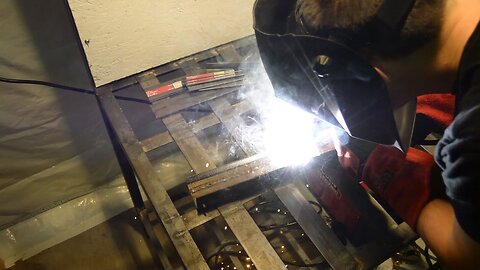
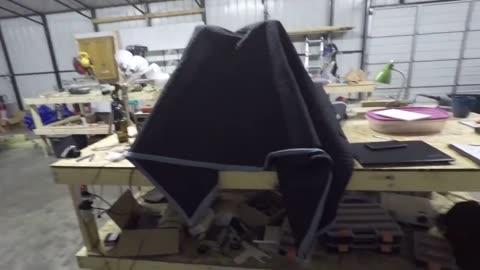
DIY Welding Bench ~ a Metal Workbench For Easy MIG Welding!
I made a simple DIY Workbench to make MIG welding simple and easy (even though MIG welding itself is very easy already ;) ). Most of the workbench is made from 1.5" angle iron, some flat stock steel and a little square tube steel. I put adjustable feet on the bottom with little pads of rubber so the table (besides being heavy) has no wobble and sits very nicely on the ground. I also added two monster flood lights to keep the bench well lit and added a vent fan to vent off the smoke and gasses generated from welding.
I basically shot from the hip on this, the table top is 36"x30" and the table top sits about 32" off the floor. The lights are 6' off the floor and make it bright enough to see what you're welding without an auto tinting face shield.
As always leave your comments and hate mail in below and make sure you like the video and subscribe. Thanks for watching!
Facebook: https://www.facebook.com/GarageScience/
Instagram: @garage_science
#garagescience
#diyprofessional
#welding
#welder
91
views
1
comment
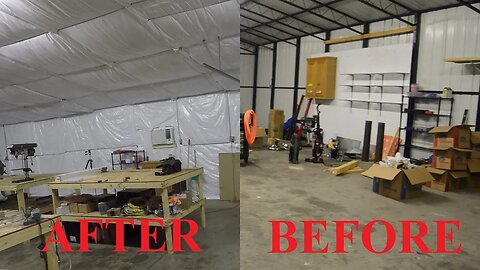
How to Insulate a Shop Yourself ~ How I made my metal shop bearable to be in
I finally got my shop insulated and I'll tell you what it makes a world of difference. Besides the obvious temperature benefits I also have better lighting and sound dampening as well. This is an improvement every single metal building needs.
Insulation can be expensive, it's even more expensive when you hire someone else to install it. Let me know what you think about this video and the DIY install I did. Was it worth it?
I spent about $6000 start to finish on this project (which includes an A/C unit and wiring a new 220V plug). I had quotes from other people of greater than $10000 to insulate a building this size. Needless to say there was a substantial cost savings by doing it myself.
I purchased my insulation as a kit for a 30'x56' shop from LTH Steel Structures:
https://www.lthsteelstructures.com/r-13-insulation-package-30-x-56-x-10-steel-building
Regrettably it looks as though prices on building supplies have gone up substantially since I purchased my insulation only about 3 months ago in June 2021. Now Sep 2021 it's nearly $1000 more expensive. Hopefully the price jumps are more due to the current housing boom and not inflation :/
If you enjoyed this channel make sure you subscribe and share on all your favorite social media platforms. Also, follow me on Facebook and Instagram!
https://www.facebook.com/GarageScience/
@GarageScience
#garagescience
#diyprofessional
#insulation
35
views
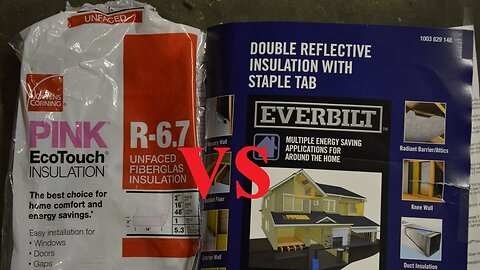
Insulation Science w/ R Value Explained ~ You Can't Cheat Heat Transfer
While looking at my options for insulating the metal frame of my shop I did a quick experiment with some comparative analyses to discover/verify that R-Values are important and there's no cheating science.
The R Value of insulation is a rating the measures the resistance of heat transfer through that material. Therefore the higher the R-Value the lower the heat transfer and the better the insulating effect. Typically the two biggest factors to determining R Values is the material used and its thickness.
It might be tempting to jump for a thinner, cheaper insulation that claims a high R-Value but it's likely only applicable to very specific circumstances that likely don't apply to you. So understanding the factors involved in determining an R Value is very helpful.
Since most bulk insulation applications are some type of blow in, spray on or fiberglass batt insulation, and since there only a small difference in R-Value per inch of material on these insulations that means the name of the game is primarily thickness of insulation.
The heat transferred into a metal shop building is primarily from convective heat transfer and radiant heat transfer to the exterior of the building which is then conducted through the structure to the interior of the building. On the interior of the building convection heat transfer and radiant heat transfer then transfer the heat into the air inside. Use of insulation blocks both but it's effectiveness is heavily dependent on the material and thickness of the insulation.
I try and provide quality videos, if you enjoyed please subscribe. If you're not willing to subscribe then please tell me why in the comments so I can do better in the future. @GarageScience
Be sure to follow me on FB: https://www.facebook.com/GarageScience/
And on Instagram: @garage_science
20
views
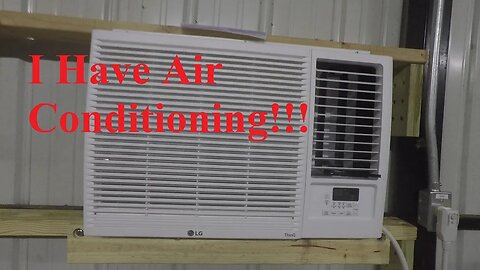
VLOG #2 Shop Air Conditioning and Insulation
Another update video on some of the events around the Garage Science workshop. Trying to make the shop a year round 24/7 usable space by adding A/C and insulation. Most times during the day it gets up to about 105F and on really hot days it can top 120F. Not too good for the tools and equipment I'm using in here and definitely not too good for people. Heat stroke is a thing and thankfully I haven't had it yet... but I've gotten close.
This channel has been and will always be for the average joe and day to day tinkerers that don't lead glamorous youtube star lives. So if you're part of the 99.999% that fall into this category make sure you subscribe and share with your friends. I think we've all become fairly familiar with the concept of algorithms and simply watching videos anymore isn't enough. You gotta interact with them if you want to see me do well. So thanks for the support, likes are free so don't be chincey.
#garagescience
#diyprofessional
#engineer
Follow me on FB:
https://www.facebook.com/pg/GarageScience/
And on Instagram:
@garage_science
60
views
VLOG #1 It's Been a While!!!
Quick update because I haven't released any content in a while! Life is crazy, and right now it's crazy busy. But there is something to show for it. But to avoid any patent disqualifying public disclosures I can't show really anything. Hang in there, subscribe and share my channel far and wide. Big things are happening for Garage Science in 2021.
11
views
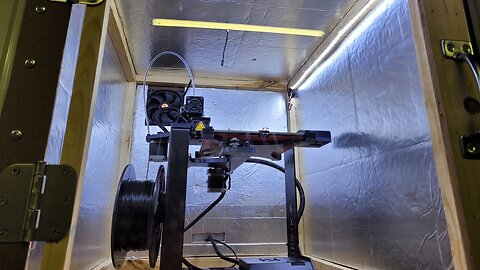
DIY 3D Printer Case ~ An Easy Enclosure to Improve 3D Printing Quality
Here's my easy solution when you have to run a 3D printer in a space that isn't temperature controlled. It's fairly easy to keep a 3D Printer away from drafts or major temperature shifts, but outside in an unheated shop during the winter brings the challenge of maintaining temperature around the print bed to the foreground very quickly.
I think this 3D Printer Enclosure turned out extremely well and I couldn't be more satisfied. Let me know what you think about this enclosure in the comments.
An FDM printer like the one used in this video basically works like a hot glue gun attached to a gantry that slides back and forth with a build platform that moves up and down. This combination of movements allows a very thin bead of melted plastic to be laid down with each pass. This plastic is built up into layers until a 3D Printed part emerges. Large temperature shifts effect the amount of shrinkage that occurs in the plastic during the printing process and excessive shrinkage can cause poor print quality or cause print to detach from the build plate resulting in a completely failed print.
I use a Makergear M3 single extruder printer, I've had it for a few months now and I'm very satisfied. There's a few quirky user interface aspects but it's built like a tank and prints very well.
Some of the specialty components I used in this enclosure are linked to below:
Cooling Fan: https://amzn.to/3quEhSd
LED strip: https://amzn.to/2VLpCEg
12V Power Supply: https://amzn.to/39MOeo4
Thermostat: https://amzn.to/2VH1rXB
Makergear M3 3D Printer: https://amzn.to/2JTUejY
Make sure you follow me on Social Media:
Facebook: https://www.facebook.com/GarageScience
Instagram: @garage_science
52
views
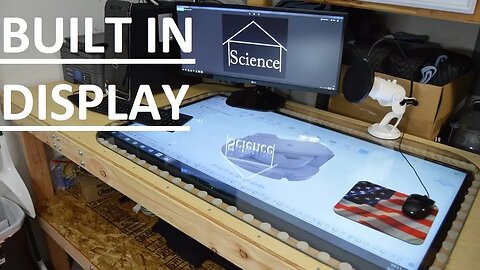
Making My Maker Computer Desk ~ Part 2, Two Years Later!!!
It's been over 2 years since this desk was originally built and it's been through a lot. I've gotten tons of comments and now I'm implementing some of those suggested improvements.
This desk has been an amazing addition to my work area and having a built in secondary display is very handy when you're looking for extra screen space. I would still like to make the TV display touch screen enabled so if you know an easy way to do this then let me know in the comments.
Make sure you check out my original video on how I built this desk from scratch:
https://youtu.be/gFOKZ-V_d4s
My channel is dedicated to all the random project I pursue and I've been very blessed to have the support I have from the youtube community. Be sure to like subscribe and share around social media. Every viewer makes this channel possible and I'm only here because you guys watch me. Help me grow and produce better content by sharing with your friends and family.
Also follow me on:
Facebook: https://www.facebook.com/GarageScience
Instagram: @garage_science
#garagescience
#diyprofessional
#maker
#engineering #make #diy #homemade #woodworking #woodworker #doityourself #technology #tech #project #hobby #experiment #garage #science #innovate #innovation
15
views

I'm Back! What Happened to Garage Science?
Well I'm back, and if you didn't know yet my day job for the past 6 years has been as a nuclear engineer with the US Navy! I've driven warships and operated nuclear reactors. But now the transition to civilian life has come so expect more regular content as the dust starts to settle in life. Let me know what you think in the comments and any particular content you'd like to see!
#garagescience #navy #veteran
11
views
Easiest Nickel Electroplating Guide for Bright Nickel Coatings
This is the easiest set of instruction I think that exist to get bright nickel plating without paying through the nose for expensive plating baths. The ingredients are relatively cheap and the results are amazing!!! Let me know what you think of this guide in the comments
Recipe:
Nickel Sulphate 8 grams/oz
video tutorial: https://youtu.be/2_jZCHQAPS4
get from amazon: https://amzn.to/2sC5WYn
Nickel Chloride 1.7 grams/oz
get from amazon: https://amzn.to/39wj2Ha
Boric Acid 1.1 grams/oz
get from amazon: https://amzn.to/2MOk6N4
Nickel Metal
get from amazon: https://amzn.to/36eQL6b
I tried to make these instructions easy to follow and simple, in my experience I've only had limited success with nickel plating up till now but with this recipe I've gotten really good results. This recipe is called a Watt's Plating Bath and is based on the guidance provided in the nickel plating handbook which can be viewed here: https://www.nickelinstitute.org/media/2323/nph_141015.pdf
Nickel plating is useful for creating decorative coatings of bright silvery metal that's corrosion resistant or for precoating other materials in preparation for copper plating such as when copper plating steel. Too see more about this reaction you can watch my other video on the topic: https://youtu.be/6CS84Rj8RrM
Electroplating is different from electroless plating in that a power source is used to induce the chemical reaction and there are two electrodes used in electroplating. This nickel plating bath is fast and only requires about 1 minute to get a complete coating of nickel on a part. You can easily provide the required voltage from 2 or 3 AAs or a cell phone charger.
Let me know what you think of this guide in the comments below and follow me on FB and Instagram.
FB: https://www.facebook.com/GarageScience/
Instagram: @garage_science
29
views

In Depth Enviroklenz Air Filter Review ~ An Air Purifier That Works
I couldn’t believe how quickly Enviroklenz responded over this review and even changed the design of their product because of it!!! The whole process of making this review was very eye opening and a great experience.
After making this video and sending it to Enviroklenz they responded in less than a day saying they had designed a cage for the blower and were working to implement it into the assembly process. That's impressive, major props to these guys for working to make the best product they can make!!!
Enviroklenz makes a wide range of products geared to help make your home’s air and surfaces cleaner and safer for both your short term and long-term health. The air we breath can have very significant effects on our long term health. Sometimes even by our own doing, in some cases when inside air is dirtier than outside air. Well this filter helps bring balance back to the quality of your indoor air. And I don’t mind saying that about it because I believe every word of it. Enjoy the review and here is a quick snap shot of some of the more technical information from my own experimenting:
Power Consumption: 65-75W (on high setting, this is approximately 1 incandescent light bulb worth of power)
Temperature Rise from inlet to outlet: 3 Degrees Fahrenheit
Filtering half life for VOCs: ~6hours (this means within 30hrs it could basically take any concentration of VOCs to essentially zero)
Patent Number: 8496735
Patent Title: Method and apparatus for control and elimination of undesirable substances
http://patft.uspto.gov/netacgi/nph-Parser?Sect1=PTO2&Sect2=HITOFF&p=1&u=%2Fnetahtml%2FPTO%2Fsearch-bool.html&r=2&f=G&l=50&co1=AND&d=PTXT&s1=Timilon&OS=Timilon&RS=Timilon
Watch how to make the homemade diffusers in this video by watching my other video titled “Homemade Essential Oil Diffuser How To ~ A DIY Oil Diffuser Anyone Can Make” here: https://youtu.be/0InJQ2EvhSY
If you would like to purchase an Enviroklenz air filter like this one you can get a 10% discount by using the discount code “Garage10” and the following link:
https://enviroklenzairpurifiers.com/enviroklenz-mobile-air-system-promotion/
If you would like to get the Wave Plus air purity monitor that I used in this review you can get it here: https://amzn.to/2paaJyF
And make sure you follow me on Instagram @garage_science
As well as on FB here: https://www.facebook.com/GarageScience/
67
views
1
comment

How to Make Nickel Sulfate Safely ~ A Nickel Plating Solution Ingredient
Creating nickel sulphate at home doesn't have to be hazardous. Here is a straight forward and easy way to make nickel sulfate solution for nickel electroplating safely.
The most common application of nickel sulphate is to electrplate nickel. Most sources of manufactured nickel sulphate are significantly more expensive than what it cost to make it at home. In this video I'll walk you through the how to and the why for everything you need to know to make do it yourself nickel sulfate.
Bill of materials:
Nickel Metal
https://amzn.to/2ZJTm4r
Sulfuric Acid:
https://amzn.to/2KstaYl
Hydrogen Peroxide:
https://amzn.to/2IUORwZ
Glass Bottle:
https://amzn.to/2Na1UzM
500g Nickel Sulphate Hexahydrate:
https://amzn.to/2N1WPtz
100g Nickel Sulfate Hexahydrate:
https://amzn.to/2ZGIvbn
I make DIY videos all the time and try and make them as simple as possible. This video still involves the use of battery acid so make sure you take all the appropriate safety precautions when handling this compound. Sulphuric acid can cause very serious chemical burns and is extremely corrosive so be safe out there.
There isn't a whole lot of quality content out there for practical manufacturing of NiSO4 crystals for nickel plating. So hopefully this video fills that gap.
#garagescience #diyprofessional #garageplating #diy #doityourself #electroplating #hobby #project #science #scientist #garage #make #maker #engineer #chemist #chemistry
I thrive on your feedback so make sure you leave a comment whether you liked the video or not!!!! Make sure you head over to FB and like my FB page as well:
https://www.facebook.com/GarageScience
You can also follow me on instagram at: @garage_science
Credit for video clip of boiling sulfuric acid goes to Bryce Watson and the video titled "How to Make Nickel sulfate" https://www.youtube.com/watch?v=SEtOiW4Lo8Q
Credit for clip of hindinburg goes to TWMAV and the video titled "[HQ] 1937 Hindenburg Explosion In Colour With Herbert Morrison's Commentary" https://www.youtube.com/watch?v=jH-mhZLuGRk
60
views

Homemade Essential Oil Diffuser How To ~ A DIY Oil Diffuser Anyone Can Make
Only a few parts and about an hour and you can have a simple do it yourself essential oil diffuser to fill your home with amazing aromas. And yes that thumbnail isn't photoshopped, just text added with MS Paint :-D
See how I made this incredible desk in this video:
https://youtu.be/gFOKZ-V_d4s
Get the best Essential Oil Starter Kit: https://yl.pe/4zjr
(click on the link and then click continue to pick out a starter kit)
Young Living Essential Oils are the best essential oils on the market in my opinion which is coming from 2 years experience using them after having used many other random store bought brands. Quality matters and the Young Living Oils are the best! ;)
parts list for diffuser:
fog maker: https://amzn.to/2WFUlkB
pc fan: https://amzn.to/2CKpBHy
300ohm resistor: https://amzn.to/2WDYQvZ
The way a ultrasonic diffuser works is a piezo electric element vibrates at a very high frequency. This is the white disc you see on the fog maker. This disc is in contact with the water and when it vibrates it creates a low pressure area that causes the water to boil at room temperature. Some of that boiled water re-condenses and the rest leaves the water as mist. The mist takes some of the oil floating on the surface of the water with it and then that oil is naturally vaporized into the air. Essential Oil Diffusers like this get essential oils into the air better and more efficiently than any other type of aroma diffuser.
The same principles for humidifiers and this project can also serve as a diy humidifier. A diy mist maker like this can really help to get moisture back into the air and increase the humidity of a room.
#garagescience #diyprofessional #essentialoils #homemade #diytechprojects #diy #doityourself #essentialoil #youngliving #maker #engineering #hobby #diffuser #eo #youngliving #doterra #engineer #experiment #science #garage #winning
This is actually the second homemade essential oil diffuser I've made. The first one was the exact same as this one and has been working great for over 4 months. This is definitely a project anyone could do since it requires minimal tools.
My channel garage science focuses on hobby projects, science projects, 3D printing and improving 3D printed parts. I hope you found this video interesting and entertaining. Make sure you subscribe and share it with your friends also have a do it yourself hobby.
BTW, I came up with wanting to do a project like this after watching the video titled "DIY Reed Diffuser! Homemade Home Products That Save You Money! (Clean My Space)" (https://youtu.be/K_6WaBYYly4)and realized that the only people making diy diffuser videos were making a diy reed diffuser which aren't nearly as good at being a deodorizer as an ultrasonic diffuser. So I figured I could make a guide for the best diy diffuser on youtube. Let me know what you think of the project in the comments!!!!
Some of the inspiration for this video came from the video titled "Ultrasonic Mist Maker || DIY or Buy" by GreatScott! which can be watched here: https://www.youtube.com/watch?v=aKhPj7uFD0Y
Another good video on fog makers can be seen in the video titled "Trying to build a crude mini Fog/Smoke Machine" by GreatScott! which can be watched here https://youtu.be/Y4-eDcaF4q4
This video also functions to show how to make a DIY Nebulizer similar to the one shown in the video titled "How to make a NEBULIZER at home" by Coverrise (https://youtu.be/4nxL6htNDiM). A homemade nebulizer can be a cheap and affordable alternative to something store bought but shouldn't replace required medical equipment.
Follow me on Instagram: @garage_science
Like my FB page: https://facebook.com/GarageScience
106
views
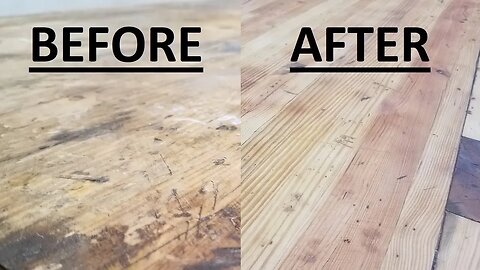
Refinishing 10yr Old Homemade Workbench
My Dad's work bench for his wood shop has been through a lot over the past 10+ years that it's been in existence and I got a chance to resurface it and give a face lift for the next decade of garage shop projects.
#garagescience #diyprofessional #maker #engineer #engineering #madeintheusa
This shop table is made from very thick lumber, I think it was four 10X12's if my memory serves me correctly. You could shoot this think with a machine gun and nothing would go through the table top. But all the wood joining, hammering, tool maintenance and random projects wore away at the table top until it was nearly completely black.
I wanted to restore this bit of garage furniture to some of it's former glory. I did this with basically just a belt sander and some exterior wood sealant. If you want to attempt a project like this it really only takes about an afternoon and the results look great. Just get some quality belt sander belts so you don't have some many rip like I did.
This is a DIY stand desk me and my dad built when I was still in high school. It's basically the best diy desk you could ever ask for. Better than a plywood desk but boy is it heavy. It's a two many job to move it without the casters it currently has. But what a great wooden work bench. It's tough and simple, not so much on the affordable side since the lumber used to make it usually goes for a pretty penny.
I hope you enjoyed this video and make sure you check out my Garage Science facebook page here: https://www.facebook.com/GarageScience/
And my Instagram account: @garage_science
30
views

Why You Can't Copper Plate Steel ~ Reactivity Series Explained (works the same for aluminum plating)
I'll show you the science behind acid copper plating steel and the extra steps required to achieve success. Watch entire video for all the info!!! All this information applies the same way to aluminum.
In chemistry there are several factors that go into whether a chemical reaction will take place. A couple pretty big hitters are the relative electronegativities and the position of the elements in the reactivity series. The way these characteristics interact with each other isn't necessarily intuitive especially if you don't have a very strong background in chemistry.
Basically since iron (Fe) is higher in the reactivity series and more "electro positive" than copper it undergoes a single displacement reaction with copper when it is placed in an aqueous solution of copper ions.
The reaction is almost instant and a thin coating of copper is formed on the surface of the iron. This prevents any kind of electroplating one might be trying to accomplish.
The solution to prevent this reaction from occurring is to first plate the iron component in something else before attempting to electroplate with an acid copper solution.
I explain in this video how the reactivity series works, how the immersion deposit of copper through a single displacement reaction occurs and what material to first plate onto the iron to achieve an adherent coat of copper plating.
Nickel plating is or tin plating is usually the intermediate coating process used to electroplate steel. I'll be making a nickel plating guide in the future so make sure you subscribe so you don't miss any of the info.
Basically nickel does not react with copper nor does nickel sulphate react with iron. This stepping stone process allows anyone to get good copper plating finish on steel parts.
#garagescience #diyprofessional #garageplating #diy #doityourself #chemistry #experiment #science #garage #scientist
If you enjoyed this video let me know in the comments or leave me a question if something wasn't clear. Below are some resources for your own reference. Good look and happy electroforming!!!
Reactivity Series:
https://www.thoughtco.com/activity-series-of-metals-603960
https://en.wikipedia.org/wiki/Reactivity_series
Single Displacement Reaction:
https://en.wikipedia.org/wiki/Single_displacement_reaction
Electroplating / Electroforming Guide (Not for the faint of heart!)
https://metalfinishing.epubxp.com/t/12238-metal-finishing-guide-book
Get Copper Sulphate and try this experiment yourself here:
https://amzn.to/2RzjEFT
Be sure to check me out on Facebook here:
https://www.facebook.com/GarageScience
And on instagram here:
@garage_science
47
views
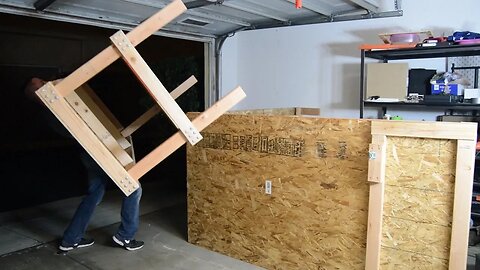
Simple Tough Affordable Workbench Minimal Tools ~ DIY Professional #7
I built this 2x4 simple workbench in an afternoon/evening for less than $100 (2018 dollars). That's a truly affordable workbench. Definitely worth the investment and it’s rock solid!!!!!!!
Checkout my channel for my workbench ideas for small garage
This diy standing desk was made with minimal tools and materials and was meant to be ultra sturdy and affordable. This maker desktop is definitely simple tough and affordable. It’s not a cheap workbench its affordable. This homemade desk is big enough for just about any do it yourself project and I think you’ll be very satisfied with a custom desk like this if you decide to undertake a project like this and be a diy professional.
#garagscience #diyprofessional #makergarage #diy #doityourself #hobby #make #engineer #woodworking #woodwork #woodworker #furniture #shop #workshop #engineering #maker
This project is suitable for a maker desktop, computer desk or just a diy garage workbench. It doesn't take a lot of woodworking knowledge to make this wooden work bench.
A number of studies have shown that people tend to be more productive at a standing desk so I highly encourage you to follow this tutorial on making a diy standing desk. It is really very easy.
Subscriptions, likes, comments and shares are the name of the game. I’m just a little youtuber trying to make my way amidst a lot of competing content. If you enjoyed watching please like this video, it means more than you know. It also helps more of my content surface in the search engine for others to enjoy. So, help your neighbor and hit the like button or leave me a comment and let me know what you didn’t like
My garage workshop is just about the way that I want it. Now that I have two work surfaces, one for my computer and one for everything else I can get my printer back up and running and start churning out more videos on a regular basis… hopefully.
Full Cut List:
(4) 71” 2x4
(4) 41.5” 2x4
(4) 35” 2x4
(4) 32” 2x4
Table Top and Shelf 74”x35”x0.5”
This workbench isn't all that different than the workbench I made that involved embedding a TV into the desk top you can watch this video titled "Making My Maker Computer Desk ~ The DIY Standing Desk I Always Wanted!" here: https://youtu.be/gFOKZ-V_d4s
I was also inspired to make a video about this despite how simple the project was to had a different flavor to the youtube community compared to older videos like the one titled "DIY Simple Workbench - Woodworking Bench
" by DIY PETE which can be seen here: https://youtu.be/fAZ9ZQm7Ndo
Go like my Facebook page here:
https://www.facebook.com/GarageScience
And follow me on Instagram here:
@garage_science
116
views
1
comment

DIY Electroplating ~ Best Part Shape and Orientation Guide
The nitty gritty of copper plating or any electroplating involves chemistry, physics, electricity and engineering experience. The best minds in the business have been working out the details for over a hundred years. The basics have been condensed for us non experts and here is a short presentation of some of that knowledge. The document I used for the majority of this information can be viewed here:
http://www.materialsfinishing.org/attach/Electroplating.pdf
Copper electroplating has become quite a hobby of mine and I've spent countless hours researching the inns and outs of this science/craft/art. Hopefully you found this video to be helpful, certainly let me know in the comments if it did. Remember to subscribe and share with your friends as well, sharing is caring.
Part shape and orientation plays as big a role in successful electroplating as the chemistry in your plating bath. There is no amount of chemistry that can fix a poorly designed part or a part that is poorly hung in a plating bath. If you don't want to fail at copper plating then you need to put these tips into practice.
#garagescience #diyprofessional #homeplating #copperplating #electroplating #science #garage #chemistry #hobby #experiment #electroforming #copperplate #diy #homemade #doityourself #physics #electrochemistry
I've noticed that I've started to dominate many of the copper plating related searches on youtube which both indicates people have enjoyed my videos and that there aren't that many people making videos about copper plating. My hope is to expand the available knowledge about copper plating on youtube by providing more in depth knowledge and guidance instead of your typical how to copper plate a 1um thick layer of copper onto a nickel video that most people tend to make. You can help in this endeavor by subscribing and sharing.
Checkout my FB page for more great content:
https://www.facebook.com/GarageScience/
Follow me on instagram here:
@garage_science
31
views
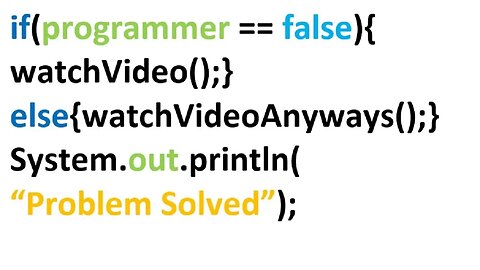
Why Everyone Should Learn to Code
It only takes 20 hours to learn the basics of a new skill. There are simply too many resources available for anyone to have any excuse for not learning the basics of programming.
You don't have to have a degree in computer science, computer programming or information technology to get into programming. Whether you're trying to get into the job market to start a web development career or make a living on video on how to learn to code, everyone should code. It's basically a free hobby since all you need is a computer. It's a new year and job market 2019 is ready for you.
I made this video as a bit of an intro/motivation for anyone whose learning to code for beginners, learning to code c++ or javascript or java or python or html or css or really any kind of software. I hope this video gets you excited to make software engineering projects. Good luck!
I have a Bachelor of Science in Mechanical Engineering and work as an engineer. My major didn’t require me to take a single class on programming. It’s only because I also got a minor in Electrical Engineering that I was required to take a one class on programming. This one class on Java is the only formal training I’ve received on programming. Yet, I’ve been able to learn Java, Arduino, VBA (Visual Basic for Applications), and will soon be teaching myself Python.
Business Insider Article on most popular programming languages:
http://www.businessinsider.com/14-most-popular-programming-languages-stack-overflow-developer-survey-2018-4
So what kind of excuse are you hiding behind. If nothing else, learn to write a bit of code to have an appreciation for all the people that do this for a living. Chances are you just think it’s too hard or that it will take too long. Well, get over yourself, it’s not that hard and there are sooooo many guides out there that you could learn any aspect of any programming language in a couple of minutes. My channel doesn’t do tutorials on programming but there are plenty that do. It’s an a la carte approach to learning, you just have to know how to use Google.
If this is the first time you have been exposed to this channel I highly encourage you to SUBSCRIBE. This channel has and will always pursue the highest quality content and never fall prey to the trap of chasing after views. Subscriptions help grow the channel and increase visibility on Youtube. The bigger the channel, the better and more frequently I’ll be able to produce content. Support me with that all important click on the red button ;)!!!
#garagescience #diyprofessional #grayscalegenerator #learntocode #computerscience #softwareengineering #programming #coding #homebrew #engineer #science #garage #homemade #doityourself #java #c+ #c++ #html #python #ruby #c #arduino #vba #javafx
Be sure to like my FB page for even more great content: https://www.facebook.com/GarageScience/
Also check out my Instagram page here: https://www.instagram.com/garage_science/
37
views
Making My Maker Computer Desk ~ The DIY Standing Desk I Always Wanted!
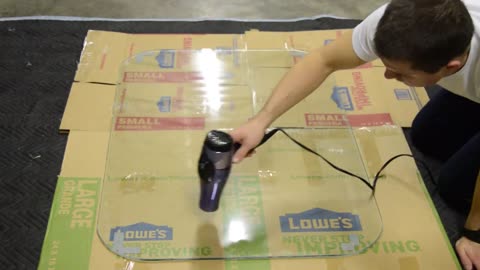
Multi Display desks are common, BUT not many utilize a high definition TV to get a second display integrated with the desk. This approach multiplies the possibilities by several orders of magnitude. Glass table top available here: https://amzn.to/2HalsyG
I hope you enjoy this quick guide on making a DIY standing desk which has turned into one of my favorite diy tech projects.
#garagescience #diyprofessional #maker #engineering #make #diy #homemade #woodworking #woodworker #doityourself #technology #tech #project #hobby #experiment #garage #science #innovate #innovation
I’ve had an idea for a custom desk like this for years. It’s pretty expensive unless you already have a TV to use with the desk. Fortunately, the new house I moved into came with a living room TV that I was able to purchase from the previous resident for $5.00. That’s right, 5 dollars. This left my old TV open for this awesome project. Enjoy and let me know if it inspires you to do something similar!
If this is your first exposure to Garage Science, this is a haven for tinkers and makers with in depth science and practical applications to make cool projects or just cool experiments. I tend to focus on 3D printing and copper plating, but I also branch out to other projects I randomly do.
A homemade desk with a display embedded under the tabletop allows the user to not only efficiently use desk space but everything from quick notes to tracing on paper to display scaled models and drawings can be done easily. It’s also a lot of fun to do Autodesk Fusion 360(or any CAD for that matter) on an embedded TV desk. Now I just need to get a CAD mouse. This whole project was very affordable and significantly cheaper than trying to buy a desk this big and modifying it to embed the TV.
Be sure to subscribe and share this video with your friends if you enjoyed watching.
You can follow me on FB here: https://www.facebook.com/GarageScience/
Or on Instagram here: @garage_science
*************************************************************
CUT LIST
2x4:
(x4) 72 inches (left to right frame)
(x4) 33.5 inches (front to back frame)
(x6) 30.5 inches (front to back cross members)
(x2) 43.5 inches (left to right TV cavity cross members)
(x4) 42 inches (legs)
3/8” OSB:
75”x33.5”
46.5”x29”
1/2” Birch Plywood:
75”x33.5”
Drawing: https://drive.google.com/open?id=1nXUL4P7JNXov0MNq6dK1Dxz-rZOKfT_K
******************************************************
TV Manual: https://www.searspartsdirect.com/partsdirect/user-manuals/lc48le551u-sharp-parts-manual
I also got motivated to build this desk after watching the video titled "Ultimate DIY Desk PC - DRILLING SO MANY HOLES" by Linus Tech Tips (https://youtu.be/jxAPtBZQc3M) hopefully my video motivates you to build a desk of your own as well.
88
views
UPDATE: UV Pass Filter DLP Projector Mod ~ How well did it work in my SLA Printer?
If you tried the UV pass filter mod and had trouble getting it to work this video should give you some comfort and offer up a few ideas on what to do next. This is as much a learning experience for as it is for you and thanks for taking the journey with me. I hope you enjoy the video and be sure to let me know what you though in the comments.
#garagscience #diyprofessional #grayscalegenerator #engineer #engineering #maker #make #science #garage #hobby #project #dlp #projector #acer #mod #diy #doityourself #homemade
The principle behind this modification is that normally a DLP projector contains a "hot mirror" that blocks both UV and IR wavelengths. It does this to protect the rest of the optical components from the heat associated with IR light and the damaging high energy light associated with UV light. But unfortunately that tends to include wavelengths associated with curing resin such as 385nm or 405nm. Since these wavelengths are only near UV if the output of the projector is modified to include these wavelengths then the curing speed of a DLP printer can be greatly increased.
This concept was proven true in my previous video. However, due to some who have tried this modification themselves and failed I felt it necessary to investigate how well my modification has been holding up. Turns out its been both good and bad, and my efforts to correct the bad have so far turned out very bad haha. I'm all ears for recommendations so let me hear them in the comments.
Be sure to subscribe if you haven't done so already
Also check me out on FB here:
https://www.facebook.com/GarageScience/
Or on instagram: @garage_science
19
views

Autodesk Magenta Resin Review ~ DLP/SLA 3D Printing Material
I enjoyed working with this resin despite having some color issues. Prints look great and I got some incredibly detailed prints with it. This resin is now sold and produced by Colorado Polymer Solutions.
Let me know what you think of the review in the comments. I'm experimenting with different filming styles and trying to keep things more condensed.
If you are unfamiliar with DLP 3D printers here is a quick overview. DLP (Digital Light Processing) 3D printers are a subclass of SLA (Stereolithography) 3D printers that traditionally use lasers and mirrors to create each layer. A DLP printer uses a HD projector with a halogen lamp to produce cross sections of a 3D part on the top or bottom of a tank of resin (resin vat). That part is then peeled from the bottom or further submerged from the top to create layer after layer. DLP printers generally tend to print faster than laser based SLA printers because they are able to project an entire layer at a time.
#garagescience #diyprofessional #resinreview #grayscalegenerator #resin #review #3d #printer #3dprinter #project #timelapse #hobby #homemade #diy #doityourself #make #maker #engineer #engineering
Make sure you share with your friends and help this channel grow. The better response on these resin reviews the more that I will do. There aren't a whole lot out there as of right now.
Remember to like my FB page for more great content:
https://www.facebook.com/GarageScience/
Follow on Instagram here: @garage_science
12
views