

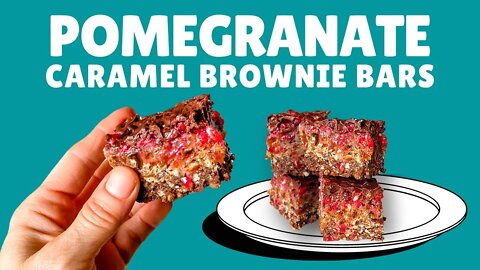
How to make delicious Pomegranate Caramel Brownie Bars
Let's make this Clean Dessert by Karielyn Tillman of the book Clean Desserts. You can find it here: https://amzn.to/3XJZLeq
These bars are so delicious and free from any added sugar or Standard American Diet (SAD) type foods. Nothing but goodness, here! And my son keeps asking me to make them again, so you will definitely please a crowd with these.
Stuff I use:
Loaf Pan: https://amzn.to/3uiHXti
Food Processor: https://amzn.to/3AY1LG6
Parchment Paper: https://amzn.to/3GWh6Ld
-----------------
POMEGRANATE CARAMEL BROWNIE BARS
-----------------
Yields: 10 small squares | Prep Time: 15 min | Inactive Time: 60 min
INGREDIENTS:
For the brownie layer:
1 cup walnuts
1/4 cup cacao powder
4 medjool dates, pitted
2 tbsp coconut oil
1/8 tsp sea salt
For the pomegranate topping:
1 cup pomegranate seeds
For the caramel layer:
2 cups medjool dates, pitted
1/4 cup coconut oil
2 tbsp almond butter
2 tsp vanilla extract
For the chocolate drizzle:
1/4 cup semi-sweet mini-chocolate chips
1/2 tsp coconut oil
DIRECTIONS:
Prepare the brownie layer:
1. Prepare a 9x5 loaf pan lined with parchment paper. Set aside.
2. Add all ingredients for the brownie layer to a food processor and process until the walnuts and dates are broken down into small pieces and everything is well combined, taking care to not over process.
3. Transfer the mixture into a prepared loaf pan and spread it evenly on the bottom of the pan. Place an extra piece of parchment on top of the brownie mixture and press it down very tight and compact.
4. Place the loaf pan in the freezer to firm while you prepare the rest of the recipe.
Prepare the pomegranate topping:
1. Seed the pomegranate by scoring the outside with a sharp knife, without cutting all the way through. Use your hands to pry the pomegranate in half.
2. Place one of the halves face down in the palm of your hand and, using the other hand, tap the outside of the pomegranate with a spoon until the seeds fall out. Have a medium-sized bowl ready to catch the seeds. Set aside.
Prepare the caramel layer:
Add all ingredients for the caramel layer to a food processor and process until the dates are broken down into tiny pieces and everything is well combined, taking care not to over process.
Assembly:
1. Remove the loaf pan from the freezer. Transfer the caramel mixture into the loaf pan and spread it evenly on top of the brownie layer.
2. Sprinkle the pomegranate seed topping evenly on top of the caramel layer and gently pat it down so it's slightly embedded into the layer.
3. Using a spoon, drizzle the melted chocolate evenly over the top of the pomegranate seeds.
4. Place the loaf in the freezer for about an hour, or until the squares are firm and the chocolate is hardened.
5. Remove the loaf pan from the freezer and cut into 10 small squares.
6. Store in an air-tight container in the freezer or refrigerator until ready to serve, because the squares will get soft if left out at room temp.
-----------------
🍽 My Amazon Store (affiliate links): https://www.amazon.com/shop/lisalongdesigns
🍞 Cultures for Health: https://culturesforhealth.com/lunchwithlisa
🔪The TidyBoard System: https://tidyboard.com/?rfsn=6740248.ade92a
📸 Instagram: https://instagram.com/lunch.withlisa
🙂 Facebook: https://www.facebook.com/lunchwithlisa
❤️ Subscribe: https://www.youtube.com/channel/UC24dtzF90unWcCDxlFcUGVA?sub_confirmation=1
-----------------
⭐️ Watch my videos a week early over at Patreon: https://patreon.com/lunchwithlisa
☕️ Buy me a coffee: https://ko-fi.com/lunchwithlisa
-----------------
Disclaimer:
Some of the above links are Amazon affiliate links and I receive a small commission with each sale at no extra cost to you. Thank you so much for the support!
Music for intro created and played by me.
You've made it to the end! YAY! Welcome to my channel.
23
views

Super easy Thai style noodles #foodshorts
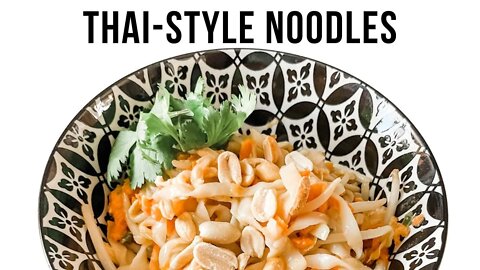
How to make Thai Style Noodles that are a Crowd Favorite
https://youtu.be/MA79aHVUZFM
1
view
How to make Thai Style Noodles that are a Crowd Favorite
This dish is so versatile! You can eat it hot or cold. You can add chicken or leave it out completely and add tofu. You can make this dish to suit your desires of lots of carbs and pasta or very little carbs and It's Skinny Pasta, instead. It's up to you!
-----------------
THAI STYLE NOODLES RECIPE
-----------------
Prep: 20 min | Cook: 20 min | Serves 4
INGREDIENTS:
12 oz linguine pasta or It's Skinny Pasta (2 packages): https://amzn.to/3VI6AeD
1/4 cup creamy natural peanut butter
1/4 cup agave nectar, honey, or maple syrup
1/4 cup regular or reduced-sodium soy sauce or coconut aminos
3 tbsp rice wine vinegar
1-2 tsp sambal oelek
1/8 tsp sesame oil
3 tbsp vegetable broth
1 bunch scallions (green & white parts), chopped
6 cloves garlic, crushed or minced
1 tbsp finely chopped fresh ginger
1 1/2 cups mung bean sprouts
1 1/2 cups shredded carrots
7 oz baked seasons tofu, thinly sliced (or chicken or shrimp etc)
Chopped fresh cilantro
Chopped peanuts (optiona)
DIRECTIONS:
1. Break the linguine strands in half and drop them into a large pot of boiling water. Cook until tender, about 8 minutes. Drain, transfer to large serving bowl, and set aside. Or prepare your It's Skinny Pasta (https://amzn.to/3VI6AeD) by draining and rinsing and setting aside in a large bowl.
2. In a small bowl, whisk together the peanut butter, syrup/honey, soy sauce, vinegar, sambal, and sesame oil, if you're using it, until smooth. Set aside.
3. Pour the broth into a nonstick skillet and add the scallions, garlic, and ginger. Cook, stirring frequently, until the scallions begin to soften, about 3 minutes. Mix in the peanut butter mixture and cook until hot, about 3 minutes.
4. Scrape the peanut-scallion mixture over pasta and toss well to coat the noodles. Add the bean sprouts, carrots, and tofu and toss again.
5. Serve warm or at room temp, with bowls of cilantro and peanuts, if desired, for diners to add as they wish.
-----------------
🍽 My Amazon Store (affiliate links): https://www.amazon.com/shop/lisalongdesigns
🍞 Cultures for Health: https://culturesforhealth.com/lunchwithlisa
🔪The TidyBoard System: https://tidyboard.com/?rfsn=6740248.ade92a
📸 Instagram: https://instagram.com/lunch.withlisa
🙂 Facebook: https://www.facebook.com/lunchwithlisa
❤️ Subscribe: https://www.youtube.com/channel/UC24dtzF90unWcCDxlFcUGVA?sub_confirmation=1
-----------------
⭐️ Watch my videos a week early over at Patreon: https://patreon.com/lunchwithlisa
☕️ Buy me a coffee: https://ko-fi.com/lunchwithlisa
-----------------
Disclaimer:
Some of the above links are Amazon affiliate links and I receive a small commission with each sale at no extra cost to you. Thank you so much for the support!
Music for intro created and played by me.
You've made it to the end! YAY! Welcome to my channel.
16
views
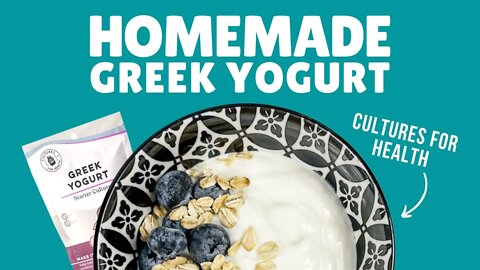
How to Make Homemade Greek Yogurt with Cultures for Health Starter Culture
Making Greek Yogurt at home will save you money when you compare the cost of 1 gallon of milk to 1 quart of yogurt! Let’s make this delicious treat together with @Cultures for Health : https://culturesforhealth.com/lunchwithlisa
-----------------
HOMEMADE GREEK YOGURT
-----------------
INGREDIENTS
Pasteurized Whole Milk (Not UHT/Ultra-Pasteurized)
Greek Yogurt Starter Culture: https://culturesforhealth.com/products/greek-yogurt-starter?sca_ref=2616012.VKxYDwUM0C
EQUIPMENT
1 Quart Size Glass Jar
Stainless Steel Pot that can hold 1 Quart with Lid (avoid aluminum)
Thermometer: https://amzn.to/3VsL11K
Stainless steel / silicone / wood spoon or spatula
Sink OR Large Container Filled with Ice Water (Optional)
Yogurt Maker or Preferred Heating Method: https://amzn.to/3VcZ8bP
Strainer: https://culturesforhealth.com/products/greek-yogurt-maker?sca_ref=2616012.VKxYDwUM0C
See more recipes: https://culturesforhealth.com/blogs/recipes/yogurt-recipes
-----------------
🍽 My Amazon Store (affiliate links): https://www.amazon.com/shop/lisalongdesigns
🍞 Cultures for Health: https://culturesforhealth.com/lunchwithlisa
🔪The TidyBoard System: https://tidyboard.com/?rfsn=6740248.ade92a
📸 Instagram: https://instagram.com/lunch.withlisa
🙂 Facebook: https://www.facebook.com/lunchwithlisa
❤️ Subscribe: https://www.youtube.com/channel/UC24dtzF90unWcCDxlFcUGVA?sub_confirmation=1
-----------------
⭐️ Watch my videos a week early over at Patreon: https://patreon.com/lunchwithlisa
☕️ Buy me a coffee: https://ko-fi.com/lunchwithlisa
-----------------
Disclaimer:
Some of the above links are Amazon affiliate links and I receive a small commission with each sale at no extra cost to you. Thank you so much for the support!
Music for intro created and played by me.
You've made it to the end! YAY! Welcome to my channel.
30
views

Leftover Sweet Potato Enchiladas #plantbased #vegan
Delicious and Easy Plant-Based Enchiladas Recipe by Bad Manners
https://youtu.be/yPEO-t9ct6o
#foodshorts
3
views

Delicious and Easy Plant-Based Enchiladas Recipe by Bad Manners
Sweet potato, squash, and black beans come together to make these DELICIOUS plant-based enchiladas! My son loved them so much he ate two servings, and I know you will love these, too. Experiment with using meat instead of veggies if you so desire.
Find this recipe and more like it in the book "Bad Manners: Eat Like You Give a F*ck": https://amzn.to/3tSPsqS
From their Amazon page:
"Bad Manners started their wildly popular website to show everyone how to take charge of their plates and cook up some real f*cking food. Now beloved by millions, their first cookbook has become a must-have in every kitchen.
Yeah, plenty of blogs and cookbooks preach about eating "clean," why ginger fights inflammation, and how to cook with only the most expensive super foods. But they are dull or pretentious as hell--and most people can't afford the hype.
Bad Manners lives in the real world. It offers more than 100 recipes for their best-loved meals, snacks and sides for beginning cooks to home chefs. (Roasted Beer and Lime Cauliflower Tacos? Pumpkin Chili? Grilled Peach Salsa? Believe that sh*t.) Plus this cookbook arms you with all the info and techniques you need to shop on a budget and get comfortable in the kitchen.
Bad Manners is an invitation to everyone who wants to do better to elevate their kitchen game. No more ketchup and pizza counting as vegetables. No more drive-thru lines. No more avoiding the produce corner of the supermarket. Sh*t is about to get real."
-----------------
ENCHILADAS RECIPE
Makes 8 enchiladas or enough for 4 people
-----------------
Enchilada Sauce:
2 1/4 cups vegetable broth
1/3 cup tomato paste
2 1/2 tbsp chili powder
2 tsp ground cumin
1 1/2 tsp dried oregano
2 to 3 cloves garlic, minced
2 tsp soy sauce or tamari
1 tbsp lime juice
Filling:
1 large sweet potato (about 1 lb) cooked
2 tsp olive oil
1/2 yellow onion, chopped
1 medium yellow squash, grated on your box grater (about 1 cup)
1 tsp chili powder
1/2 tsp ground cumin
1/2 tsp salt
2 cloves garlic, minced
1 1/2 cups cooked black beans (or one 15 oz can)
1 tsp maple syrup or agave syrup
Sliced avocado
Chopped fresh cilantro
DIRECTIONS:
1. Make the enchilada sauce: Dump everything but the lime juice into a medium saucepan and bring it to a simmer. Use a whisk to make sure the tomato paste isn't clumping. simmer for 10-15 minutes so it has time to thicken up. Add the lime juice and turn off the heat. Let it cool while you make the filling.
2. Cook the sweet potato if you haven't, yet. You can steam it, microwave it, or boil it over medium heat. Dump it into a bowl and smash it around, doesn't need to be super smooth.
3. While the sweet potato cooks, grab a large skillet or wok and heat the oil over medium heat. Add the onion and saute until it begins to brown, 3-5 minutes. Toss in the squash and cook for another minute. Add the chili powder, cumin, salt, garlic, and black beans. Cook together for another 2 minutes and then fold in the mashed sweet potato and maple syrup and turn off the heat. Mix until combined.
4. Now you're going to make the enchiladas. Turn oven to 375*F. Grab a 9x13 baking dish.
5. Cover the bottom of the baking dish with about 1 1/2 cups of the sauce. Using a griddle, your oven, or the microwave, warm up the tortillas. Dip a tortillas around in a little of the sauce in the baking dish so that the bottom is all coated. Fill the tortilla with a couple spoonfuls of filling, then roll it up and set it seam-side down in the dish. You know how enchiladas are supposed to look! Keep going until you run out of space or out of filling.
6. Cover the enchiladas with the remaining sauce, cover the dish tightly with foil, and throw it in the oven for 20 minutes. Take off the foil and cook it for 5 more minutes. Let it cool for a minute or two before serving. Feel free to top those savory guys with some sliced avocado or chopped cilantro if you care about presentation.
*Bring this dish to a potluck for a culinary mic drop.
-----------------
🍽 My Amazon Store (affiliate links): https://www.amazon.com/shop/lisalongdesigns
🍞 Cultures for Health: https://culturesforhealth.com/lunchwithlisa
🔪The TidyBoard System: https://tidyboard.com/?rfsn=6740248.ade92a
📸 Instagram: https://instagram.com/lunch.withlisa
🙂 Facebook: https://www.facebook.com/lunchwithlisa
❤️ Subscribe: https://www.youtube.com/channel/UC24dtzF90unWcCDxlFcUGVA?sub_confirmation=1
-----------------
⭐️ Watch my videos a week early over at Patreon: https://patreon.com/lunchwithlisa
☕️ Buy me a coffee: https://ko-fi.com/lunchwithlisa
-----------------
Disclaimer:
Some of the above links are Amazon affiliate links and I receive a small commission with each sale at no extra cost to you. Thank you so much for the support!
Music for intro created and played by me.
You've made it to the end! YAY! Welcome to my channel.
91
views
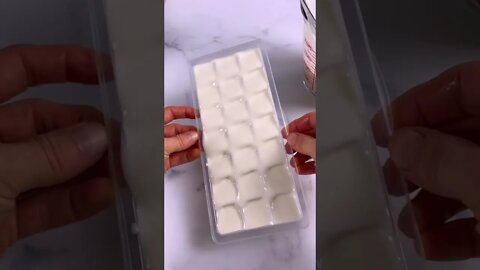
How to make frozen yogurt at home
Making frozen yogurt is super easy! Here’s how I do it…
#shorts #foodshorts #frozenyogurt
2
views
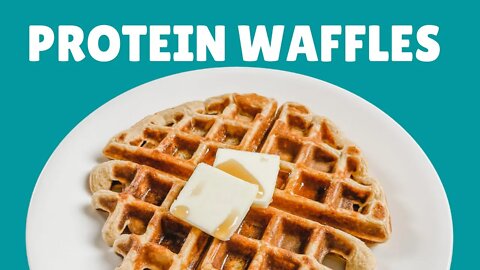
How to make Protein Packed Waffles for Anytime of the Day!
Craving waffles but following a high protein diet and tracking those macros? I got you covered. Never buy store-bought waffles again! This recipe is delicious and you can top it however you like, but I'll show you 4 ways I loved to top these at the end. Here's your weekend treat!
AMAZON LINKS:
Waffle Iron: https://amzn.to/3hKlGSg
Oil Spray Bottle: https://amzn.to/3EHgKXu
Cooling Rack: https://amzn.to/3hQHID0
Corelle White Plates: https://amzn.to/3GpOpWZ
-----------------
PROTEIN WAFFLES RECIPE
Makes 4 Large Waffles
Per waffle:
220 Calories | 9g Fat | 17g Carbs | 15g Protein
-----------------
INGREDIENTS:
80g (1 cup) organic oat flour (organic rolled oats blended into a fine flour)
226g (1 cup) fat free cottage cheese
4 large eggs
1 tsp honey
1 tsp vanilla extract
1 tsp cinnamon
1 tsp baking powder
1 tbsp melted butter or oil
DIRECTIONS:
1. If you don't have oat flour, just blend your rolled oats in a blender until they are a fine flour. Pour them out and set them aside. We don't want them at the bottom of the blender or they won't blend well with the rest of the mixture.
2. Place the rest of the ingredients in the blender along with the flour on top and blend until combined.
3. Heat a waffle iron and pour 1/4th of the batter into the waffle iron (about 1/2 cup or more) and wait until the steam dies down (about 3 minutes). Repeat 3 more times.
4. Place them on a cooling rack so they stay crispy, and top with your favorite toppings and enjoy!
-----------------
🍽 My Amazon Store (affiliate links): https://www.amazon.com/shop/lisalongdesigns
🍞 Cultures for Health: https://culturesforhealth.com/lunchwithlisa
🔪The TidyBoard System: https://tidyboard.com/?rfsn=6740248.ade92a
📸 Instagram: https://instagram.com/lunch.withlisa
🙂 Facebook: https://www.facebook.com/lunchwithlisa
❤️ Subscribe: https://www.youtube.com/channel/UC24dtzF90unWcCDxlFcUGVA?sub_confirmation=1
-----------------
⭐️ Watch my videos a week early over at Patreon: https://patreon.com/lunchwithlisa
☕️ Buy me a coffee: https://ko-fi.com/lunchwithlisa
-----------------
Disclaimer:
Some of the above links are Amazon affiliate links and I receive a small commission with each sale at no extra cost to you. Thank you so much for the support!
Music for intro created and played by me.
You've made it to the end! YAY! Welcome to my channel.
4
views

How to make Sweet Potato Al Pastor & Homemade Corn Tortillas
Go! NOW! Get this amazing cookbook from Bad Manners (https://amzn.to/3EglphF )! It's not only super hilarious, but has amazingly delicious and healthy meals you can make FAST as F*CK! They really are super delicious and super fast.
Try out this recipe below and see for yourself!
⭐️⭐️Affiliate Links to ITEMS MENTIONED (or not) IN VIDEO:⭐️⭐️
Bad Manners Fast as F*ck: https://amzn.to/3EglphF
Taco Holder: https://amzn.to/3tDtbNH
Ninja Food Processor: https://amzn.to/3hOMwZB
Tortilla Press: https://amzn.to/3THS59v
-----------------
SWEET POTATO AL PASTOR RECIPE
Cook Time: 15 minutes
Makes enough for 8 tacos: serves 4-6 people
-----------------
INGREDIENTS:
Filling:
1/2 white onion chopped
1 cup fresh or canned pineapple chunks with 1/4 cup juice
1/4 cup lime juice
3 tbsp mild chili powder
2 tsp liquid smoke
2 tsp smoked paprika
1 tsp ground cumin
1/2 tsp dried oregano
2 tbsp olive or safflower oil
8 oz tempeh cut into 1-inch-long strips OR 1 can of black beans smooshed (yes, that's a technical term)
3 cups shredded raw sweet potato
2 tbsp liquid aminos or soy sauce
Tacos:
8 corn tortillas
Toppings:
diced onion, jalapenos, cilantro, or pineapple salsa
DIRECTIONS:
1. Make the filling: in a blender or food processor, throw together the onion, pineapple, lime juice, chili powder, liquid smoke, smoked paprika, cumin, and oregano. Let it rip until the sauce starts looking sorta smooth, then set aside.
2. In a large skillet, warm up the oil over medium heat. Add the tempeh (or beans) and saute it around for about 2 minutes. Then fold in the sweet potato and sprinkle over the liquid aminos or soy. Keep cooking until the sweet potato starts to soften up, 3-5 minutes longer.
3. Pour in the sauce you blended up earlier and stir it all up until everything is covered and starting to warm up, about 3 more minutes. Remove from heat.
4. Start making some tacos: Warm the tortillas and serve topped with the filling, onions, jalapenos, and cilantro, or pineapple salsa.
RECIPE FOR CORN TORTILLAS:
Can be found on your bag of corn flour (masa harina).
-----------------
🍽 My Amazon Store (affiliate links): https://www.amazon.com/shop/lisalongdesigns
🍞 Cultures for Health: https://culturesforhealth.com/lunchwithlisa
🔪The TidyBoard System: https://tidyboard.com/?rfsn=6740248.ade92a
📸 Instagram: https://instagram.com/lunch.withlisa
🙂 Facebook: https://www.facebook.com/lunchwithlisa
❤️ Subscribe: https://www.youtube.com/channel/UC24dtzF90unWcCDxlFcUGVA?sub_confirmation=1
-----------------
⭐️ Watch my videos a week early over at Patreon: https://patreon.com/lunchwithlisa
☕️ Buy me a coffee: https://ko-fi.com/lunchwithlisa
-----------------
Disclaimer:
Some of the above links are Amazon affiliate links and I receive a small commission with each sale at no extra cost to you. Thank you so much for the support!
Music for intro created and played by me.
You've made it to the end! YAY! Welcome to my channel.
33
views

How to Make Edible Cookie Dough 3 Ways
Craving cookie dough?! Me too. So I had to share this recipe with you on how to make edible cookie dough in 3 different flavors! These are mouthwateringly delicious, and they won't wreck your diet if you use proper portion control - watch the video to see how I do this!
-----------------
CHOCOLATE CHIP COOKIE DOUGH
-----------------
***NOTE: If you're worried about e-coli in your flour, you can heat it in the oven to kill off any possible bacteria before consuming: Spread your flour on a rimmed baking sheet and bake in a preheated oven 7 minutes or until flour temp reaches 160 degrees F on an instant read thermometer. Let it cool completely and transfer to an airtight container.
INGREDIENTS:
3/4 to 1 cup (136g) Flour (I used this Gluten Free Flour: https://amzn.to/3DXrCP9)
1/4 cup (56g) unsalted butter, softened
1/4 cup (56g) creamy natural (or homemade) peanut butter (optional - you can opt for 1/2 cup butter if you have a peanut allergy)
1/2 cup (110g) coconut sugar (or packed light brown sugar or a sweetener for no sugar)
3 tbsp (40g) more coconut sugar or granulated sugar
1/4 tsp salt
1 1/2 tbsp milk (or more as needed)
1/2 tsp vanilla extract
1/2 cup (82g) mini semi-sweet chocolate chips
DIRECTIONS:
1. Add butter, brown sugar and granulated sugar to a medium mixing bowl, sprinkle salt evenly over.
2. Using an electric hand mixer whip together until pale and fluffy, about 3 minutes.
3. Mix in the vanilla extract.
4. Add in flour and blend just to combined, while adding milk 1/2 Tbsp at a time to thin if needed.
5. Using a rubber spatula (or your hands) fold in chocolate chips.
6. Store cookie dough in refrigerator (note that it will harden up once chilled because the butter will solidify, you can let it rest at room temperature if desired). Or portion it out into smaller servings and freeze for later.
FOR CHOCOLATE CHOCOLATE CHUNK COOKIE DOUGH: replace 1/3 cup of the flour with 1/3 cup (32g) cacao powder. Mix cacao in with the flour. Replace mini chocolate chips with 2 oz. dark chocolate chopped into small bits. (Try the @MrBeast Feastables Bar Here: https://feastables.com/)
FOR PUMPKIN SPICE COOKIE DOUGH: add 2 tsp pumpkin spice and 1/2 cup 100% pumpkin puree into the batter and add the entire whole cup of flour along with the mini chocolate chips.
-----------------
🍽 My Amazon Store (affiliate links): https://www.amazon.com/shop/lisalongdesigns
🍞 Cultures for Health: https://culturesforhealth.com/lunchwithlisa
🔪The TidyBoard System: https://tidyboard.com/?rfsn=6740248.ade92a
📸 Instagram: https://instagram.com/lunch.withlisa
🙂 Facebook: https://www.facebook.com/lunchwithlisa
❤️ Subscribe: https://www.youtube.com/channel/UC24dtzF90unWcCDxlFcUGVA?sub_confirmation=1
-----------------
⭐️ Watch my videos a week early over at Patreon: https://patreon.com/lunchwithlisa
☕️ Buy me a coffee: https://ko-fi.com/lunchwithlisa
-----------------
Disclaimer:
Some of the above links are Amazon affiliate links and I receive a small commission with each sale at no extra cost to you. Thank you so much for the support!
Music for intro created and played by me.
You've made it to the end! YAY! Welcome to my channel.
7
views

3 Ways to Use Up Sourdough Starter Discard
Now that you have been making sourdough, you're probably wondering what you do with all the leftover starter you've been tossing out! Well, don't toss it out anymore - turn it into more delicious food! Today I'm sharing with you 3 ways to use up that sourdough starter discard and feed your family delicious healthy meals.
-----------------
RECIPES can be found in the Fiber Fueled Cookbook: https://amzn.to/3UqsUt5
-----------------
Cultures for Health: https://culturesforhealth.com/lunchwithlisa
Rolling Pin: https://amzn.to/3G2R3l1
-----------------
🍽 My Amazon Store (affiliate links): https://www.amazon.com/shop/lisalongdesigns
🍞 Cultures for Health: https://culturesforhealth.com/lunchwithlisa
🔪The TidyBoard System: https://tidyboard.com/?rfsn=6740248.ade92a
📸 Instagram: https://instagram.com/lunch.withlisa
🙂 Facebook: https://www.facebook.com/lunchwithlisa
❤️ Subscribe: https://www.youtube.com/channel/UC24dtzF90unWcCDxlFcUGVA?sub_confirmation=1
-----------------
⭐️ Watch my videos a week early over at Patreon: https://patreon.com/lunchwithlisa
☕️ Buy me a coffee: https://ko-fi.com/lunchwithlisa
-----------------
Disclaimer:
Some of the above links are Amazon affiliate links and I receive a small commission with each sale at no extra cost to you. Thank you so much for the support!
Music for intro created and played by me.
You've made it to the end! YAY! Welcome to my channel.
7
views
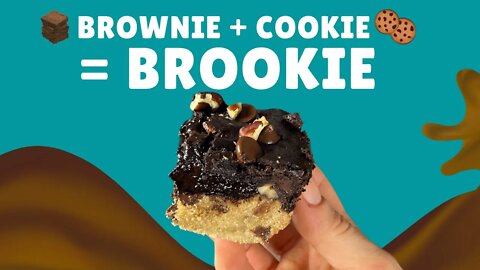
How to Make Delicious Low Calorie Brookies | Weekend Treats
This weekend, let's make some BROOKIES! They're the mouth-watering combination of a brownie and a cookie recipe married together into one delicious treat.
-----------------
BROOKIES RECIPE
Makes 16 Brookies - Per Brookie:
Calories: 351 - Fat 22g - Carbs 53g (18g sugar) - Protein 6g
-----------------
INGREDIENTS:
Cookie Layer:
1/2 cup salted butter
1/2 cup sugar (or coconut sugar or sweetener like Swerve: )
1/2 cup light brown sugar (or coconut sugar or brown sweetener like Swerve: )
1 large egg
1 tsp vanilla extract
1 1/2 cups Flour (AP/Almond/Oat/Gluten Free like this flour: )
1/2 tsp baking soda
1/4 tsp baking powder
1/2 tsp salt
1 cup chocolate chips
Brownie Layer:
1/3 cup Flour (AP/Almond/Oat/Gluten Free like this flour: )
2 tbsp cocoa powder (or Dark Cocoa like this one: )
1/2 tsp salt
3/4 cup semisweet chocolate chips
4 tbsp salted butter
1/2 cup sugar (or coconut sugar or sweetener like Swerve: )
1 tsp vanilla extract
2 eggs
1/2 cup chocolate chips
1/2 cup nuts (optional)
DIRECTIONS:
1. Preheat oven to 350F.
2. Line an 8x8 or 9x9 with parchment paper and lightly grease.
COOKIE LAYER:
1. In a bowl, mix together flour, baking soda, baking powder, & salt.
2. In another bowl, cream together butter, light brown and regular sugar until well combined.
3. Add egg & vanilla to the butter-sugar mixture and beat until smooth.
4. Add 1/2 the dry ingredients and beat together. Add the rest of the dry ingredients and beat until combined, using a spatula, spoon, or your hands if it gets too hard for the mixer.
5. Fold in the chocolate chips and press into the bottom of your pan.
BROWNIE LAYER:
1. Mix flour, cocoa, & salt in a small bowl and set aside.
2. Melt the chocolate chips and butter together in the microwave for 30 seconds, stir and nuke it for 30 seconds more if not fully melted. Or you can do this in a pan over low heat until smooth & glossy. Let it cool slightly.
3. In a large bowl, beat eggs for 30-60 seconds until pale & thick.
4. Add sugar & beat an additional 30-60 seconds until dissolved.
5. Add melted chocolate mixture & vanilla and stir on low speed until smooth.
6. Add dry ingredients and mix on low until no more lumps.
7. Stir in chocolate chips and nuts, if using.
8. Pour the brownie batter over the cookie layer and spread evenly.
9. Bake on lower rack in the oven until top is set and brownies are slightly "jiggly" in the middle. About 25-35 minutes.
10. Cool in the pan on a wire rack.
11. Cut and serve.
-----------------
🍽 My Amazon Store (affiliate links): https://www.amazon.com/shop/lisalongdesigns
🍞 Cultures for Health: https://culturesforhealth.com/lunchwithlisa
🔪The TidyBoard System: https://tidyboard.com/?rfsn=6740248.ade92a
📸 Instagram: https://instagram.com/lunch.withlisa
🙂 Facebook: https://www.facebook.com/lunchwithlisa
❤️ Subscribe: https://www.youtube.com/channel/UC24dtzF90unWcCDxlFcUGVA?sub_confirmation=1
-----------------
⭐️ Watch my videos a week early over at Patreon: https://patreon.com/lunchwithlisa
☕️ Buy me a coffee: https://ko-fi.com/lunchwithlisa
-----------------
Disclaimer:
Some of the above links are Amazon affiliate links and I receive a small commission with each sale at no extra cost to you. Thank you so much for the support!
Music for intro created and played by me.
You've made it to the end! YAY! Welcome to my channel.
13
views

From Scratch Sourdough Discard Flatbread Pizza | Recipe by Cultures for Health
What a great way to use up all your sourdough discard! This from scratch sourdough discard flatbread is so amazingly delicious and easy and VERSATILE! I'm excited to share this recipe with you. Let me know in the comments what you make with your flatbread after you try the pizza recipe!
Cultures for Health Whole Wheat Starter: https://culturesforhealth.com/products/whole-wheat-sourdough-starter?sca_ref=2616012.VKxYDwUM0C
Dough Scraper: https://amzn.to/3DwrjuK
Digital Food Scale: https://amzn.to/3ft9wwj
Cast Iron Skillet: https://amzn.to/3NtgAps
Rolling Pin: https://amzn.to/3TZC8MB
-----------------
SOURDOUGH DISCARD FLATBREAD RECIPE
https://culturesforhealth.com/blogs/recipes/sourdough-flatbread-discard-recipe
-----------------
2 cups of flour, we recommended using ap flour
1 teaspoon of kosher salt
1 teaspoon of baking powder
1 cup of your sourdough discard
½ cup of yogurt
1 tablespoon of olive oil
DIRECTIONS:
1. First, you will want to combine the flour, salt, and baking powder with your whisk. Once those 3 ingredients are completely combined, it’s time to add the sourdough discard. At the same time you are adding your sourdough discard, you should also add the yogurt and olive oil. Grab that spoon and start mixing!
2. Once all the ingredients are combined, start to knead your dough. We recommend using the folding method. You can knead this way by pulling one side of the dough over the other. Every time you repeat this step, you should be turning your dough about 90 degrees.
3. The next step is the easiest, let it rest! Put your sourdough in a shaded spot and let rest for about 30 minutes. Once you’ve let it rest, it’s time to shape it!
4. Start to shape your sourdough flatbread by dividing your sourdough into 3 equal pieces. Next, you will roll each of the pieces into disks. Grab your ruler! These disks should be no more than ¼ of an inch thick.
5. Now, brush only one side of the disk with olive oil. The side that is oiled should go down on your cast iron skillet. Cook on this side for 2-3 minutes and then flip when it looks bubbly and dry. Once it looks like this, brush the top with more olive oil and flip the sourdough flatbread. Now, let this side cook for another minute then remove from heat.
6. Top these sourdough flatbreads with whatever your heart desires!
FOR THE PIZZA:
30g Turkey Pepperoni (15 slices)
30g Rao's Pizza Sauce
30g Shredded 2 Cheese Blend for Pizza
Shredded Fresh Basil
Per Pizza - Calories: 366 - Carbs 38g - Fat 14g - Protein 22g
-----------------
🍽 My Amazon Store (affiliate links): https://www.amazon.com/shop/lisalongdesigns
🍞 Cultures for Health: https://culturesforhealth.com/lunchwithlisa
🔪The TidyBoard System: https://tidyboard.com/?rfsn=6740248.ade92a
📸 Instagram: https://instagram.com/lunch.withlisa
🙂 Facebook: https://www.facebook.com/lunchwithlisa
❤️ Subscribe: https://www.youtube.com/channel/UC24dtzF90unWcCDxlFcUGVA?sub_confirmation=1
-----------------
⭐️ Watch my videos a week early over at Patreon: https://patreon.com/lunchwithlisa
☕️ Buy me a coffee: https://ko-fi.com/lunchwithlisa
-----------------
Disclaimer:
Some of the above links are Amazon affiliate links and I receive a small commission with each sale at no extra cost to you. Thank you so much for the support!
Music for intro created and played by me.
You've made it to the end! YAY! Welcome to my channel.
172
views
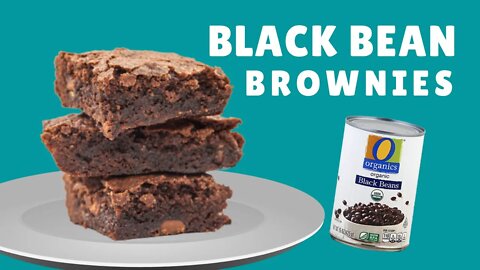
How to Make Black Beans into Brownies | Weekend Treats
This weekend, let's make these super delicious brownies using black beans! Gluten free, dairy free, under 200 calories per brownie!
-----------------
BLACK BEAN BROWNIES RECIPE
Makes 9 brownies - Per Brownie:
Calories: 235 - Fat 12g - Carbs 31g - Protein 6g
-----------------
1 - 15oz can black beans, drained & rinsed
1/4 cup honey or maple syrup
1/3 cup coconut oil, melted
1 tsp vanilla extract
1/4 cup coconut sugar
1/4 cup cocoa powder
1/2 tsp baking powder
1/4 tsp sea salt
2 large eggs
3/4 cup chocolate chips, divided
INSTRUCTIONS:
1. Preheat oven to 350F. Grease an 8x8" or 9x9" pan and set aside (line it with parchment or foil if you prefer).
2. Put beans, coconut oil, coconut sugar, & honey into your blender or food processor and blend until well combined.
3. Add cocoa powder, salt, baking powder, and vanilla & blend until smooth.
4. Add in eggs and blend until just combined. Don't over mix.
5. Mix in 1/2 cup chocolate chips by hand.
6. Pour into greased pan and top with remaining 1/4 cup chips.
7. Bake for 20-25 minutes or until the top is set and brownies are just barely pulling away from the sides.
8. Let cool, cut, and enjoy!
9. Store in an airtight container in the fridge for a few days. Reheat for 15 seconds in the microwave to restore the fresh-from-the-oven goodness.
10. Freeze for longer storage, but I doubt you'll let them last that long - they're delicious!
-----------------
🍽 My Amazon Store (affiliate links): https://www.amazon.com/shop/lisalongdesigns
🍞 Cultures for Health: https://culturesforhealth.com/lunchwithlisa
🔪The TidyBoard System: https://tidyboard.com/?rfsn=6740248.ade92a
📸 Instagram: https://instagram.com/lunch.withlisa
🙂 Facebook: https://www.facebook.com/lunchwithlisa
❤️ Subscribe: https://www.youtube.com/channel/UC24dtzF90unWcCDxlFcUGVA?sub_confirmation=1
-----------------
⭐️ Watch my videos a week early over at Patreon: https://patreon.com/lunchwithlisa
☕️ Buy me a coffee: https://ko-fi.com/lunchwithlisa
-----------------
Disclaimer:
Some of the above links are Amazon affiliate links and I receive a small commission with each sale at no extra cost to you. Thank you so much for the support!
Music for intro created and played by me.
You've made it to the end! YAY! Welcome to my channel.
8
views

How to Easily Make Sourdough Bread at Home
All it takes is a little practice and patience. I'm gathering all the steps I've learned that work for me in my part of the world to make a pretty amazing loaf of homemade sourdough bread.
https://www.youtube.com/c/WeedsSardines
https://www.youtube.com/c/TheBreadCode
https://www.youtube.com/c/ThePerfectLoaf
-----------------
SOURDOUGH BREAD RECIPE
-----------------
100g Whole Wheat Flour
400g Bread Flour
315-325g Water
100g Sourdough Starter (Cultures for Health: https://culturesforhealth.com/products/whole-wheat-sourdough-starter?sca_ref=2616012.VKxYDwUM0C)
10-12g Salt (I used Kosher)
10-15g Extra water (optional)
DIRECTIONS:
1. Prepare the starter by discarding most of it leaving about 25g of starter, and feed it 90g of water and 100g of flour (I used 25g whole wheat and 75g bread flour). Stir it all together until there's no dry bits left. Let it sit on your counter top overnight to ferment and feed again in the morning repeating the same steps. Do this until your starter triples in size.
2. When the starter has tripled in size and before it falls, start the autolyse step: combine whole wheat & bread flour & water. Let it sit for 1 hour.
3. Add the starter and squish together until well combined. Let it sit for 15 minutes to rest.
4. Add the salt and optionally add in a little more water (10-15g) and mix well. Let rest for 30 minutes.
5. Stretch and fold and then let rest 30 minutes more.
6. Stretch and fold again and let rest for 2 hours.
7. Shape your loaf and place it into a banneton or a bowl lined with a floured tea towel. Then cover and put into the fridge for 10-12 hours or overnight.
8. The next morning, pre-heat oven to 500F with your dutch oven inside (no lid).
9. Flip out the sourdough loaf onto parchment paper or this silicone baking mat (https://amzn.to/3NdCyfW) & SCORE the loaf with a sharp knife or a lame (https://amzn.to/3zmP5YE).
10. Place the sourdough into the hot pot and cover with a lid (optional: give it a few spurts of water from a spray bottle or sprinkle in with your hand). Place it back into the oven and lower the temp to 485F. Bake for 18-20 minutes.
11. After time is up, remove the lid and bake for another 25 minutes at 465F.
12. Remove from the oven and allow to cool for a nice crust. Slice and enjoy!
-----------------
🍽 My Amazon Store (affiliate links): https://www.amazon.com/shop/lisalongdesigns
🍞 Cultures for Health: https://culturesforhealth.com/lunchwithlisa
🔪The TidyBoard System: https://tidyboard.com/?rfsn=6740248.ade92a
📸 Instagram: https://instagram.com/lunch.withlisa
🙂 Facebook: https://www.facebook.com/lunchwithlisa
❤️ Subscribe: https://www.youtube.com/channel/UC24dtzF90unWcCDxlFcUGVA?sub_confirmation=1
-----------------
⭐️ Watch my videos a week early over at Patreon: https://patreon.com/lunchwithlisa
☕️ Buy me a coffee: https://ko-fi.com/lunchwithlisa
-----------------
Disclaimer:
Some of the above links are Amazon affiliate links and I receive a small commission with each sale at no extra cost to you. Thank you so much for the support!
Music for intro created and played by me.
You've made it to the end! YAY! Welcome to my channel.
103
views

Four Delicious Snacks for Game Night
4 Recipes: Healthy Snacks for a Small Crowd
https://youtu.be/_HW0bcCOcZ0
The TidyBoard System:
https://tidyboard.com/?rfsn=6740248.ade92a
#gamenight #shorts #foodshorts
13
views

Pumpkin Spice Protein Cupcakes | Weekend Treats Series
It's fall, y'all! And nothing says fall like Pumpkin Spice, and these PROTEIN-PACKED cupcakes are AMAZINGLY delicious. I've already made them 3 times for me and my child as he continues to request that I make more.
Enjoy!
Cupcake Pan: https://amzn.to/3Db3sl7
Silicone Baking Cups: https://amzn.to/3s7yuE6
Quest Cinnamon Crunch: https://amzn.to/3D93rhM
-----------------
PUMPKIN SPICE PROTEIN CUPCAKES RECIPE
-----------------
Prep Time: 15 min - Cook Time: 25 min
Servings: 12
Calories: 131
Protein: 12g
Carbs: 10g / Fiber 2g / Sugar 5g
Fat: 5g / Sat Fat 2g
INGREDIENTS:
• 3/4 cup (90g) cinnamon or vanilla whey blend (Quest Cinnamon: https://amzn.to/3D93rhM)
• 1/4 cup almond flour
• 1/4 cup coconut flour
• 2/3 cup calorie-free sweetener
• 2 tsp. baking powder
-
• 1 tsp. ground cinnamon
• 1/2 tsp. ground nutmeg
• 1/2 tsp. ground ginger
• 1/4 tsp. ground cloves
-
OR 2 tsp. pumpkin pie spice
• 3/4 cup (6 large) egg whites
• 1 1/2 cup 100% pure pumpkin
• 1 tbsp. avocado oil or melted coconut oil, or buttery spread
FROSTING:
• 8 oz. whipped cream cheese or dairy-free cream cheese, softened at room temp
• 1/2 cup powdered calorie-free sweetener (Swerve Confectioner's: https://amzn.to/3zhEb6L)
• 2 tbsp pure maple syrup (optional)
DIRECTIONS:
1. Preheat oven to 350F.
2. Whisk together dry ingredients (through spices) in a medium mixing bowl.
3. Add wet ingredients (through oil) and mix until no clumps but don't overmix.
4. Lightly spray the wells of a muffin tin with cooking spray, or use cupcake liners which you can also lightly spray. Or just use silicone liners and don't spray at all (see links above).
5. Divide batter between wells, filling 2/3 full or just using all the batter split evenly. They won't rise a whole lot.
6. Bake for 20-25 minutes until a toothpick or knife inserted comes out clean.
7. While cupcakes cool, combine frosting ingredients until smooth.
8. Spread frosting over cupcakes with a knife or use a piping bag (can also use a ziplock bag and cut off one corner for an instant "piping bag").
9. Store in the fridge in an airtight container for up to one week, or freeze for longer.
-----------------
🍽 My Amazon Store (affiliate links): https://www.amazon.com/shop/lisalongdesigns
🌈 Instagram: https://instagram.com/lunch.withlisa
🙂 Facebook: https://www.facebook.com/lunchwithlisa
❤️ Subscribe: https://www.youtube.com/channel/UC24dtzF90unWcCDxlFcUGVA?sub_confirmation=1
-----------------
⭐️ Watch my videos a week early over at Patreon: https://patreon.com/lunchwithlisa
☕️ Buy me a coffee: https://ko-fi.com/lunchwithlisa
-----------------
Disclaimer:
Some of the above links are Amazon affiliate links and I receive a small commission with each sale at no extra cost to you. Thank you so much for the support!
Music for intro created and played by me.
You've made it to the end! YAY! Welcome to my channel.
9
views
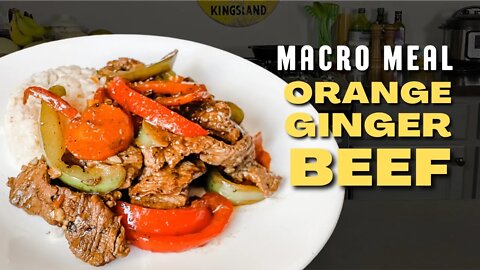
Orange Ginger Beef | Complete Meals for Dinner | The Complete Macro Cookbook
Here's a great complete meal that tastes delicious and can be customized for you to hit your macros! Choose the Muscle Building or Fat Loss version, and check out this awesome book for more recipes: https://amzn.to/3ThVyfp
I use these glass containers for meal prep: https://amzn.to/3s96U9H
The TIDYBOARD System: https://tidyboard.com/?rfsn=6740248.ade92a
-----------------
ORANGE GINGER BEEF RECIPE
-----------------
Prep Time: 15 min - Cook Time: 30 min - Serves 4
Per serving (3 oz beef, 1/3 cup rice, 1/4 Veggies)
Calories: 528 / Protein: 25g / Carbs 65 g / Fiber 5g / Fat 18g
INGREDIENTS:
1 1/2 cups quick brown rice
1/3 cup freshly squeezed orange juice, no pulp
4 garlic cloves, minced, divided
1 tsp minced fresh ginger
2 tbsp low-sodium soy sauce
1 tsp cornstarch
2 tsp water
2 tbsp olive oil, divided
12 oz top sirloin steak, thinly sliced
1 cup 1/4-inch-thick carrot sliced
1 red bell pepper, seeded and thinly sliced
1 green bell pepper, seeded and thinly sliced
Salt
Fresh ground black pepper
DIRECTIONS:
1. Cook the rice according to the package instructions. Set aside.
2. To make the sauce, combine the orange juice, half the garlic, the ginger, and the soy sauce in a small saucepan and bring it to a boil over medium-high heat.
3. In a small bowl, mix the cornstarch and water. Add the mixture to the saucepan, reduce the heat to low, and stir until combined. Cook, stirring occasionally until the marinade thickens, 6 to 8 minutes. Set aside.
4. Heat 1 tbsp oil in a large non-stick skillet over medium-high heat. Add the steak and cook, stirring frequently, until browned, 5 to 8 minutes. Transfer to a plate.
5. In the same skillet, heat the remaining oil and add the carrots, cooking for 4 to 5 minutes. Add the red and green peppers and cook until slightly tender, 4 to 5 minutes. Then add the garlic and cook another minute.
6. Add the steak and sauce and mix well.
7. Divide the rice between four bowls. Top with the steak and sauce. Season with salt and pepper and serve. This dish will also store nicely in an airtight container in the fridge for up to 3 days.
FAT LOSS: To up the fiber in this recipe, you can omit the brown rice and replace it with additional veggies such as broccoli, green beans, or asparagus.
-----------------
🍽 My Amazon Store (affiliate links): https://www.amazon.com/shop/lisalongdesigns
🌈 Instagram: https://instagram.com/lunch.withlisa
🙂 Facebook: https://www.facebook.com/lunchwithlisa
❤️ Subscribe: https://www.youtube.com/channel/UC24dtzF90unWcCDxlFcUGVA?sub_confirmation=1
-----------------
⭐️ Watch my videos a week early over at Patreon: https://patreon.com/lunchwithlisa
☕️ Buy me a coffee: https://ko-fi.com/lunchwithlisa
-----------------
Disclaimer:
Some of the above links are Amazon affiliate links and I receive a small commission with each sale at no extra cost to you. Thank you so much for the support!
Music for intro created and played by me.
You've made it to the end! YAY! Welcome to my channel.
26
views
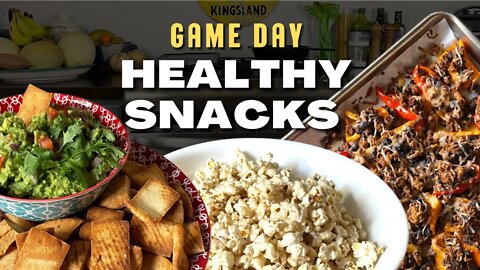
4 Recipes: Healthy Snacks for a Small Crowd
I had a request for some healthy snacks for watching football or any other sport, so here's 4 amazingly delicious recipes straight from the book The Complete Macro Cookbook: https://amzn.to/3ywj8wv
🌽 Air Popper: https://amzn.to/3EHlDQR
🔪 The TIDYBOARD System: https://tidyboard.com/?rfsn=6740248.ade92a
-----------------
RECIPES BELOW
-----------------
BEEF NACHO'D PEPPER
Prep Time: 15 min - Cook Time: 20 min - Serves 4
Per Serving (About 4 Peppers): Calories: 437; Protein 37g: Total Carbs 26g; Fiber 10g; Fat 20g
INGREDIENTS:
Nonstick cooking spray (optional)
1 lb lean ground beef (for less fat use ground turkey or chicken)
1 tbsp chili powder
1 1/2 tsp ground cumin
1 tbsp garlic powder
3 tbsp canned chopped green chiles
1 (15 oz) can black beans, drained & rinsed
1 (1lb) bag mini bell peppers, halved
Salt
Freshly ground black pepper
1 cup shredded Mexican cheese
DIRECTIONS:
1. Preheat oven to 400F. Spray a rimmed baking sheet with cooking spray or line it with foil or parchment paper.
2. In a large skillet over medium-high heat, brown the meat. Add the chili powder, cumin, garlic powder, and green chiles. Saute until fully cooked, about 8 min. Add the black beans and cook, stirring for 2 min. Remove from the heat and set aside.
3. Prep your mini bell peppers by cutting off the tops. Halve each of them and clean out the insides.
4. Place the peppers on the prepared baking sheet & season with salt and pepper. Stuff each pepper with the meat and bean mixture and sprinkle with the shredded cheese. Bake for 10 minutes.
-----------------
HOMEMADE PITA CHIPS
Prep Time: 5 min - Cook Time: 15 min - Serves 4
Per Serving (1 pita or 16 to 20 chips): Calories 290; Protein 6g; Total Carbs 35g; Fiber 5g; Fat 15g
INGREDIENTS:
4 whole-wheat pitas, cut into wedges or squares
1/4 cup coconut oil, melted
1 garlic clove, minced
Salt
DIRECTIONS:
1. Preheat oven to 350F.
2. Put the pita wedges in a large bowl. Cover with garlic and coconut oil and toss gently to coat. Spread the pita out on a large baking sheet in a single layer. Sprinkle with Salt.
3. Bake for 10 to 20 minutes, or until golden brown, tossing the chips partway through to ensure balanced browning. Remove from the oven & allow to cool. Store the chips in an airtight container at room temperature for up to 5 days.
-----------------
5-MINUTE GUAC
Prep Time: 5 min - Serves 6
Per Serving (1/4 cup): Calories 171; Protein 2g; Total Carbs 11g; Fiber 7g; Fat 14g
INGREDIENTS:
3 large avocados, peeled & pitted
3 garlic cloves, minced
1/2 small red onion, diced
1 medium tomato, diced
Juice of 1 lime
1/2 tsp salt
1 tbsp chopped fresh cilantro
1 jalapeno pepper, seeded and diced (optional)
DIRECTIONS:
1. Scoop the avocado flesh into a medium bowl and mash it with a fork until smooth.
2. Add the remaining ingredients and mix until combined. Taste and add salt or additional lime juice to get the flavor you prefer.
3. While this is best enjoyed immediately, if you store it, find an airtight container and keep one or two avocado pits in there as well. The pits can help prevent further oxidation from occurring. Store in fridge for up to 3 days.
-----------------
COCONUT KETTLE CORN
Prep Time: 5 min - Cook Time: 10 min - Serves 6
Per Serving (1 cup): Calories 61; Protein 1g; Total Carbs 9g; Fiber 1g; Fat 3g
INGREDIENTS:
1 tbsp coconut oil*
1/4 cup popcorn kernels
1 tbsp honey
Ground cinnamon
Salt
DIRECTIONS:
1. In a wide saucepan with a tight fitting lid, heat the oil over medium-high heat. Once the oil is hot, test the temperature by dropping in 2 or 3 popcorn kernels. Wait for the kernels to pop. Once they've popped, you can add the remaining kernels. Cover with a lid and let the magic happen.
2. The kernels will pop for 3 to 4 minutes. Once the popping stops, remove the pan from the heat.
3. While the popcorn is still hot, add the honey, cinnamon, and salt. Toss to combine.
*Tastes great WITHOUT the oil. So if you air-pop the kernels, leave it out for less fat and calories! 27 less calories, that is!
-----------------
🍽 My Amazon Store (affiliate links): https://www.amazon.com/shop/lisalongdesigns
🌈 Instagram: https://instagram.com/lunch.withlisa
🙂 Facebook: https://www.facebook.com/lunchwithlisa
❤️ Subscribe: https://www.youtube.com/channel/UC24dtzF90unWcCDxlFcUGVA?sub_confirmation=1
-----------------
⭐️ Watch my videos a week early over at Patreon: https://patreon.com/lunchwithlisa
☕️ Buy me a coffee: https://ko-fi.com/lunchwithlisa
-----------------
Disclaimer:
Some of the above links are Amazon affiliate links and I receive a small commission with each sale at no extra cost to you. Thank you so much for the support!
Music for intro created and played by me.
You've made it to the end! YAY! Welcome to my channel.
0:00 Intro
0:29 Beef Nacho'd Peppers
3:28 Homemade Pita Chips
5:04 5-Minute Guac
6:51 Coconut Kettle Corn
8:02 Tasting the Food
9:22 Outro
100
views

Do you know how to track #macros ?!
Macronutrient Tracking and Counting for Beginners: The Basics
https://youtu.be/d2wZDsXnipM
#shorts #countingmacros
1
view
Macronutrient Tracking and Counting for Beginners: The Basics
I've been asked a few times how I'm keeping track of my macros and to explain what they are and how to do it, so here's my video explaining all the basics to get you started in the macronutrient tracking world!
I've tried to keep it super basic and simple, but please reach out with any questions you may have!
⛓ Links:
Macros Cheat Sheet: https://i.pinimg.com/originals/f4/bc/54/f4bc54ce7e6217db8531656d8fe56564.jpg
⚖️ Food Scale: https://amzn.to/3yk9n4y
💪🏻💃 Fit Girl Club: https://www.facebook.com/groups/FitGirlClubWithCoachDeasy/
👙 Granite Bikini Blitz: https://graniteconditioning.net/bikini-body-blitz/
🥗 MyFitnessPal: https://www.myfitnesspal.com/
👑 Calorie King: https://www.calorieking.com/
-----------------
🍽 My Amazon Store (affiliate links): https://www.amazon.com/shop/lisalongdesigns
🌈 Instagram: https://instagram.com/lunch.withlisa
🙂 Facebook: https://www.facebook.com/lunchwithlisa
❤️ Subscribe: https://www.youtube.com/channel/UC24dtzF90unWcCDxlFcUGVA?sub_confirmation=1
-----------------
⭐️ Watch my videos a week early over at Patreon: https://patreon.com/lunchwithlisa
☕️ Buy me a coffee: https://ko-fi.com/lunchwithlisa
-----------------
Disclaimer:
Some of the above links are Amazon affiliate links and I receive a small commission with each sale at no extra cost to you. Thank you so much for the support!
Music for intro created and played by me.
You've made it to the end! YAY! Welcome to my channel.
8
views

Fluffy Pancakes made with Banana & Eggs! #pancakes
The Fluffiest Banana and Egg Pancakes Ever!
https://youtu.be/Tx7YjWBcqCM
#shorts #foodshorts
16
views

The Fluffiest Banana and Egg Pancakes Ever!
Tired of flat dense pancakes made with those magical two ingredients: banana and eggs? Well, now you'll be making the fluffiest banana and egg pancakes ever!!! These super fluffy, protein-filled pancakes taste delicious with or without syrup, and maybe you'll be inspired to tweak them to perfection and make them your own! Tag me on social media if you do!
📷 Find me on Instagram: https://instagram.com/lunch.withlisa
😀 Find me on Facebook: https://facebook.com/lunchwithlisa
-----------------
BANANA PANCAKES RECIPE
For the entire stack:
376 Calories
38.2 g Carbs
9 g Fat
40.4 g Protein
-----------------
INGREDIENTS:
1 (158 g) Banana
2 (84 g) Eggs
2 Scoops (32 g) Just Natural (UNFLAVORED) Clean Lean Protein by Nuzest https://amzn.to/3M8djLH
1 tsp Baking Powder
Flavoring (optional)
Dash of sea salt
DIRECTIONS:
1. Heat up your griddle over medium heat.
2. Mash the banana in a bowl.
3. Mix two eggs with the banana really well.
4. Add the protein powder, baking powder, and any flavorings and salt and mix well.
6. Add 1/4 cup to the preheated griddle and cook for 2-3 minutes then flip for 1 more minute until golden brown on both sides. Be careful, they can easily burn.
7. Serve with your choice of toppings: syrup, fruit, whipping cream, coconut whipping cream, and sprinkles for fun!
-----------------
🍽 My Amazon Store (affiliate links): https://www.amazon.com/shop/lisalongdesigns
🌈 Instagram: https://instagram.com/lunch.withlisa
🙂 Facebook: https://www.facebook.com/lunchwithlisa
❤️ Subscribe: https://www.youtube.com/channel/UC24dtzF90unWcCDxlFcUGVA?sub_confirmation=1
-----------------
⭐️ Watch my videos a week early over at Patreon: https://patreon.com/lunchwithlisa
☕️ Buy me a coffee: https://ko-fi.com/lunchwithlisa
-----------------
Disclaimer:
Some of the above links are Amazon affiliate links and I receive a small commission with each sale at no extra cost to you. Thank you so much for the support!
Music for intro created and played by me.
You've made it to the end! YAY! Welcome to my channel.
10
views

Vegan Sausage Recipe that tastes great! #shorts
Homemade Vegan Sausage That's Actually Good
https://youtu.be/DXEHKf1ku_g
9
views

Homemade Vegan Sausage That's Actually Good
Just because I wanted to see if I could do it, I made this vegan sausage, and it was so good, I wanted to share it with YOU! Totally plant-based, vegan sausage that doesn't include all the nasty stuff you might find in the "fake meat" versions at the store.
***DISCLAIMER: I’m not a vegan nor do I claim to be one, but I enjoy eating and trying lots of foods!
-----------------
VEGAN SAUSAGE RECIPE
From: https://elavegan.com/vegan-sausage-recipe/
Per 1 Sausage:
Calories 192
Fat 8g
Carbs 24g
Fiber 7g
Protein 8g
-----------------
INGREDIENTS:
1 1/2 cups (270 g) white beans from one 15 oz can drained and rinsed
1 cup (90 g) oats (gluten-free if needed)
1/2 cup (60 g) walnuts
1/2 medium (60 g) onion chopped
3 garlic cloves minced
3 chia eggs (3 tbsp ground chia seeds + 1/4 cup water)
1 flat tbsp tomato paste
1 1/2 tbsp tamari or soy sauce or coconut aminos
2 tsp onion powder
2 tsp smoked paprika
1 tsp Italian seasoning
3/4 tsp sea salt or less/more to taste
1/2 tsp ground cumin
1 pinch of cayenne pepper or more to taste
Black pepper to taste
1/2 tsp fennel seeds, optional
Liquid smoke for a smoky flavor, optional
DIRECTIONS:
1. In a small bowl, mix the ground chia seeds with 1/4 cup of water and set the mixture aside for 5 minutes to thicken. Note: You can blend whole chia seeds in an electric spice/coffee grinder or blender for a few seconds if you don't have ground chia seeds.
2. Rinse the canned white beans very well in a sieve, then drain them and pat dry with a paper towel. Make sure they aren't wet at all.
3. Process the oats and the walnuts in a food processor or blender (use the pulse function, as they should still have some texture and not turn into fine flour).
4. Add all the other ingredients to the food processor and pulse again. Don't over-process the mixture, or it will be mushy. The mixture shouldn't be sticky, but if it is, simply add some flour (e.g. oat flour).
TIP: You could freeze the mixture for about 10 minutes, then it will be easier to shape into sausages.
5. Form 6-7 sausages with your hands (I used 1/3 cup of mixture per sausage for 6 sausages). Place the sausages on a large plate lined with parchment paper and put the plate into the fridge for about 20 minutes to firm up.
6. Wrap each sausage in some parchment paper and tin foil and twist the ends, like a candy wrapper. Then place in a steamer basket/pan (I used my large pot with a steamer basket but you could just add a sieve to your large pot) and steam for around 35 minutes. You can reused the tin foil so don't throw it away!
7. Once cooked, you can serve immediately, pan-fry, or even grill for a crispy result.
PAN FRY: Preheat a large skillet over medium heat. Brush the sausages with a little oil on each side and add them to the pan. Fry for around 7-10 minutes, turning occasionally until browned and heated through.
8. Enjoy with mustard, BBQ sauce, or serve in a burn like a hot dog. Or use a rice paper wrapper to create a casing! See the link above for how to do that and all her extra notes about substitutes or extra instructions.
-----------------
🍽 My Amazon Store (affiliate links): https://www.amazon.com/shop/lisalongdesigns
🌈 Instagram: https://instagram.com/lunch.withlisa
🙂 Facebook: https://www.facebook.com/lunchwithlisa
❤️ Subscribe: https://www.youtube.com/channel/UC24dtzF90unWcCDxlFcUGVA?sub_confirmation=1
-----------------
⭐️ Watch my videos a week early over at Patreon: https://patreon.com/lunchwithlisa
☕️ Buy me a coffee: https://ko-fi.com/lunchwithlisa
-----------------
Disclaimer:
Some of the above links are Amazon affiliate links and I receive a small commission with each sale at no extra cost to you. Thank you so much for the support!
Music for intro created and played by me.
You've made it to the end! YAY! Welcome to my channel.
113
views